Retirement Sewing Room

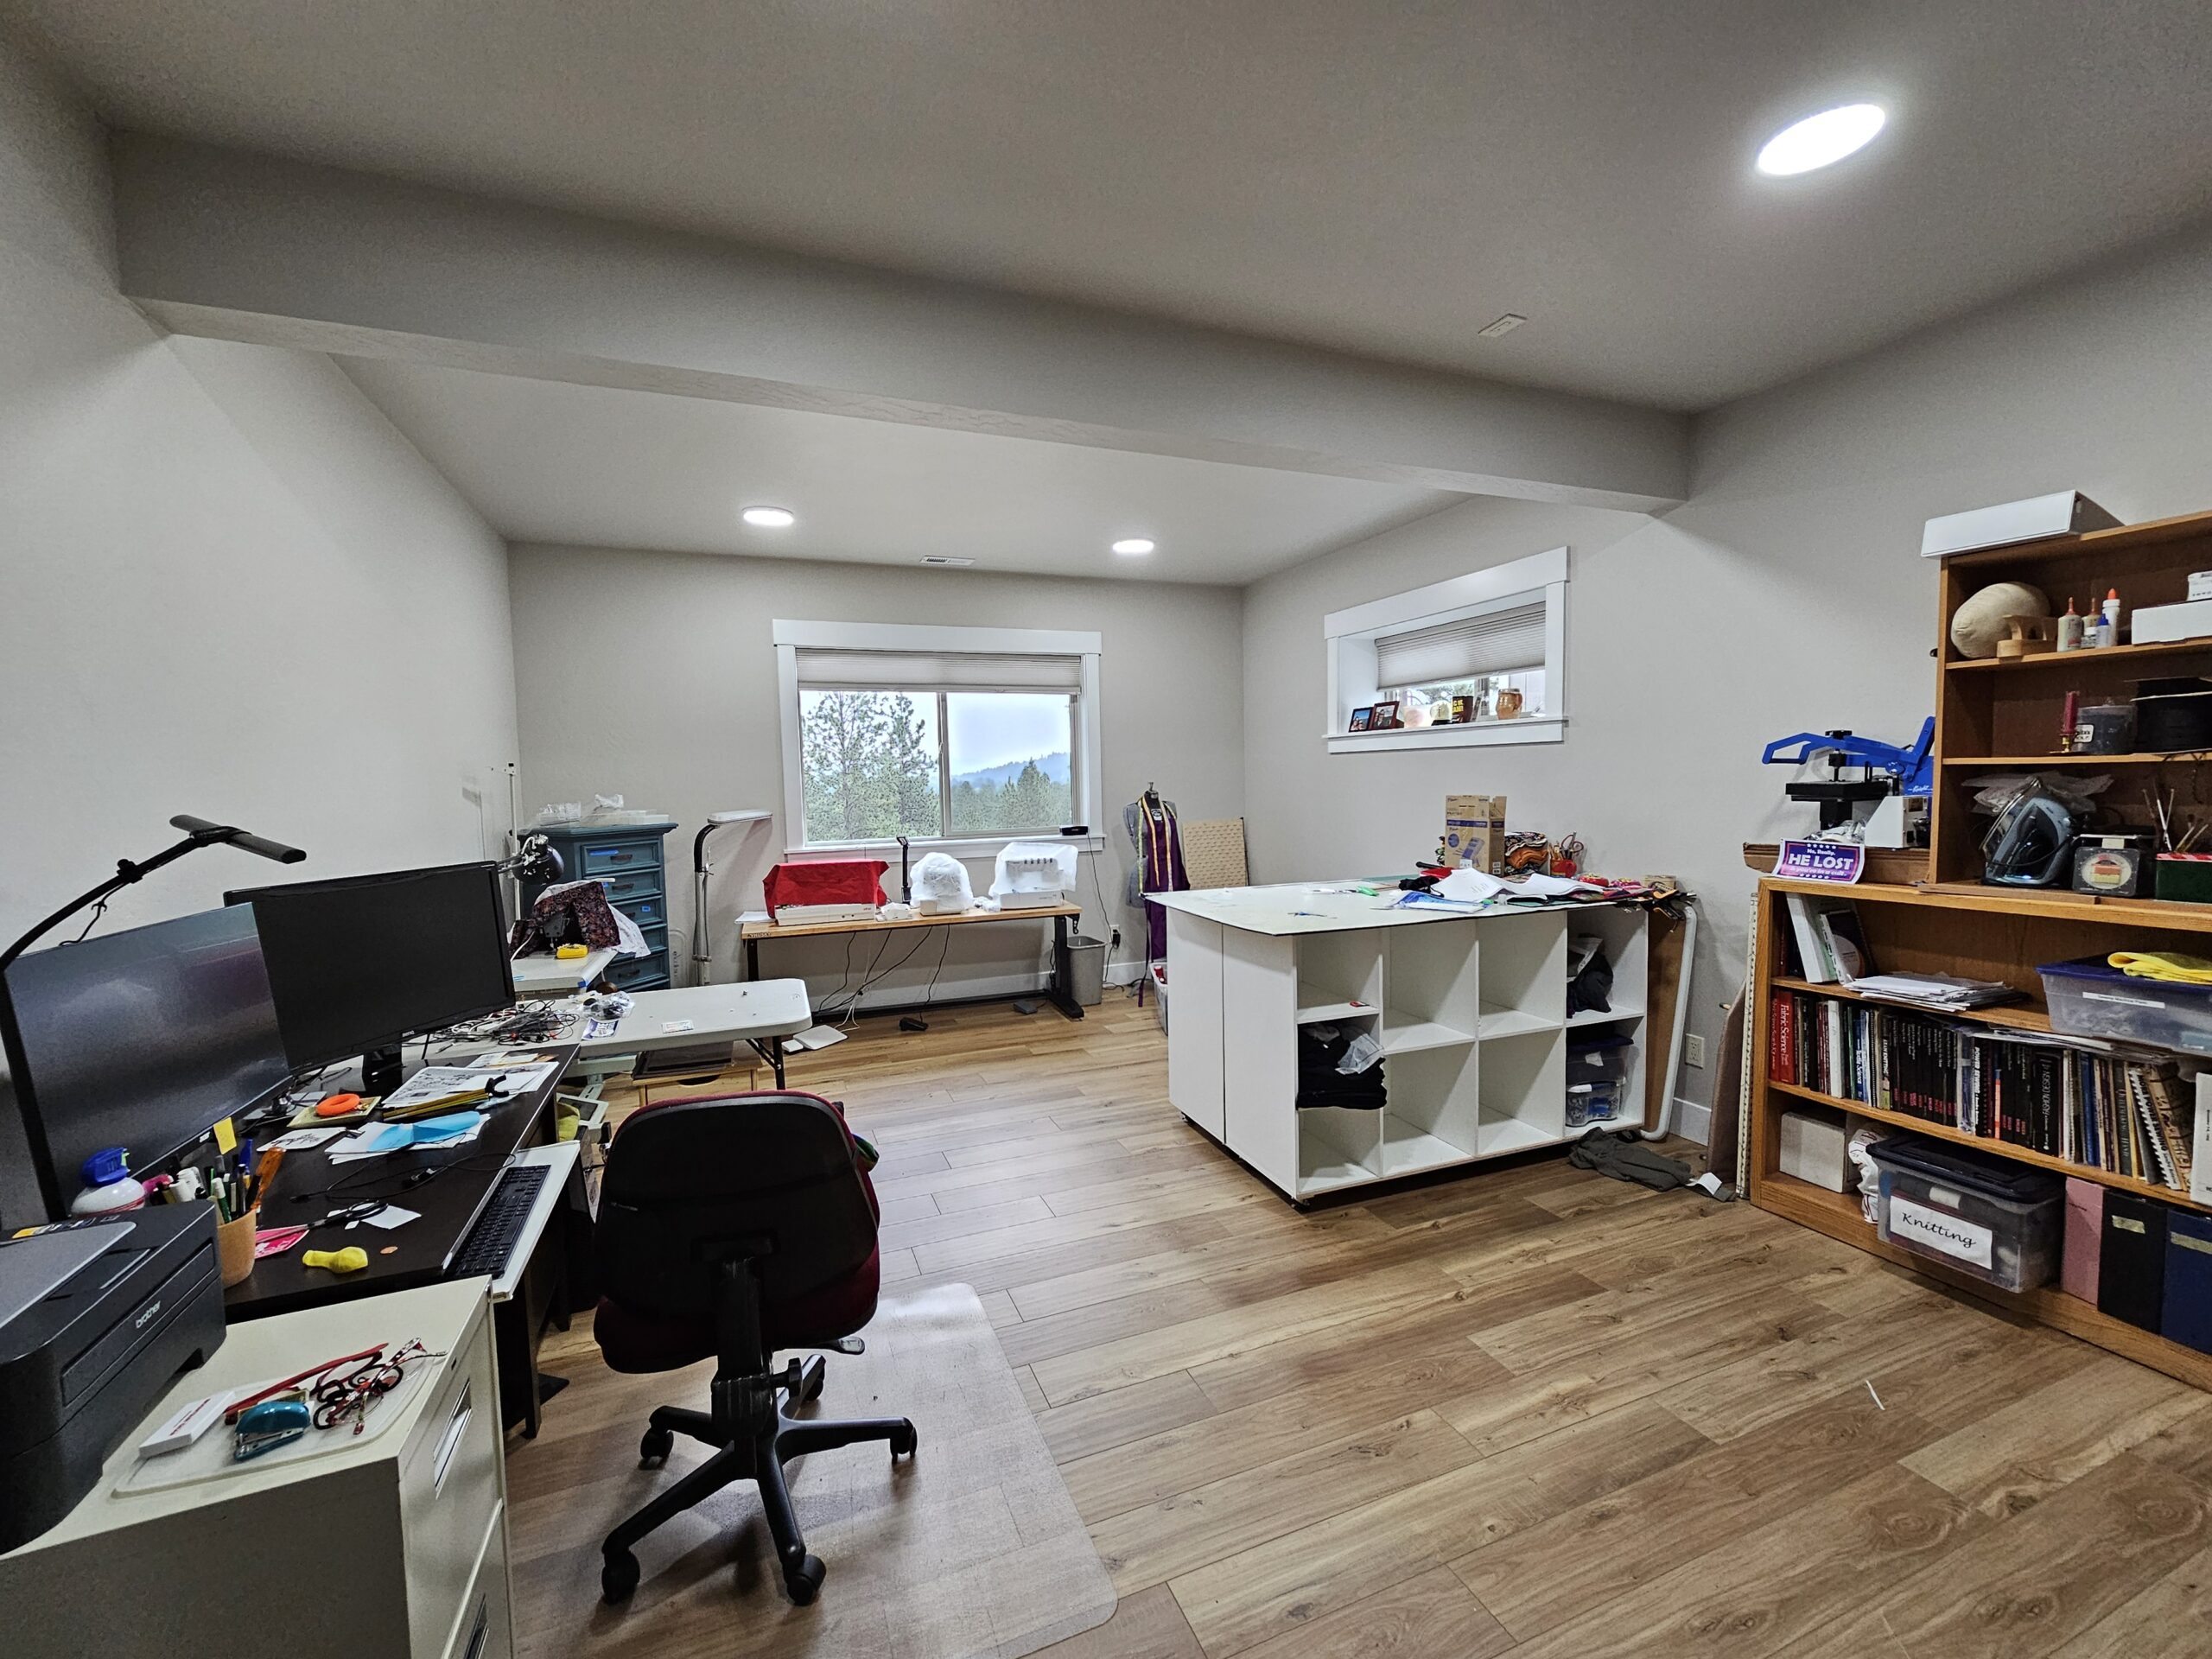
My sewing room/workroom has always been a large basement bedroom downstairs. I have a large window that looks out on the garden, a store room, and a large closet. When I was working I was always in “make it work” mode. I also got stuck in a rut. It was not very conducive to try different space use things out. Why bother painting when the room gets trashed with dirty tents and gear?

Retiring gave me a chance to rethink my space. One of the goals of retirement was to find my joy in creating again. So what would that look like? More/better storage, a cutting table, freshening things up and slightly improved organization was the plan.

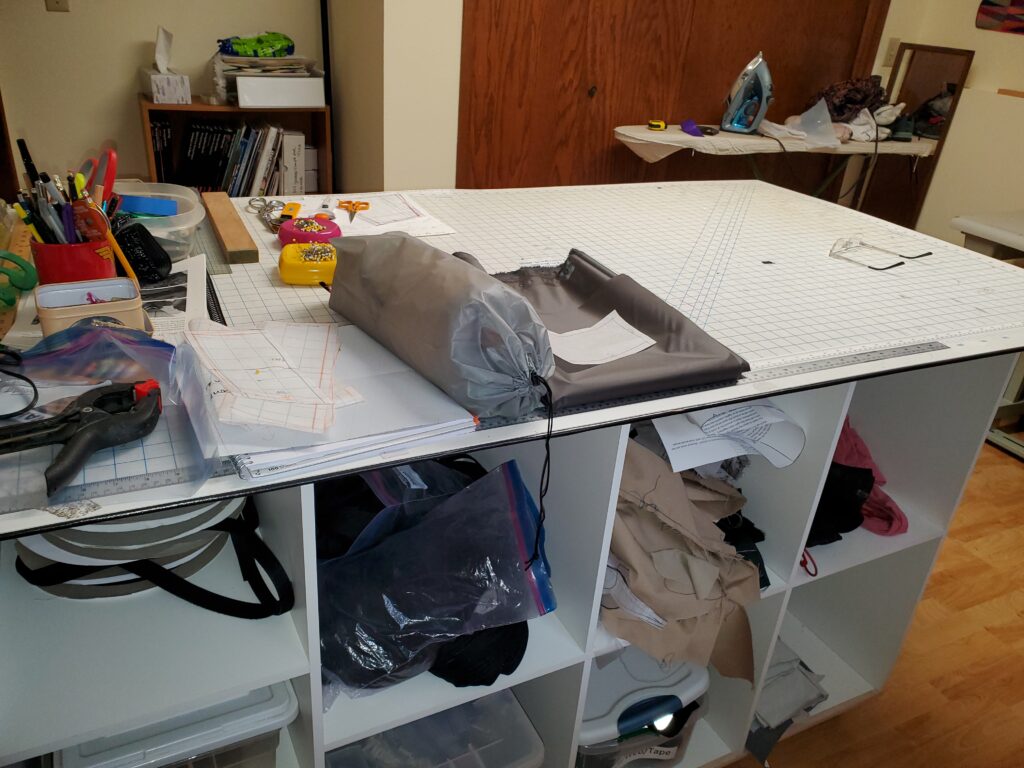
I have a huge cutting mat. It’s 70 x 48 and it’s 35 years old. It’s pretty worn. It will be hard to replace as I have not seen one that big in years. I saw an IKEA hack for a cutting table that looked amazing. My hub builds furniture for fun and hates IKEA, so I ordered up my own version of the IKEA Kallax hack table. My cutting mat is on the top which is perfectly sized to fit. The table is custom height for me. The cubbies are customized for storage bins and it’s on wheels. The best part is you can break it down into two cupboards if you don’t need the cutting part. It’s fantastic and I love it.

I wanted a sunny color. I wanted yellow: not too yellow to affect my color use but enough to augment daylight and be a happy color. I’m thrilled with my paint color. I put up some new shelves and my prayer flags. I acquired a bookcase from my retired husband that fit perfectly under the window. Last but not least, I played with various floor plan configurations of cutting table and machines. The fact that I sold my walking foot industrial made it much easier to squeeze four machine into the space. The table being on wheels is excellent.

What would complete the dream is a suite of industrial machines: a cover hemmer, a serger, and 5- or 6-thread flatlock.

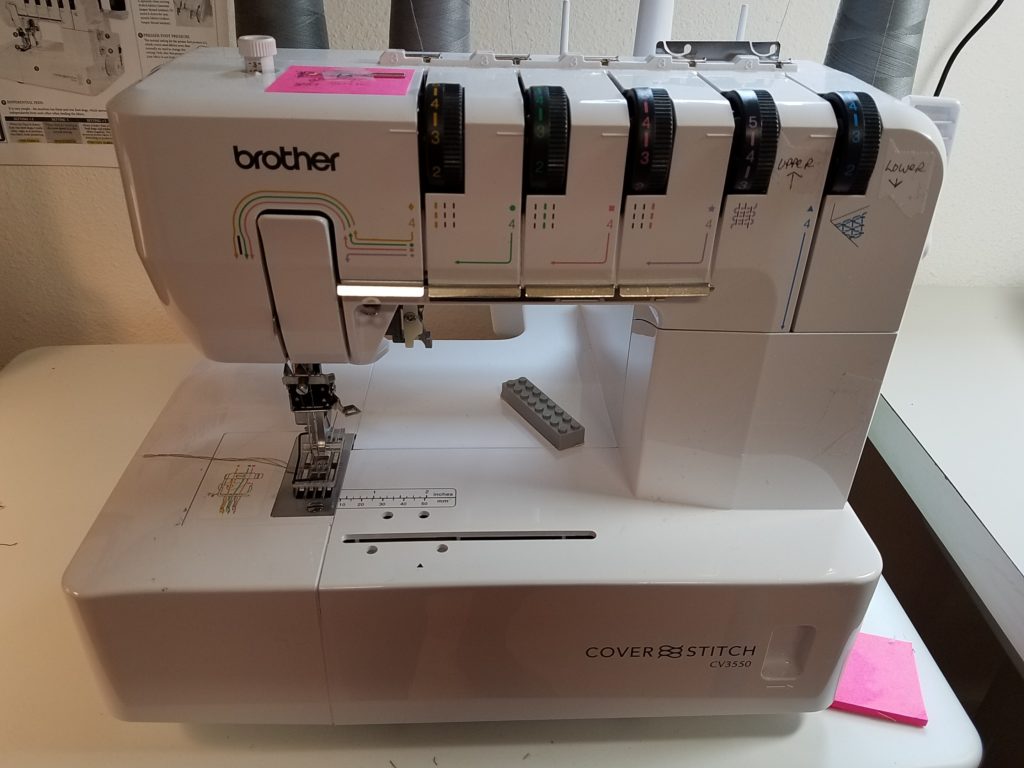
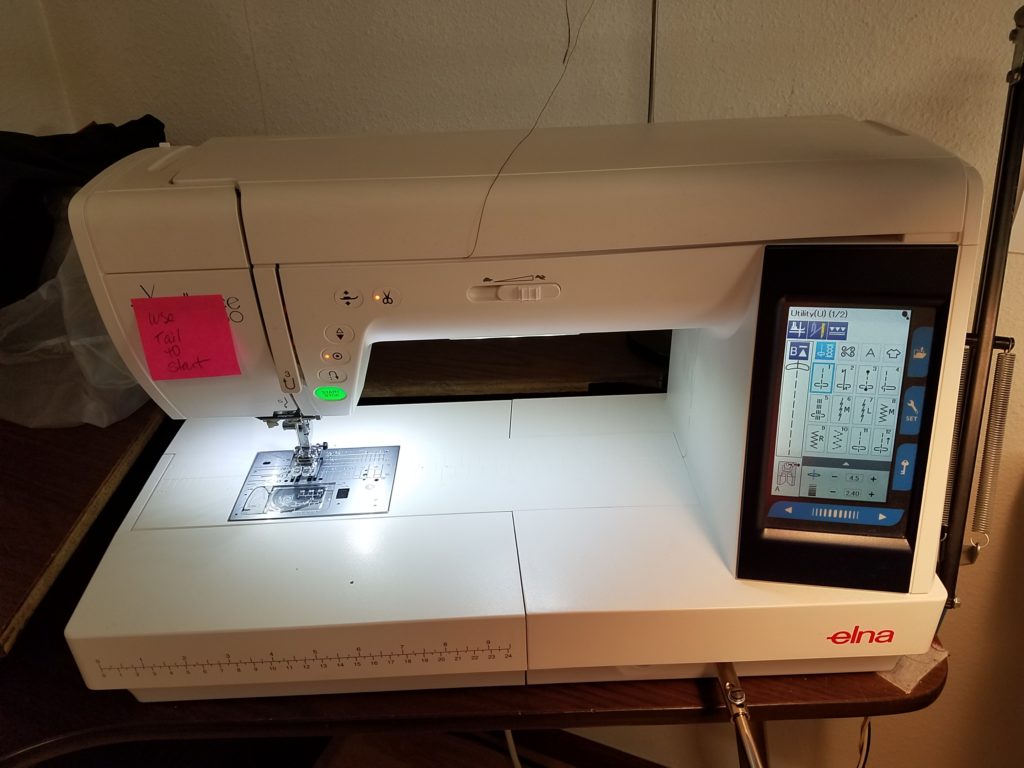
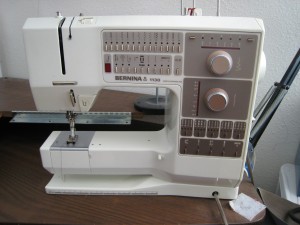
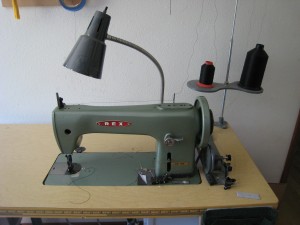
Machines currently in use from L to R: Artisan needle feed, Babylock 644 serger, Elna 780 and a Brother 3550 coverhemmer.

Sometimes I am annoyed that I didn’t do this sooner, but as I’ve mentioned before I’d kind of lost my joy. Why would I be motivated to spruce it up when all I wanted was to close the door at the end of the day.

Bike Bags Binge

Of course I’m making my own. I did very few orders before I closed the shop. Now, I’ve been experimenting and making some just because I can. It’s a THING now…you will see lots of variations from lots of different makers out there.

I’m fortunate in that I know professional bag makers out there who have been generous with tips. I’ve also got years of experience making all sorts of weird bags but not specifically for bikes.

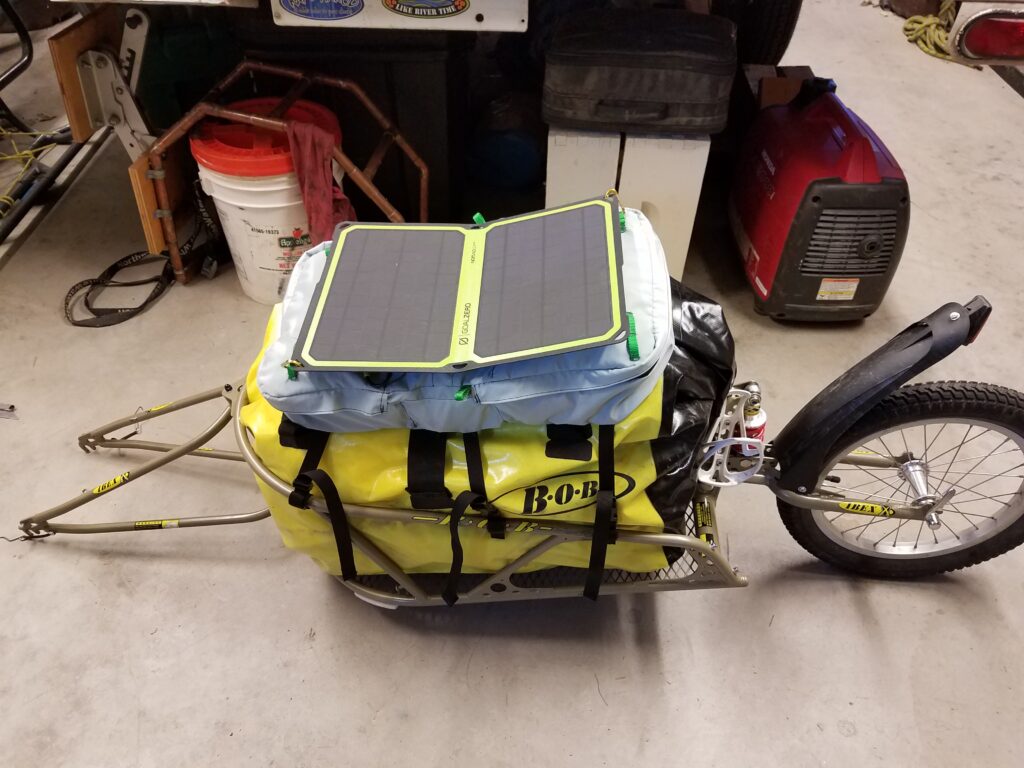
The first one I made (if you can count as a bag) was for my husband’s BOB trailer, the first time he rode the Great Divide Route from Jasper AB to Seely Lake MT. He wanted something he could attach his solar panels to for charging, that also could hold a bit of gear:

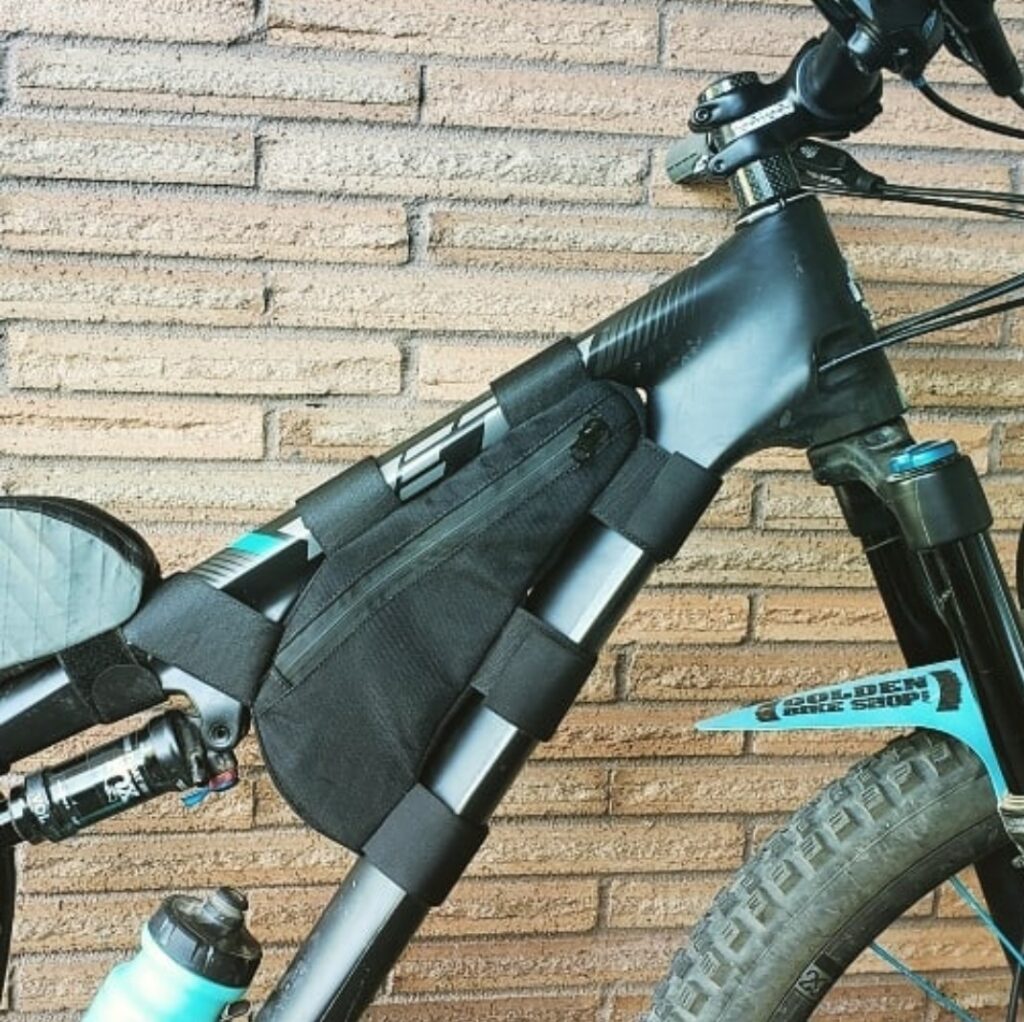
Then a friend asked for a small bag for a mountain bike. This one took some fitting skillz because of the shock on the frame:

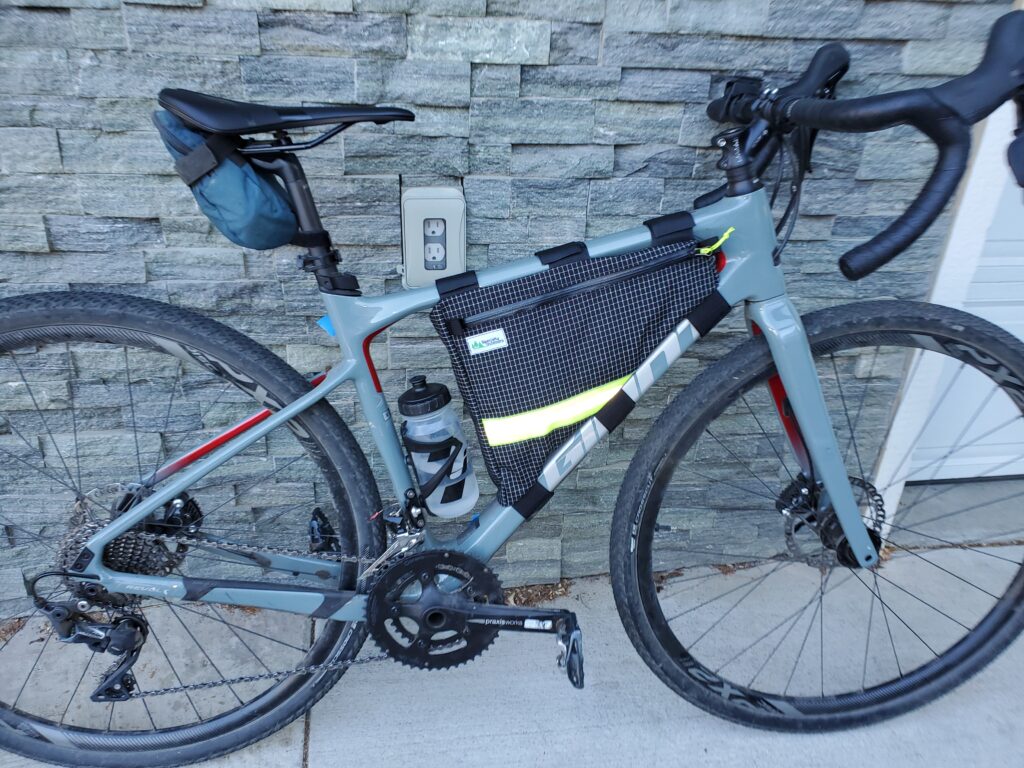
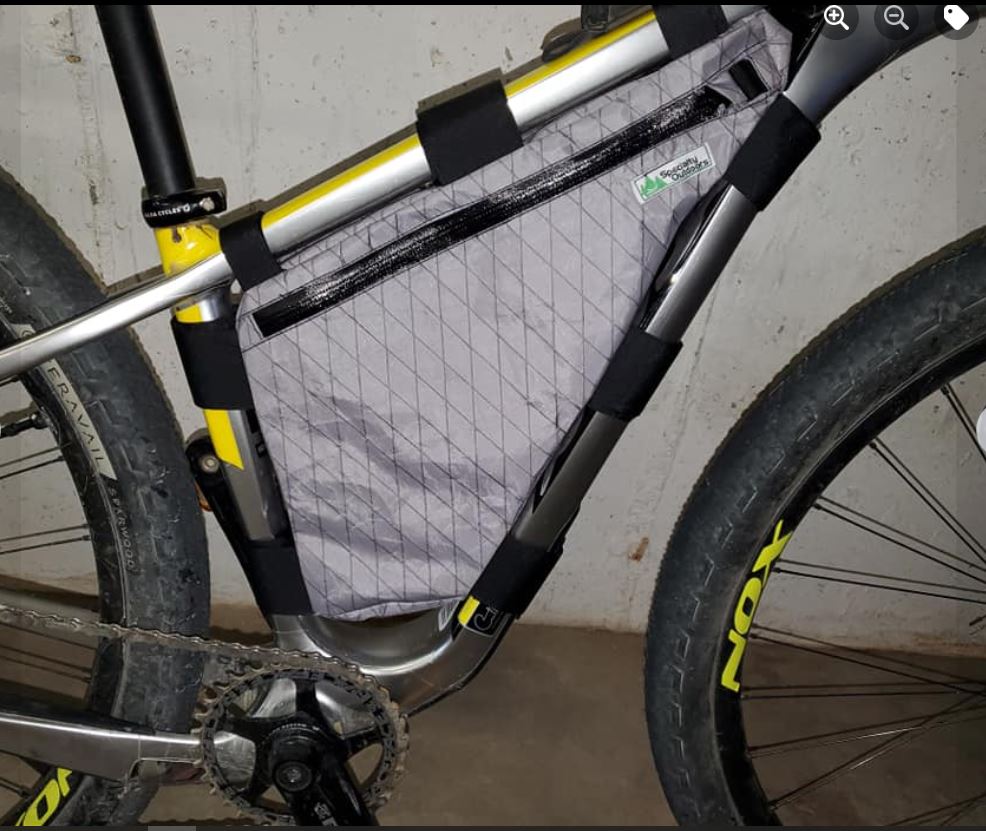
Then it was time to get a little more serious. I picked up a gravel bike, and all the cool kids had custom frame bags. This was my first attempt at a custom fit triangle bag:

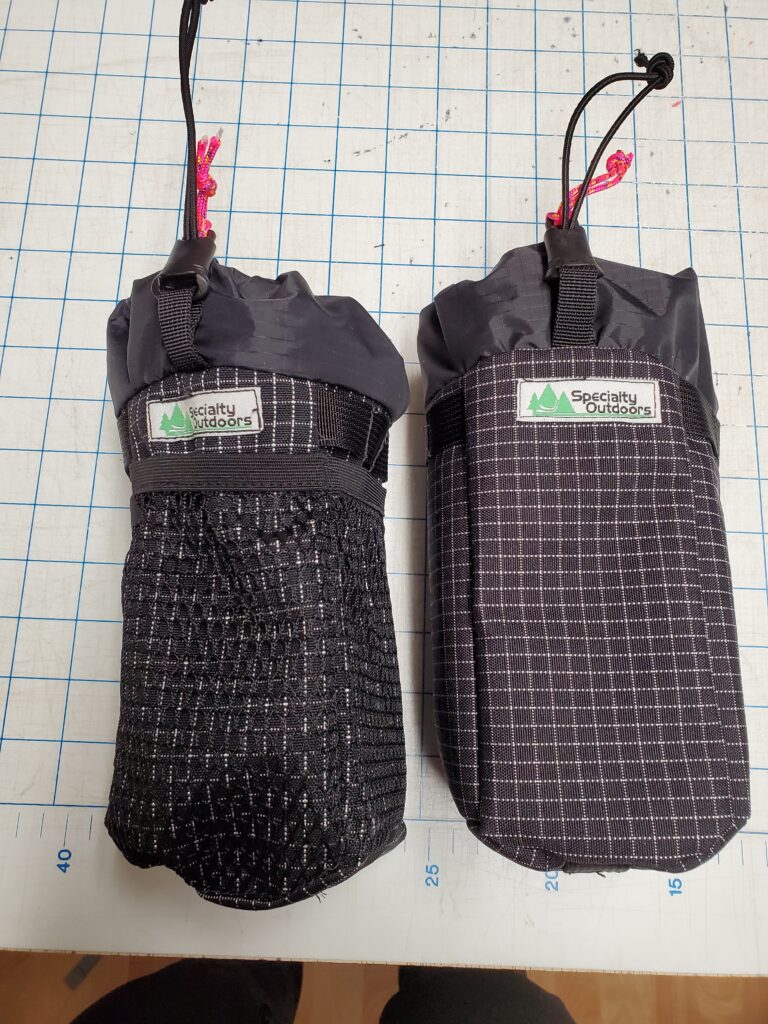
And then of course I just had to make matching snack bags:
(tutorial here)

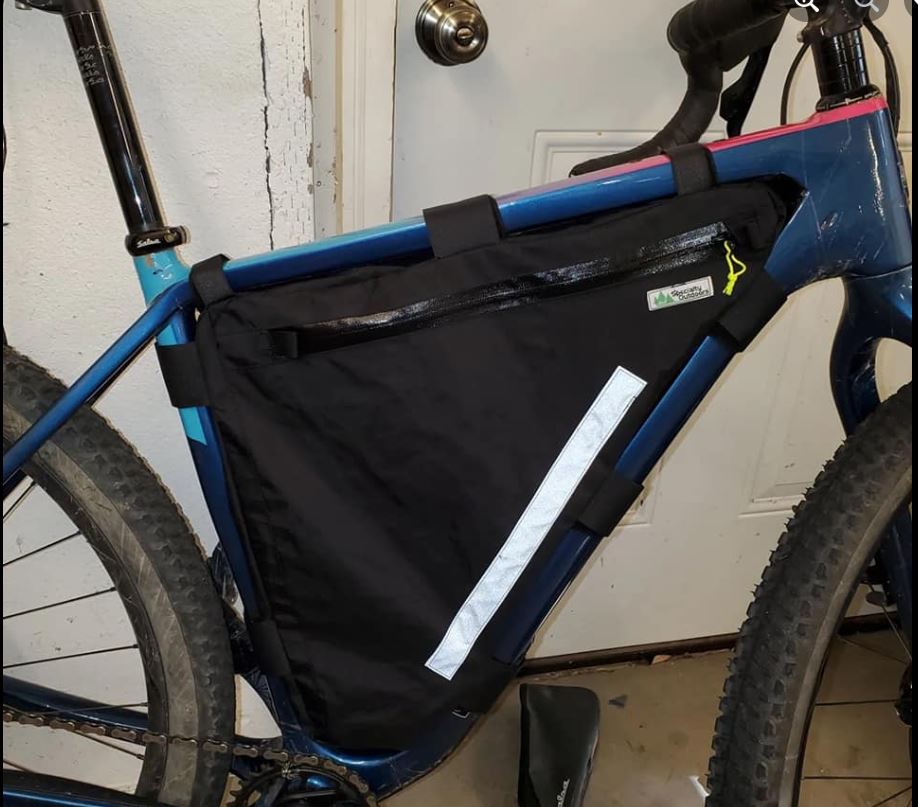
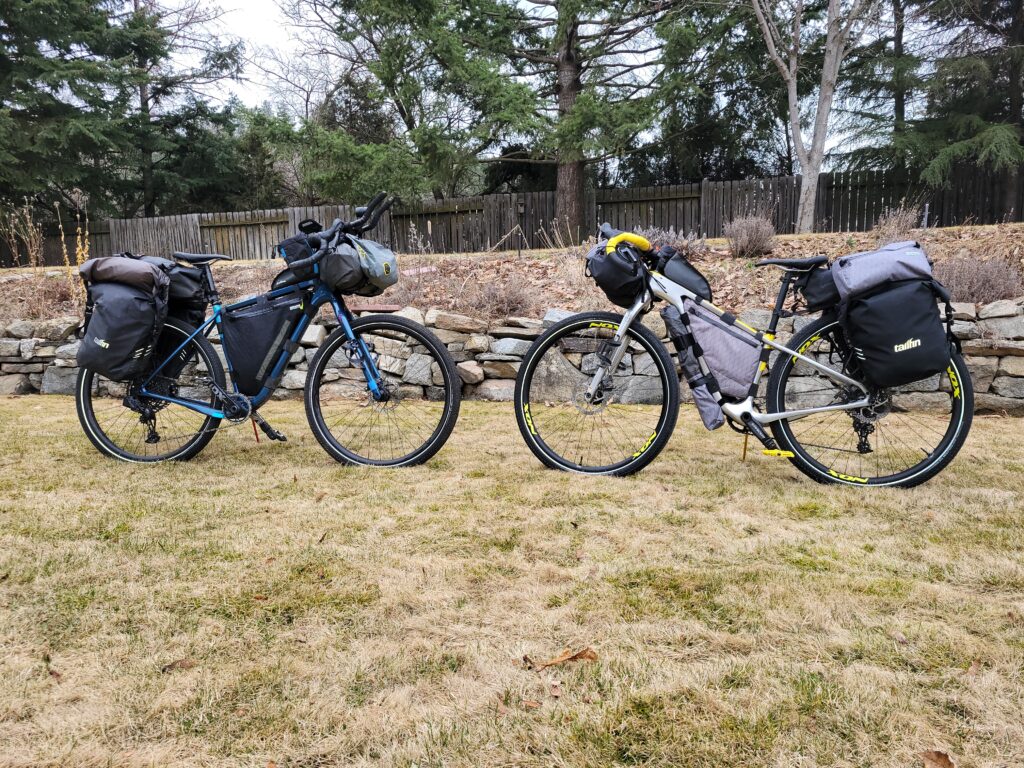
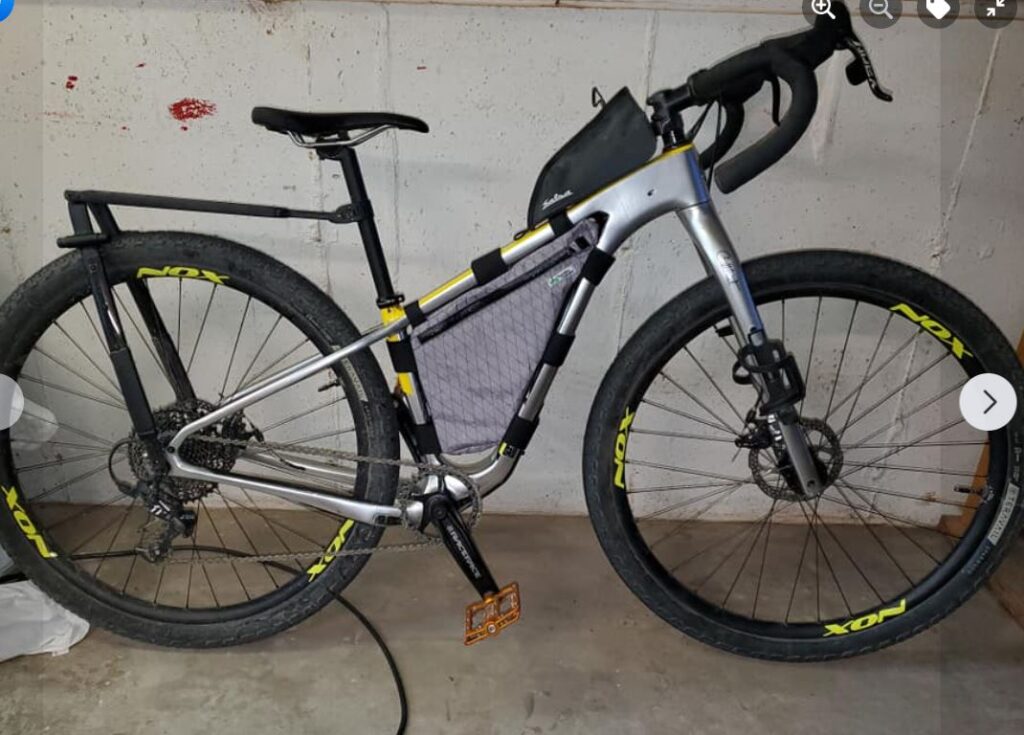
It turns out that particular gravel bike didn’t meet my needs. If you must know, I couldn’t put wide tires on it; not enough mounts for stuff, and it was geared way too high for the hilly terrain around here. My dear sweet hub bought me a Salsa Cutthroat, which of course needed new bags. Plus he got a new bike and he needed some bags. You know how it goes…

Bag on 52″ Salsa Cutthroat

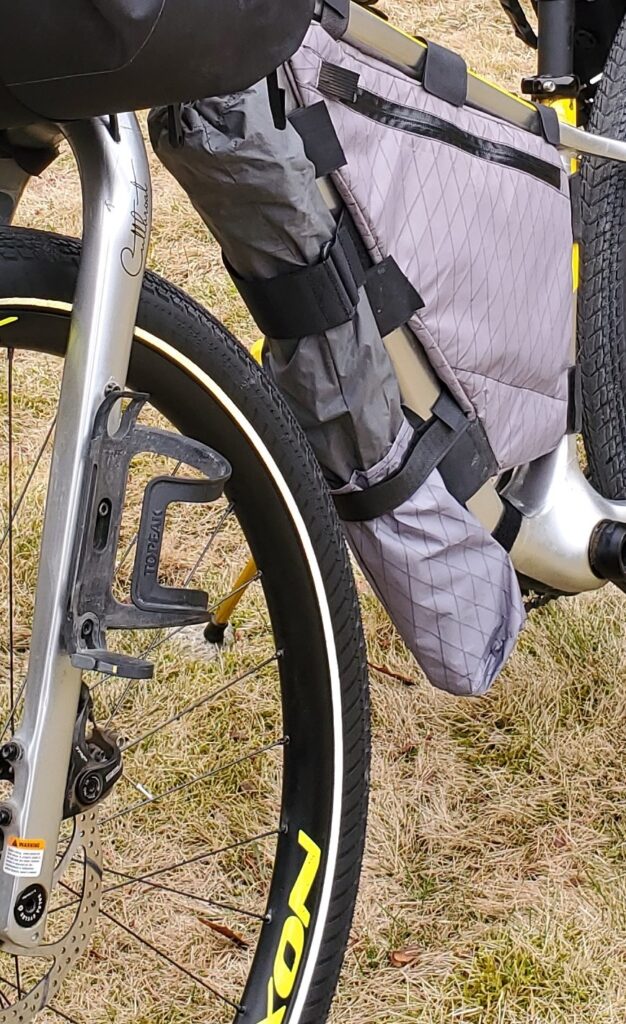
Next up, we are leaving for a few months in Europe spring 2023. This means a few more bags! First off, I had to come up with a system to hold the tent poles to the down tube. It’s not really a bag; more like a contraption. But it works!!

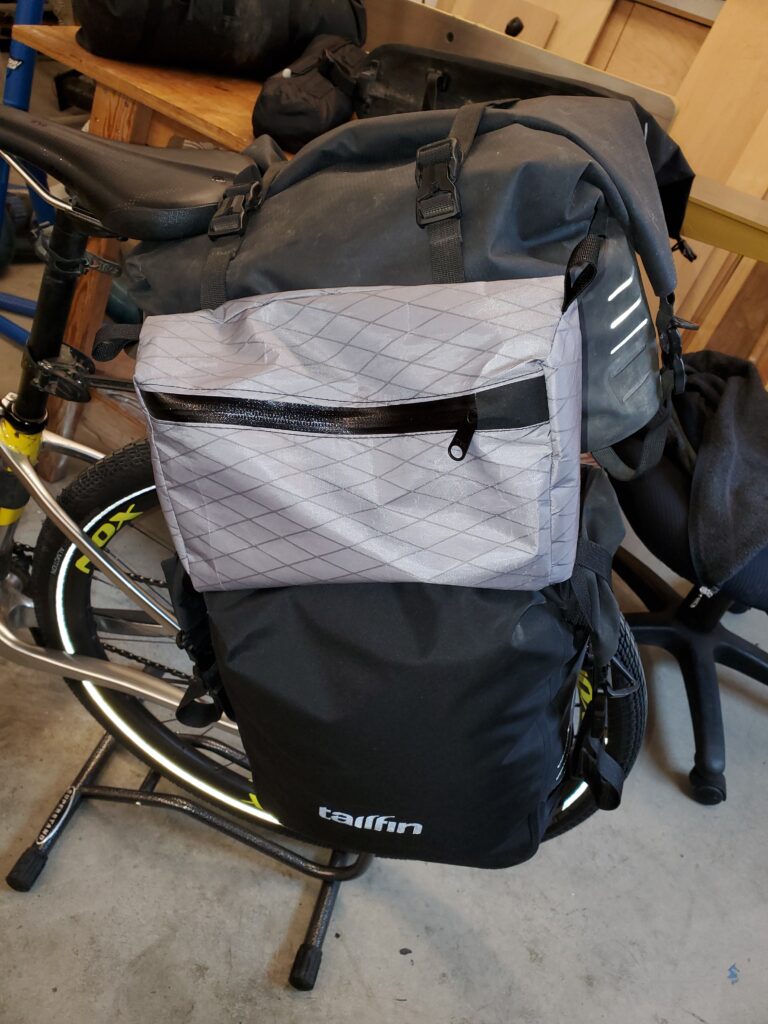
My hub has outfitted our Cutthroats with the Tailfin system. These panniers are quite a bit smaller than some, so I decided we needed a moderate size bag that would fit on top of the pannier, nesting next to the “trunk” bag.

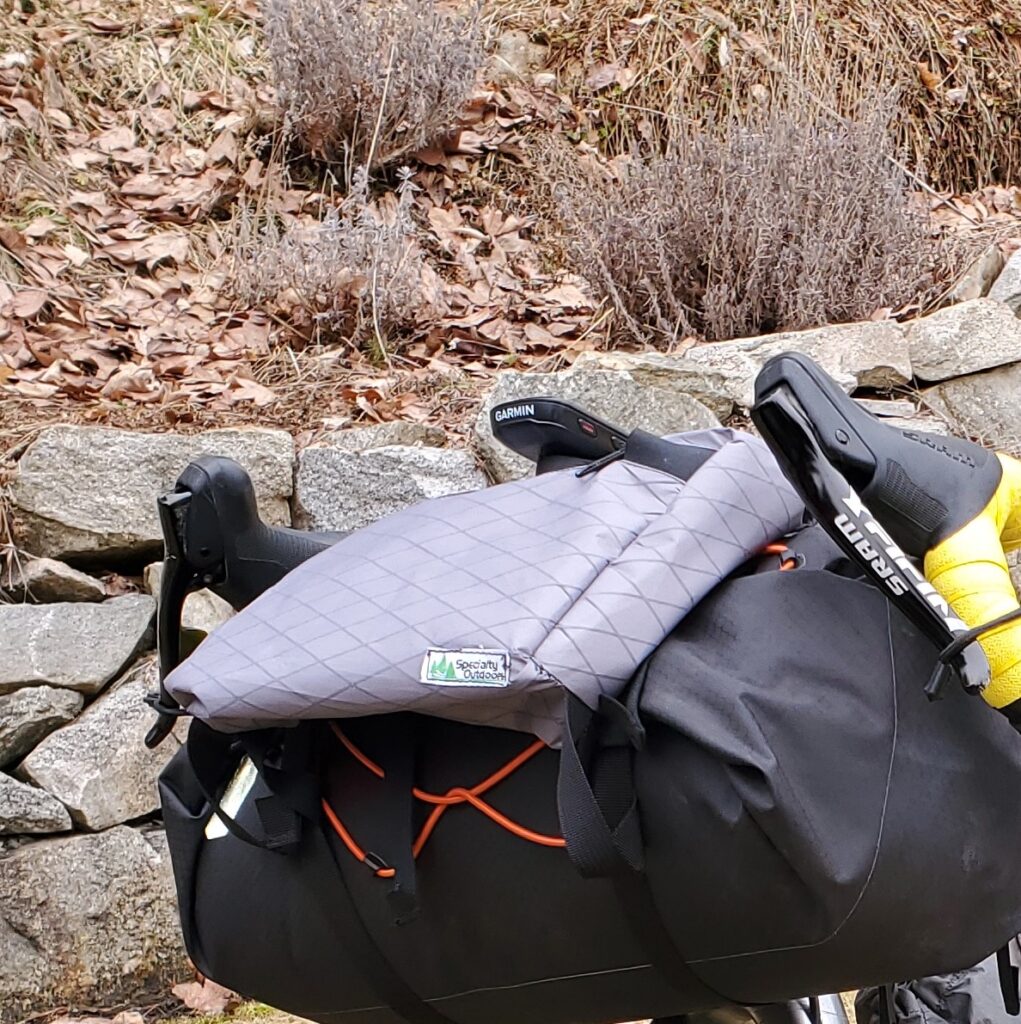
I then added a small front “handy” bag to go on top of my bar mounted Ortleib drybag that holds my sleeping bag:

Last but not least, I made a dry bag with some heat seal fabric as an experiment. It’s not pretty but will do the job of holding a wet tent fly.

I think we are pretty well set!


The main fabrics I used were Dyneema cordura from Outdoors Wilderness Fabrics and X-Pac from Ripstop By The Roll.
Happy Trails.
If you want to follow along on our ride up the Loire and down the Danube, check the EV 6 page in the top menu.

Zipper Magic

Sometimes being considered an expert is an awkward place to be. Sure, I know a lot of things and have cultivated that knowledge for many years, but also – there are many things I DON’T have a good knowledge of. And there are many areas where I know just enough to be dangerous and am not getting the result I want. I am always looking for opportunities to learn more and I get very excited when I meet people that can help me learn and answer my questions.

This brings me to Tailor Birgit of Pattern Adventure. I think I stumbled on Birgit when she joined my Outdoors Gear Repair Shop. She has a very special niche: custom outdoor clothing patterns and instructional courses geared towards outerwear. Her background is amazing, coming from a tailoring apprenticeship and fashion design/fashion house training, translated into custom outerwear. She offers several different online real-time workshops on project design and various aspects of construction. I started to explore course options through her appearances in the Sew Inspired by Discovery Fabrics Facebook group, of which I help admin.

What I am excited about is the new streaming course, “Sew a Zipper into a Jacket” available for purchase on Vimeo. The things you will learn, oh my. I was first exposed to her process via a Saturday morning general project course and couldn’t wait to learn more. For me, Birgit’s technique, process and tips has filled in the gaps in my quest to do nicer zipper finishes. Almost everything I’ve learned about zippers I have learned from reverse engineering and a few books here and there. I’ve been on quest to improve my jacket zippers for years but they were never quite perfect enough for me. I knew there was a better way but I was not getting there on my own.

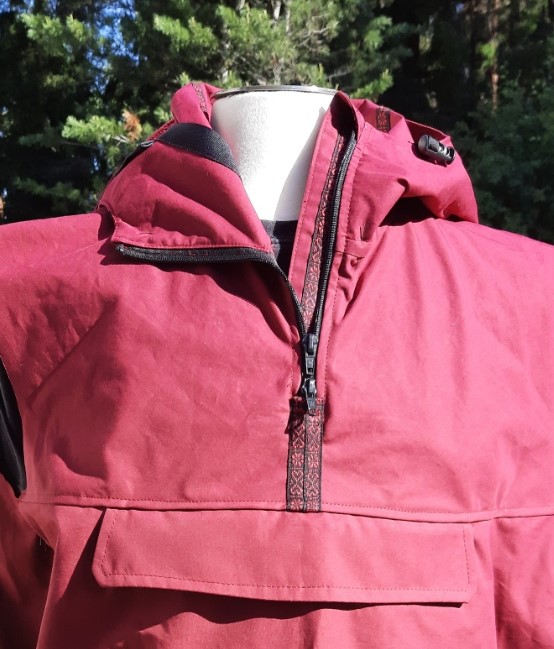
Example of Birgit’s work.

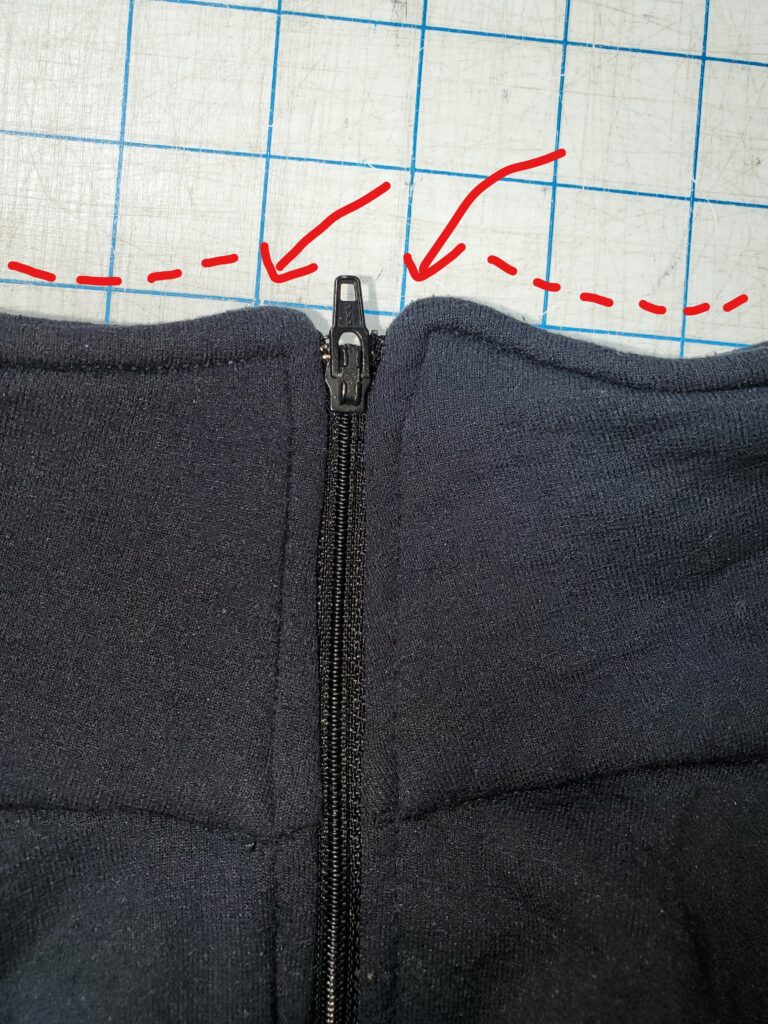
No matter what I tried, I haven’t been able to get the tops of my collars square. Granted this may be a galloping horse* issue, but it matters to me.


*can’t see it from the back of a galloping horse aka the three foot rule


Birgit will walk you through the jacket zipper process in great detail, step by step, with voice and video guidance. She will cover everything from precise zipper placement, guards, inside finishes, topstitching, matching points, and most importantly: how it all comes together for perfectly lined up zippers from top to bottom. You get the “why” on why things are done a certain way. Her instruction is suitable for new sewers wanting to get it right the first time and seasoned folks looking to up their game. As a course to purchase that you can watch over and over, it’s very well priced.

Is it magic? Not quite, but having the right techniques to use can feel like it.

Link to course trailer: Sew A Zipper Into A Jacket

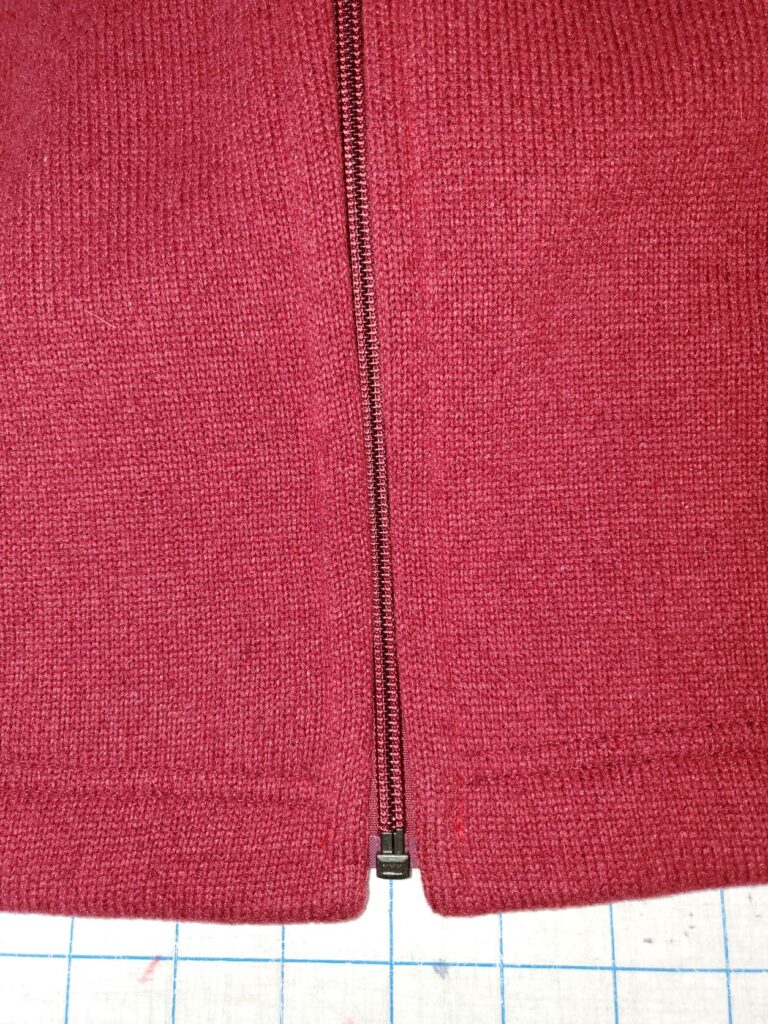
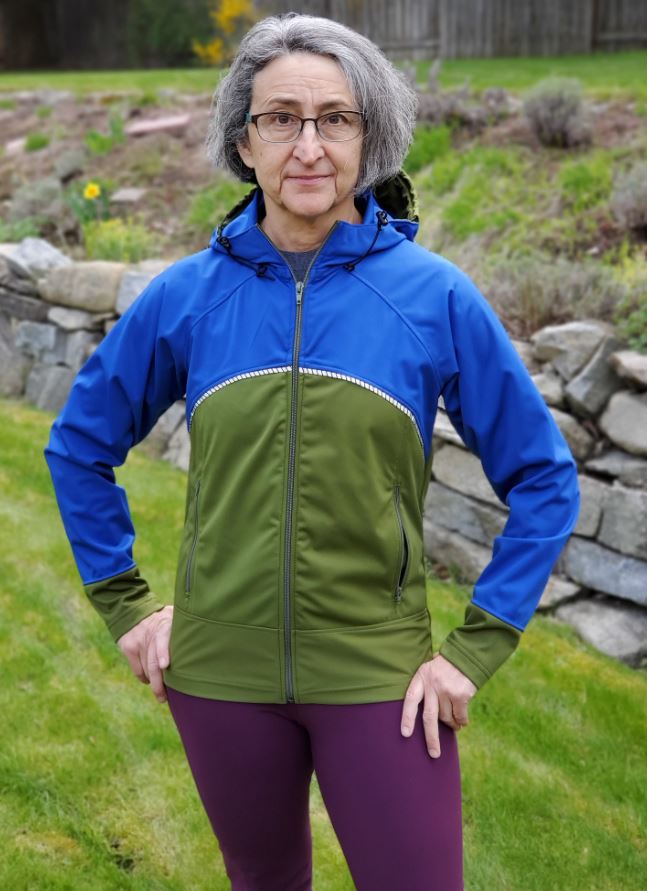
My first attempt. Not perfect but I learned so much in the process! The next one will be easier. This is a Polartec Thermal Pro (aka “Sweater Fleece”) Jacket using Wardrobe by Me Men’s Fleece Jacket pattern. Fabric is from Discovery Fabrics, my sponsor.

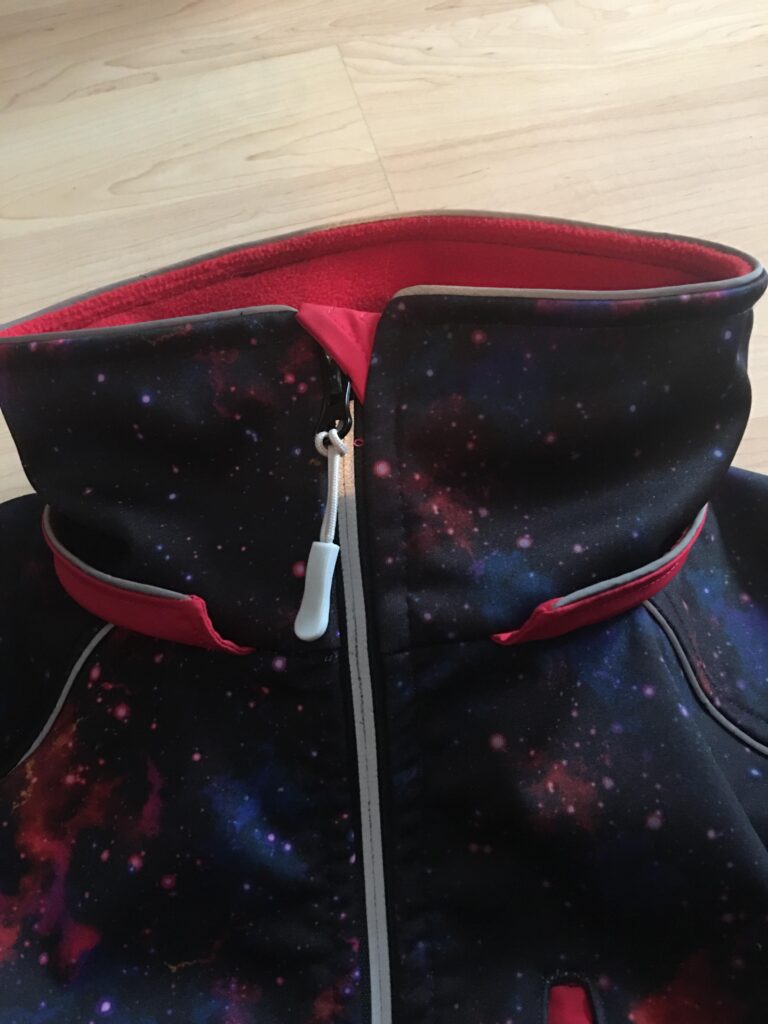
My friend Karen Dean is perfecting this method:

My Iceland Trip

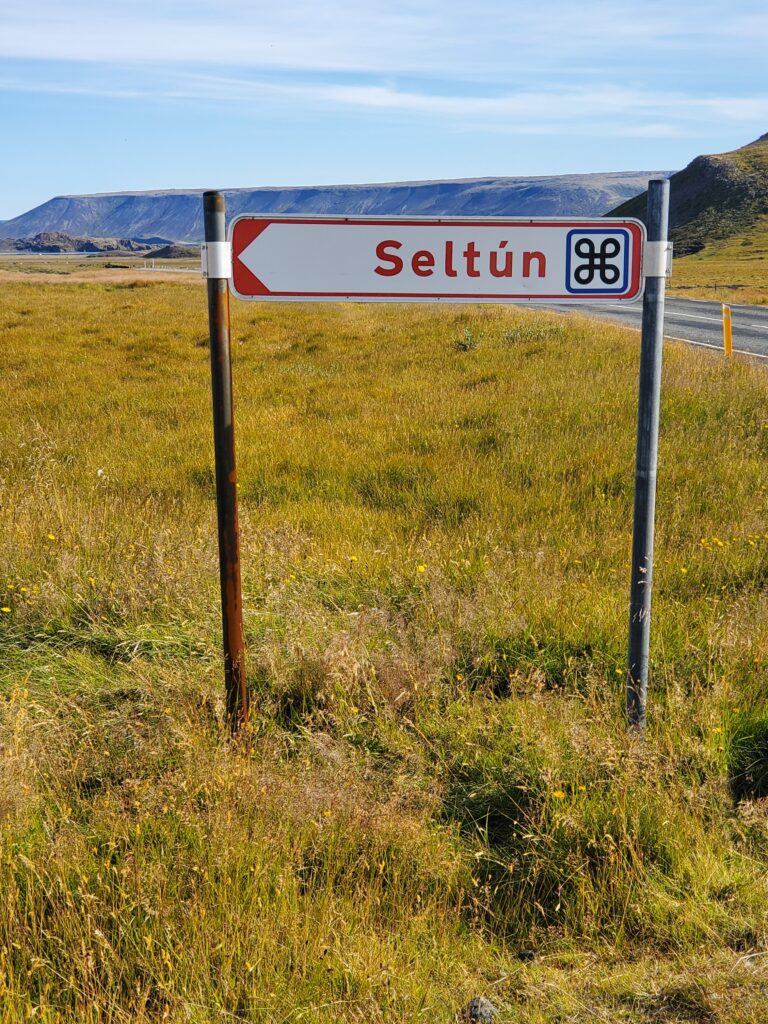
My husband and I spent 15 days in a camper van on the Ring Road. Amazing does not begin to describe it. I have been getting lots of questions from friends so while it’s fresh, I will make notes. Any prices I mention are from August 2022.

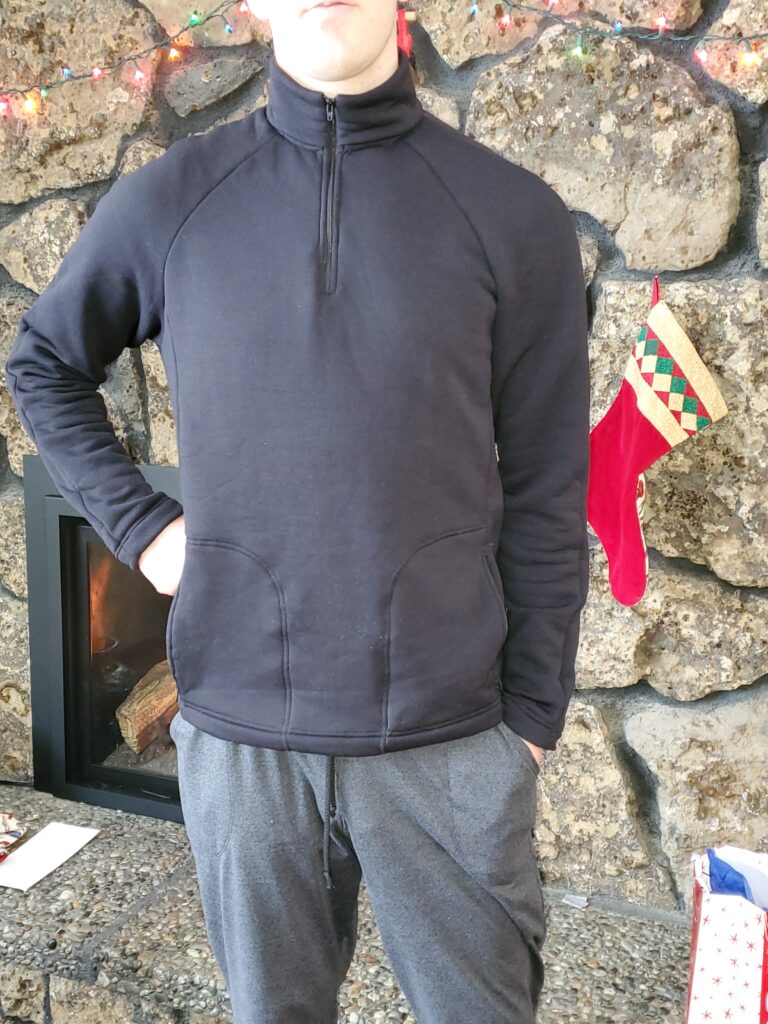
First, a shout out to my blog sponsor, Discovery Fabrics. I had grand plans to sew everything for this trip but…life. However, I did an inventory and it looks like we were outfitted pretty well with Discovery Fabrics between me and my spouse: Neoshell jacket and pants, Polartec Powerwool pullover, Polartec Powerstretch pants, 2 Polartec Powerwool lightweight shirts, a Polartec Powergrid baselayer top, 2 Yoga Stretch leggings. These performance fabrics all did their jobs of keeping us warm, comfortable and dry in Iceland’s crazy weather.

Eruption just happened to happen timed with our trip.

Caveat: I am no expert. This is just my comments from a single trip. There is lots more information out there.

Camper

I booked a van last year (summer 2021) when Craig said figure out someplace for us to go. I booked a camper first as I figured that would be a good place to start. For rentals, you can get everything from a Rav-4 sized vehicle with a popup on top, to king cab 4x4s with campers and snorkels and small RVs. If you wish to go to the interior, 4×4 is mandatory as 4×4 is required by law on “F” roads. We had considered a 4×4 and nixed it due to cost (almost twice as much) but in retrospect, I wish we had done it. Next trip? I’m sure your only limitation is how much you want to spend.

We saw lots of rental campers that are a small vehicle with a pop-up tent. Our observation, confirmed by talking to campers, is that they are COLD for sleeping and really wet when storming. After one rainy night, we saw people wringing their mattresses out. Not for us!!

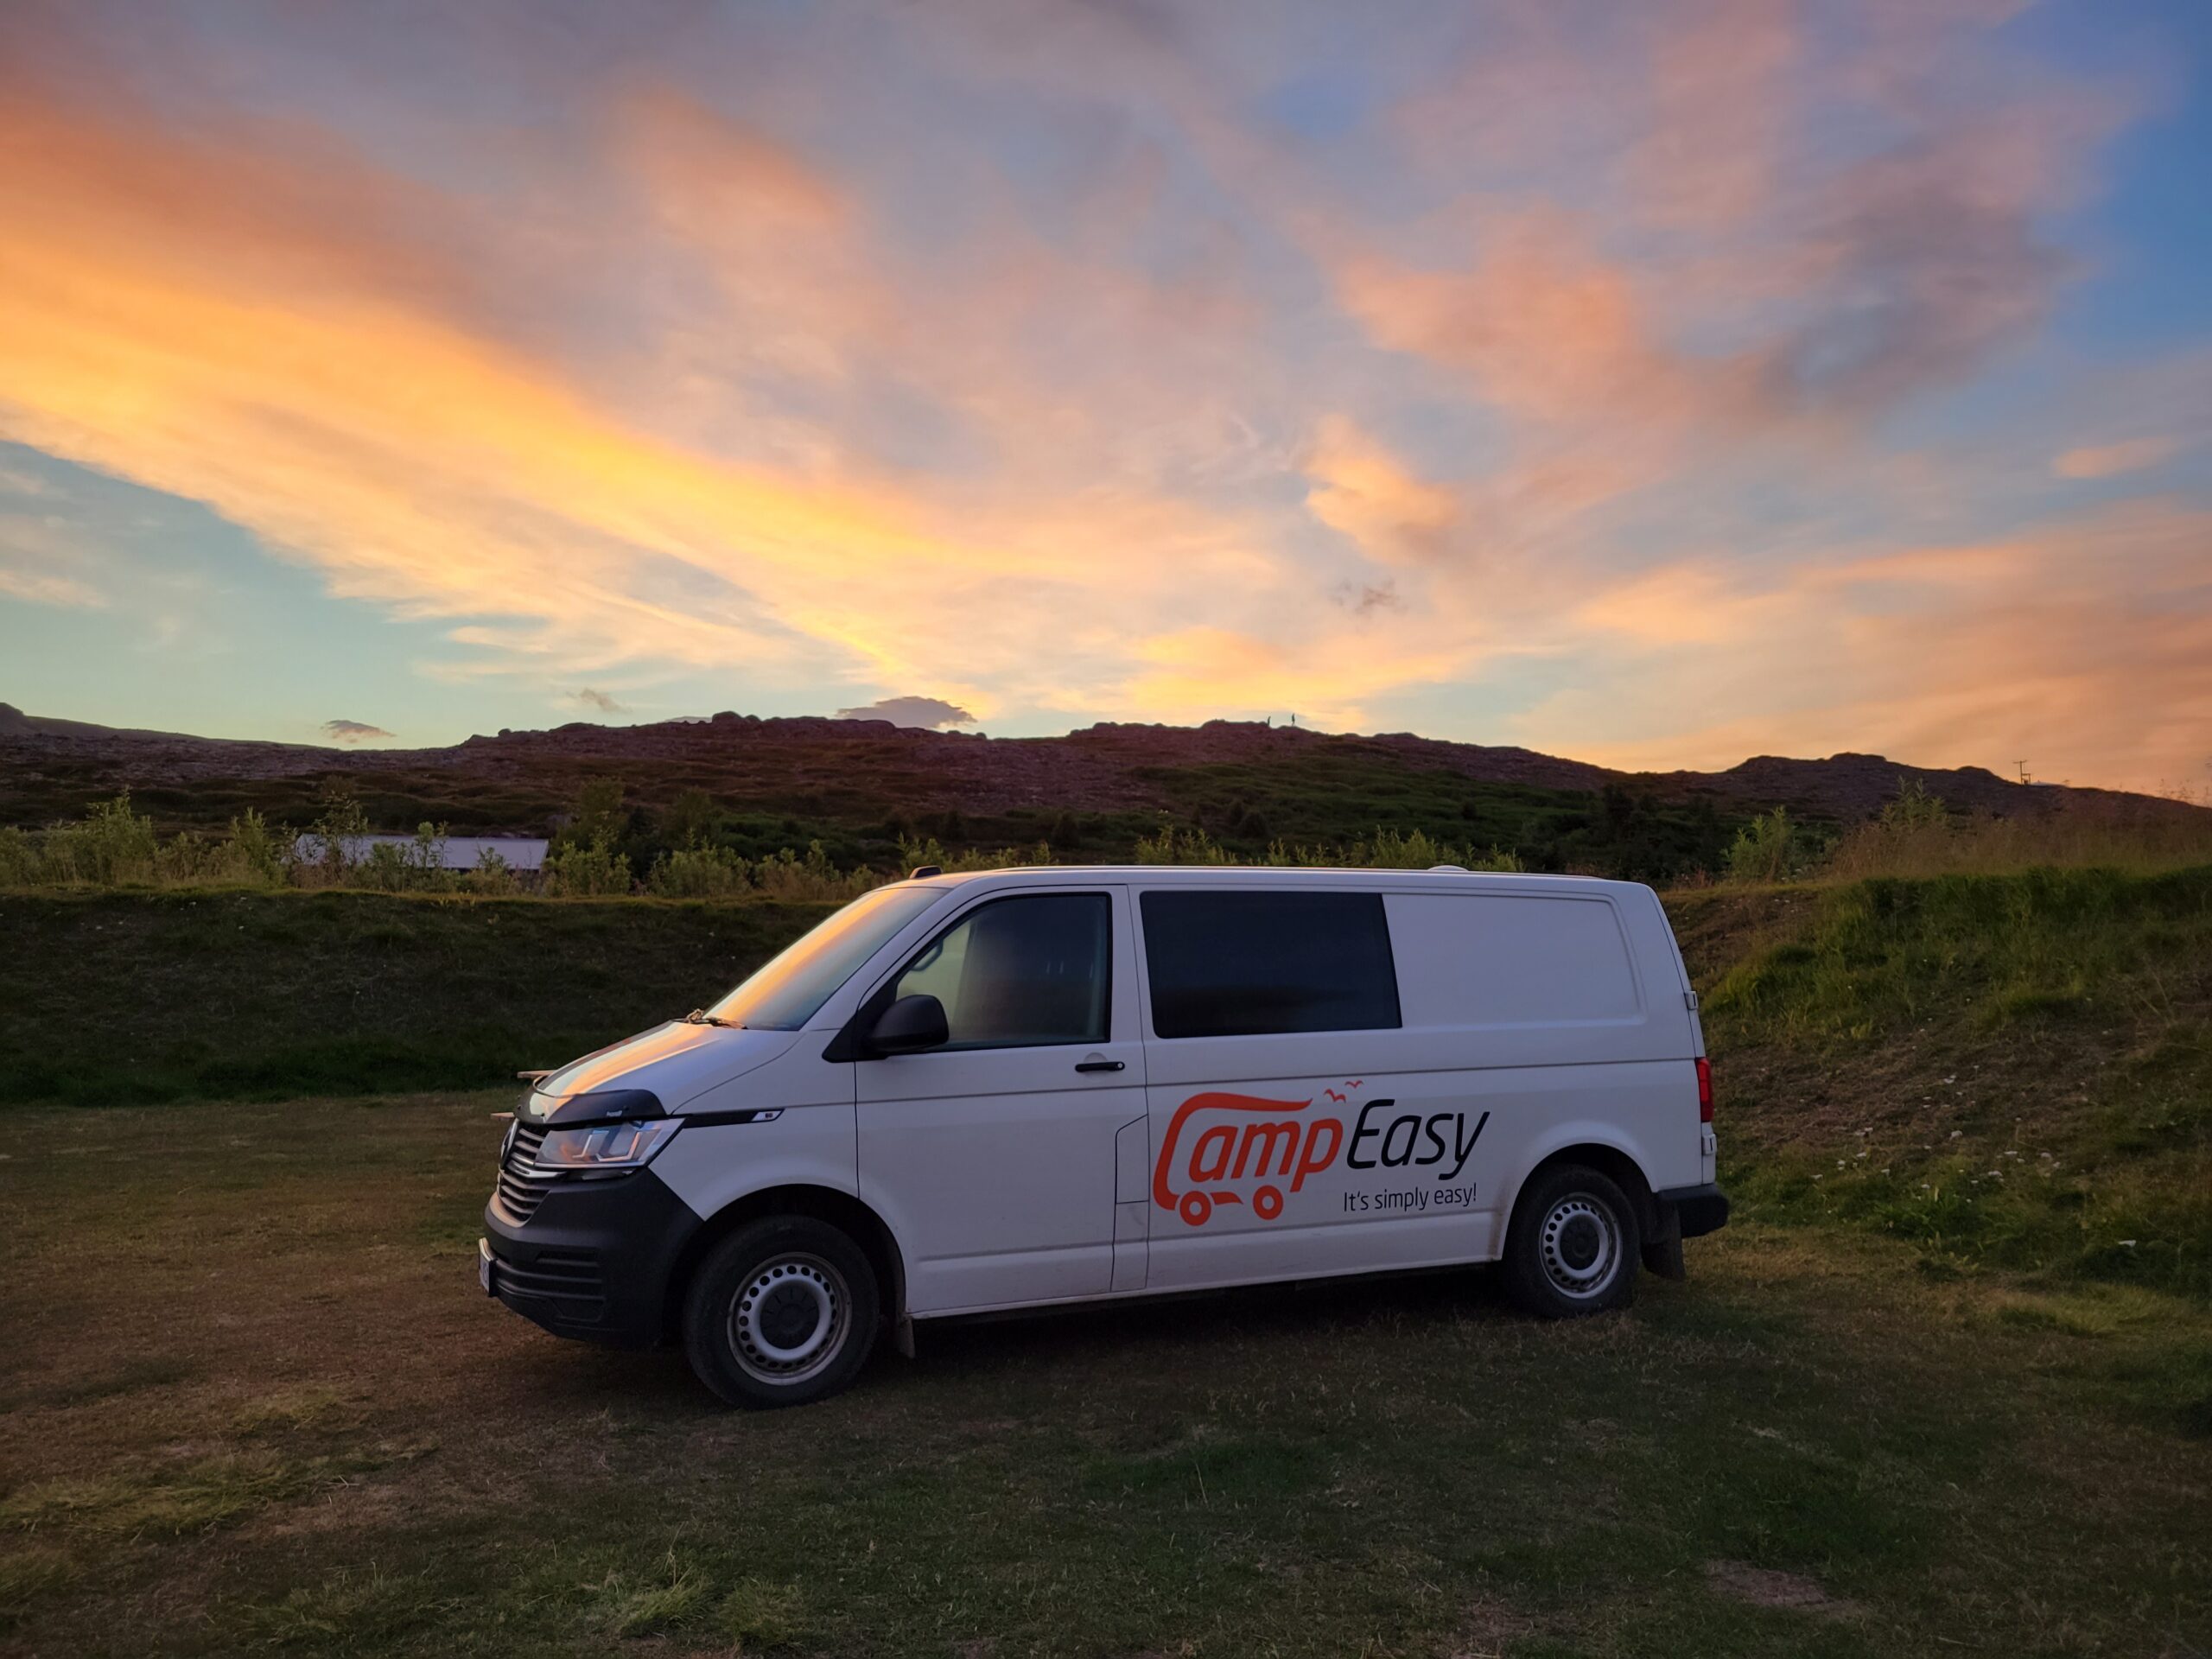
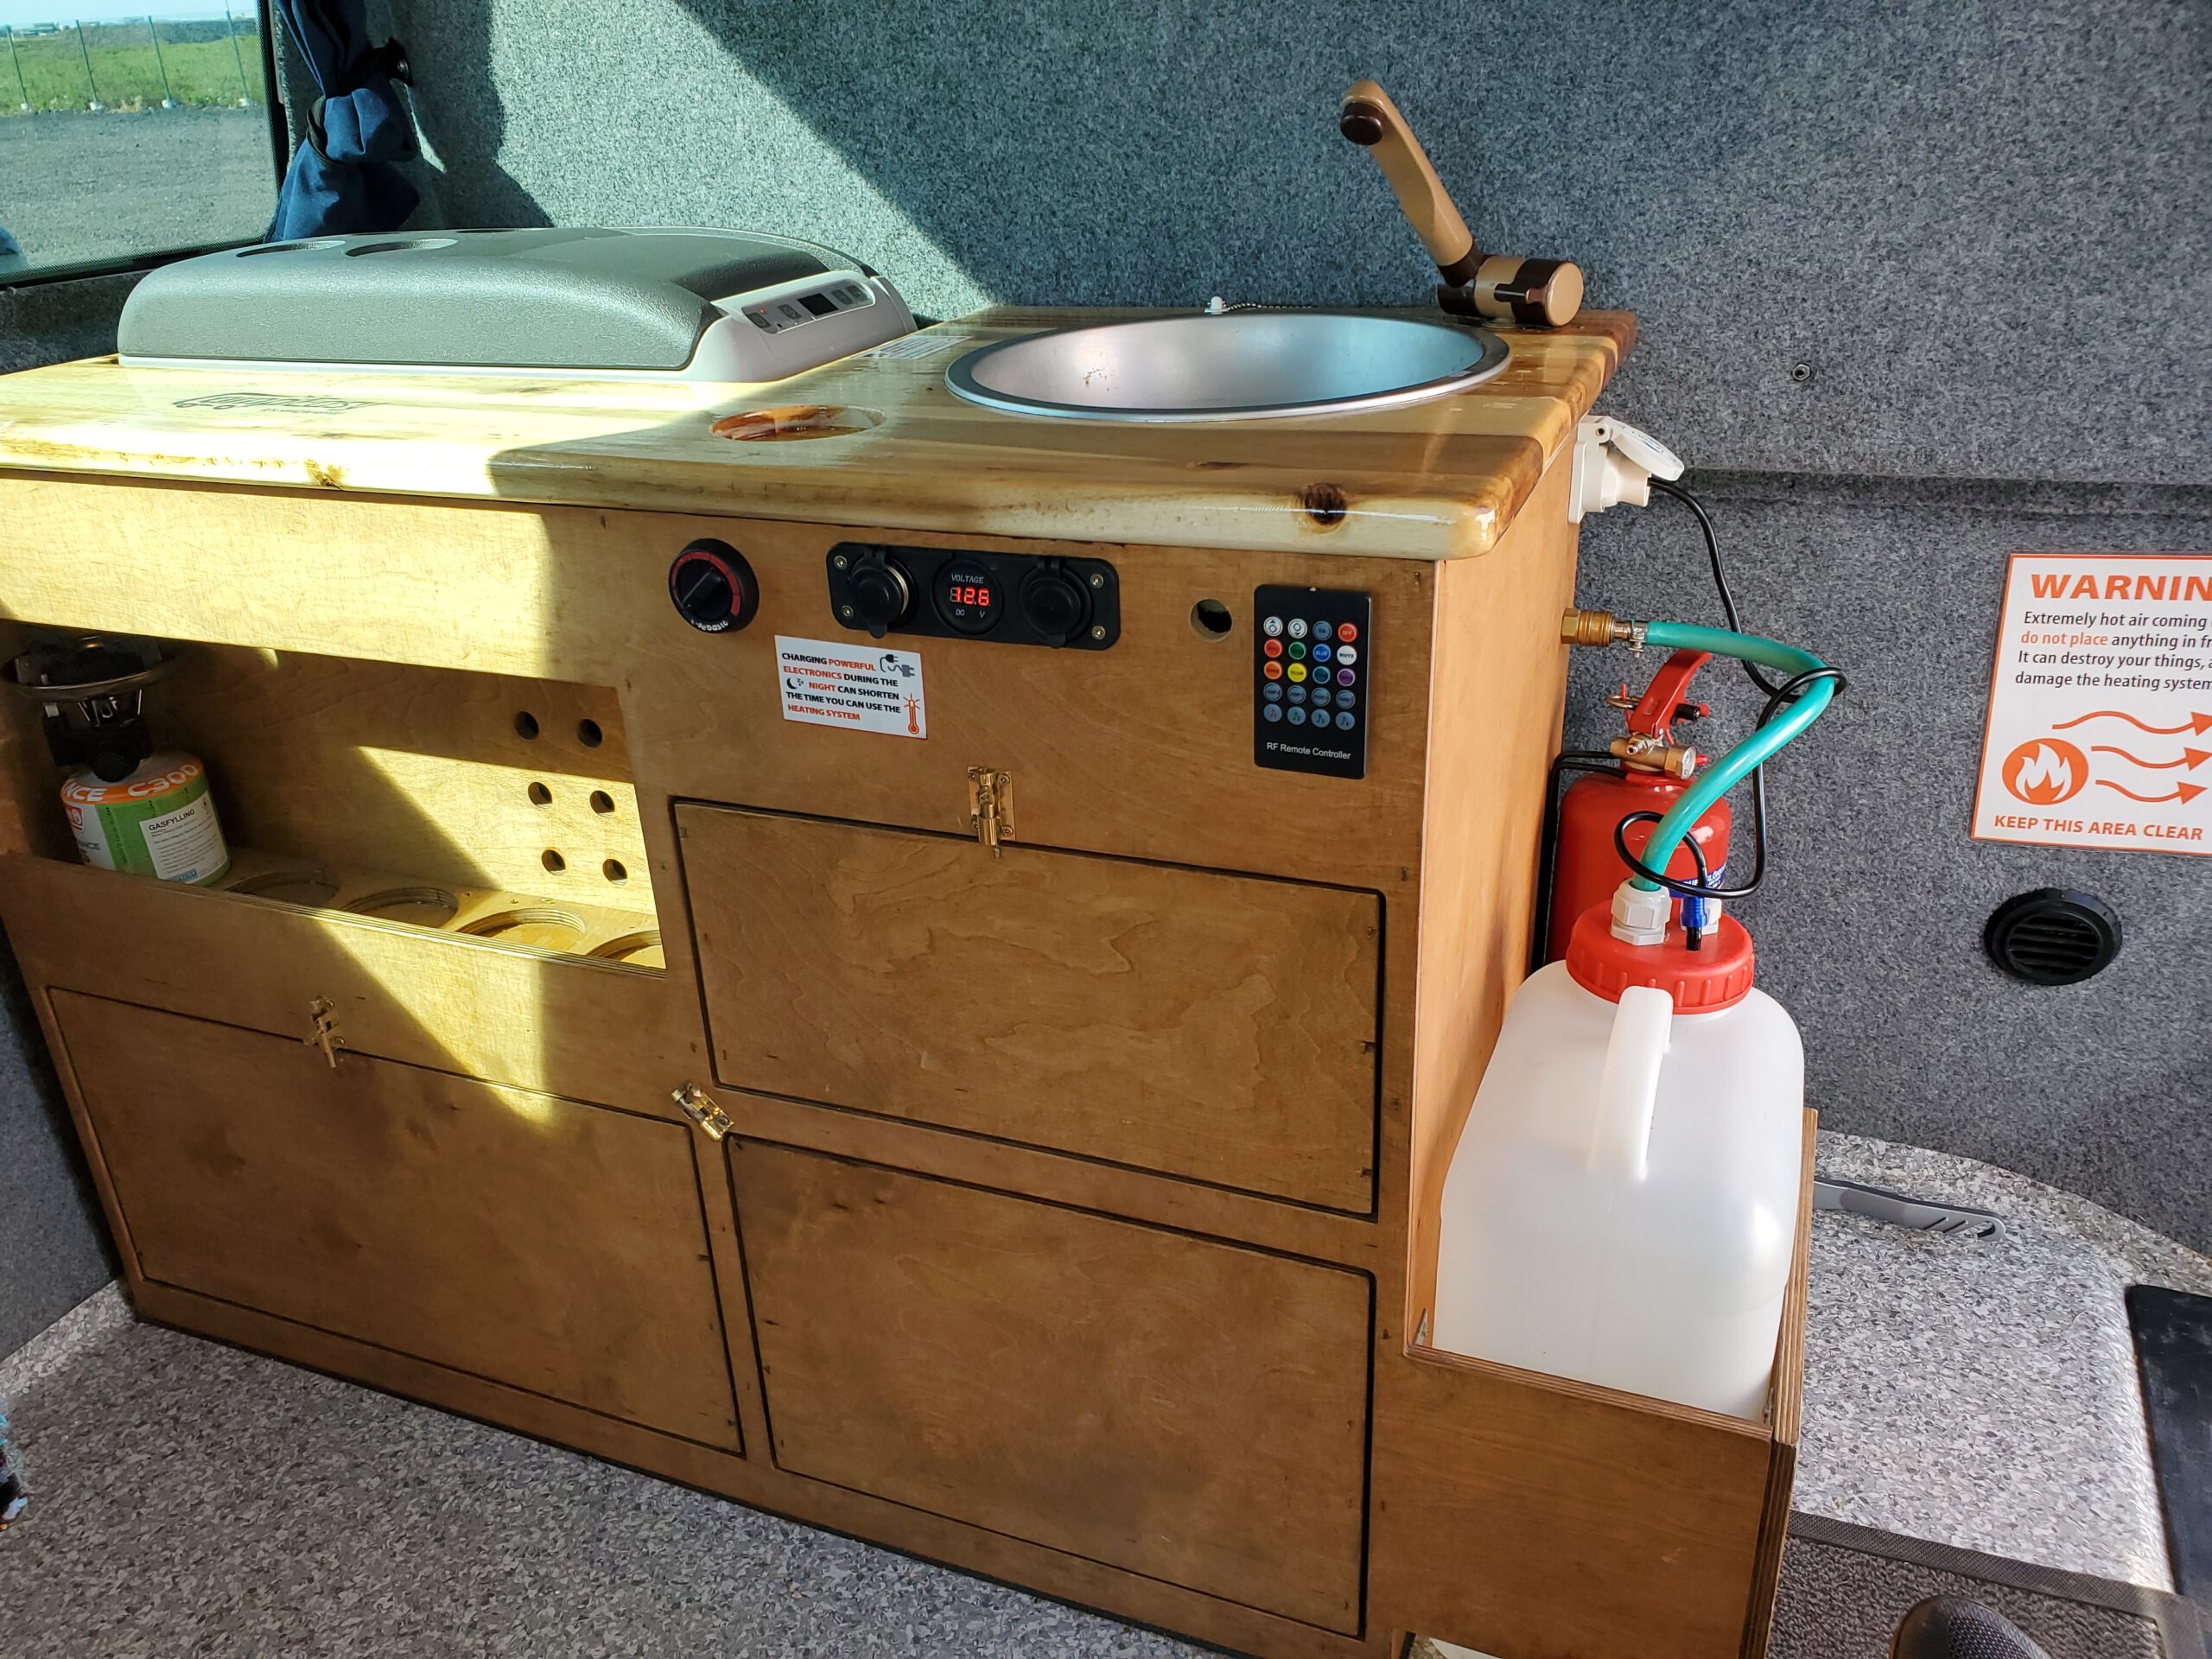
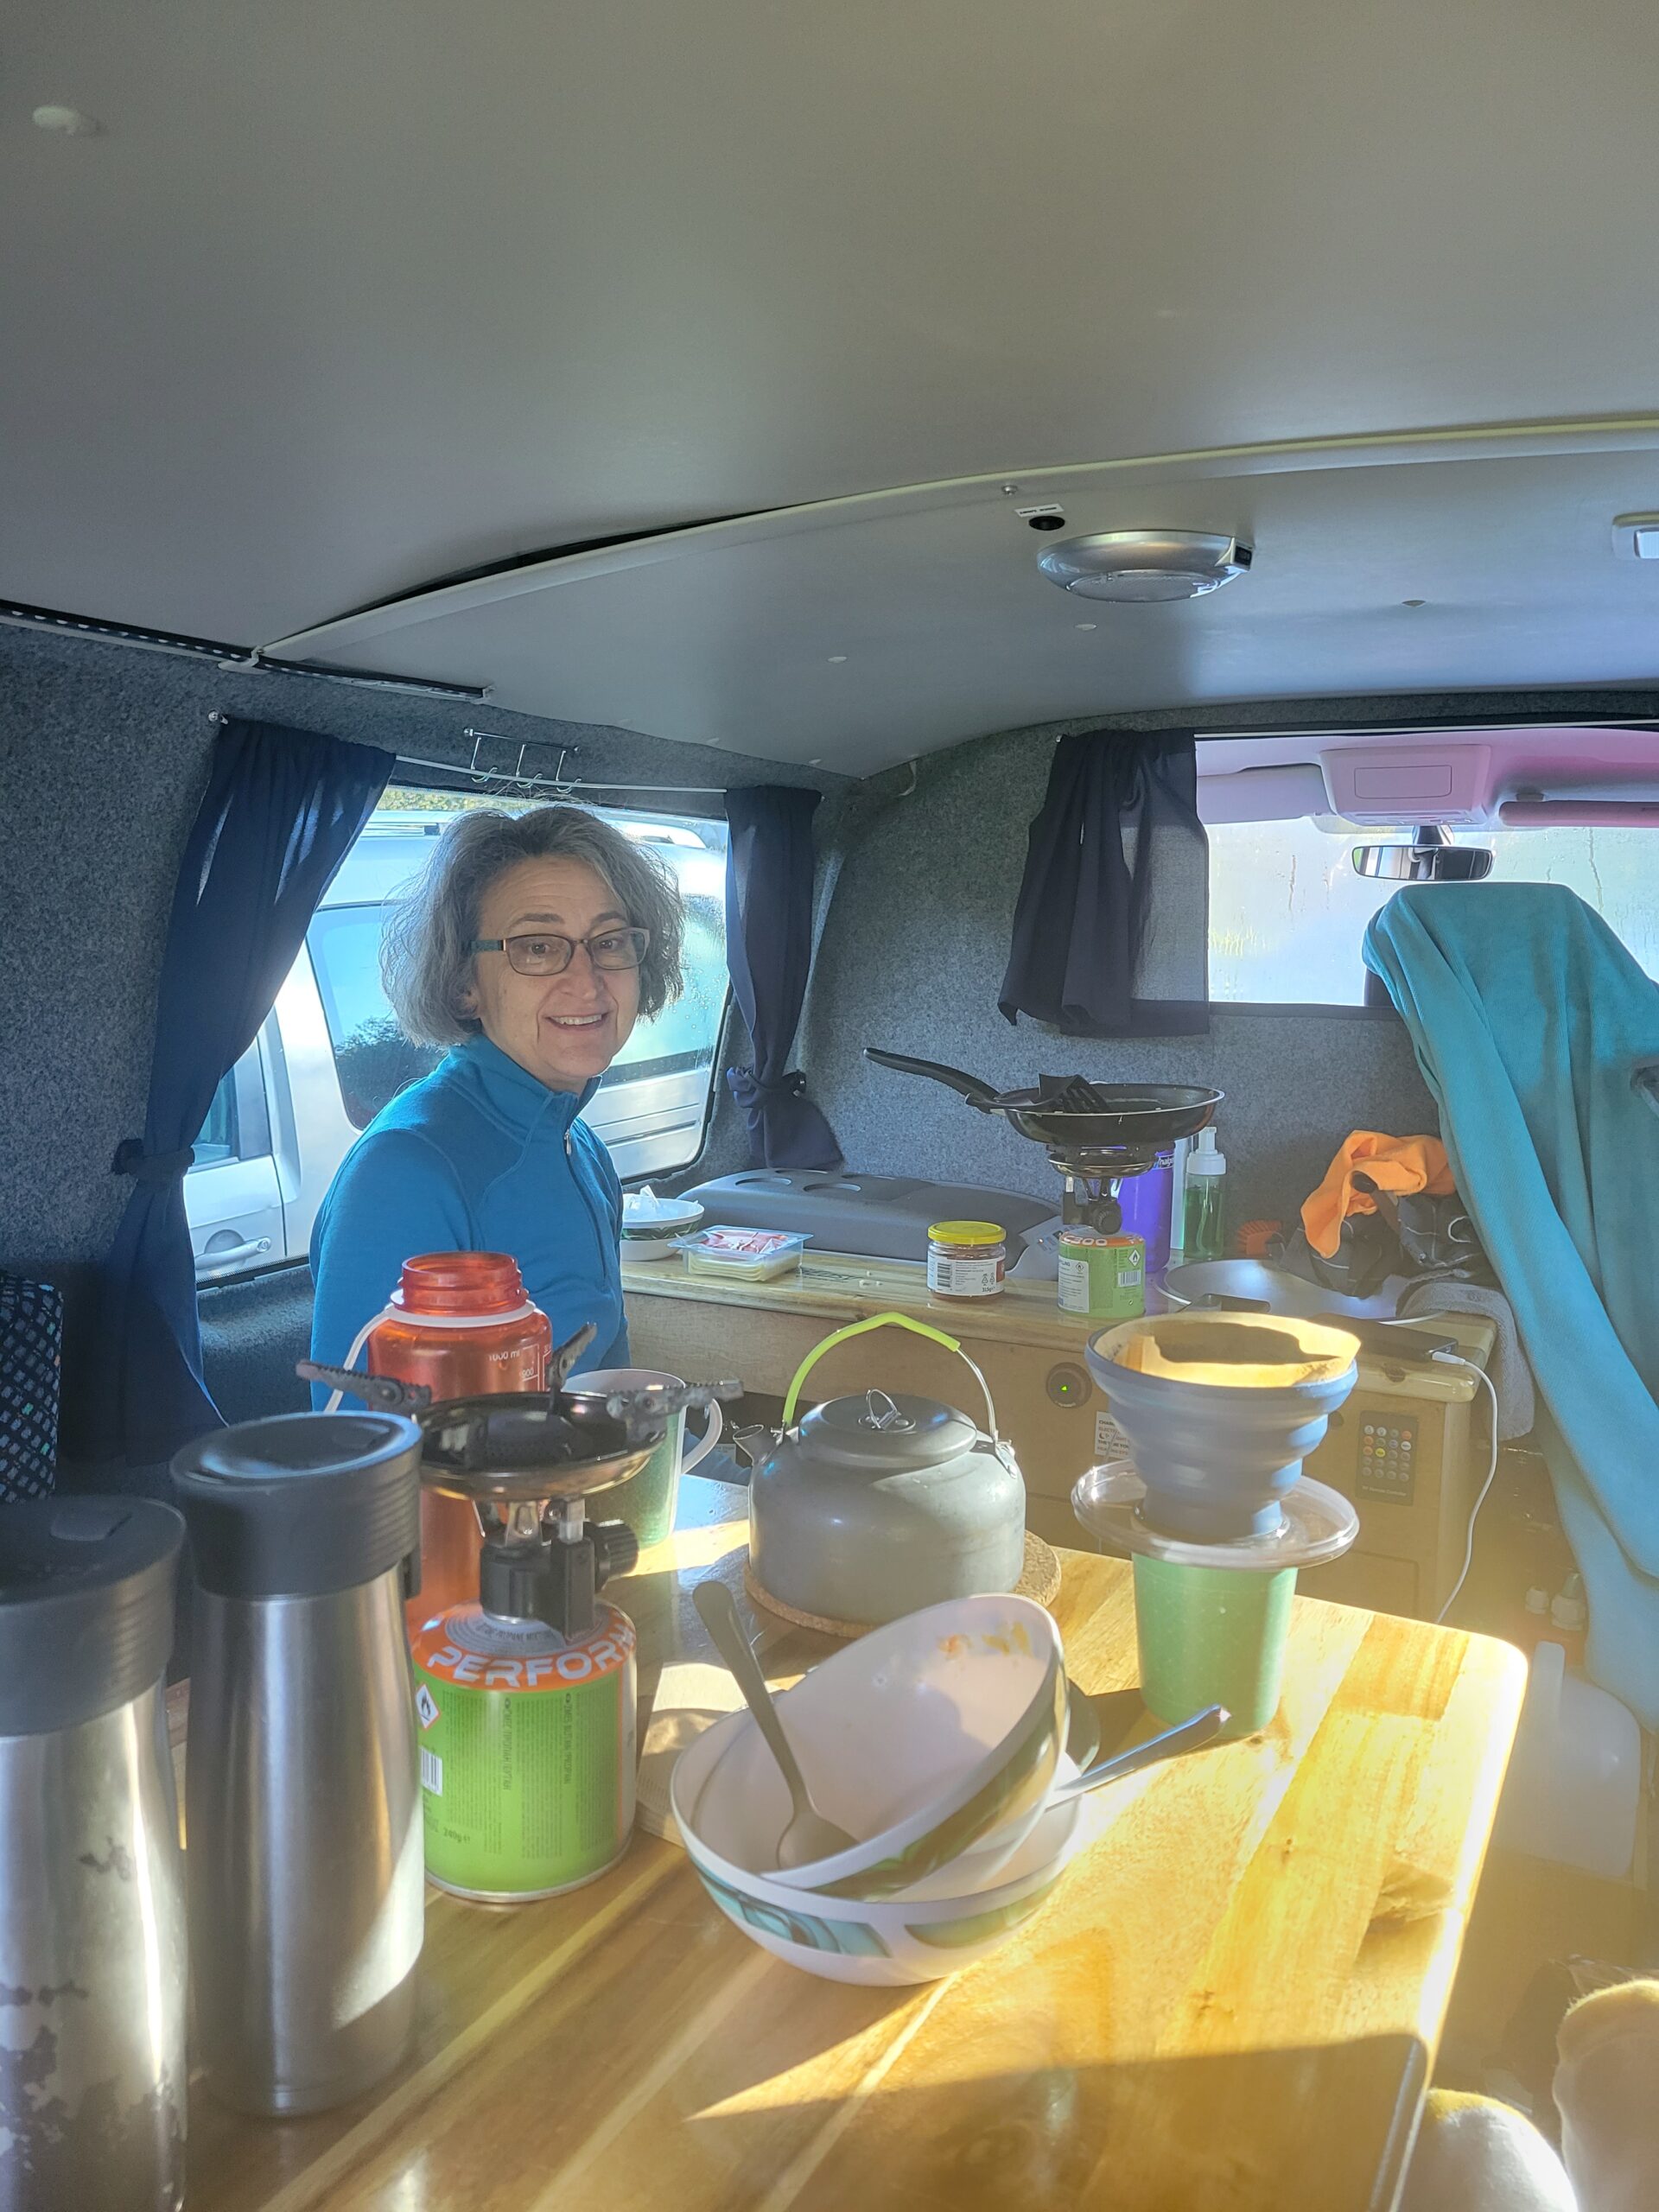
I chose CampEasy because of their excellent reviews. By booking so far ahead, I was able to get a good discount on the rental. Our van was a built out VW Transporter. We opted for this size because the table/bed conversion gives you a full width/queen bed. Smaller vans have the kitchen console long ways which gives you a double size bed: too small for us. The rig was basically equipped with bed that converts to benches/tables, a kitchen console with 12V cooler, 3 gal water jug with electric pump and a small sink, good heater and utility space. It comes with a single burner gas stove and basic kitchen stuff. We had the option to get a second burner and large pot which really helped with my cooking style. The van comes with bedding: duvets, pillows, sheet. This was adequate though good grief, who uses a cotton sheet in damp Iceland? Next time I will bring my own fleece sheet. Most of the van companies including ours offer extras like folding table, camp chairs and more. Whether they charge per day depends on the item and company. Our only complaint was the tires looked pretty iffy but thank goodness no issues. Iceland roads are hard on tires we were told. All in all, we were very satisfied with Campeasy. The vehicle was solid and the company very easy to work with.


Most companies including ours offer a navigation table that acts as a Wi-Fi router. They have their own info and nav software which connects you directly to staff for questions. Most importantly, you can add an unlimited Wi-Fi option for $6 day. Looking at phone plans, this made the most sense for us instead of taking what Verizon offered. In case you wondered how we could post prolifically to social media… that was how. Plus we had internet access to look anything up, good maps, etc. 4G coverage around the island was excellent.

Camping

For camping, there are several things to know. The first is wild camping/boondocking is expressly forbidden by law. You must stay in designated campground unless you have express permission from the landowner. Tourists created this situation by abusing the land; go figure. Second, there are campgrounds everywhere: most towns have one and some accommodations have a campground in addition to hostel or hotel. Lastly, no reservations are needed except maybe for Reykjavik city one. My understanding is all the rules apply in the interior, too.

It’s not camping like we have here in the US. Camping is a large grass area and you park where you want; there are not designated spaces. There is a central facility that will have toilets, sometimes showers, and a kitchen/washup area. Some have washers but no dryers. Showers are mostly free but not always. Bathrooms vary from very nice to thank god the toilet is clean. Washers are for fee too except for one campground we went to. We opted to cook in the camper as many times the kitchen was tiny with people lined up to use a single burner. These campgrounds are more like a legal place for people to stay at night as compared to camping itself as a destination. Most towns also have a geothermal pool/health facility. We showered, swam and soaked at a lot of these pools as they were very clean and nice compared some campground shower options. The farther you get off the Ring Road, the less people there are at the campgrounds.

Olafsfjordur camp


Cost averaged $21 a night, with showers $2-5. There is something called a “camping card” where you prepay for a small selection of certain sites. I did not get this as I did not want to be locked into specific sites; it is only good for a small selection of sites.

Itinerary

(Or lack of). When I started to research this trip, I found dozens of suggested Ring Road itineraries online. Pretty early on, we decided to do a camper and not book accommodations, the main reason being we did not want to be locked into having to be at a certain place on a certain day. In truth, distances per day are pretty consistent so I think if you did book based on a suggested plan, you can’t really go wrong. The only thing we booked ahead was the first night camping in Reykjavik. We booked a kayak tour the night before we got to Djupivogor and whale watching the same day we decided to go.

You will find different recommendations on whether to do the Ring Road clockwise or counter-clockwise. Advice I was given was to go whichever way the weather report indicates will be better. We started counter clockwise at that is where we ended up after hiking to see the volcano.

There are tons of good websites with suggestions of things to see and do, whether it’s hikes, historical sites, or attractions. We personally try to avoid “attractions” and crowds but at the same time, as a unique island there are places that you may want to see that will have crowds or that cost money. I head the Lava Show in Vik is pretty cool, with a second one opening in Reykjavik soon. Since we got to hike in to see the active volcano, we didn’t consider that or a helicopter flight. We also passed on the Blue Lagoon and found a smaller spa to go on the other side of the island.

I found the Rick Steves guidebook to be rather worthless for our style of travel. There were a few helpful tidbits, but I did better with a detailed paper map, Gaia topos downloaded onto our tablet, and Google (we had unlimited wi-fi). I did research with Google and Trip Advisor. There are several FB groups on Iceland Travel that I found after the fact that look like good resources. For hiking, I used websites (“ten best hikes” etc), local info (example, at Skatafell) and Gaia by zooming way in on topo maps. I did notice that East Fjords has trail guides (books in Eng and Isk) that have dozens of trails in them. Surprisingly, Trail Forks did not have much at all.

Things to see and do

You won’t be able to see and do everything on your list. With the help of maps and Google, I would pre-planned stops a day or two ahead. I did have a list of “musts” that got adjusted as we went along. There are Points of Interest signs EVERYWHERE but you don’t always know what the POI is. I found out on the last day there is an app called Kringum that will help immensely in knowing what sites are out there. There are Points of Interest signs EVERYWHERE but you don’t always know what the POI is. There are so many more than are marked on maps or in Google. I think this app helps to dial that in. Don’t be afraid to get off the Ring Road and explore. The non-F gravel roads are just fine.

Typical POI sign


Anyway, here are some of the things we did, and some we missed, with comments. This is based on our counter-clockwise loop.

Things we did

  • Active volcano: well duh, if you get the chance to see an erupting volcano, DO IT. The Icelandic powers that be try to make it as accessible as possible but it may be a rough hike in.
  • Grindavik: very close to many cool geothermal sites.
  • Hveragerdi: this is where they built a shopping mall over the rift zone. It is a very active geothermal area. We missed the river you can hike up one hour to natural hot springs to soak in.
  • Pingvellir National Park: this was high on my list as it’s a park devoted to the rift zone and an important historical site. It rated a “meh” from us for two reasons. One, it was really crowded and two, there is interesting rift geology all over the island. You don’t have to go just one place to see it.
  • Waterfalls: Every waterfall is beautiful, but in retrospect I might not have paid to park to see some of them (Seljalandsfoss)…. there are only hundreds you will see. One gets excited to *finally* see them. We skipped Skogafoss (see comments on what we didn’t do)as the parking lot was a shitshow with busses everywhere plus downpour. As you move away from the busy south, parking will become free for attractions.
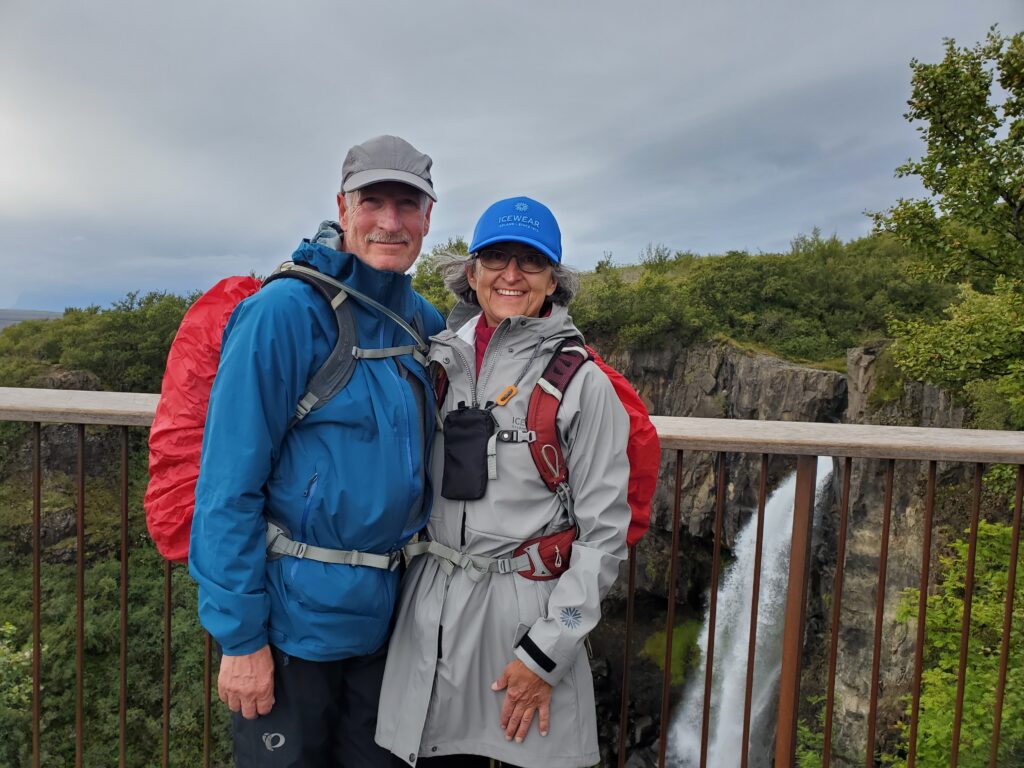
  • Vatnajokull National Park: Yes, some of it is busy. But it’s amazing and worth your time. We spent two days camping at Skatafell, doing long and short hikes. The points of interest are all related to the unusual geology, and in fact the area is a UNESCO World Heritage Geology Site. We did a worthwhile short day hike to Svartifoss one day. The next we did a much hard, more strenuous day hike loop on the S3 trail to Kristinartidar Peak, a 14 km loop with great views. There are many small POI pull outs with interpretive signs that you should check out. The geology info on the signs is very in depth. We skipped the black sand beach at VIK due to torrential downpour. (see comments on what we didn’t do) You can get up close to several of the glacial lagoons. When you get to Jokulsaron Glacier Lagoon and the Diamond beach, look for pull outs that are not the main (bus) parking area.
  • East Fjords: the weather kind of crapped out on us when we were in this area. We did a lot of driving the mist-shrouded fjords that was quite beautiful. It looks like there is tons of hiking here. We did a kayak tour out of Djupivigor that was pleasant but kind of meh for wildlife; not sure I would recommend that. I chose that area to get away from crowded tours and it was listed as a wildlife tour.
  • Bakkagerdi/Borganfjordur: We went here specifically to see puffins at the bird sanctuary, but they had left already. There are puffin sites on the south near the black sand beach at Vik that we should have checked but I forgot to put those in my notes.
  • Kirkjubaer: this is the oldest wood church in Iceland. Our kayak guide told us about it. It was beautiful. If old churches are your thing, there are lots to explore.
  • Hengifoss waterfall: another beautiful waterfall hike. Not that long but straight up.
  • Studlagil Canyon: everyone kept telling us to go here for the basalt columns. It rated a huge meh. There are much much more interesting basalt features like Hengifoss waterfall for example.
  • Dettifoss waterfall. Stunning
  • Asbyrgi canyon: another meh from us. It is the same kind of geomorphology as Dry Falls but smaller and with trees all over.
  • Wool farm at Gilhagi. Great stop at a family run wool farm.
  • Husavik: Cute little town. The whale museum is totally worth it. We had dinner, walked through town, swam at the pool. We used this as a base for Myvatn area. We had initially booked whale watching here and cancelled it. I could see hanging out here for a day or two. The GeoSeas thermal baths spa with infinity pools overlooking the ocean was fantastic.
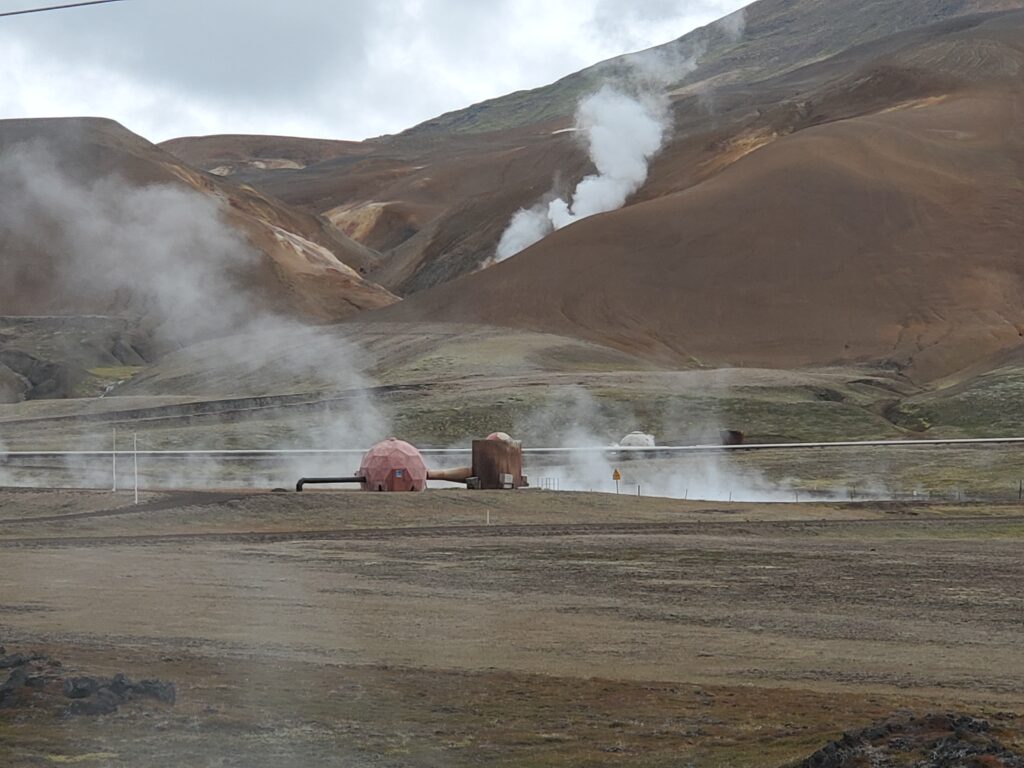
  • Myvatn area: We skipped the Nature Baths and Game of Thrones film site, and focused on the truly amazing geology. The geo sites are easy to explore with good trails and boardwalks. The hikes are pretty short. Namafell hotpots and Krafla crater are must-dos. The Krafla power plant has really good displays inside.
  • Whale watching: we scored by booking same day in Dalvik. We took a small “rib” boat out. It’s like a cushy zodiac. It’s fast and then they shut it off near the whales so you can get really close. We saw three humpbacks at very close range.
  • West and North: the weather turned again so we did more driving, scenery watching and checking POIs.
  • Textile museum at Bloundos: Totally worth it if fiber arts interest you
  • Eiriksstadir: this is a longhouse reconstruction/reenactment living museum. It is an excellent presentation. This was fascinating and totally worth it.
  • Reykjavik National Museum: very interesting and a good cultural base to start from. The lighting was poor which was a real disappointment.
  • Swimming pools: Every town has a geothermally heated swim center with showers, gym, lap pool, hot tubs and sometimes other features like sauna or waterslide. They are very reasonable and very clean. A great alternative to sometimes questionable campground shower facilities.

Things we missed for various reasons:

  • Reykjavik Market: I really wanted to do this but the volcano ate up our Reykjavik day.
  • Reykjavik Food tour: this is supposed to be amazing but they were all booked. Book in advance if you want to do this. Plus… the volcano…
  • Puffins: they had already left the East Fjords but were still in the Vik area at Reynisfjara Beach. I had read about this location but forgot to make a note. Plus it was pouring rain when we were at Vik.
  • Blue Lagoon. Not our kind of scene.
  • Skogafoss waterfall and hike: one, it was pouring and two, Craig was turned off by the hikers lined up like ants and the tour busses in the parking lot. This waterfall is the beginning of the Firmvorduhals hike which I really wanted to do. The whole hike is huge, going over the pass into the interior. There are ways to hike the whole thing and shuttle bus back, but we were going to do out/back up to the pass. There are something like 27 waterfalls on the way up, and once you get past the first couple the crowds supposedly really thin out. If it hadn’t been pouring I would have pushed to do it.
  • The interior: It is supposed be even more geologically unique and interesting in the interior, but requires a 4×4 you can take on F roads. It is undeveloped in there but there are camps and backcountry hostels. Next time.
  • Greenhouse tour.
  • Natural hot springs

Where we stayed

This is a list of the towns/sites we camped at in the order we went counter clockwise, with comments as needed.

  • Reykjavik City Campground
  • Porlakshofn this town looks really cute, had a good Thai restaurant, and a coastal bike path that looks really nice.
  • Vik
  • Skatafell Very nice National Park campground. Free washer and dryer. We stayed two nights here.
  • Djupivogor
  • Bakkagerdi
  • Skjoldolfssstadir hunting lodge
  • Husuvik campsite had borderline gross facilities.
  • Olafsfjordur
  • Holmavik
  • Grindavik

Weather and what to wear

It’s true, the weather really does change every 5 minutes. In one day we could have sun, mist, downpour, huge winds and any mixture of the above. In August, 2022 temperature ranges were from a low of high 40’s to mid 50’s. Keep in mind it is damp and windy. All the advice is to dress in layers. I usually wore a wind block fleece legging or softshell pants, light merino base layers, a heavier base layer or fleece pullover and a vest with a Neoshell (waterproof breathable) jacket, or some combination of these. At night in our van I slept in Merino base layers. I had a hat, gloves and a light buff that served multiple purposes. I had T shirts and light leggings with me I never wore.

I have several thoughts on rain gear. You will get everything from heavy mist to outright long torrential downpours. A friend suggested two sets of rain gear: one to wear and one to dry. We definitely used the “two coats” plan. If you have an Alaska Guide style rain coat (PU vinyl) instead of Gore-tex type fabric, I would bring it. Gore-tex and similar will wet out but not Alaska style gear. We caved and bought this kind of coat while we were there. Umbrellas are worthless because of wind. For feet, I suggest waterproof hiking boots and waterproof walking shoes at a minimum.

Me in my “Alaska Guide Style” PU coated vinyl raincoat.

Retirement doesn’t mean no sewing.

It just means more fun sewing. Or sewing is more fun.

I am relieved and so pleased to have my joy aka sew-jo for sewing back!!! I do not miss the “work” aspect at all. I sold my heaviest walking foot to a budding upholsterer for a good price. I’ve reorganized a bit, and sold or given away some materials that maybe I shouldn’t have. It was making me crazy to look at a 25 year accumulation of colored jacket zips, most of which will never match anything current. I sold the collection to an an alterationist, keeping back only the obviously useful colors.

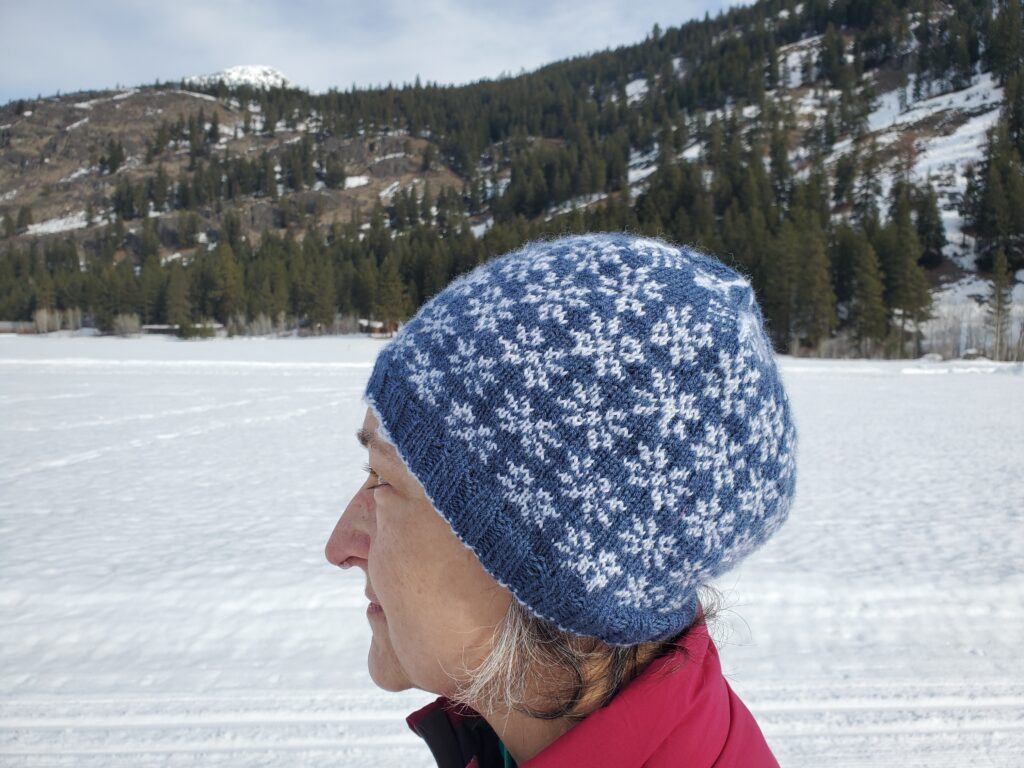
First off, I’ve been knitting. I used to knit a little 40+ years ago, and restarted with the help of a friend two winters ago.

I made some bike bags for my hub’s and my Salsa Cutthroats. The snack bags are slightly modified from this tutorial:
https://learnmyog.com/bpStemBag.html Of course we did some bikepacking!!

And then there’s more sewing. I am grateful to my sponsor, Discovery Fabrics, for giving me access to the most amazing tech fabrics ever. I am a “resident expert” in the store’s Facebook Page, https://www.facebook.com/groups/724102688417093 which is kind of funny as there are many amazing sewists in that group. I think I learn more than I share. It is a fantastic group if you Facebook: so much more than just inventory discussion. The level of inspiration, talent and support for sewing with tech fabrics is incredible. It’s a fun group of really fine people, very reminiscent of the old Usenet groups rec.sewing and alt.sewing for the quality of discussion
Anyway, I get state of the art tech fabrics from Discovery and have been sewing up a storm for myself and loved ones. I am very inspired by the new PDF Independent Designers out there but that is a post for another day.

There is more but I will have to dig for photos.

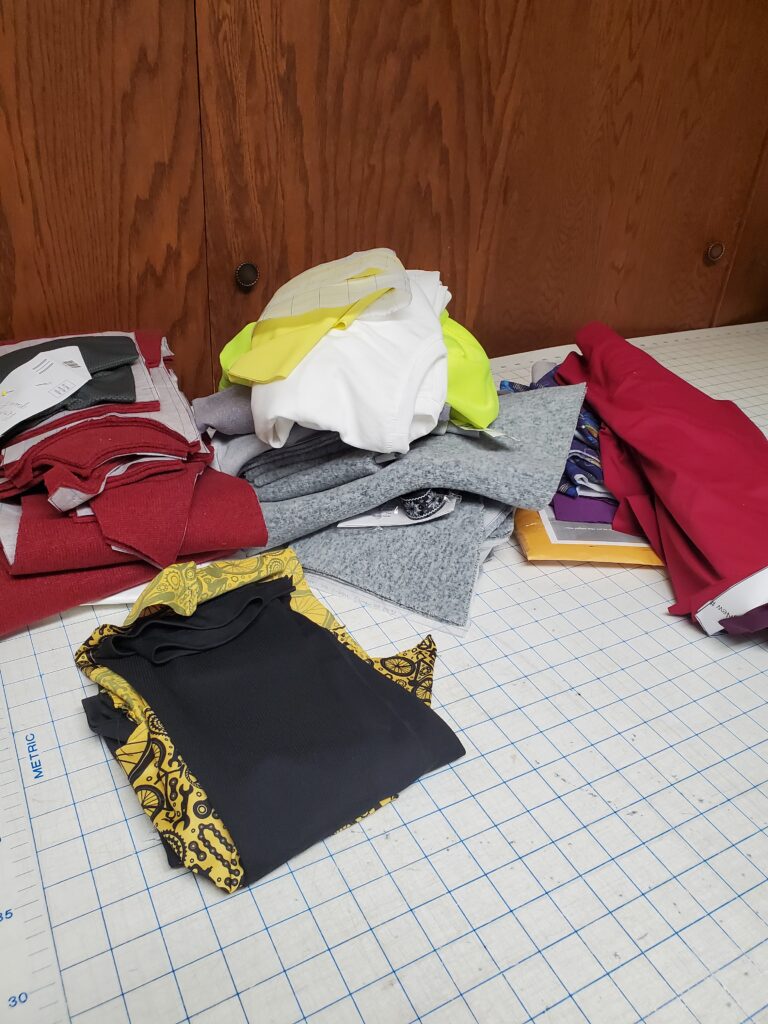
My husband retired this spring and we are out having adventures. I can barely keep up with my sewing list. This is the current stack of next up to sew:

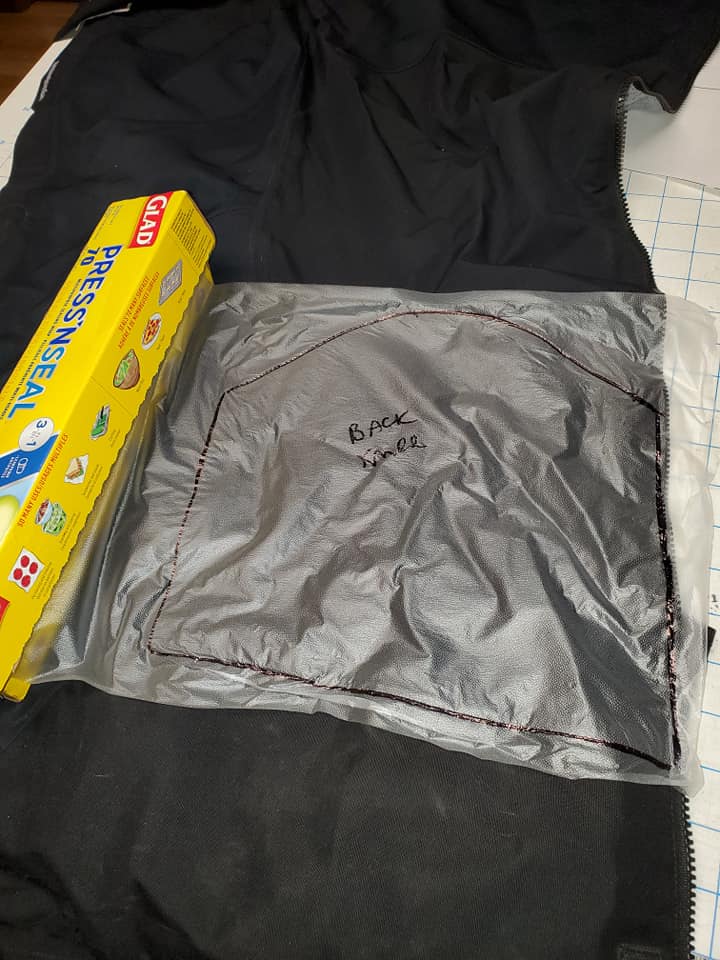
Press'nSeal on flat panel

Using plastic wrap to copy a garment… who knew?

another time-saving technique I learned.

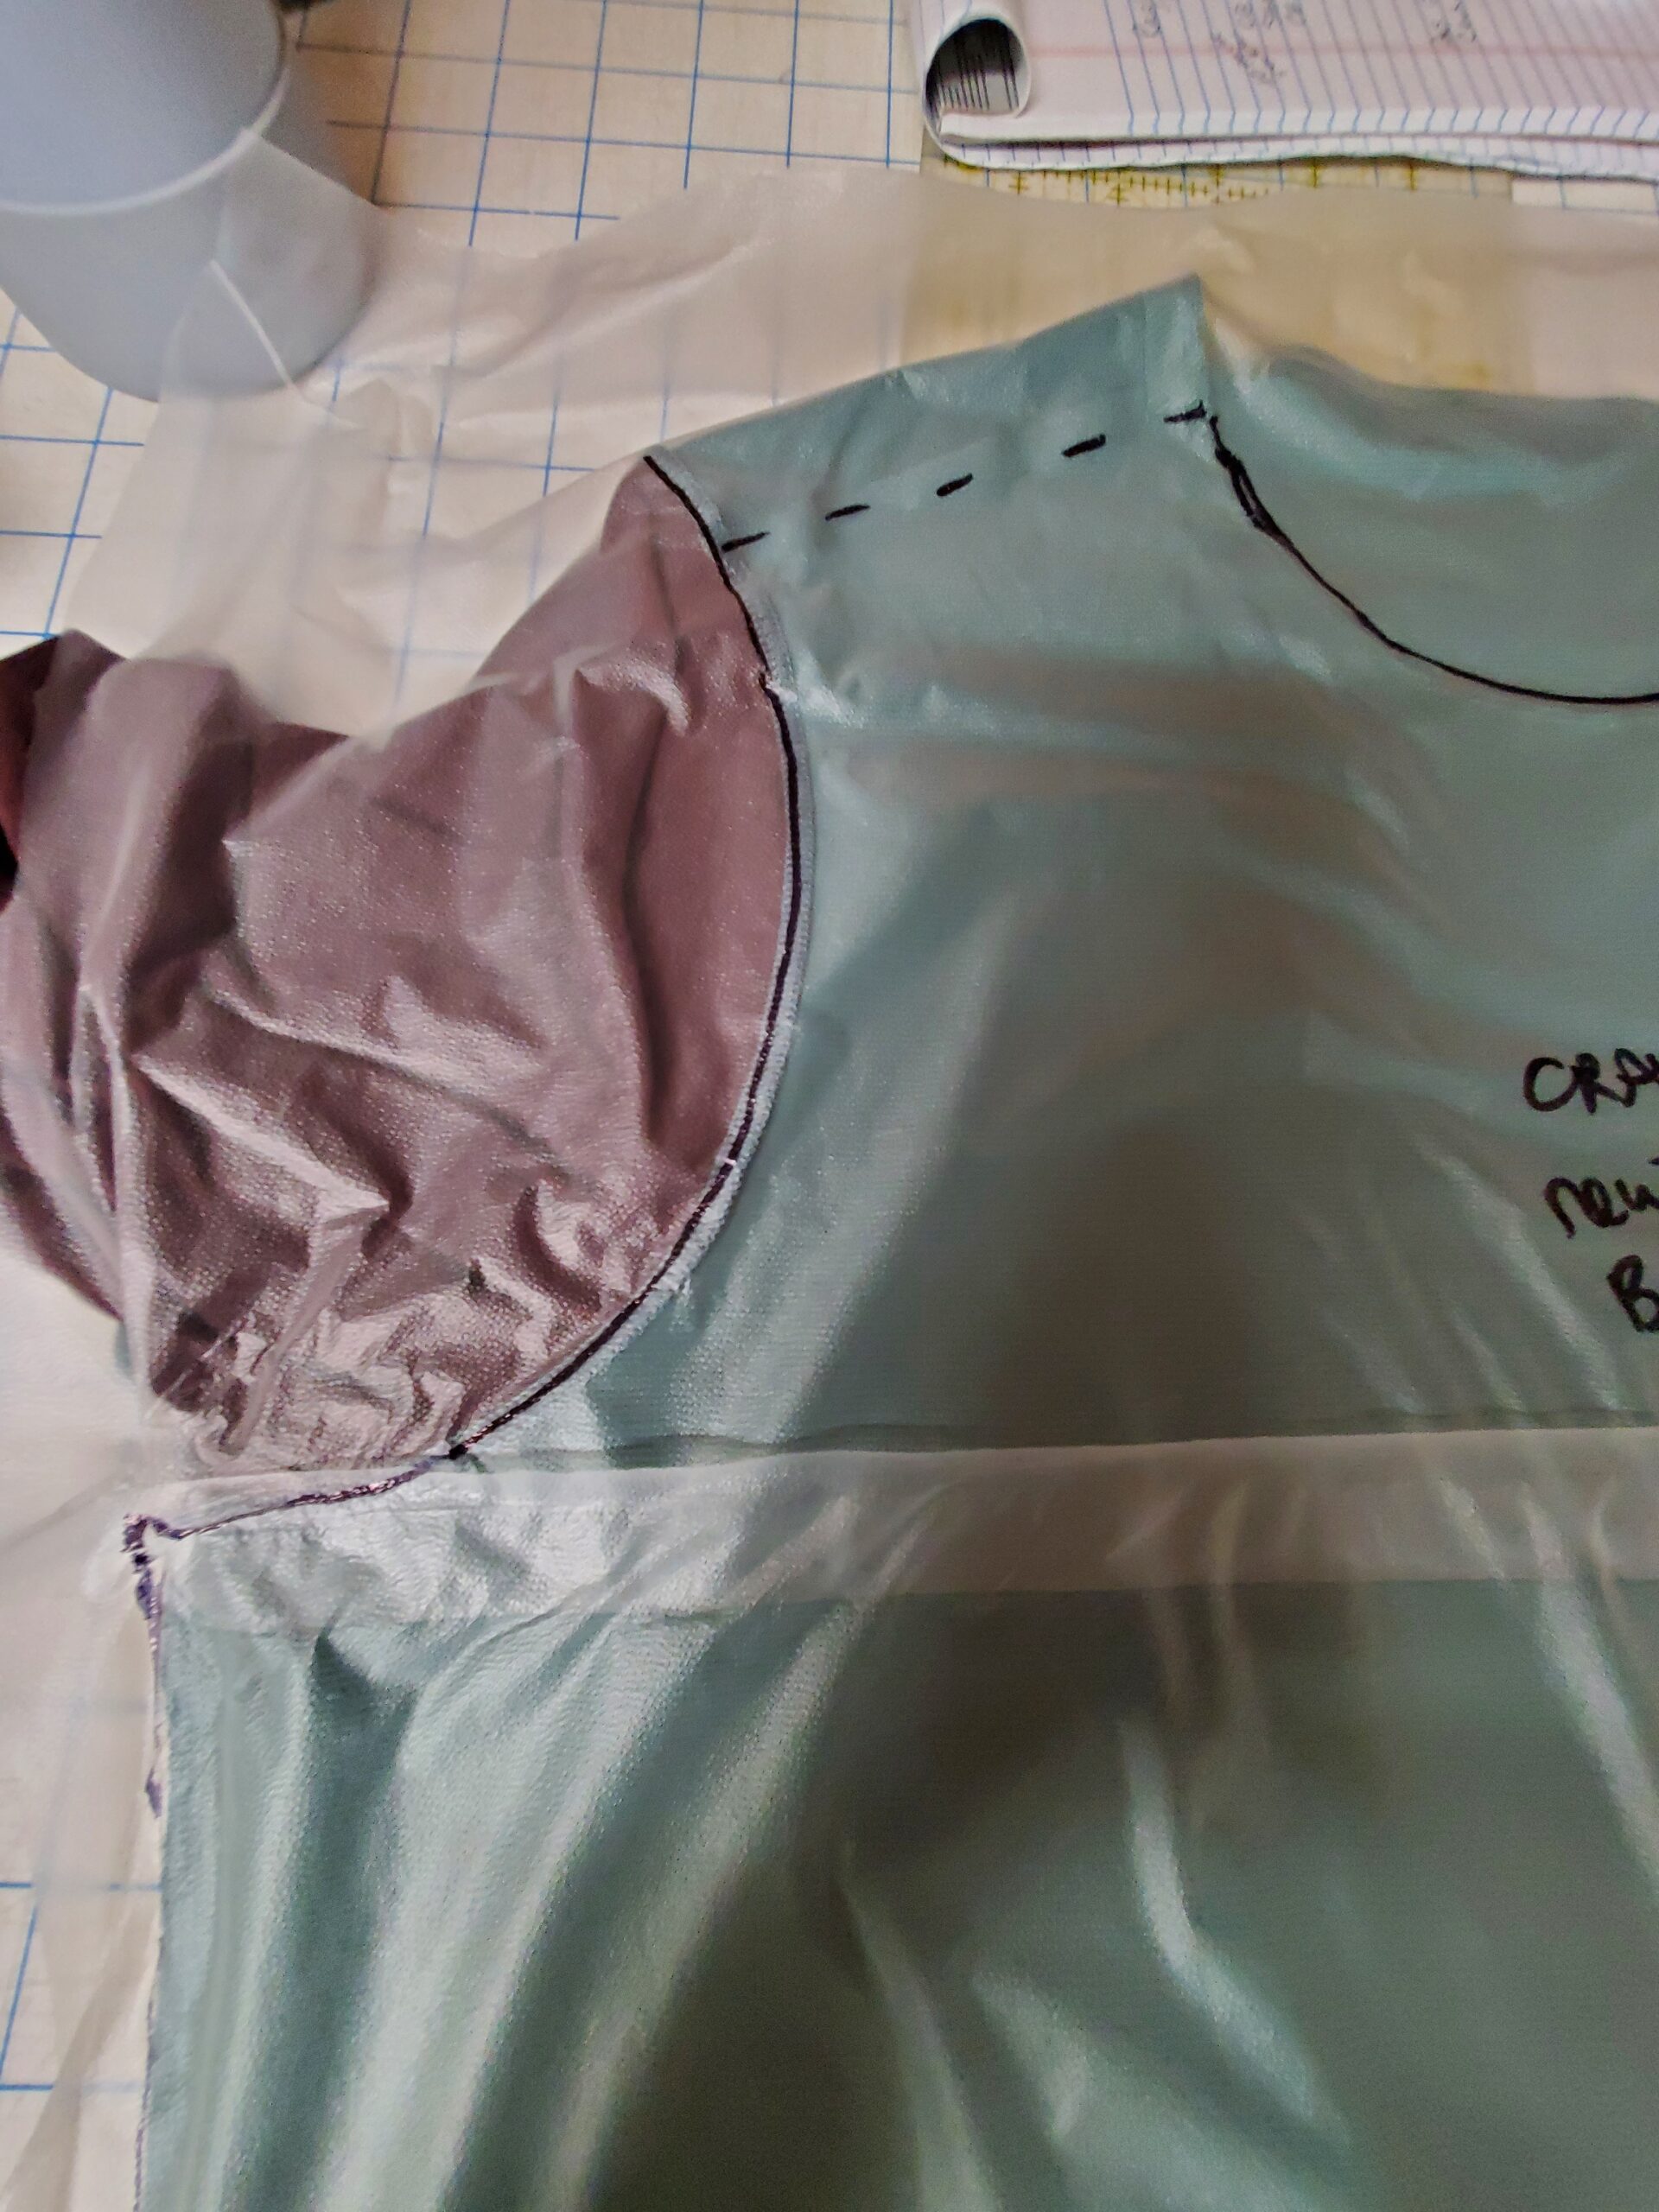
Recently I read a post on Facebook where someone described a technique use Glad Press N Seal to “slip” a copy of a garment. Whaaaaa? Sounded crazy but I was intrigued. I gave it a try and – yes- it is an amazing technique. I found it to be easy to do and very accurate. As someone who has copied numerous garments over the years with paper, pins, and needle wheel, I think this is vast improvement.

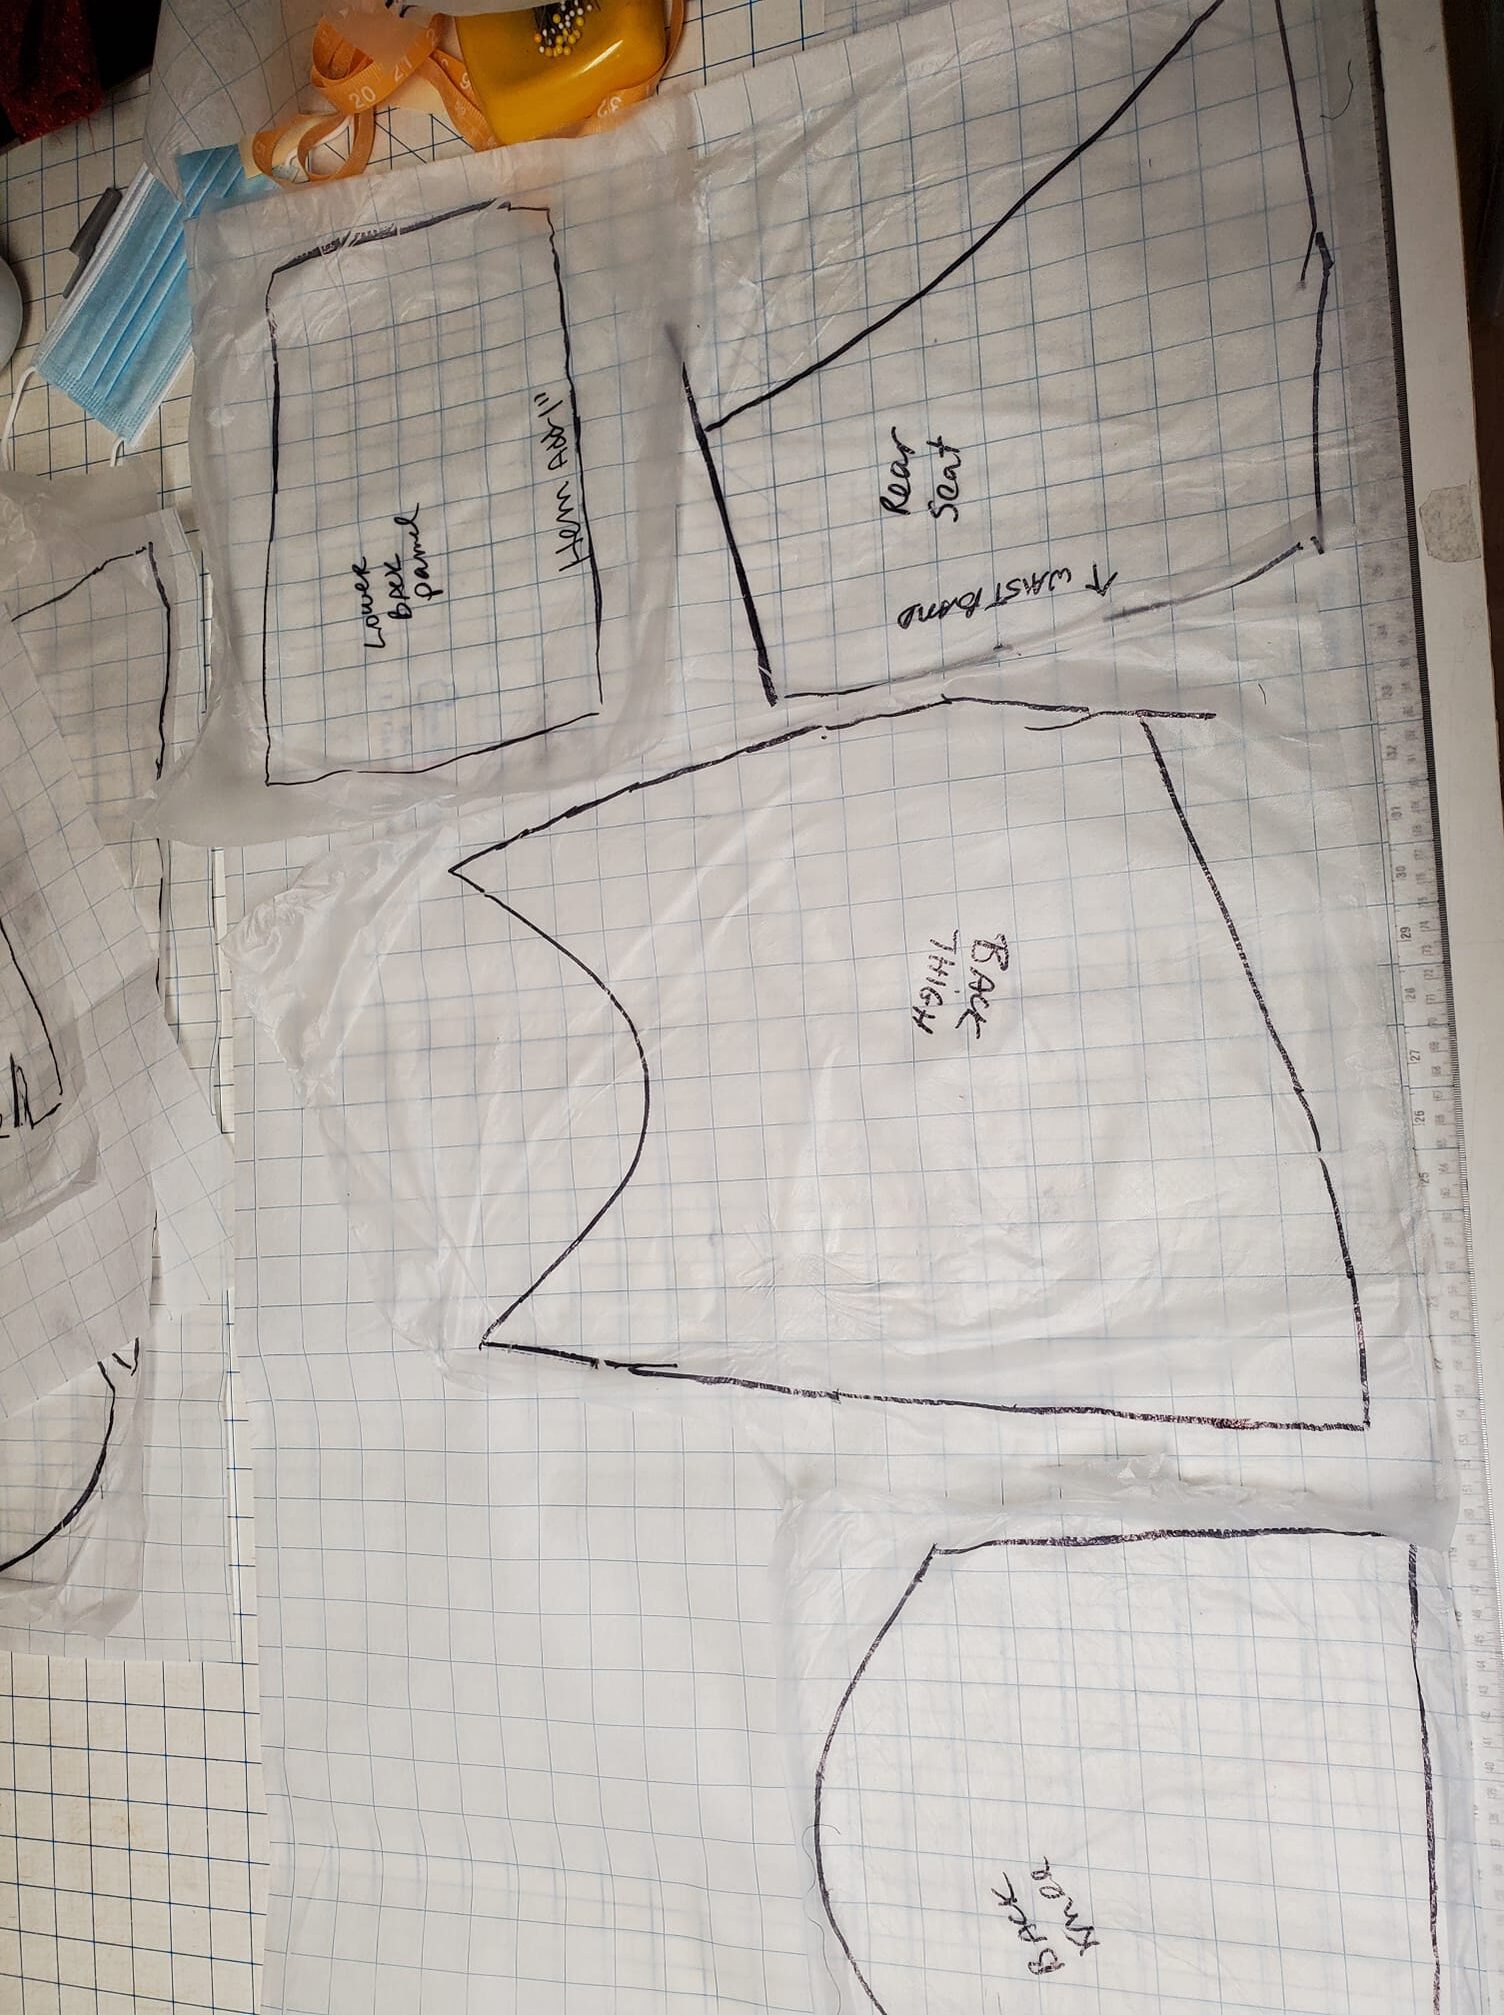
I put this method to the test copying my very favorite 25 year old Patagonia Ladies’ drop-seat ski pants which of course are not made any more. These pants are somewhat complicated with at least three different fabrics, darts, a gusset, and articulation. The pattern pieces I came up with required an absolute minimum of truing and re-drawing. It was very easy to make the changes I wanted to make in the process. Photos will be after the text explanation.

What you will need:

  • Glad Press n Seal (try Amazon if you can’t find it in a store)
  • A Sharpie
  • Pellon Grid
  • Assorted French curves and rulers
  • A garment to copy
  • A table to work on
  • Scissors (for cutting Pellon Grid)
  • Optional: Tailor’s Ham

Method of work:

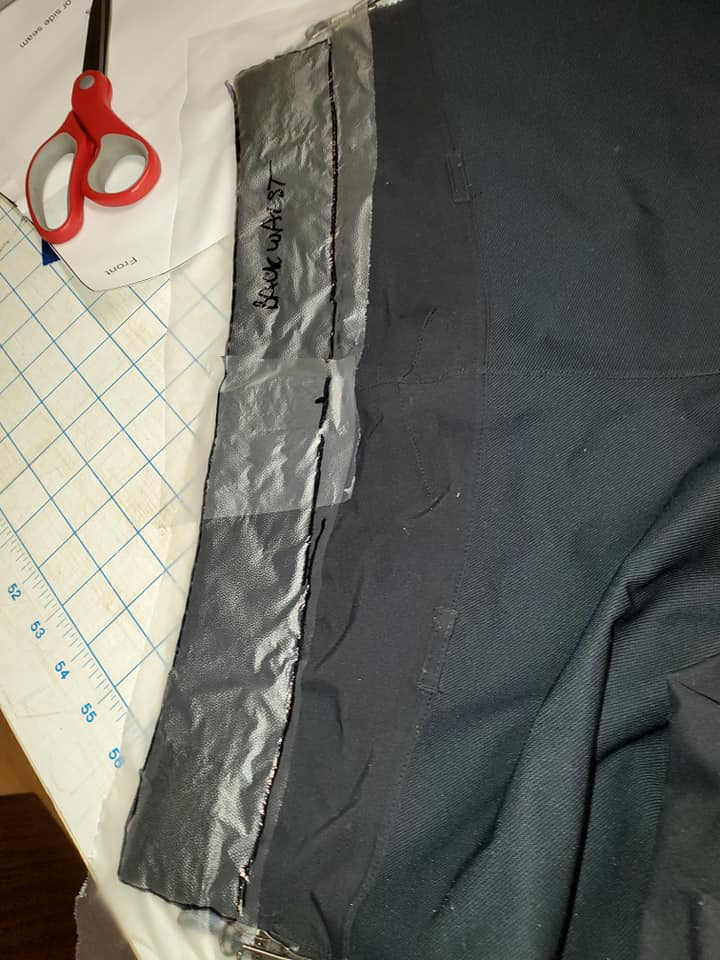
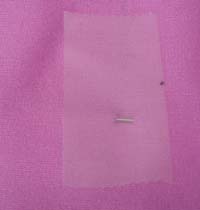
Spread your garment out flat on a table. Decide which panel/part area you want to copy first. A flat area without darts or shaping would be a good first piece to do. Cut some Glad Press n Seal a little bit bigger than your area. You may have to stick several pieces together if it is a large area or an odd shape. The wrap has a slightly sticky side to it. You will press the wrap to your garment area, sticky side down. Make sure your area is as flat as possible, then smooth the wrap, eliminating any wrinkles. Once you have the wrap totally smoothed out, take a Sharpie and outline the seamline. I found it is easy to carefully run the marker right along the seam line. Mark the grainline and/or direction of most stretch. You will add seam allowance later. At this point, peel off the wrap, label it, and set it aside. I found the pieces stack and can be separated later.


For curves and odd shaped areas you might want to shape that part of the garment over a tailor’s ham, the edge of an ironing board, or something with a similar shape. This will allow you to capture the shaping of curved seams or darts. What I found with darts is to smooth the wrap starting at the opposite end from where the dart is, then work the excess into an actual “dart” or fold in the wrap. Mark this with the pen so you don’t lose it when you flatten the piece in the next step. Trace the seamline as above with a Sharpie. Preserve this fold when you peel the wrap off the fabric. Label your piece and set it aside.

Front knee with multiple darts

For every piece of the garment make a piece. Be sure to label each one. Once you have all your pieces traced, smooth each one onto the wrong side of a piece of Pellon a bit bigger. I like to line up the grainline. The pieces that have curves or darts should smooth out flat. If you marked a dart it should now lay flat. At this point, I touch up the seamlines if any are wonky, and make sure the piece has as needed notes and labelling. I might make some notches or other marks if it’s not obvious where it goes.

Once your wrap is onto the Pellon with all markings and seamlines, it’s time to check a few things. Using a tape measure, check your seamlines. When I did this, I found I was within 1/8″ on most seams, enough to mock it up in a muslin. If you are off any more than that, double check your garment and your tracing and correct it. Add your seam allowances, then peel the Pellon off and set it aside. You are now ready to make your mock up!


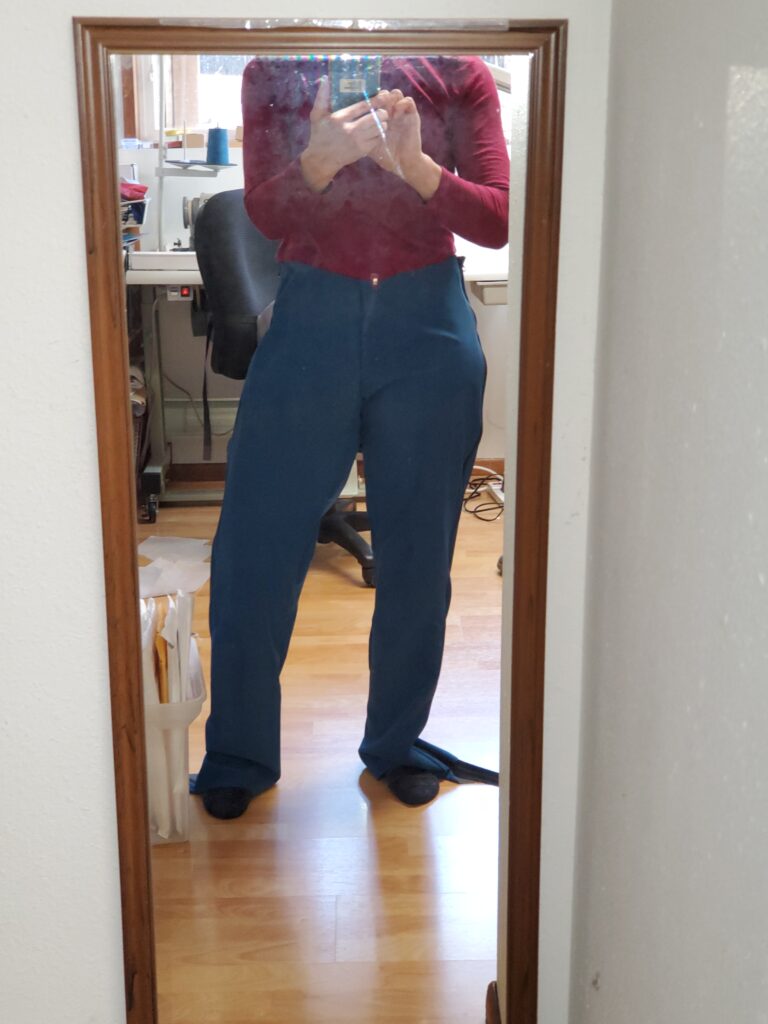
Here is the first mock up. It’s so close!!
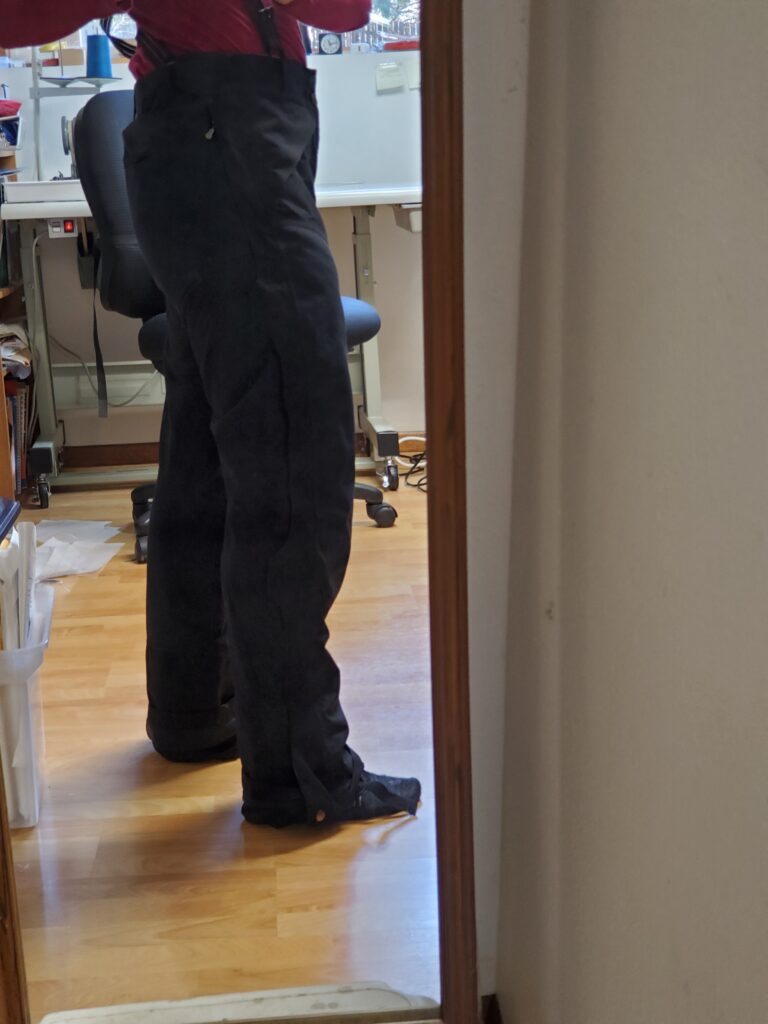
Mock up out of a potential real fabric: Polartec Powershield from Discovery

Side view of Polartec Powershield mock up


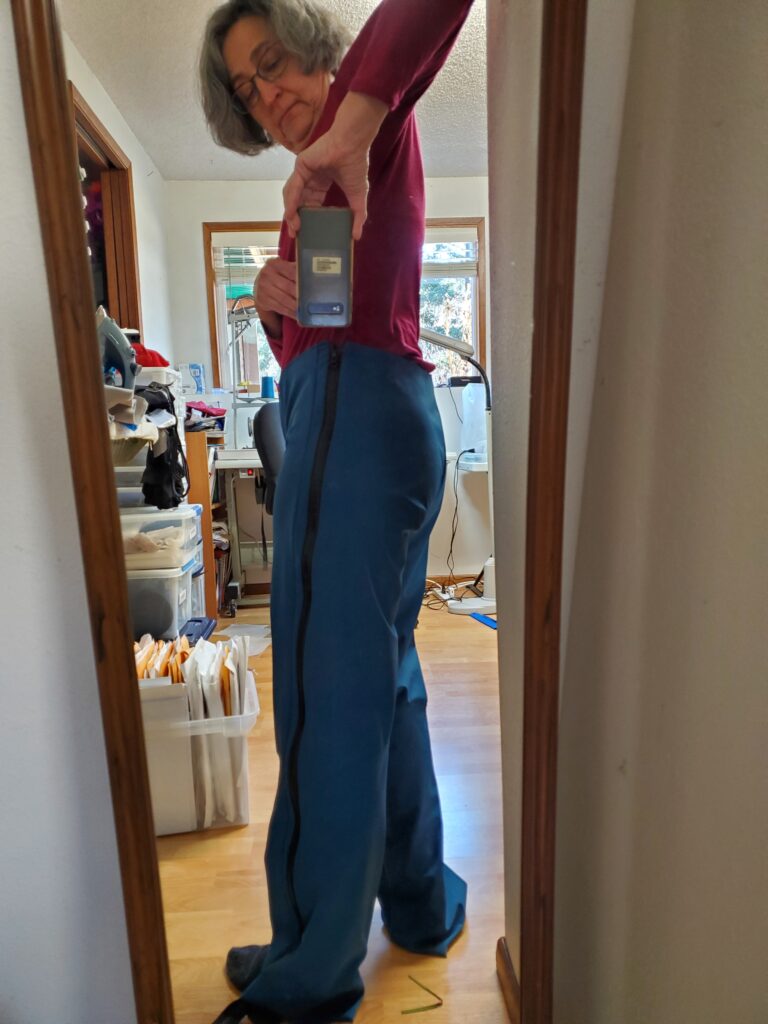
25 year old Patagonia guide pants.

This fall I will make a finished pair with all the details out of Polartec Neoshell from Discovery Fabrics.

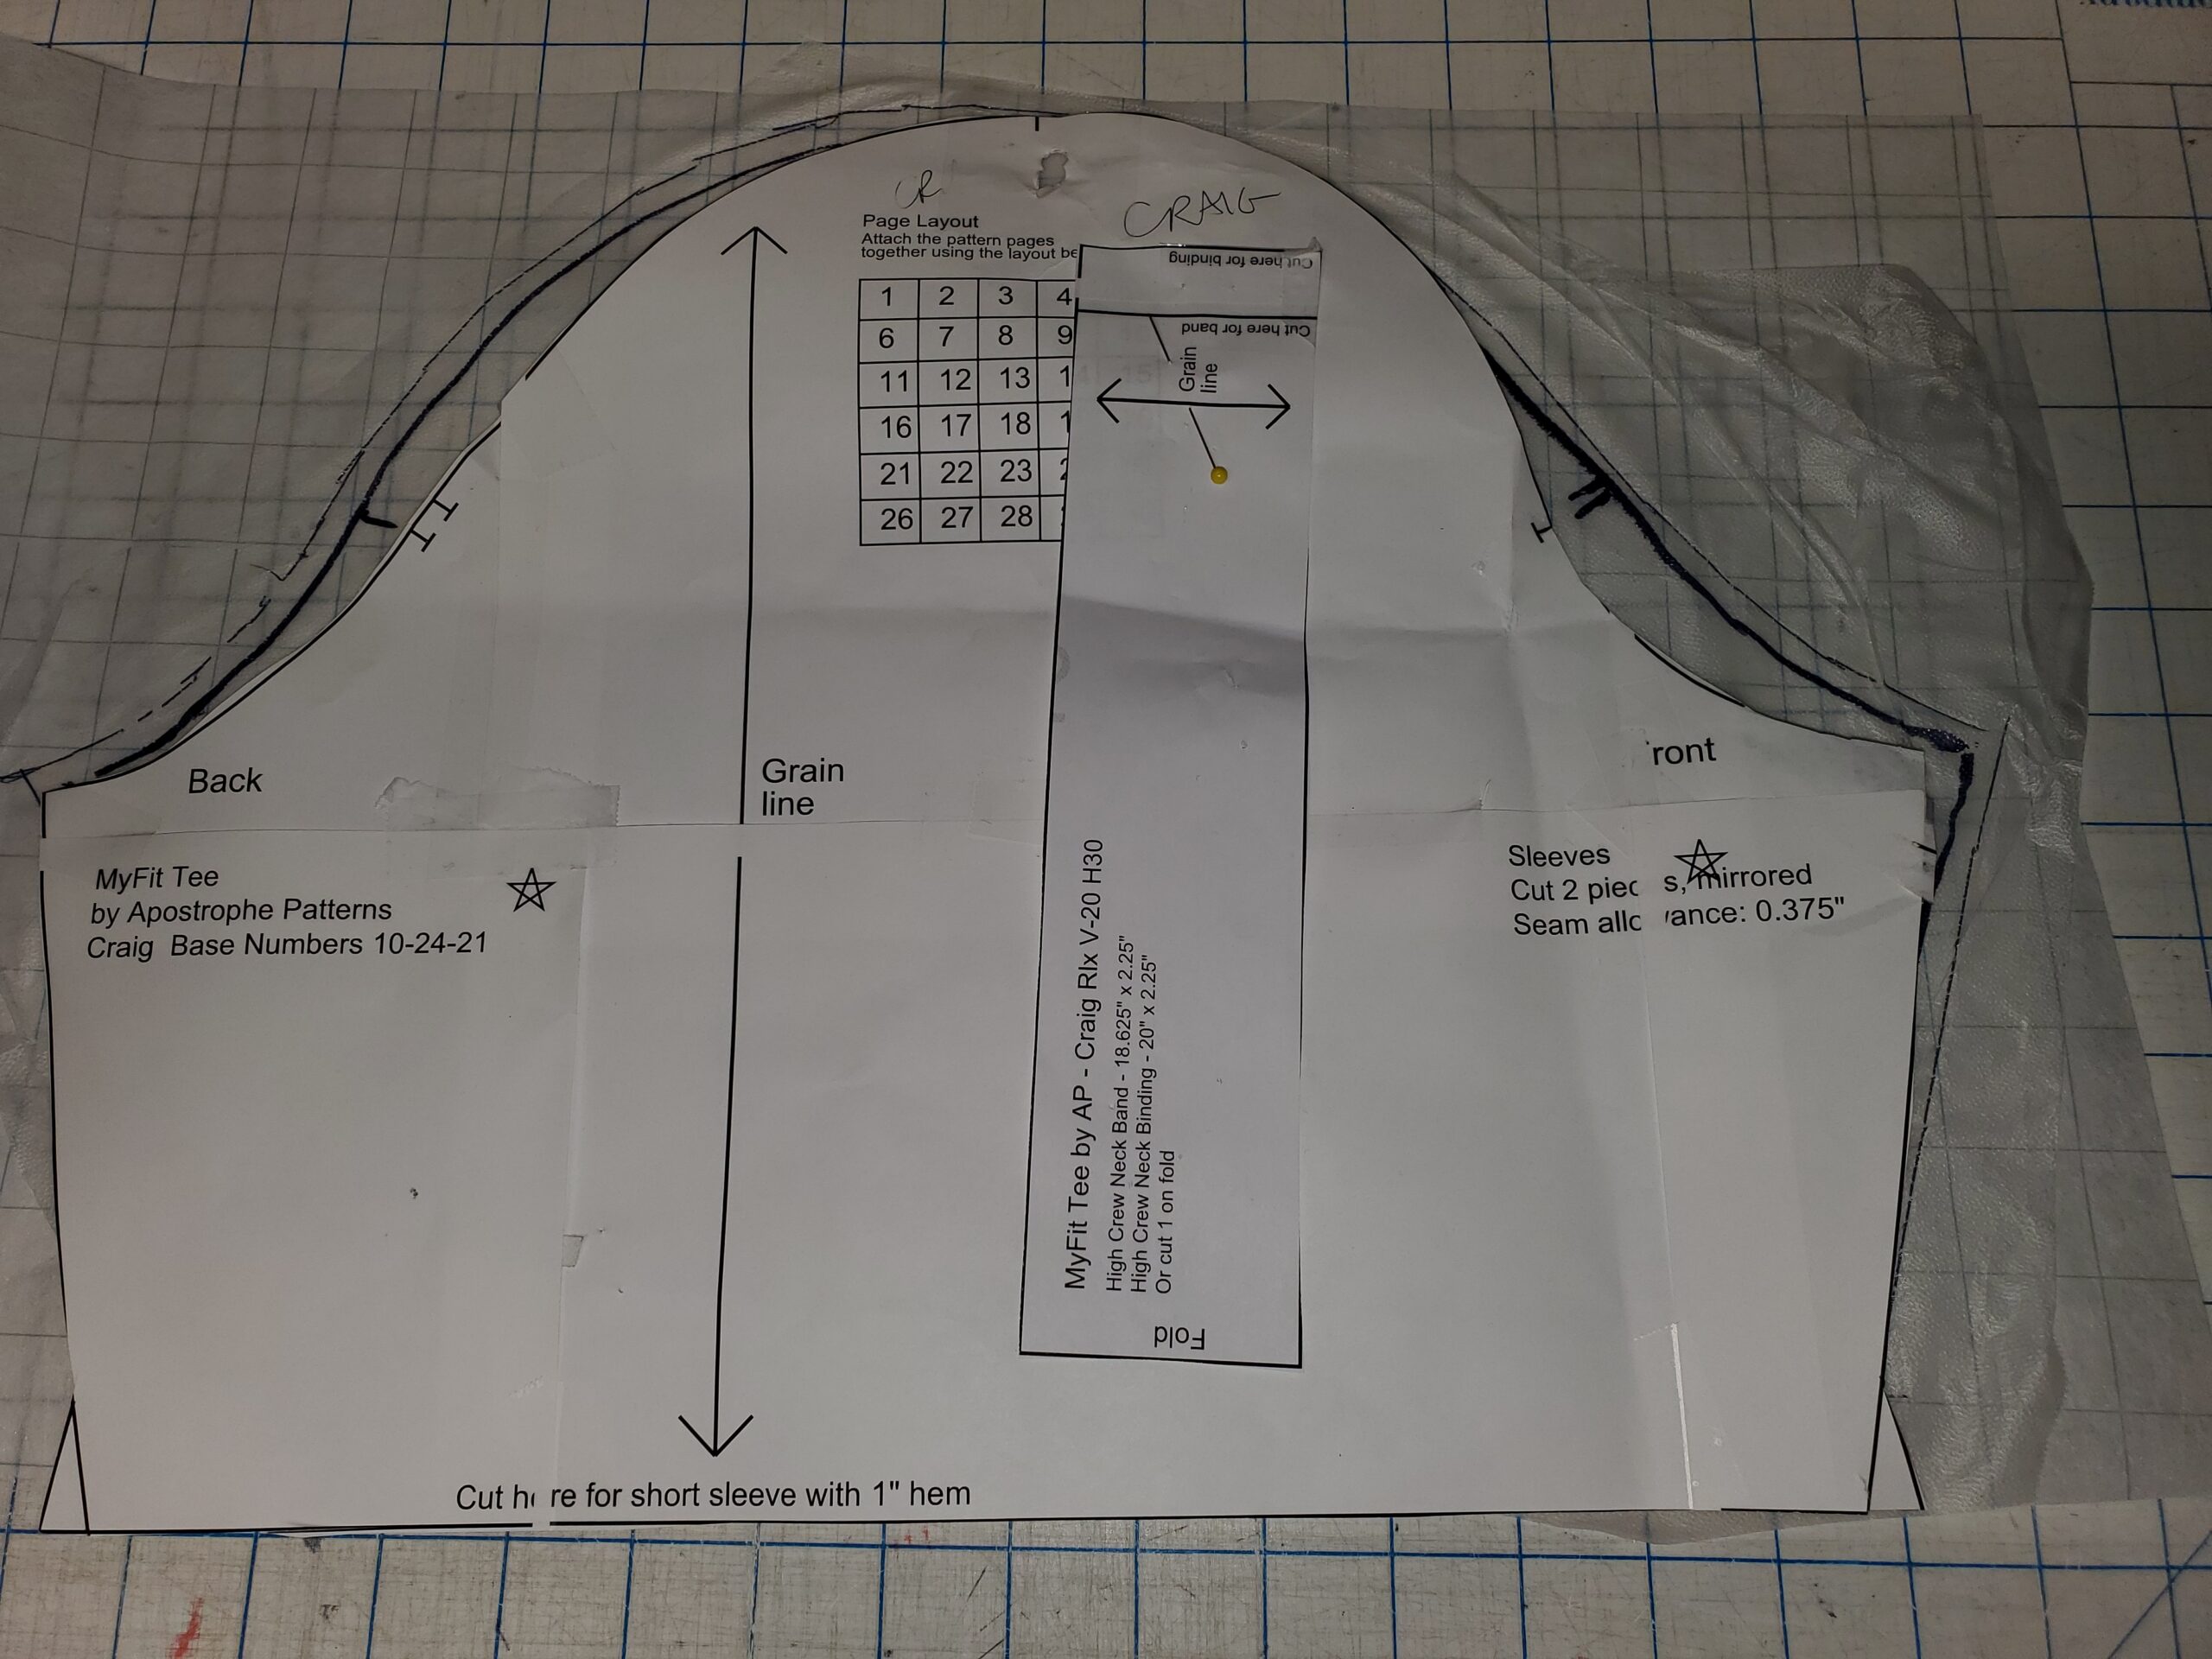
Update: I tried this technique copying a favorite wicking bike T of my husband’s. I was problem solving a sleeve issue, and copying this well fitting T was my solution to analyze sleeve problems in other patterns..

Base Layer Zip and Collar Burrito Finish, Revised With Video

Hello! Here is the updated version of this tutorial, originally posted in 2002. I’ve added video segments that I hope you will find helpful. Link to full (32 min) video here. I suggest you watch the videos in addition to reading the photos and text. This tutorial is a mix of the old material and new and is not quite as seamless as I would wish. I recommend you read, look at photos, and watch the video.

If you are looking for a smooth, foolproof way to insert a zipper into knits or base layers, look no further. I will show you how to do an enclosed inside finish, even and matching seams, and a very tidy zipper insertion. You can use this technique with almost any zippered collar: base layers, vests, jackets.

Note: if you are making a jacket or vest with a full length zipper, you can skip to Part 3.

Thanks to Jalie Patterns for the the zipper insertion technique. 

Introduction to burrito collar finish

Part 1, prepare to insert the zipper

demonstration of how to measure/mark the zipper placement

(CF=Center Front, WS=Wrong Side, RS=Right Side)

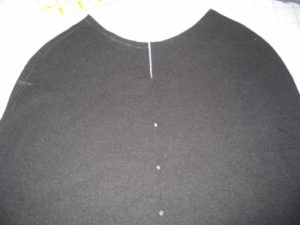
Adjust, layout and cut your pattern as usual. Figure out how long you want the front zipper to be, and mark the CF. Keep in mind collar width added to the front panel for the length of the zipper. Mark CF with dots and a 2″ slash at CF.

Sew sleeves, back and collar on. Do not sew side seams; you want to work flat.

More on determining length and marking of zipper

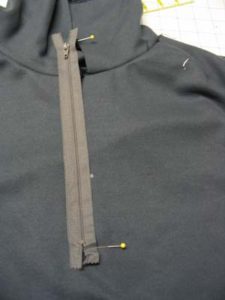
Check length of zipper against collar fold point and your marks.  I have the collar fold marked with a pin. This is the final width of the collar.

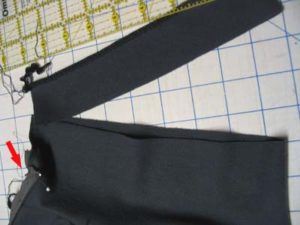
Now, noting the exact placement of bottom zipper stop, mark bottom of the zipper with a pin:

How to mark and stablize the bottom of the zipper

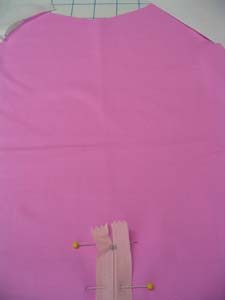
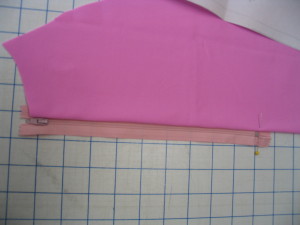
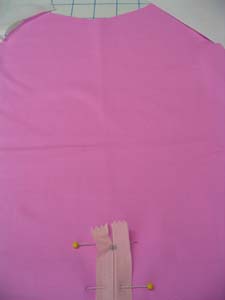
Turn zipper RS down and going the opposite way it should, on the RS front. Secure the zipper.

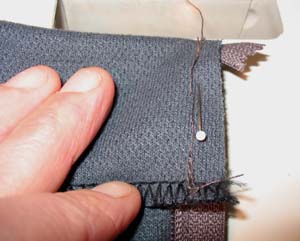
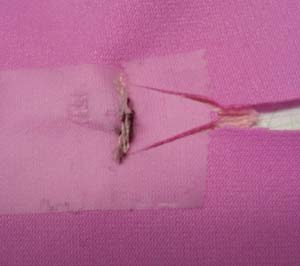
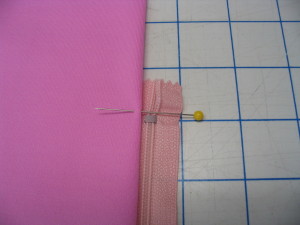
Where you have bottom of zipper marked with a pin, use a couple of pieces of clear tape on the WS. This will act as a stabilizer when you sew the bottom of the zipper. 

Part 2, sew the zipper

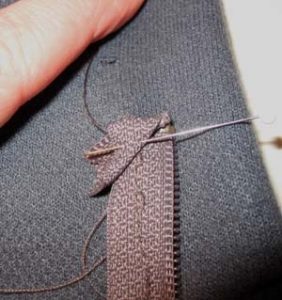
Stiching the bottom of the zipper

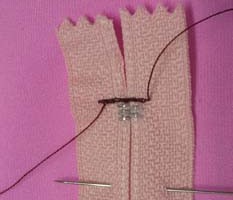
Now, stitching very carefully, stitch across the bottom of the zipper, Next to the zipper stop. The RS of shirt up, zipper is RS down and pointing the wrong way. You will stitch next to the bottom of the stop, just as wide as the coils of your zipper, no wider. Take just a very few stitches, and backstitch. Even as pictured I took a few too many. You just want to secure the end of the zipper.

Then, you will carefully cut down the CF of your shirt from the slash at top CF, making a “>” at the end of the zipper. Clip EXACTLY to the edge of your stitching and make sure the legs of the  “>” are longer, not shorter.

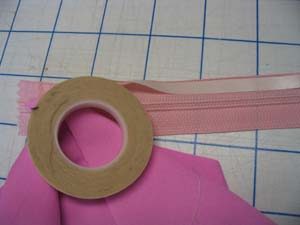
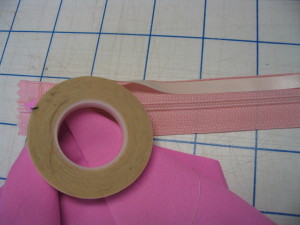
For the next step of actually sewing the zipper tape to the fabric, a nifty notion called Wonder Tape is very helpful. It is washable, and really keeps knits from distorting during this step.

Using Wonder Tape to secure the zipper

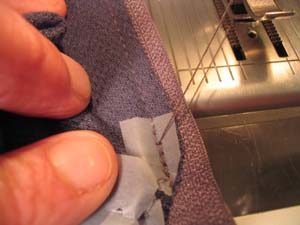
Apply the Wonder Tape to the RS of the zipper. Turn the long cut edge of the fabric and press carefully to zipper tape to secure, making sure there is no distortion. Do not stretch or distort. Now stitch carefully, starting exactly at the apex of the “V” cut. Use the zipper foot to get close to the coil. Note that on the grey fabric, the edge of the fabric opening is placed only part way to the edge of the zipper tape. This is done deliberately as placing the cut edge at the edge of the zipper tape will take up to much seam allowance. Stitch from bottom to top stop on both sides.

Note: Normally I teach to sew the zipper with the fabric down, zipper tape up for reasons of easing the fabric. In this case, we want to see *exactly* where we are are putting the needle to start sewing from our cuts, and we do this with the fabric side up.

sewing the collar facing to the zipper

Part 3, finish the top of the zipper

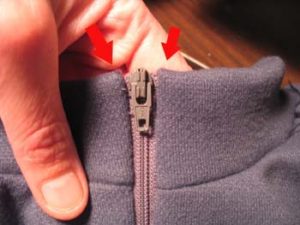
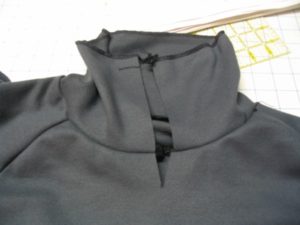
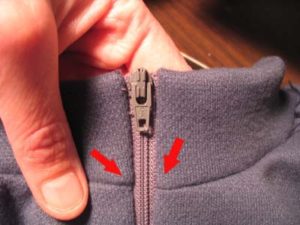
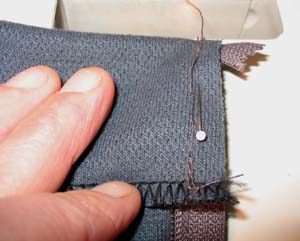
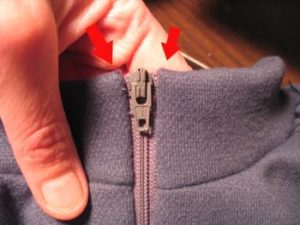
If you’ve done the prior steps correctly, you’ll have a zipper attached to main part of the collar. The zipper should stitched up to the top stop, which is just at the desired height of the collar.  Finish the top of the zipper by folding it over twice. You can secure the folds with a pin, then fold the collar facing over the zipper tape, RS facing to RS collar. Make sure the top stop of the zipper is at the fold line for the collar, and that the raw edge of the facing is 3/8″ below the the collar/neckline seam. Using a regular zipper foot, baste the facing into place. Turn RS out and and check that the top stop is where you want it. Then go back and stitch with a zipper foot, from top of zipper to the collar seam, no farther. Do both sides. Check that collar seams and top corners/top stops are even by zipping the zipper closed and checking from the right side. Adjust as needed.

Part 4, the actual burrito

You will really want to watch the video for this part. This is where we make the actual a “Burrito Style” enclosed finish of the facing. Fold the facing to inside. Use a pin to secure it, matching the neck seam line to the seamline of the facing. Make the following marks on the facing and the neck seam: center back, shoulder seams, a point 1/2 way between shoulder seams and center back, and on facing only, exactly where the edge of the zipper tape is.

where to make your marks before you construct the burrito
Getting the burrito ready to sew

Matching the marks, fold the zipper down, and bring the RS collar facing to the collar seam, seams together, RS of collar facing to WS of shirt front body. You may have to “roll” the zipper to enable bringing the facing around. If you have done this right, the zipper is inside. Line up the neck seam with the seamline of the facing matching the mark a the zipper tape and the shoulder seams, secure with pins. The zipper tape and the shirt front will be enclosed in the “burrito”. You should have something that looks like:

Your burrito should look something like:

Your burrito should look like this.

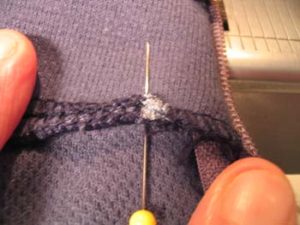
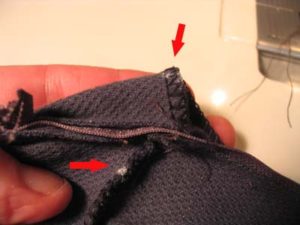
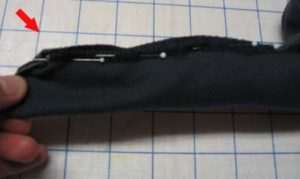
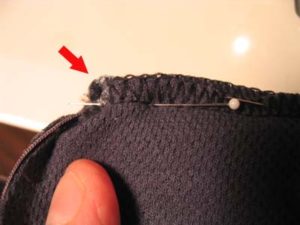
Tips: This is very fiddly so be patient with yourself. Feel for any folds or places where the fabric inside the burrito might be caught with a pin. You can work the start point with your fingers (arrow above) to make sure the seam allowances are flat.

Sewing the burrito

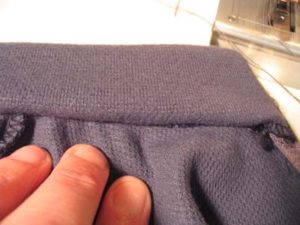
Now, sew your seam. Start at the marks by the zipper tape, then follow over the existing neck seam with the facing, all three layers. Sew at t least to the shoulder seam. Make sure you sew only along the seam allowances, not catching the body of the shirt. Carefully pull on your burrito to turn it right side out. Check for small pleats or catches and fix them if you need to. Once you have it the way you want, press or finger press; you can even topstitch if you want. You are all done!

A great partnership….

Introducing our sponsor, Discovery Fabrics

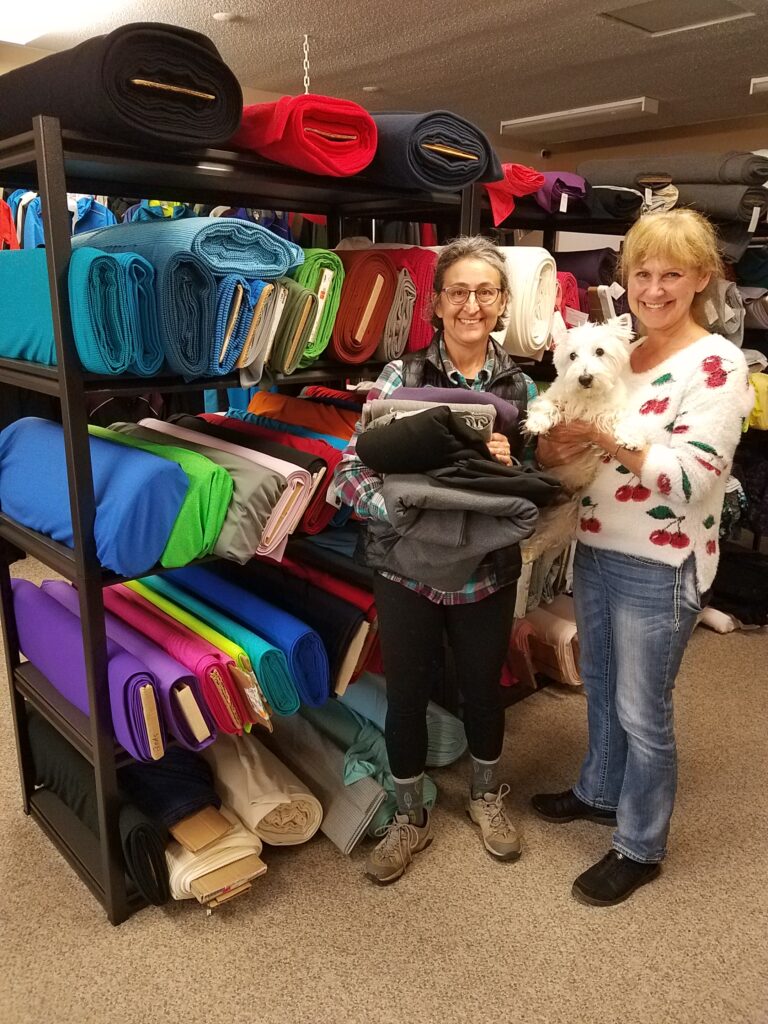
I am very excited to announce Discovery Fabrics of Campbell River, BC, Canada as our official sponsor. If you haven’t visited Discovery Fabrics, Sew Inspired by Discovery Fabrics on Facebook, or the physical store on Vancouver Island, you are missing out.

Discovery carries a full array of Polartec fabrics, including hard to find items like Delta, Power Wool, Powershield, and Neoshell. There is a huge selection of Schoeller fabrics, luscious bamboo fabrics, luxurious knits, reflective knits, and other high quality active wear fabrics. You won’t find this selection anywhere else. What you need to know is in addition to a fabulous array of technical and other fabrics, Discovery Fabric is committed to excellent customer service. Whether it is helping to select the right technical fabric for a specific need, or color matching various fabrics for perfect coordination, they can help.

Do it…. you know you want to….

I’ve know Leslie for years and it feels great to formalize a long relationship. I also help out at Sew Inspired by Discovery Fabrics Facebook Group as admin and resource person.


I do hear occasional grumbling “..but they are in Canada….the shipping…”. I get it: shipping costs have gone up. Two things stand out to me. One: It’s not much more to order from Discovery Fabrics than anywhere else. Two: It’s worth to me for the access to fabrics I cannot get anywhere else and to support a business that goes above and beyond with customer service.

The Discovery Fabrics website says, ” We are obsessed with quality because we use the fabric sell. We source our fabric from the best mills and factories in the world. “

I will attest to that.

I am keeping the blog!!

The Blog Stays!!!!

Part of retirement has been figuring out budgeting now that Specialty Outdoors as a business is no more. I found out yesterday that I will be keeping this website and blog after all…. got some great news from my hosting service.

What this means for you is some updates – who wants to update when the site might be going down – and continued blog entries. The hardest part is remembering to do photos and video documentation when I am working so I can create posts for you.

Speaking of video…. I do have a YouTube channel with an assortment of how-to tips that I have gleaned over the years.

https://www.youtube.com/channel/UCMlU1rZLwc3PmkZ2rjeGcPQ

Also, stay tuned for a very special affiliate announcement.

I retired!!

Badass Sewing For Dirtbags

Yes, I retired.

October of this year I called it quits. That’s right…done..finito…no more. I not only wasn’t enjoying my work anymore, I was downright annoyed and irritated at things I shouldn’t be. It’s not your fault you do not know about zipper wear. My dear supportive husband finally said, “so quit”. So I did. It took about 6 weeks to close old orders and accounts but I can honestly say by Thanksgiving I was done.
The notes and comments have been amazing. It’s nice to feel appreciated.

What does the future hold? I don’t know yet. I’m creating joy sewing for myself, and mentoring sharing my knowledge with budding sewists, primarily through the Sew Inspired by Discovery Fabrics group on Facebook.

I have been making some little tips and tricks videos, posted on my YouTube Channel.

Thanks for all the great years and stay tuned for what’s next.

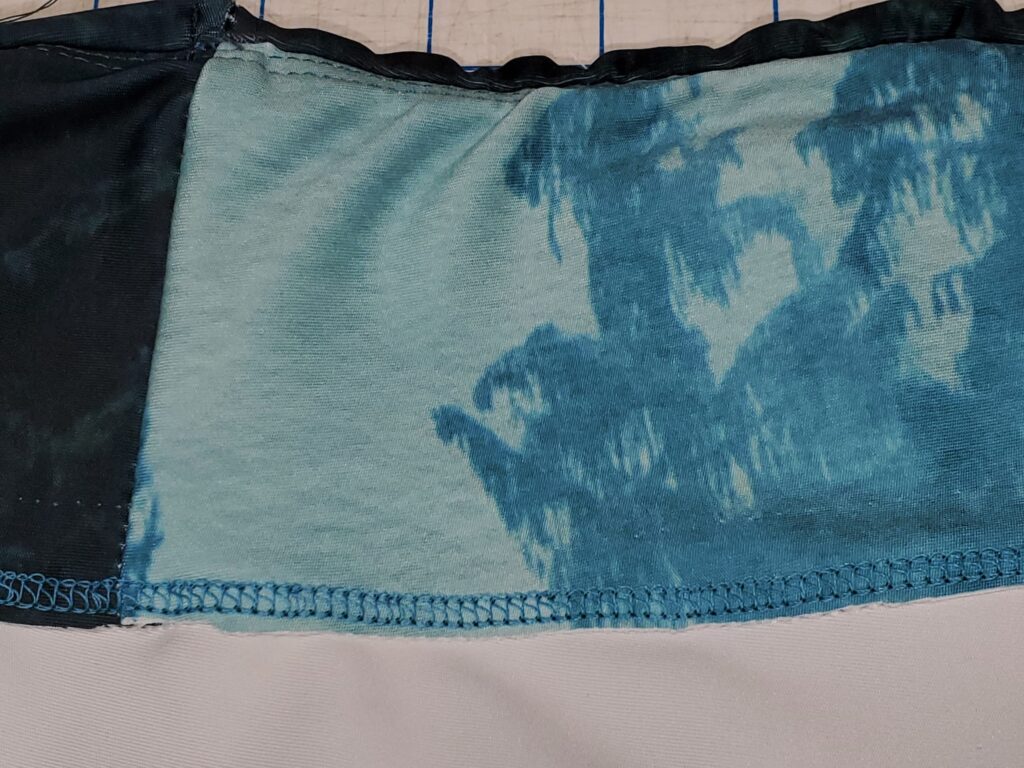
Tutorial: soft athletic waistband

First things first. For the purpose of this tutorial, let’s assume you have intermediate/advanced sewing skills, a sewing machine and a serger. I use a cover hem in the demo, but you can get by with a zigzag machine – see video.
Second, I am assuming that you can construct leggings or any garment that has the typical faced contour type waistband with both inner and outer pieces to the waistband. For this tutorial, you should have your garment constructed to the point where the legs are together and you are ready to put on the waistband.


Note: This technique will “use up” a bit of your waistband. Depending on your fabric, you will lose 3/8″ -1/2″ in height. If this is of concern just add a little bit to the waistband before you cut it out.

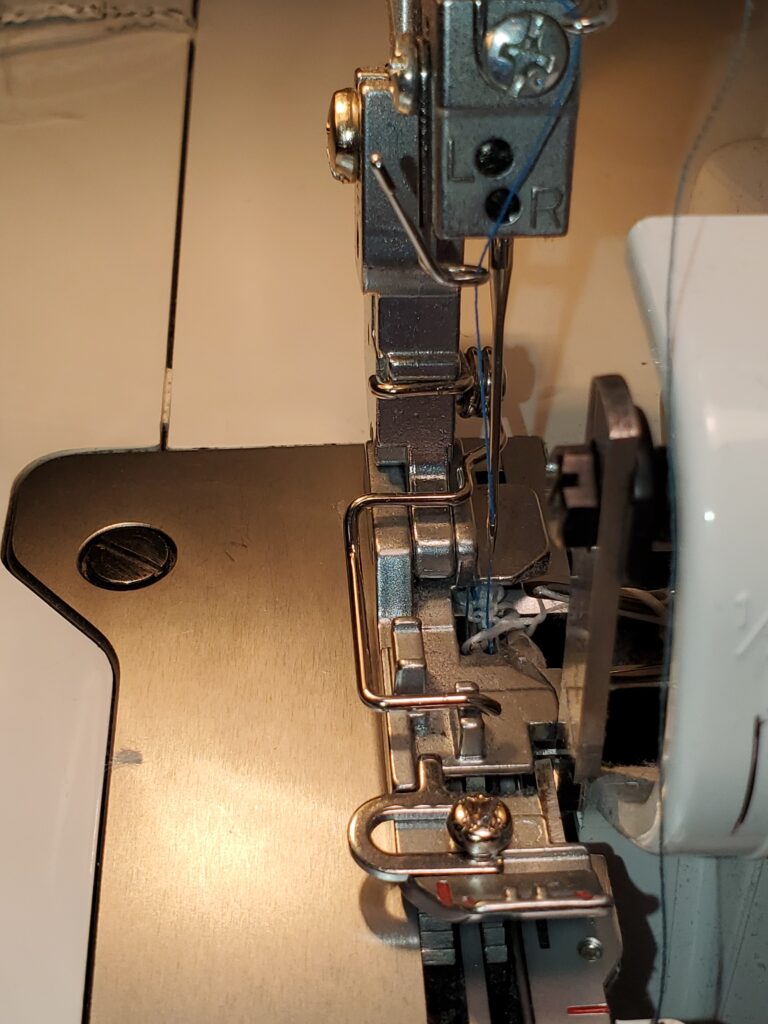
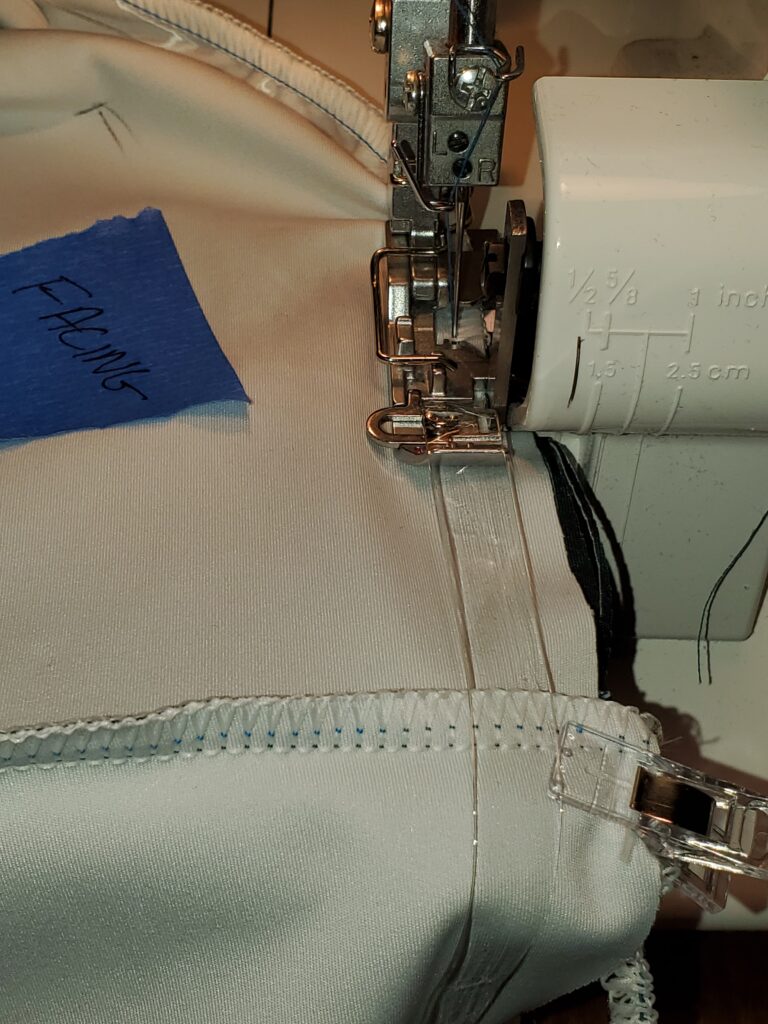
Setting up: Have your waistband facing and outside ready to go. DO NOT TRIM FACING even if pattern directions tell you. You might want to label the facing. Have some 3/8″ elastic ready to go, cut to length. Set your serger up for most narrow single needle seam. You will only be attaching elastic with the 1-needle set up, not seaming.

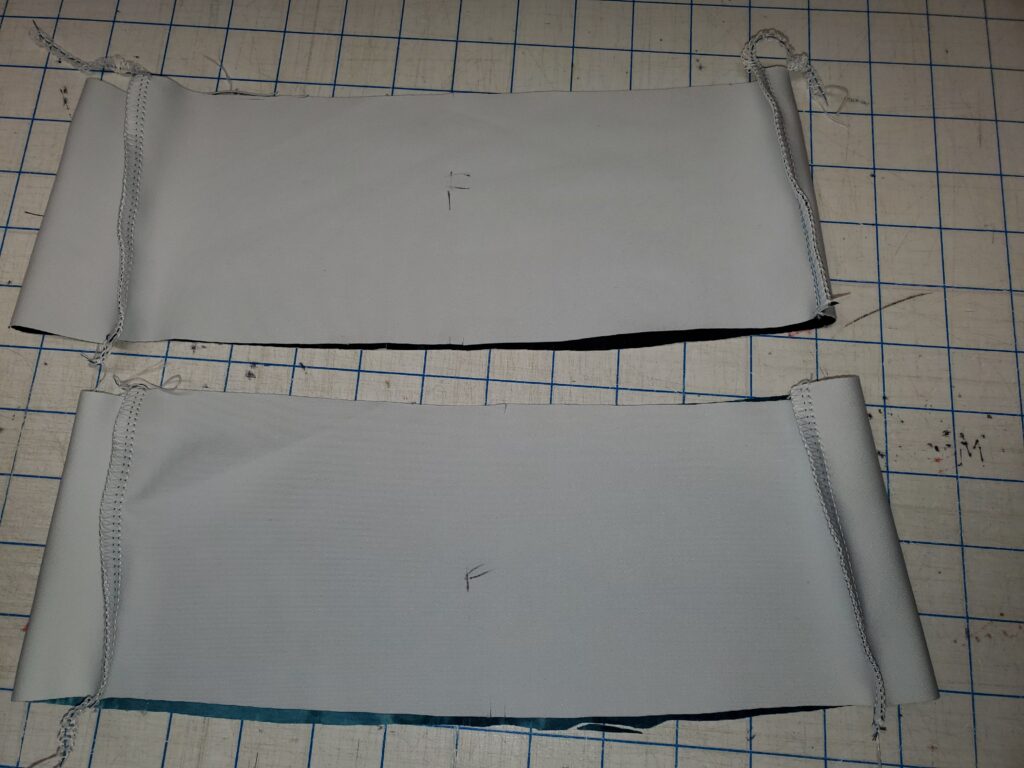
“f” is for front of waistband. Facing is not trimmed.
Left needle removed for narrow seam. Elastic foot set for 3/8″ elastic.


The first thing to do is sew the top of the waistband edges together FACING SIDE UP with your serger. The 3/8″ elastic being inserted along the seam as you go.

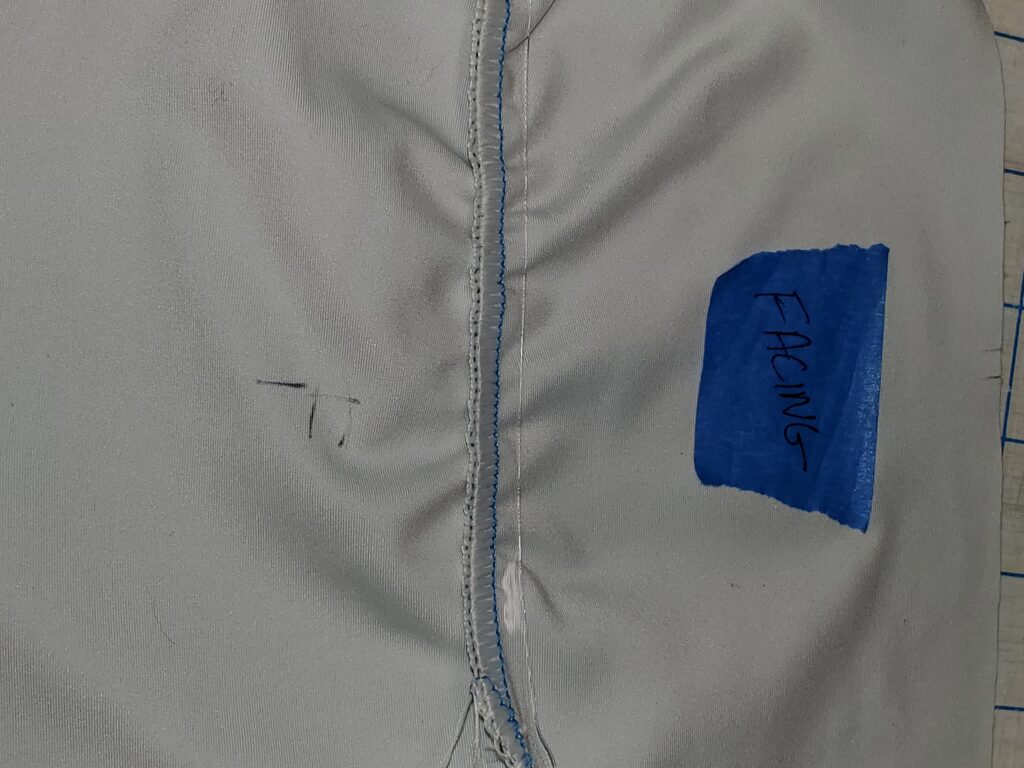
When you are done, it will look something like:

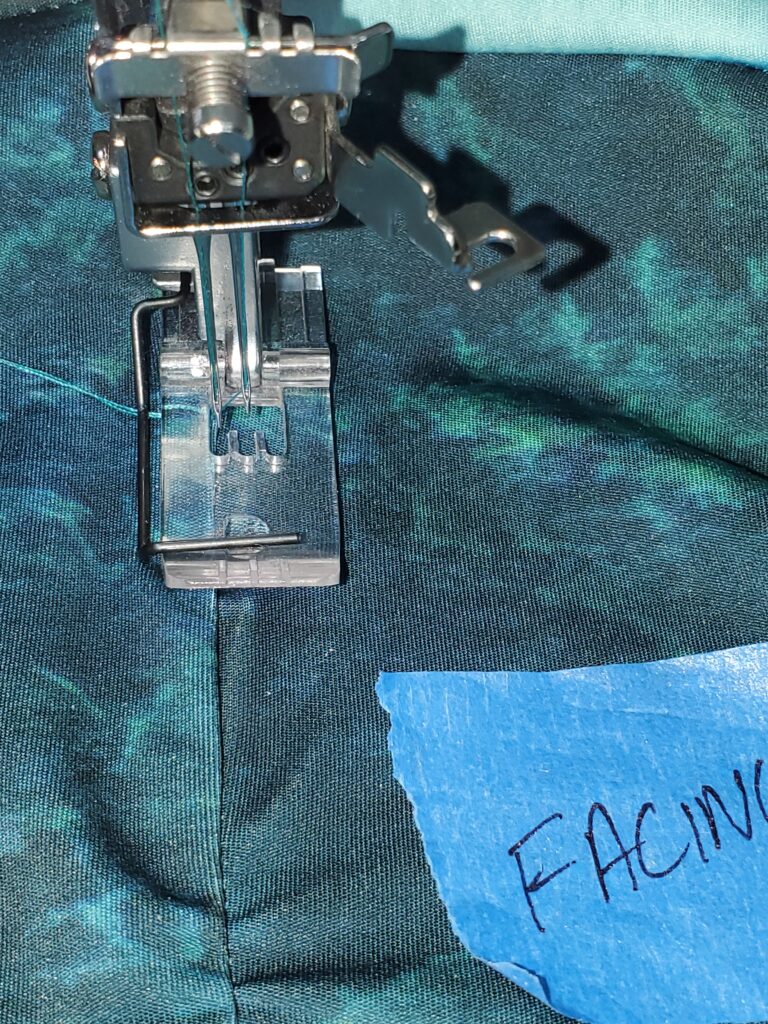
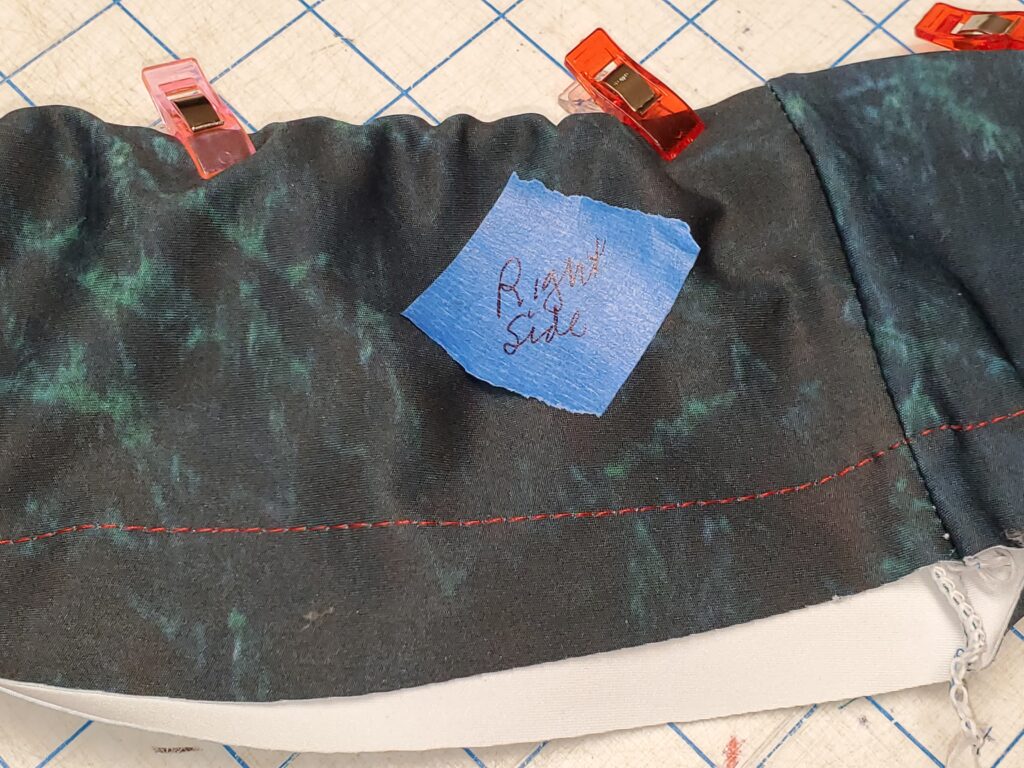
Topstitching: open waistband out flat, set up under coverhem with facing side to the right, left needle just to the right of the seam. Topstitch. Stitching is on facing side only, through the elastic. Details and a zig zag option are in the next video.

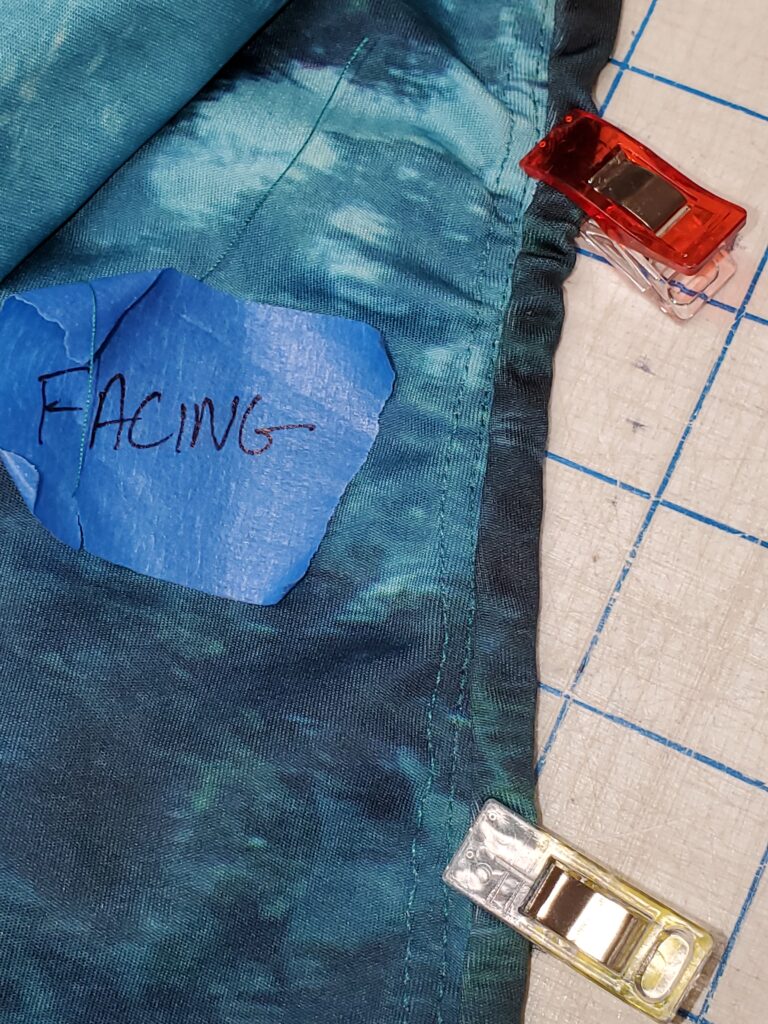
After topsitching, roll the right side waistband so it it right side out with a gentle roll around the elastic. Use clips or pins to hold into place.

This video shows all the steps up to this point.

Now that you have the facing right side out and the top clipped into place, you need to secure the layers. The raw edges will be uneven. DO NOT TRIM FACING. Flatten the layers and secure with a line of basting about 1-1/2″ from the raw edge of the outer waistband.

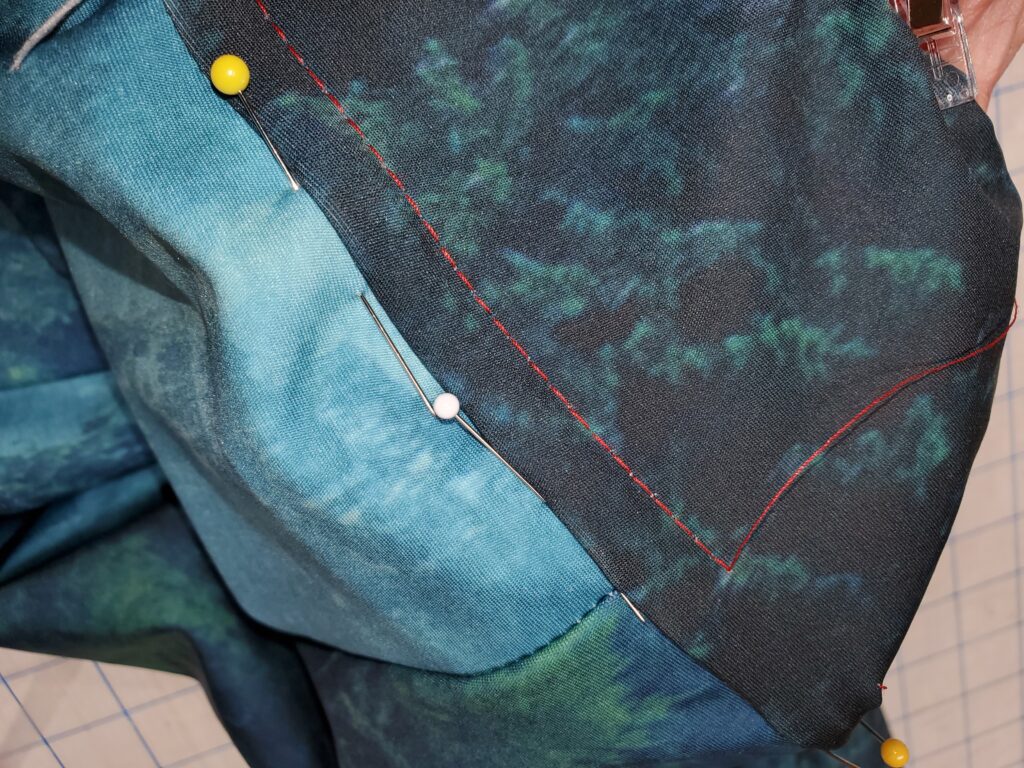
With your serger, stitch right side of waistband to right side of garment. Be careful not to catch facing layer. Flatten the waistband and tuck seam allowance up into the waist band. Secure, making sure the seam is pulled flat.

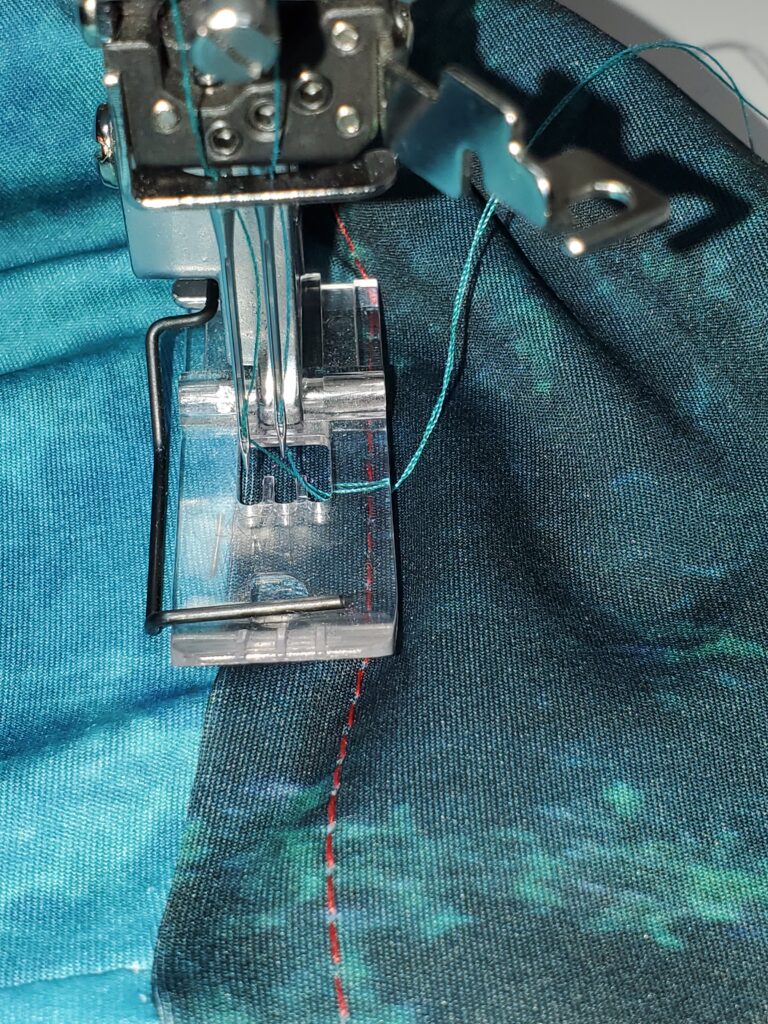
Top stitch with coverhem through the waistband with the seam tucked inside.

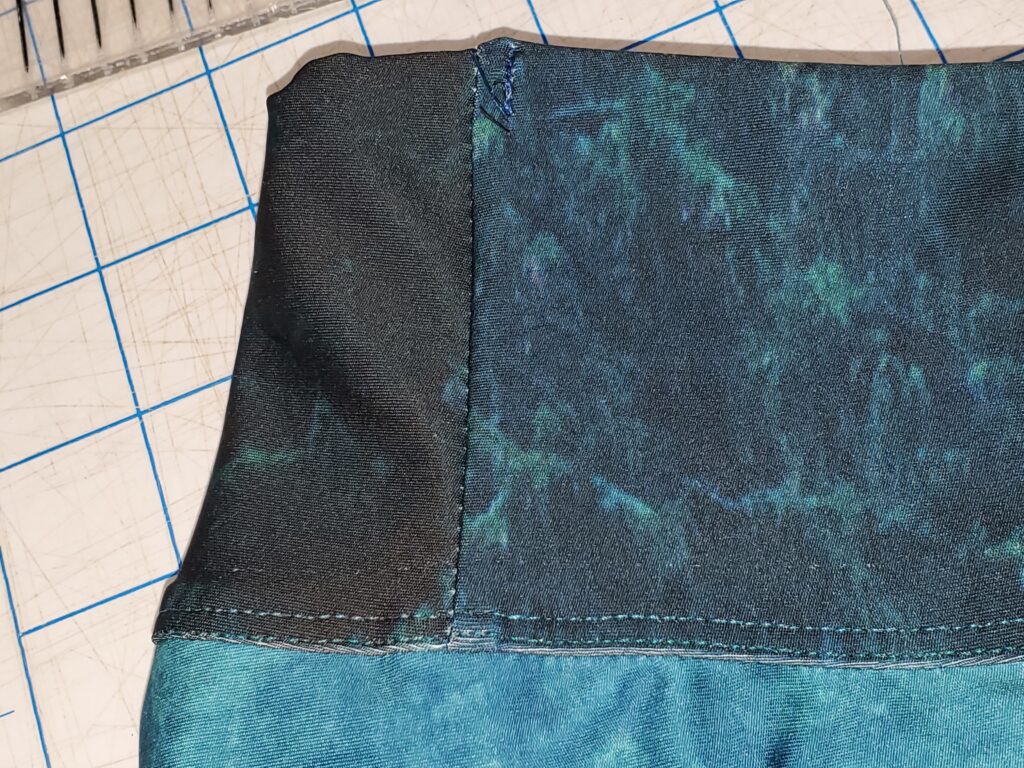
The seam will be fully enclosed. Trim off excess and you are done.

See the last video for details.

All done!! I will play with ways to improve this technique.

Welcome to Tutorials

Seeing as I am semi-retired, I have more time to make tutorials now. I call them my “Keeping It Real” series as in,…. keeping it real. Most our our sewing rooms are not Instagram perfect and I am no exception. I’d rather share my tips and experience when I’ve got the notion than take precious time out to make my workroom look perfect. I would rather spend my hard earned money on more fabric than matching organizers.

I’ve been sewing for 50 years, starting with horse blankets for my Breyer horses, and now slowing down as an outdoor clothing/technical sewing repair expert. I will be sharing what I get inspired to share so check back every now and then. I am learning as I go – both making tutorials and new things to share.

No theme…. just what I am inspired to share. My YouTube Channel has assortment of videos from masks to magnets, and specific tutorials are covered in blog posts.

Why? Read my blog post on Hoarding Information.

Make a Bike Jersey

Base Layer and Collar Finish

Insulated Van Shades with Tabs

Soft Athletic Waistband

Make Lycra Bike Shorts

Van Shade Tutorial, tab mounted shades

As a lifelong sewist, of course I want to make my own van shades instead of paying someone else. I looked at a few different products both online and in person, and decided “why not?” I have access to materials, skills, and time so here goes…

This is what I came up with for the first iteration. These mount over recessed back door windows, taking advantage of the dead air space for insulation value and the steel to fasten magnets to. This tutorial is for what I will call a tab mount as pictured below. I will be experimenting with snap mounts and flush mount later. Update: new magnet videos added at the bottom of the tutorial.

Not too shabby for v1, eh? I am happy to walk you through what I did. I have lots of different windows in my van, and as I learn more and try things I will add to this tutorial. Why a tutorial? Read my blog post on Hoarding Information… this will explain a lot of where I come from.

About this tutorial and videos: I don’t have a sewing channel. I’m not about a slick set up to get followers. I just want to share what I know and help you to do it better. I jokingly call my videos “keeping it real” because I don’t have coordinated craft containers with a designer look and I don’t have VLOG set up. I have a busy workroom in my basement where I have many personal and work projects going at any given time. I’d rather make a video while I am working than take the time to make my workroom look picture perfect. I hope you find something useful here.

Let’s Get Started!!

First, equipment:

  • Sewing machine, walking foot recommended. New needles size 90.
  • Spray adhesive, repositionable type for fabric (quilt shop)
  • Craft clips
  • Straight edge
  • Pencil
  • Shears/snips
  • Blue tape
  • Flat surface for layout, marking etc.
  • High quality thread
  • Flat surface for cutting

Tips: A walking foot attachment, or a machine with a built in walking foot, will make working with layers much easier. Layers tend to shift when the feed dogs are only on the bottom. Most home machines have an attachment you can borrow or buy.

Materials – links at bottom of list

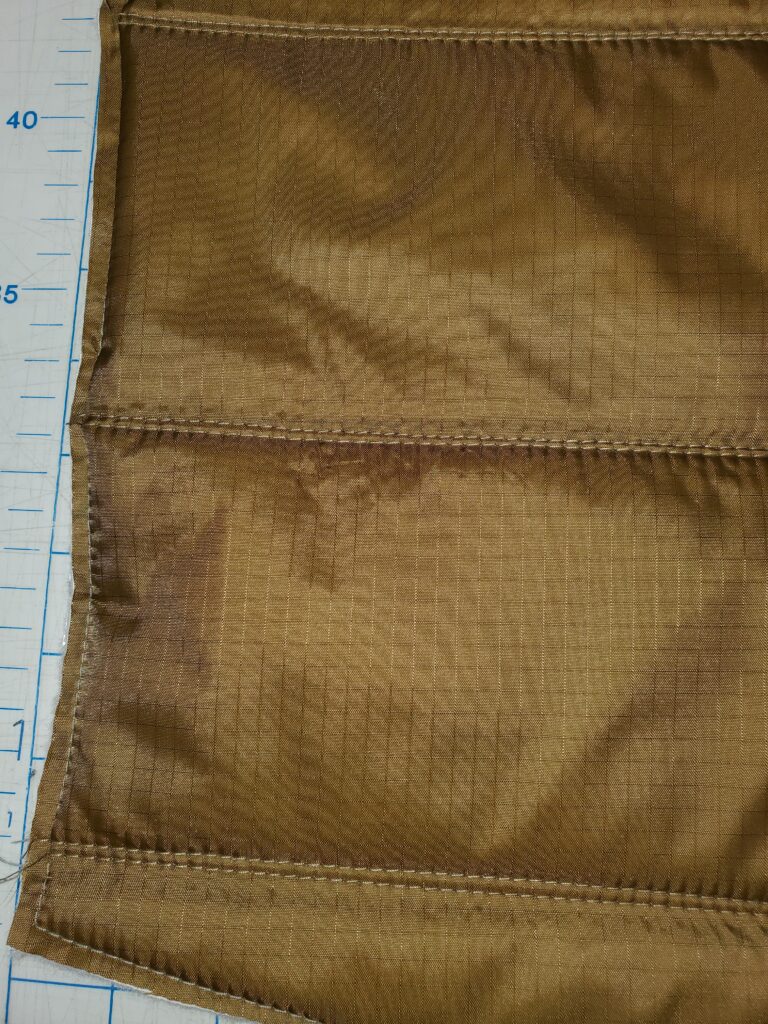
  • Inner/outer cover: 1.9 oz coated ripstop from OWF
  • Insulation: Warm Window from Joann or 200 wt. Thinsulate from OWF
  • 1” grosgrain ribbon, OWF
  • 1-1/2” grosgrain ribbon, OWF
  • 1-1/4 or 1-1/2 webbing OWF
  • 1” Velcro hook and loop OWF
  •  1” grid pellon for patterns, Joann
  • Magnets,  60 x 10 x 3 mm neodymium magnets for tabbed shades;  Applied Magnets

Suppliers:

Note: I am not an engineer, so I didn’t spend a lot of time trying to puzzle out R value information. Warm Window is a tried-and-true window product. Joann regularly puts out 40% off coupons so I thought I would start with it. I was concerned it would be bulky but I think it is OK. I opted for ripstop covering instead of a cute print as I am very concerned about condensation.

One reason I started with tabs is that getting magnets that are small enough to insert into a binding (for a flush mount) that aren’t super expensive is a challenge. Wider ones that need tabs are easier to find. (.40 each vs $3.50 each!!)

1. Measure: Measure the window opening in the door, not the window itself. Add ½”  or more all the way around (total 1” or more additional in length and width). This will depend on how much you want the shade to overlap the steel around the window.  I find it helpful to use 1” grid Pellon for patterning as you can keep your pattern squared up accurately. Draw out your measurements on the Pellon.  Cut out pattern, mark where you think you want your magnets to go. There will be now seam allowance: this is the finished size of your shade.

2. Cut: Cut each layer of material out. Do not use pattern for cutting yet. Cut layers larger than you need. Example,  If your window is 24” x 24” cut pieces 30 x 30. Cut all pieces (inner, outer, insulation). This is insurance. You need a bit of a margin when working with layers.

Tip: Measure twice. Measure three times! No kidding – once you cut, you are stuck with it.

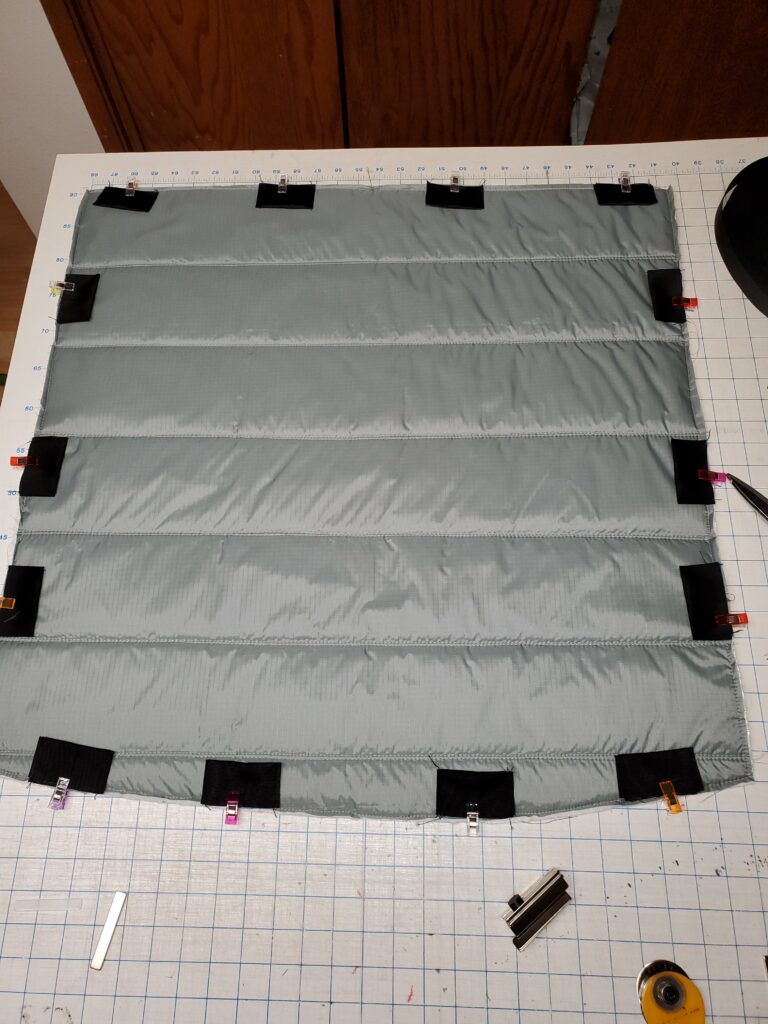
3. Layout and stacking: Using your flat space, lay out newspaper to protect from overspray.  Using blue tape, tape outside layer right side (RS) down to table, smoothing out wrinkles. Spray with fabric adhesive. Add your next layer, the insulation, with the side you want out facing down to the wrong side (WS) of bottom layer.  If you are using Warm Window, the Mylar should be down towards the outside; quilted side up. Make sure there are no wrinkles. Spray with fabric adhesive. Add top layer, the one for the inside of the shade, right side up. Make sure all layers are aligned straight and evenly.  Reposition anything if you need to. Make sure everything is smooth and press together with your hands. This technique is the same with any insulation you might use.

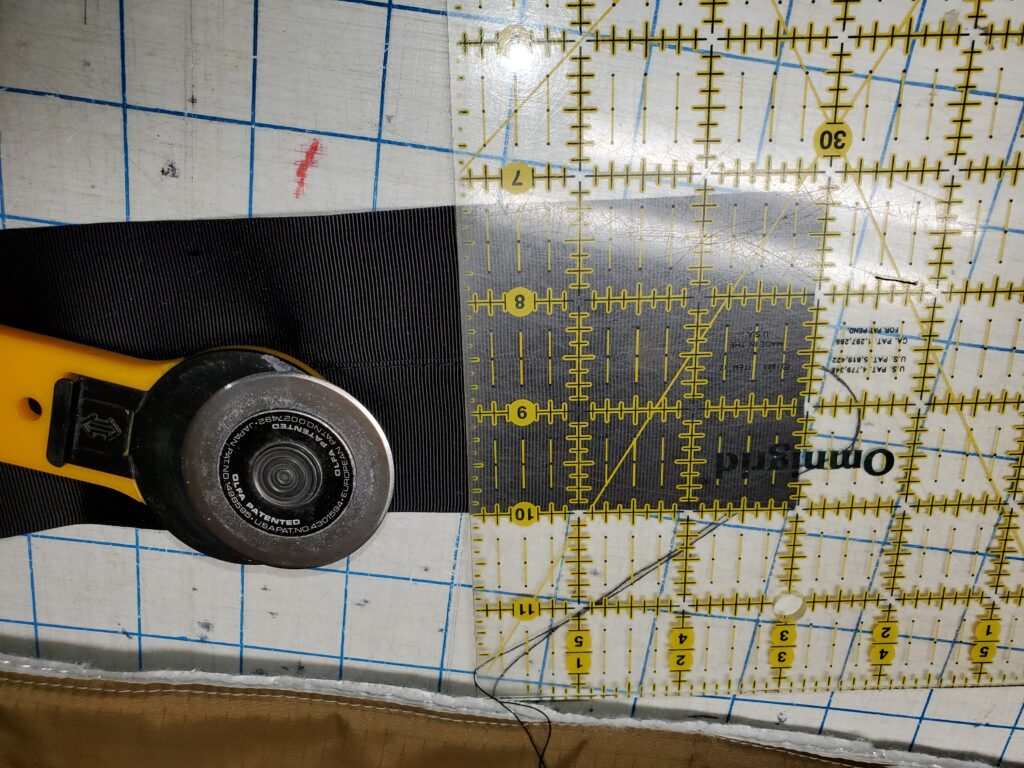
4. Cutting. Layout pattern centered on all three layers. Make sure there is excess in every direction. Make sure pattern is aligned to fabric grain. You may pin through all layers at the edge. Cut all layers at once with sharp shears. Use craft clips to secure the edges all the way around so you can baste them next.

5. Baste cut edges by stitching close to edge (1/4”) with long stitch on sewing machine. If you have a walking foot, use it as it will help feed the layers more efficiently without shifting.

6. Determine quilting pattern. If you are using Warm Window you can match the quilting for folding with the lines manufactured into the insulation. Quilt line spacing will depend on how you want to fold the shades. Mark quilting with a long straight edge. Do two parallel rows, 1/8” to ¼” inch apart for best folding. Quilt.

Tip: Don’t be in a hurry. Make the time to double check your work each step of the way. Did you miss a place? Is anything missing/backwards/upside down?

Make Tabs:

You need to determine magnet spacing for your tabs and make the tabs.  I used 60 x 10 x 3 mm neodymium magnets and made my tabs 3” wide. To make tabs:

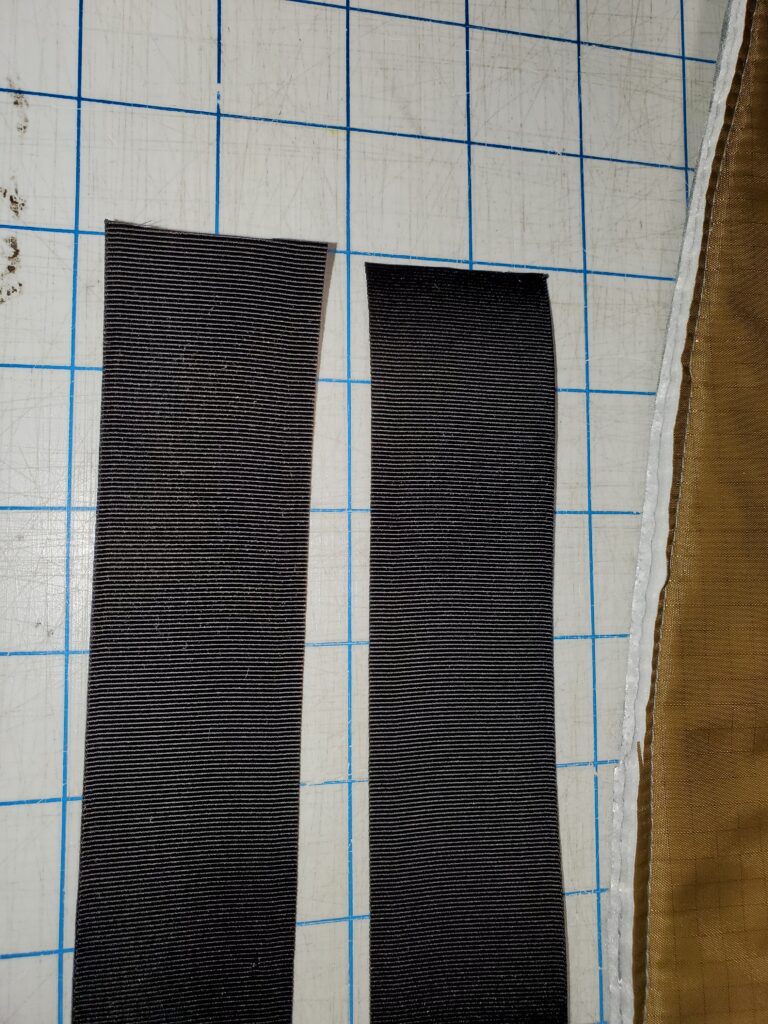
Cut 1.5” grosgrain. You will need 6” per tab. Example: 10 tabs, 60” of grosgrain.

Cut 2 strips 30” long.

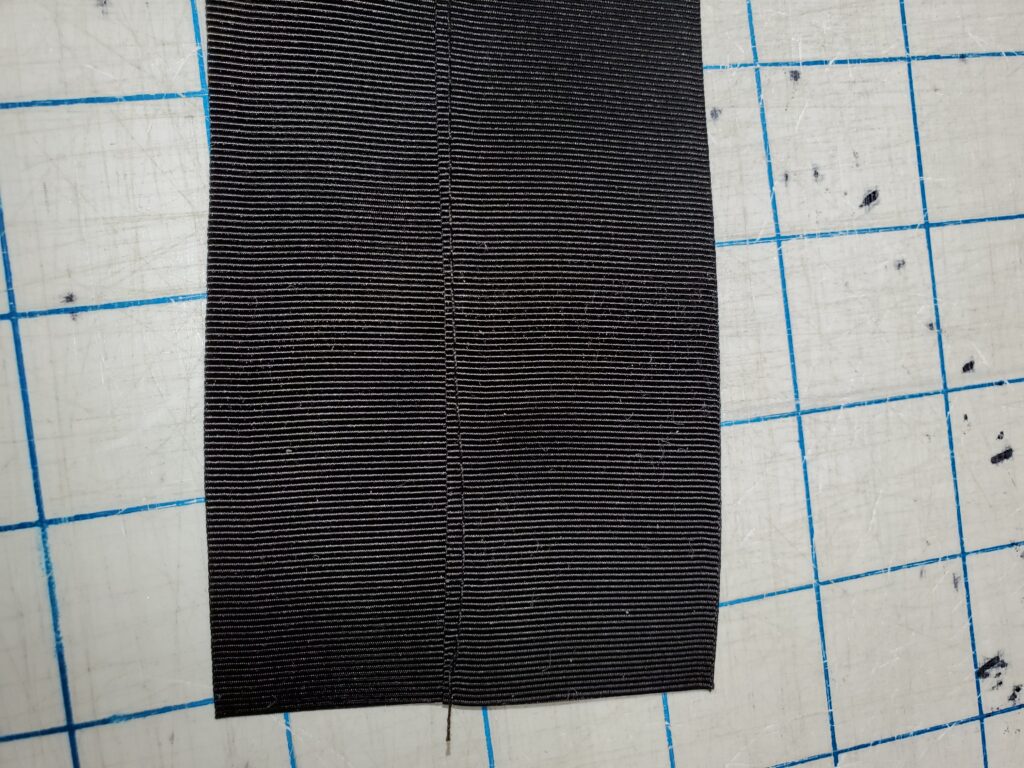
Stitch together by overlaying the long edges,

Cut into 3” strips.

Fold each piece in half and stitch the short ends closed.

Separate magnets and get them ready to insert into tabs.

 Clip tabs into position on outside of shade.

Sew tabs into place, inserting a magnet in each one as you go around. Make sure to tuck the magnet into the pocket and DO NOT SEW OVER MAGNET.

Next, get your straps ready. These are the ones that will hold the shade when it is accordion folded up. You will want a longer on on the outside, shorter one on the inside.

Getting ready to bind and binding:

By now you should have a finished shade! Check it for missed catching of Velcro, straps and binding. Everything oriented correctly? Clip all your threads, and go test it out!!! Does it fit? Pull it flat and make sure it’s squared up evenly around your window. What do you think?

As I do more research and develop my own ideas, I will be sure to add to this tutorial. Happy sewing! #vanlife

UPDATE: I’ve added two video about magnets and how to install in the edges. Note on magnets – I say a couple of different sources, but this is what is correct: 1″ x 1/4″ x 1/8″ is what fits in the binding. I have only found these at Applied Magnet. Amazon has all sorts of magnets, but not these. Here’s the link:

1″ x 1/4″ x 1/8″ Neodymium magnets

My Machines, part 4. Long overdue update.

I sold one. I retired two, one to the recycling bin. I bought three… all somewhat specialized for the garment end of things.

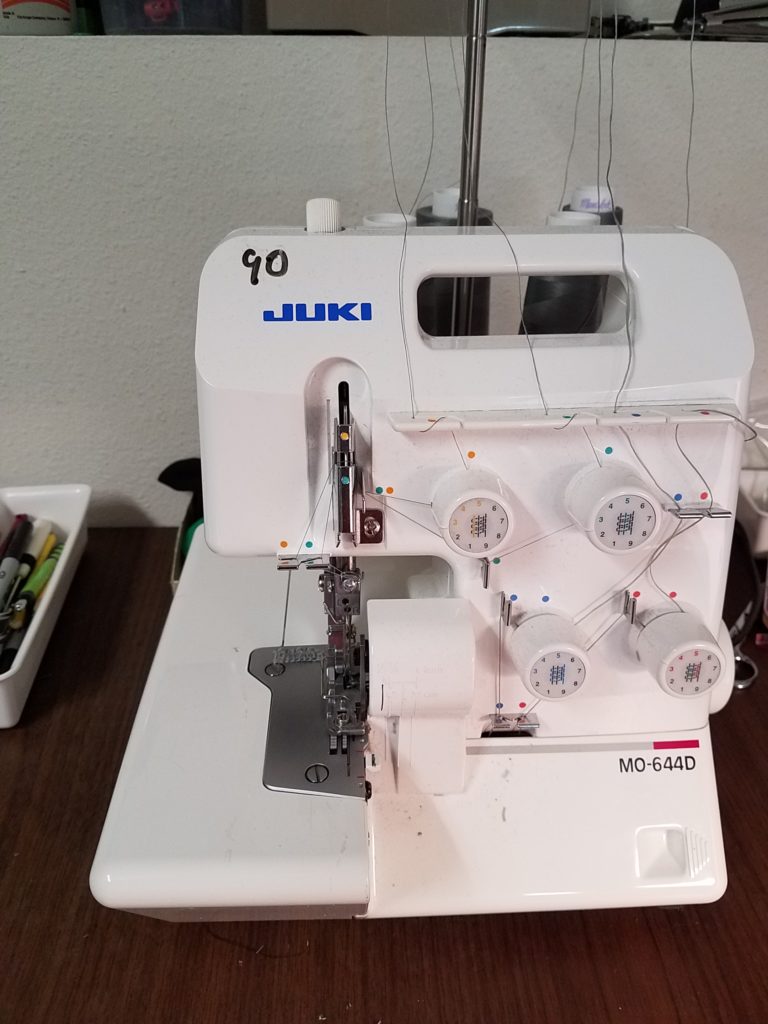
First off, it was so sad to retire the 1987 first generation Babylock serger to the recycling bin. It was beyond repair, rebuild, or service. Every piece of metal in the thing was worn beyond repair. Every time I tried to use it something wouldn’t work. I turned to one of my trusted advisers, Ron of A1 Sewing Machine, for a recommendation. He recommended a Juki 644 as a reliable workroom 3/4 serger and he was right on. Sometimes you don’t realize how old and worn something is until you replace it with new. Helpful hint: you can write on your machine with a dry erase: this is the current needle installed. Trust me on this: If you are battling an old machine or one that just never works quite right, quit torturing yourself, especially if you are working professionally. I hate spending money and kick myself every time I hold off getting the right tool.

Juki serger, reliable workhorse

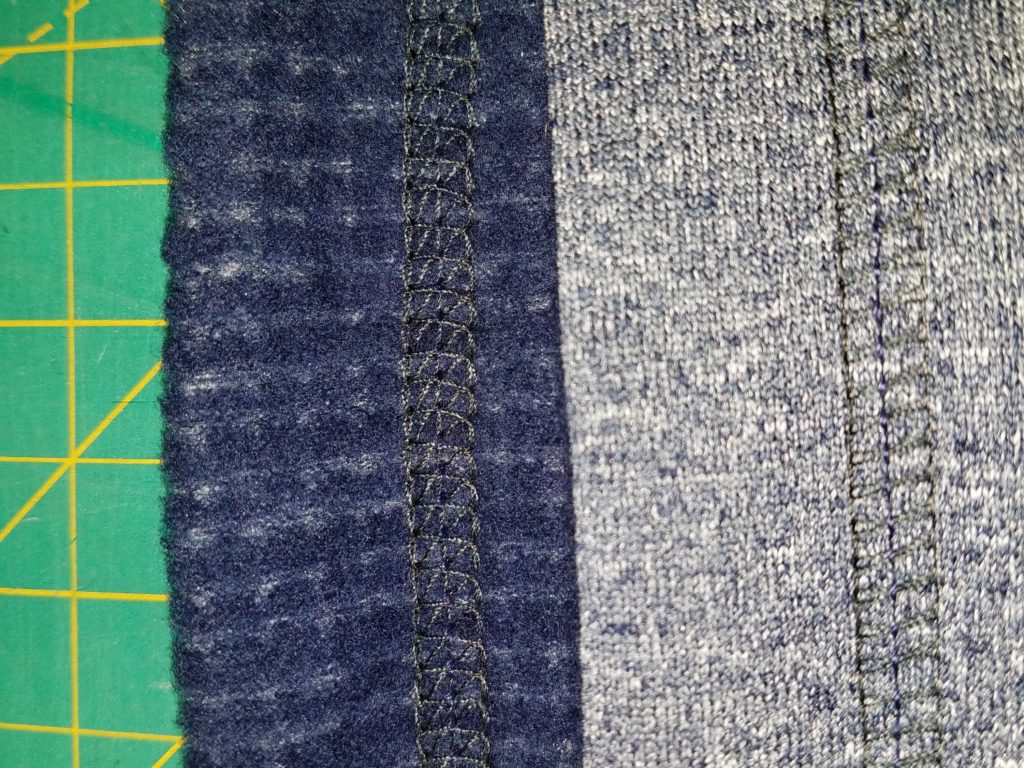
Next, I sold my Pfaff combo serger/coverhem. I had originally purchased it for the triple needle coverhem function, but I never loved the performance of the machine. When I heard that Brother came out with a top cover hem home machine, the 3550, that was it… ordered one sight unseen. This machine is amazing and easy to use once you understand the learning curve that all coverhem machines come with. I absolutely LOVE being able to provide an ultra-professional, finished look when I am altering activewear, baselayers, sweaters or other fleece, softshell garments.

Grey side is top cover stitch; navy is the underside, three needle cover hem.
Brother 3550 Coverhem, top spreader removed.

Why stop there? With retirement looming, I wanted to replace my trusty 33 year old Bernina while I am still working. While it’s very reliable, mostly, once in a while I get a vibe that it might croak on me. I was able to find an Elna 780 floor model and my-o-my it is rather amazing. I appreciated the control and features that I use specifically on garment projects. The harp space is huge and it does everything but make toast. Maybe I am modern but I like the ease of computer controls for eyelets and darning. It has a very wide stitch – up to 9mm for some functions which is very handy for certain repairs.

I still have my needle feed and walking foot and several other machines stashed away.

Base Layer Zip and Collar Finish

(new reformatted page coming soon, apologies for formatting)

Hello all, I know it’s been ages since I posted anything new. Here is a tutorial from the archives. If you are looking for a smooth, foolproof way to insert a zipper into knits or baselayers, look no further.

step24

I will show you how to do an enclosed inside finish,

Even and matching seams,

step13

And a very tidy zipper insertion:

step12

First, thanks to Jalie Patterns for the the zipper insertion technique.  Grey garment pictured is the Vuokatti baselayer pattern, offered free by Shelby Kaava Outfitters.

Let’s get started!!

Zipper Insertion

Part 1, preparation

(CF=Center Front, WS=Wrong Side, RS=Right Side)

Adjust, layout and cut your pattern as usual. Figure out how long you want the front zipper to be, and mark the CF. Keep in mind collar width added to the front panel for the length of the zipper. Mark CF with dots and a 2″ slash at CF.

step1

Sew sleeves, back and collar on. Do not sew side seams; you want to work flat.

step2

Check length of zipper against collar fold point and your marks.  I have the collar fold marked with a pin. This is the final width of the collar.

step3

Now, noting the exact placement of bottom zipper stop, mark bottom of the zipper with a pin

step4

Turn zipper RS down and going the opposite way it should, on the RS front. Secure the zipper.

step3-5
step5

Where you have bottom of zipper marked with a pin, use a couple of pieces of clear tape on the WS. This will act as a stabilizer when you sew the bottom of the zipper. 


Part 2, sewing

step6

Now, stitching very carefully, stitch across the bottom of the zipper, RS of shirt up, zipper is RS down and pointing the wrong way. Take just a very few stitches, and backstitch. Even as pictured I took a few too many. You just want to secure the end of the zipper, no wider.

Then, you will carefully cut down the CF of your shirt from the slash at top CF, making a “>” at the end of the zipper. Clip EXACTLY to the edge of your stitching and make sure the legs of the  “>” are longer, not shorter.

step7

For the next step of actually sewing the zipper tape to the fabric, a nifty notion called Wonder Tape is very helpful. It is washable, and really keeps knits from distorting during this step.

Apply the Wonder Tape to the RS of the zipper.

step9
step8

Turn  the long cut edge and press to secure, making sure there is no distortion. Stitch carefully, starting exactly at the apex of the “V” cut. Use the zipper foot to get close to the coil. Note that on the grey fabric, the edge of the fabric opening is placed only part way to the edge of the zipper tape. This is done deliberately, to keep the opening narrow and undistorted.

step11

Finish both sides of the zipper. If you have been careful, you’ll have a nice, even, small  opening like pictured below.  When you are crossing the collar seams, make sure that they match up on either side Check this before you stitch. Fold the seam allowances towards the collar. This will also help with the collar treatment. Pick off any excess wonder tape you can see. The rest will wash out.

step12
step13-5

Collar Finish

If you’ve done the prior steps correctly, you’ll have a collar attached to your top The zipper should be about 1/2 way up the collar, with the top of the zipper at the desired height of the collar.  One some patterns you may want to trim the collar down. Reserge the cut edge.

step16

Once the collar is trimmed,  finish the top of the zipper by folding it over twice. You can secure the folds with a pin, then fold the collar facing over the zipper tape, RS facing to RS collar. Make sure the top stop of the zipper is at the fold line for the collar, and that the serged edge of the facing is lined up with the collar/neckline seam. Then stitch carefully using zipper foot,  to secure the collar facing.

step14
step15

Do both sides. Check that collar seams and top corners/top stops are even by zipping the zipper closed and checking from the right side. Adjust as needed.

step13

Now for the fun part. We are going to do a “Burrito Style” enclosed finish of the facing. Fold the facing to inside. Use a pin to secure it  about 3/8 from the edge of the zipper, and a chalk or other pencil to make visible marks for that point on both the collar and the facing. (pictured) You might also want to make a marks on the collar facing where it meets the shoulder seam .(not pictured)

step19

Make sure that both the facing and the collar marked:

step20-1

Matching the marks, fold the zipper tape down, and bring the collar facing to the collar seam, seams together, RS of collar facing to WS of shirt front body. Match your marks, and secure the two seams together. The zipper tape and the shirt front will be enclosed in the “burrito”. You should have something that looks like:

Note that the zipper is folded down under my fingers on the left side of the image.

step21

Continue to pin, securing seams all the way from the zipper  to the where the shoulder seam intersects the collar, if not farther. Keep checking to make sure the shirt front and the zipper are not getting caught.

Close up view of the start:

step22

Use a narrow to medium zig-zag, sew your burrito. Start at the chalk marks by the zipper, and the two seam allowances together. Catch only the seam allowances, not the body of the shirt. Go at least to the shoulder seams if not farther.

step23

Go as far as you can before you get to so much bulk folded inside that you have to stop. On most fabrics, you can go at least to where the shoulder seam meets the collar, and on light fabrics, farther. So go as far as you can, then back tack. Carefully undo the burrito checking to make sure you haven’t made any pleats. If you have done it correctly, you will have a nice finished facing. After you have burritoed both sides, to finish the CB part of the facing, just lap the collar facing edge on top of the collar seam edge and stitch in the ditch to hold the facing down.
step24

More Zipper Problems: 2-way zippers

Common Zipper Problems Part 1, continued

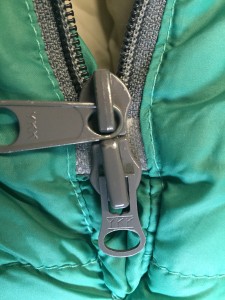
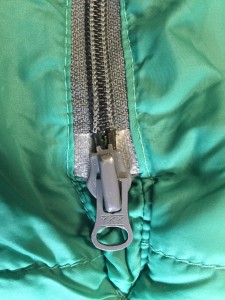
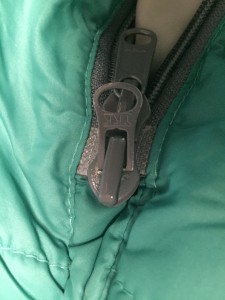
Two-way zippers are very problematic and malfunction a lot.  From a repair perspective, they are a big pain. The main reason they malfunction is people do not take the time to thread them properly. The sliders get misaligned and then  forced  which breaks the zipper.

Examples:

IMG_4780


This zipper was aligned properly. The male pins are evenly inserted at the bottom. One should be able to feel a discernible “click” when this is done right.


IMG_4777


See how nicely it zipped up?


IMG_4786


Same zipper, misaligned. Customer kept trying to zip it up like this, causing all sorts of problems. It doesn’t take much.


These problems are the same whether you have a tooth or coil zipper. Take the time to zip it correctly!

A Few Laundry Tips

The Special Stinky Bike Gear Recipe:
Soak in “Biz” overnight, at least 12 hours. this is an enzyme
based presoak that goes after organic matter, not your regular presoak.
Then, rinse that out and then run through the wash with a laundry product
called Oxyclean, which is not an detergent it’s an additive. You should be
able to get that at any supermarket.
This is courtesy Judith from www.fabrics.net ~ thanks!!

Getting Hardshells CLEAN:
Have you ever noticed that doing the two step washing process (as per label instructions) for hardshell garments doens’t really get the items “clean”?
Try this method, courtesy Mr. Mender in Sechelt, BC, Canada.
Wash your hardshell item in regular launder detergent. Treat grimy areas with your favorite treatment such as Shout. Then, rinse your item 3 times in clear water. Now, do the two step process, wash and DWR renew. It was explained to me that the wash-in cleaner is a vehicle to prepare the garment for the DWR renewal, and not a cleaner pe se. I have had good success with this method.

Hand Wash:
Did you know that baby shampoo is an excellent substitute for special products such as Woolite? It’s much cheaper, too. If you have a front load washer, you can do hand wash in the wash -yay!!

Sports Detergent:
Save your money and use regular laundry soap with an oxygenator add in.

Bike Grease:
Use Dawn and/or Simple Green.

Dryers:
Heat is the enemy. Line dry things as much as possible. The exception is when doing a DWR treatment. This requires a LOW temperature dryer to be effective.

Down Items:
Down items can be washed at home. Do not use a washer with an agitator. The keys to washing down is a mild soap like Down Wash by Nikwax, and prolonged very low temperature drying in a dryer. You will have to tennis balls to help break up clumps, and break up clumps manually too. It takes HOURS but can be done sucessfully. You can’t rush this process.

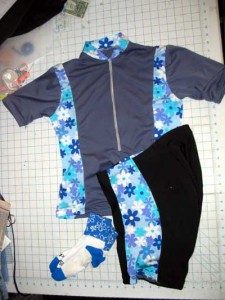
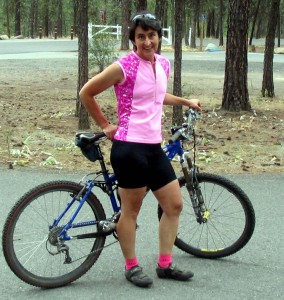
Make A Bike Jersey

CB with the the Liberace jersey

CB with the the Liberace jersey

CIMG0051


customscreen2wildjerseyf


flowerjerseypinkjersey


(this post is resurrected from a page on the old site.)

To make a cycling jersey, I am assuming you will have some basic sewing skills. If you need a reference, the Singer books on active wear, sergers and stretch fabrics are all very good. For the most part, just follow pattern directions on the suggested patterns, but please review my notes for ideas and tips.

Where to get everything? Use mail order sources. Chances are slim to none that your local chain store will carry anything that you need for these projects. If you have a better independent store, ask if you don’t see what you need.

Suggested fabrics are wicking supplex, Malden Powerdry, wicking polyester knits. See the sources page for mail order retailers. If you want contrast patterns for your jerseys, swim lycra prints are fun to use but do not make a whole jersey out of swim lycra. Figure on 1/3 yard of 60″ lycra for contrast.

Patterns: Jalie 2216, Green Pepper 401 or 402.

Jalie 2216


Sewing notes: For seams, a serger with wooly nylon in the loopers is best. If you only have a regular machine for your seams, use a good thread, sharp knit needles and a stretch stitch.
Look and see if your machine does this stitch: __//__//__//__ ; it is an excellent stitch for seaming lycra.

Fit and adjustments to pattern: Most commercial jersey patterns are fairly long. If you like your jerseys short, you will want to check the length and adjust all the panels of the patterns accordingly. The back pocket may need to be redrawn to match the adjustments. On the GP pattern you may want to alter the neckline. I have dropped the CF neckline curve about 1/2″ as it was too high for my liking. I also like my collars more narrow than the patterns provide.

Zippers:  A 9″ neckline zipper suits me just fine. I use a regular dressmaker nylon zipper in matching colors. If you like to open your jerseys all the way down or close to it, just substitute the length you want. You could also use an invisible zipper but these require a special zipper foot.

Assembly Order: This is the order that I assemble the jerseys as I prefer to work flat as much as possible; this varies from the pattern directions.

1. Put zipper in front, using my method further down on  this page. I do not pre-slit the zipper opening.
2. Put pocket on back panel
3. Sew side front panels to front, sew side back panels to back, sew shoulder seams.
4. Put collar on.
5. If you are going to put in sleeves, do them now, before you close up the side seams.
6. Close up side seams, hem sleeves or bind armholes, hem. I do not like elastic in my jersey hem.

Zipper tricks: The following is the best way I’ve found to insert a zipper into the front of a lightweight knit. This method is courtesy Jalie patterns.

You need Scotch-type tape, “Invisible Wonder Tape”, a few pins and a zipper foot for your machine.

Pictures of this zipper technique:

1. Mark bottom stop of zipper on RS (right side) with a pin.

IMG_2913


IMG_2914


2. Put a square of tape on the WS (wrong side) over the pin. This stabilizes the knit fabric and prevents distortion.

step5


3. On RS, put zipper face down, reversed ( pointing to bottom of garment) on the front, aligning bottom stop with mark.

step3-5


4. Be sure you are over the tape that is on the other side, this stabilizes the bottom of the zipper. From the RS, stitch across the end of the zipper, right next to the stop, taking only 3 or 4 stitches, and back stitch. Remove the pin.

step6


5. Now, slit the front very carefully from CF (you should have this marked) at the neckline stopping about 1/2″ above the stitching at the end of the zipper, and then make angled cuts to the bartack. Crux move: you need to snip to the stitching, angling your cuts to the exact end of the stitching, like this —

step7


6. For the next step of actually sewing the zipper tape to the fabric, a nifty notion called Wonder Tape is very helpful. It is washable, and really keeps knits from distorting during this step. Apply the Wonder Tape to the RS of the zipper.

IMG_2922


7. Peel the backing off the Wonder Tape, and turn cut edge at the “v ”, and press along the zipper edge to secure, making sure there is no distortion. Stitch carefully, starting exactly at the apex of the “V” cut. You can use the zipper foot to get nice and close to the coil if you want.

IMG_2924


8. Finish both sides of the zipper. If you have been careful, you’ll have a nice, even opening like the photo below.

IMG_4459


Do you want to change the collar?  I think the collars with these patterns are lame.  They are too wide and uncomfortable. I much prefer a binding.

Measure the neck edge of the collar pattern piece, and cut a strip of your fabric (contrast or main) that length, to what ever width you want of binding, x2 as you’ll be folding, plus 2-1/4″ seam allowances. Fold strip in half longways, right sides out. Mark CB and match up with RS CB on the jersey. Your binding will be smaller than the jersey neckline. Cut with the stretch going longways.

Sew front/back together at shoulder seams. Make CF is marked: I use a tiny snip and then pins to mark the centerline. Slit front on center, about 2″. Now, put on collar binding. The, put in zipper. Adjust zipper length so that the stop is about 1/4″ below top of collar, and install zipper using the above method. You can top stitch an anchor on the collar, or all the way around.

Armhole binding. Cut your binding strips the same length as the armhole plus seam allowance, or just a hair smaller.

Have fun!

Common Zipper Problems

With most zipper repairs, it comes down to being able to diagnose the repair and having the correct part, if it can be fixed. Today we are going to look at some common zipper problems.

IMG_4980

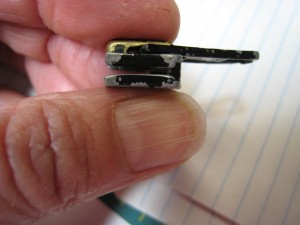
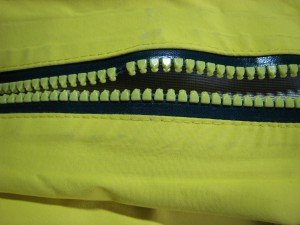
Here, the plastic around the male pin at the bottom of the zipper has completely worn away. The zipper pin will thread into the slider for a while, but it will become more and more difficult as time goes on. This cannot be fixed. The zipper must be replaced.


IMG_4988

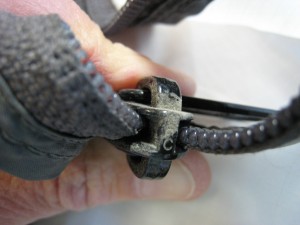
This zipper slider is bent. Even a very slight amount of bending will affect the meshing of the zipper when you zip it. If the zipper itself is not damaged, a new slider of the correct type can replace the bent one. {sidenote – squeezing the zipper with pliers to “fix” it is a stopgap measure only}


IMG_4995


The grab tab on the zipper pull has broken off. This also can be fixed by replacing the slider with an intact slider of the correct type.


IMG_4983


Here, the male pin has popped off the tape of a waterproof zipper. This cannot be repaired and requires a zipper replacement.


IMG_4985


This zipper slider shows classic signs of wear. Notice the very slight bending and the worn outer “corners”. It is very likely that the zipper was not zipping; not staying together when zipped.  This is an easy fix with a new zipper slider of the correct type.


IMG_5005 IMG_5004


Here, the box has broken off the bottom of a separating jacket zipper.


It is supposed to look like this.

This is not repairable. The whole zipper must be replaced.


IMG_4981


Missing tooth on a vislon (tooth) zipper.

This is not repairable and requires a whole new zipper.


IMG_5003


Missing tooth on a waterproof vislon zipper.

This is not repairable and requires a whole new zipper.


That’s all for today. I will keep taking photos of zipper problems and post Part 2 later.

Tent Tips: Care and Selection

I repair dozens of tent zippers every season. Many people seem surprised when their tent zipper fails. Zipper slider failure is extremely common, and it is caused mostly through normal wear and damage.

The most common symptom  of slider failure is that the zipper coil will not zip closed,  or separates at a certain point on the zipper. This is typically an indicator of a worn slider. Worn sliders can easily be replaced, provided they are not an off brand. Damaged (bent) sliders will also exhibit this behavior. Coatings on zipper sliders are not particularly durable and wear down easily.

If your tent zipper is not zipping, the slider most likely worn from dirt and grit, or it has been bent from hard use, getting stepped on, being squeezed with pliers, or similar. The whole zipper does not need to be replaced, just the sliders.


A good example of how dirty tent coil gets.

A good example of how dirty tent coil gets. This tent had been hosed down but they did not hose the zippers out.

Here are important tips on tent care:

KEEP YOUR ZIPPERS DIRT, SILT, AND GRIT FREE!!!! Depending on where you camp, shaking/sweeping the tent out may be sufficient. More likely, you will want to clean your tent. Set it up in the yard, and take a hose to it. Do not use any cleaners or brushes. A rag made from an old towel will pull micro dirt off the floor really well. Wipe down the seams and spray the zipper coils with the sprayer. Dry thoroughly.

dog ran through tent door

Door Damage, dog ran through tent door

TRAIN YOUR TENT PARTNERS. Do not leave the door lying in the dirt. Watch the kids and the dogs. Open doors fully, do not leave zippers part way open. Roll up the tent door and keep it out of the dirt.


DO NOT FORCE ZIPPERS! If there is a fold of fabric caught in the zipper, work to gently free it. You can pull hard enough on the slider to damage the slider, the coil, or tear the fabric.

CLEAN YOUR TENT: Hose tent off and let air dry, thoroughly. If tent is gritty, use a sponge or rag to wipe dirt off. Never use a scrub brush, harsh detergent, or put tent in the washer. Pay special attention to hosing off the zippers. Note: I have been hearing good reports from people who have washed tents without detergent in a front loader  (non-agitator) machine. I have not tried this myself but you are welcome to experiment. Agitators can tear doors and ties downs, and detergent will strip the waterproofing. YMMV.

NEVER PUT A TENT AWAY DAMP: This is the number one cause of mildew, which eats away at the waterproof coating on your tent. There is no fixing mildew.

Commonly asked questions about tent care, and a few comments.

Lubing zippers? If you want to use a dry lube, McNett sells a zipper lube. Do not use Vaseline or any grease product on the zipper. It’s better just to keep your tent zipper clean and grit free.

Re-waterproofing the fly? Both Nikwax and Grangers’ make excellent products to renew waterproofing and/or DWR (Durable Water Repellency). Grangers’ also makes a combination waterproof/UV protector for fabrics. Order from www.mgear.com  I have not had good success with “K-kote” but others have tried it. It might be easier to just pitch a blue tarp over the tent if the fly is leaking that bad.

Smelly tent? It’s one of two things (unless it got skunked or peed on by a dog): mildew, or hydrolyzation of the polyurethane coating. Neither is fixable. Mildew is from moisture, and hydrolyzing of the PU is due to age and exposure to environmental conditions.

Zipper separates when the tent is staked out taut? Don’t stake it so tight. If it is impossible to not stake it taut without a zipper pulling apart, that is a design flaw. A new zipper or a beefier is not going to fix this.

Floor leaks? You can try to recoat the floor with K-kote. It is a really messy project and results are iffy at best. My suggestion is to cut a piece of blue tarp the same size as the tent floor and place that down inside the tent.

Make a new fly? Absolutely not. If your friend lost the fly when they borrowed the tent, make them buy you a new tent. If  “the rest of the tent is in good shape, it’s just the fly that’s old”, the rest of the tent is NOT in good shape; it’s just as old as the fly. The body of the tent may  not show the age that the  UV-baked fly is showing, but trust me, it’s old.

I’m going to close with my soapbox: “You really do get what you pay for”. Yes, I know you’ve camped successfully for years in your $99 box-store special. I’m happy for you and glad it’s working out. However, here is why I don’t love them:

  1. Low thread count fabric. It’s not very dense which is less weather repellent
  2. Fewer stitches per inch out of really crappy thread – seams are not as strong
  3. Off brand zippers have really soft metal zipper sliders that wear out faster
  4. Blue tarp floors
  5. Minimal fly

I’ll discuss how to identify sliders for replacement later on. Until next time…

Bad Things That Happen To Good Gear

I suppose I should keep a tally but I don’t.

The Top 10 Bad Things That Happen To Gear, in no particular order. Outside of normal wear and tear, more or less…

1. Melting (backed into the stove, embers, dryers, heaters…)

2. Ultralight gear breaking from being ultralight.

3. Dog or other animal ate it.

4. Tore a hole in it. (tree branches #1 cause).

5. Saggy pants splitting at the crotch (wear a belt, dude)

6. Straps pulling out of seams (mostly poor construction, more on this later).

7. Zipper sliders getting squashed.

8. Zippers breaking from dirt and general wear.

9. Zippers breaking from not being threaded correctly at the bottom.

10. Lack of care: salt and dirt degradation of fabric

Now, for normal wear and tear –

  1. Worn down zipper sliders.
  2. Worn plastic on male pin at the bottom of a zipper.
  3. Worn out Velcro.
  4. Worn out elastic.
  5. Aged fabric – worn through, UV degraded, weakened
  6. PU  and other treatments/coatings flaking off

Zippers, Velcro and elastic are all fixable, more or less. The rest? Not so much.


My Machines, Part 3

{yes, I still have a few more}

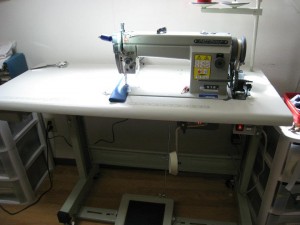
This is the workhorse. I couldn’t do what I do with out it. Silly me, I was advised to get this machine a long time ago, but being a cheapskate I procrastinated for years. I fought with an inappropriate machine for way too long.

Artisan Needle Feed with quiet servo motor

Artisan Needle Feed with quiet servo motor

This is a no-frills needle feed machine.  What is a needle feed?  The needle “walks” (feeds) as it pierces the fabric, moving the fabric back in conjunction with  the feed dogs. This makes for incredibly even feed of varying weights and thicknesses of fabric at any speed. Unlike a walking foot machine, the  presser foot does not walk; only the  needle does.  It does not have an automatic backtack or thread cutter, but that’s fine with me. It has a nice, quiet servo motor.  The needle feed has an incredible range. I can sew ripstop to Cordura with webbing. The key is to have the correct needle and thread.

If you want an industrial machine, and do not have someone local you feel good about, please contact Ron Anderson of A1 Sewing Machines

Last, for now, but certainly not least is my Singer Featherweight. IMG_4948


This machine used to belong to my mother-in-law, who was a very talented quilter. She also taught me to quilt; not like I do much of that lately but that is beside the point. This machine is hugely sentimental for me as it is the only thing of hers I got when she passed. And truthfully, this one belongs to my husband’s sister, but she has given it into my caretaking. There was another one that was to be mine, but…(insert family drama).  A funny story about this machine: I brought it up from the SF Bay Area to Washington shortly after 9/11. TSA officials didn’t like this item at all and I was pulled aside for the full meal deal bomb residue wipedown – for a little old lady’s quilting machine.

Coming up – more about different industrial machines, and “what machine should I buy”.

My Machines, Part 2

Sergers

I have the luxury of two sergers. Sergers are a wonderful tool for working with knits and finishing fabrics.

IMG_4630This Babylock may qualify as an antique. It certainly is of the first generation of sergers that came out for home use. I purchased it in 1987 and it still going strong. I’ve probably used it on hundreds of fleece items at this point. It is a 2/3/4 serger in that it will do 2-thread rolled hem, and both a 3- and 4-thread stretch seam/edge finish.


36268_492350889711_4849173_nThis is my Pfaff Coverlock that does several varieties of cover stitch hemming, and this is what a coverstitch hem looks like:

coverstitch on wool knit

What is a cover stitch? It hems and finishes all at once. This machine has been invaluable for professional looking finishes on stretch items, softshells, fleece and more. This serger  also does everything the Babylock does, but I keep it set up just for coverstitching. I don’t use this machine tons, but I am glad I have it for the results it can produce.

triple coverstitch on fleecey baselayer

209930_10150147387229712_4185666_o

coverstitch on powerstretch

Part 3 coming soon!

My Machines, Part 1

I get asked a lot about what machine to use or buy, and what machines I have. I confess I have amassed somewhat of a collection over the years. Some I use more, some I use less. I have pretty much run out of room to add anything new to the stable.  There are  some specialty machines that I would love to have, but needed something three times a years doesn’t necessarily justify the expense or the space.

Some things to consider are that many machines have a limited range of what they can do either in terms of specialty work or the materials that can be handled. With one  partial exception, there is no machine that can do it all. So here is what I have currently:

IMG_4629Bernina 1130. I purchased this machine in 1987  to replace a Viking 6000 that I burned the motor up on. For many years, this machine has done almost everything I have asked of it. It is limited by speed, and for heavy fabrics both by  piercing power and the inability to run heavy thread.  However, it is incredibly precise with beautiful stitches. I love the “needle-down” function, the ability to one stitch at a time, and the buttonhole. I don’t use it nearly as much as I used to, but for precision work, button holes and certain repairs it is still very handy. It has even survived lightning strikes to the tune of $300 in circuit board replacement.

IMG_4628This Rex walking foot has been a shop mainstay for many years. I purchased  it out of the nickel ads 15 years ago. It was a true “driven on Sunday by a little old lady” find.  While the foot is not as high lift as some other walking feet machines out there, it will handle just about anything tough I can stuff under the foot. It lacks real speed, and is not suitable for lighter fabrics. This video illustrates exactly what a walking foot aka compound feed machine does. Additionally, it is designed to run heavy thread and use big needles. Nowadays I use it primarily for repairs involving packs and heavy materials.

More about the rest of my machines soon!

Hoarding Information

When I was working on the new site, my graphics guy asked me, “why is keeping the Tips section so important to you?” The reply was simple: it’s not my information to hoard. Since the beginning of Specialty Outdoors, that has been my philosophy. Competition doesn’t concern me: I would much rather respect and support my professional peers, sharing a few tricks here and there, instead of worrying about whether they might steal ideas or customers. Heaven forbid helping the enthusiastic hobbyist to success with a project!

Here’s why I don’t hoard information. First of all, it’s not rocket science. It’s more a hammer-and-nail scenario. Most of my information I have either found online, in books, or through generous mentors and others willing to answer my questions. They weren’t hoarding: they gave it freely where they thought it could be used, and I do the same.

Sharing information was the very first lesson I learned when I got online back in… 90-something. I ventured onto Usenet, (rec.backcountry) posted my services, and was immediately and thoroughly flamed for advertising on a non-commercial board. Oops. I didn’t know any better as I had read about Usenet in Better Homes and Gardens, of all places. Anyway, some kind soul, and to this day I do not know who it was, emailed me and let me know that the way in was to participate. So I did – advice on repairing gear, cleaning gear, where to find fabrics and other tips, with a one line signature. It has been been fun being a resource, and of course people think of me when it’s out of their comfort zone to do some work.

But – I’m not going to do your homework for you. Please, don’t be lazy as it’s a real turn off. The most common example is someone who wants to do small scale manufacturing, finds me online, and wants me to tell them everything I know so that they can get started. Here’s what I tell them: You need this book. I read it to get informed, and they can too. The author, Kathleen Fasanella, shares her knowledge freely and tirelessly. Don’t email me asking where to get something. That is why there is a sources page!

Kathleen and many others have been great role models  and mentors to me. I am forever thankful, and do my best to carry on the tradition. Thank you to Kathleen, Joe, Judith, Kevin, Patrick, Patrick  and Greg… the range of knowledge you have shared with me has been immense and I am ever grateful.


Keeping Technical Clothing Clean

I’ve heard it many, many times:

“You are supposed to wash it?”

“I don’t want to ruin it by washing it.”

“My coat doesn’t keep me dry anymore but I have never washed it”.

Really? You think that sweat, grime, and dirt is GOOD for your clothing? Enough of my ranting. Keeping your investment clean a critical component to making it last. Salt, grime, sweat,  and body oils reduce the function of the properties that make your clothing special. Surface dirt affects the DWR (Durable Water Repellency), and the rest of it can clog moisture movement.

The days of Ivory Soap Flakes are long gone. Now there are excellent products out on the market that make keeping your clothing clean and functioning easy. The two main product lines are Nikwax and Granger’s. They both make a full line of environmentally friendly and easy to use laundry products specifically formulated for different types of fibers. You will want to read the label to be sure you are matching the right product for your particular item. There are down washes, soft shell washes, fleece washes and washes for hardshells and even ropes.

For hard shells, you will have the choice of a one-step or two step process. The steps are cleaning your item, and refreshing the DWR. The two-step process is washing first, then waterproofing.   I have not yet tried the newer one step products. If you opt for the two step process for your hardshell, I suggest using the spray-on for the #2 step, and not the wash-in. The reason to choose the spray on is that that you will not be coating the lining of your item with DWR, which, if coated, can make it feel funky and possibly reduce the effectiveness. Whether you go one-step or two, it is easy: just follow the directions on the bottle.

I wash all our shell clothing at the end of the ski season, and then again mid-way through. One additional thing you can do with your shells is to toss them in a low dryer for a few minutes without washing them. The heat reactivates the DWR, which is the treatment that makes moisture bead up on the outside.  WARNING: use a low dryer, not hot. Hot dryers are the enemy.  The DWR does lose effectiveness after time, due to environmental conditions, so you will want to renew it using the above instructions to wash and renew. You know if moisture is not beading up that it’s time.

You can do down items with down-specific products. There are two critical elements. The first is to only use a non-agitator washer like a front loader, and the second is drying your down. The drying is the critical element with down as it can take hours of air dry and breaking up clumps by hand to get your item fully dry.

A few other tips:

  • HOT dryers are the enemy. Avoid them at all costs. You can melt things and  cause seam seal tape to delaminate.
  • You can use “Shout” and similar laundry helpers to get grime and grease out. You can even use Simple Green or Dawn for things like chair lift grease.
  • Do not spend extra money for sportswear oriented laundry products. Just use your regular stuff with some OxiClean.
  • For handwashing, just use baby shampoo instead of Woolite. Milder, and cheaper.
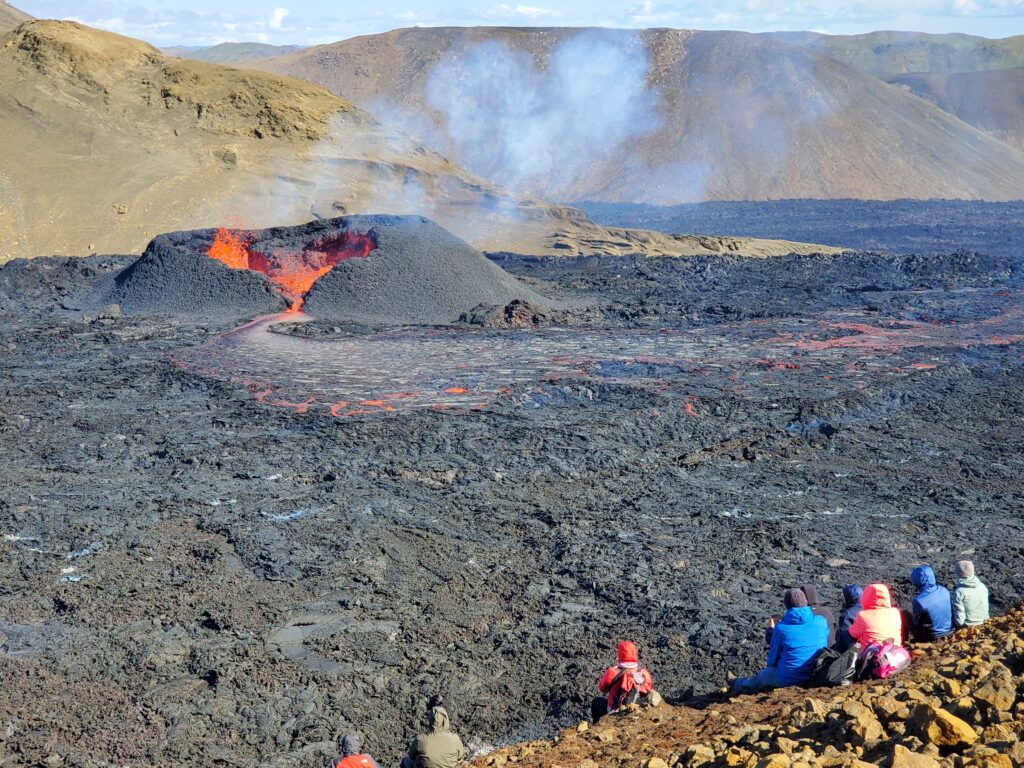


Demystifying Waterproof Breathable Fabrics

On the old site, I had a page about waterproof breathable fabrics. It was an attempt to decode the technical jargon and explain the differences in the various types of waterproof breathable fabrics. Two-layer? Three-layer? Monolithic coatings? It’s very overwhelming for we fabric tech people, much less the lay person.  Instead of trying to explain all this myself in a new, updated article, I am sharing this excellent article that is current and does a fantastic job of cutting through the BS and obfuscation that surrounds fabric technology. Even if you are like me and all the tech-speak starts to sound like Charlie Brown’s teacher (“wrrrrrr-wrrrrrr-wrrrr”), this one is highly readable.

The following article comes from Blister Gear Review,  an independent adventure sport website whose mission is to publish the most in-depth and honest gear reviews on the planet.   I really like this blog for its non-nonsense, real world reviews. My original intent was to reprint the article here, but at 5+ pages with images it’s easier to link. This article is a “must read” if you have any interest at all in understanding the technology that drives outerwear design and technical fabric development and use.

Outerwear 101

Excerpt:
2L vs. 3L Shells

Here is an important question when purchasing a shell: 2 Layer or 3 Layer? And does it really matter?

2L – The Original

2L garments are constructed with two layers; a nylon face fabric (generally with a DWR) that is bonded to a WP/BR laminate. 2L garments are always lined with some sort of lining fabric. These linings are generally made of thin nylon or mesh, and serve two purposes. First, the lining keeps the laminate from direct contact with the skin. This is important because the laminate generally has a plastic feel to it and can be quite uncomfortable.

The lining’s main purpose, however, is to protect the laminate. Even though the laminates are engineered to be resistant to fouling, without further protection of the laminate, its durability can suffer greatly. 2L garments are generally constructed with some amount of seam taping. Seam taping keeps water and wind out at the seams, but does not breathe.

2L outerwear dominates the market for many reasons. 2L construction lends itself quite well to making insulating garments, which dominate the consumer market. (People want their coats to be warm. Who knew?) 2L construction is also less expensive because the technology has been around much longer. The construction of the garments is easier because the lining allows many sewing options with less need for seam taping, and the design is easier because of the ability to work with a lining.

3L – Or, Why does this jacket cost $600???

3L garments are constructed with 3 layers: (1) a nylon face fabric (with a DWR) that is bonded to (2) a WP/BR laminate, which is bonded to (3) a tricot layer on the inside.

3L construction: blue = nylon face, yellow = WP/BR laminate, orange = tricot liner

3L construction: Blue = nylon face; Yellow = WP/BR laminate; Orange = tricot liner.

3L garments are not constructed with a lining and are therefore often shells. 3L pieces generally use the most advanced (and therefore expensive) fabrics and laminates. These fabrics make up some of the most technical pieces of outerwear available. Construction of 3L garments is difficult. Every seam has to be taped or welded, and every cut greatly modifies the look of the garment. Given that both seam taping and the fabric are extremely expensive, and construction is difficult, 3L garments can be costly pieces of outerwear.

So why bother to make (or buy) a 3L jacket, when you could just produce or purchase a 2L jacket?

There are a few reasons why 3L construction has gained a lot of momentum in the industry lately. First is performance: the addition of the bonded tricot liner increases the breathability of the garment. The tricot is hydrophilic and, as you sweat, the tricot preferentially absorbs your sweat and transports it to the laminate so it can diffuse out. Contrast this with a 2L garment, where the water vapor has to randomly bump into the laminate while navigating between your skin and the lining to diffuse out.

The next advantage is weight. 3L garments can be made without a lining, and therefore, save a substantial amount of weight when compared to their 2L counterparts.

The final advantage is the durability of 3L construction. The addition of the tricot liner adds a significant amount of support and protection for the laminate that is not present in a 2L garment. In short, a 3L garment will have better performance, with less weight, and be more durable than a comparable 2L design—albeit at about twice the cost.

2.5L – Or, What in the hell is a half a layer?

This is not a very common construction in the world of winter outerwear, but it is a common source of confusion, so we’ll briefly touch on it.

A 2.5L fabric is made up of two and half layers—sort of. It has a nylon face fabric (with a DWR), a WP/BR laminate, and then a printed lining. This printed lining is present for the sake of protecting the laminate, but does little to eliminate the clammy, plastic feeling of the laminate directly on the skin; hence the designation of a half of a layer. 2.5L fabrics are used on active rainwear because they are easier to produce and end up being lighter than 3L garments, though less comfortable.


Make Lycra Bike Shorts, Part 2

Time to finish the shorts by adding elastics. The quality of the elastic does matter. I recommend the 1″ no-roll for the waistband.

1" non roll elastic

1″ non roll elastic


Gripper elastics

Gripper elastics

For gripper, there are lots of kinds available from the suppliers at sources. The amount of stretch in each kind will vary so you will need to experiment for the correct fit around your thighs.

Do not use the pattern instruction numbers to cut your elastic, especially for the legs.  Put the shorts on sans leg elastic, and measure thigh circumference at the desired length of the shorts. Cut the elastic just a little bit shorter, or use the same number, allowing for overlap. This will give you a nice, flat, non-sausagey look.The elastic may actually be longer than the leg opening, not to worry – just stretch the lycra to put the elastic on smoothly.  For most people, the numbers given with the pattern instructions are way too short, and create a thigh elastic that is just too tight. Warning: you may have to experiment here to get the feel that is right for you. I recommended basting your elastic on first to check the length keeping in mind that when you actually stitch it, it may grow a bit.

Note: for all elastic installation, divide elastic and garment opening into quarters and mark/match up quarters, stretching elastic and/or lycra as you go to distribute stretch evenly.

For a nice finish on your gripper elastic:

serge elastic onto WS of legs

serge elastic onto WS of legs

1. Use wooly nylon to serge the elastic to the inside (WS) of the shorts leg.

2. Use a narrow zig-zag to stitch loose edge of the elastic to the WS of the shorts.


Finished leg elastic

Finished leg elastic

3.Turn elastic up, and then  stitch again on the upper edge of the elastic from the inside. Use a wider zig-zag, or a 3-step zig zag. View is from the outside.


For waist elastic, first check that shorts waist does not need altering in height, or fit. Ladies, this is a good time to adjust if you prefer a low-rise cut. Be sure and leave 1″ extra for the elastic install.  Now,  cut a length of 1″ elastic that feels comfortable around your waist. Pull it up a few inches, over lap the ends 1/2″, and cut. If you prefer to work with actual numbers, cut the waist elastic 60% of the desired finished size, then cut and over lap.

To install the waist elastic,  see notes above. Serge the elastic onto the WS raw edge of the shorts. Turn to inside, and topstitch on with a wide zig-zag. Be sure to pull on the elastic, flattening  the lycra to the waistband as you go. (pulling out wrinkles).

You should be done now – ride ’em like you stole ’em.

Make Lycra Bike Shorts, Part 1

IMG_4632Making biking shorts can be a rewarding project. If you have a serger, a machine that does a zigzag stitch, and basic sewing skills, you should find these easy enough. If you do not have a serger, do not despair as long as your machine has some zigzag options. If you need a reference, the Singer books on active wear, sergers or stretch fabrics are all very good.  Unfortunately, many patterns for cycling gear have been discontinued. You may find them on eBay, Esty or other venues for older patterns. Jalie has made 2216, their multisize pattern for shorts and jerseys, available for download for a small fee. Other patterns to look for are Stretch & Sew 313 and 312, Kwik Sew 1727 and 1233, and Green Pepper 404 and 409. Sometimes retailers will have old stock for sale.

flowerjerseyLycra Notes: Different lycras have different amounts of stretch. Swim lycra is thinner, and is less supportive, plus the quality will  vary depending on where you buy it. Swim prints are fun for a panel insert. Supplex lycra has a lot of give, and is  cool to wear in the summer. 9 oz,  called Beefy or Cordura lycra, is excellent, but heavier/warmer. It is very supportive, and very durable. You may need to go up a size in your patterns if you use this lycra as it is more dense and less stretchy than other types of lycra. There are some two way only lycras out there (rashel knits) These only stretch lengthwise; DO NOT BUY this kind of knit. Be sure the lycra is 4-way stretch.  If your local store does not have a good selection of lycra, check the Sources page.

Sewing notes: For seams, a serger with wooly nylon is best. You can experiment with flat-lock seams if you want, but I have not had good success with the typical 2/3 thread flat lock options. If you have a cover stitch machine, you can play with seaming it from both the RS and WS to mimic a top loop cover stitch. If you only have a regular machine for your seams, look and see if your machine does this stitch: __//__// ; it is an excellent stitch for seaming lycra.

Chamois/Pads: I used to make them from scratch but forget that. AeroTech Designs has a fabulous selection of chamois to choose from to put into your shorts. The pads come with installation instructions.

Cut: Cut the pattern according to directions. You may want to add extra length to the legs, or some additional seam allowance if you think you might want to make adjustments to the fit. Mark the pieces carefully as it is easy to get the panels mixed up. Because of narrow seam allowances, use a pencil to mark instead of snips. If you want to put in a print accent, replace one of the side panels. Do not put on the elastic at the waist or legs, or put in the chamois yet.

Fit: Once you have the shell of the short made, you can tweak the fit. I have a really small waist, so I always take it in from the hips on up. You can also make the legs longer or shorter, or lower the waist. Do not forget that you will fold over the waist and the legs 1″ when you add the elastic.

Installation of waist and gripper elastics is  covered in Lycra bike shorts Part 2

Note: This is an updated version of an article that used to exist on the original website

“How Did You Get Into This?”

I get asked a lot, “how did you get into this”? I’ve been sewing my whole life, starting with little blankets for my Breyer horses. I was first exposed to the outdoors industry working for Pat Smith and MountainSmith in 1983 when he was still in his garage and made the move to the  first facility. There,  I was a jill-of-all-trades batching packs for the sewers, inspecting packs, shipping and almost anything else. This was my first exposure to entrepreneurship, outdoors goods, industrial machines and production.

I cobbled together most of an apparel design degree but  did not complete it due to life happening.  I spent a lot of years doing custom clothing and bridal. When we moved to Spokane it was a great opportunity to quit that niche. Honestly, as a jeans-coated-with-dog-hair kind of gal, and piles of gear all over the place, it never was a good fit.  In the meantime, I was rummaging through the back tables in fabric stores as the first fleeces were just starting to come out.   A few patterns became available and I was able to outfit my husband and little boys with fleece garments. Adult fleece garments were spendy, and there was nothing for kids. In my quest to make affordable gear, I began to reverse engineer, tweak, and search out information that was not obvious for the home sewer.  This was noticed in the community, and a guy said to me, “you should be repairing gear”. What a great idea!

Spokane is the kind of place where small businesses are supported by the community, and we have a very active outdoors community here. It wasn’t long at all before I was getting known as “The Zipper Lady”.  I got the bright idea to build a website in ’97 or so, and established an online presence. Back then it was easy: hand code some HTML, add some links and voila`: a website is born.

I had read about Usenet in a women’s magazine and I sought out rec.backcountry. My Usenet newbie “hello, I can fix your gear” post did not go over well, and the trolls had a field day. I do not remember who it was, but I am ever grateful to the kind soul who emailed me and gently explained the Usenet faux pas I had made and let me know the correct way to (non) advertise on a non-commercial newsgroup. The key was participation and a one line signature, so that’s what I did. I helped people do their own repairs, told them where to find materials, advised them on gear care, and in return, they called on me when it was time for a pro. In addition, I was for many years a moderator and participant in the Gear Makers forum at the Backpacking.net site.

Throughout all this, the work started coming in. Whether it was a referral from a website, friend-of-a-friend, search engine, an outdoors club, or a referral from a manufacturer I confess I never kept track after I got to 45/50 states and some international work.  I now have arrangements with  local stores to collect local work, in addition to contract work and all the great folks that somehow find me. I’ve never consciously advertised, but I do believe that the willingness to share information and help other when I can contributes to things coming my way.  This leads me to thoughts on hoarding information, which will be posted another day.