

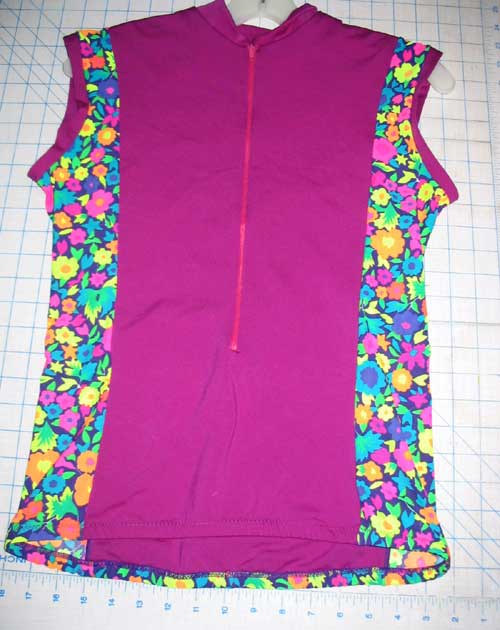
CB with the the Liberace jersey


(this post is resurrected from a page on the old site.)
To make a cycling jersey, I am assuming you will have some basic sewing skills. If you need a reference, the Singer books on active wear, sergers and stretch fabrics are all very good. For the most part, just follow pattern directions on the suggested patterns, but please review my notes for ideas and tips.
Where to get everything? Use mail order sources. Chances are slim to none that your local chain store will carry anything that you need for these projects. If you have a better independent store, ask if you don’t see what you need.
Suggested fabrics are wicking supplex, Malden Powerdry, wicking polyester knits. See the sources page for mail order retailers. If you want contrast patterns for your jerseys, swim lycra prints are fun to use but do not make a whole jersey out of swim lycra. Figure on 1/3 yard of 60″ lycra for contrast.
Patterns: Jalie 2216, Green Pepper 401 or 402.
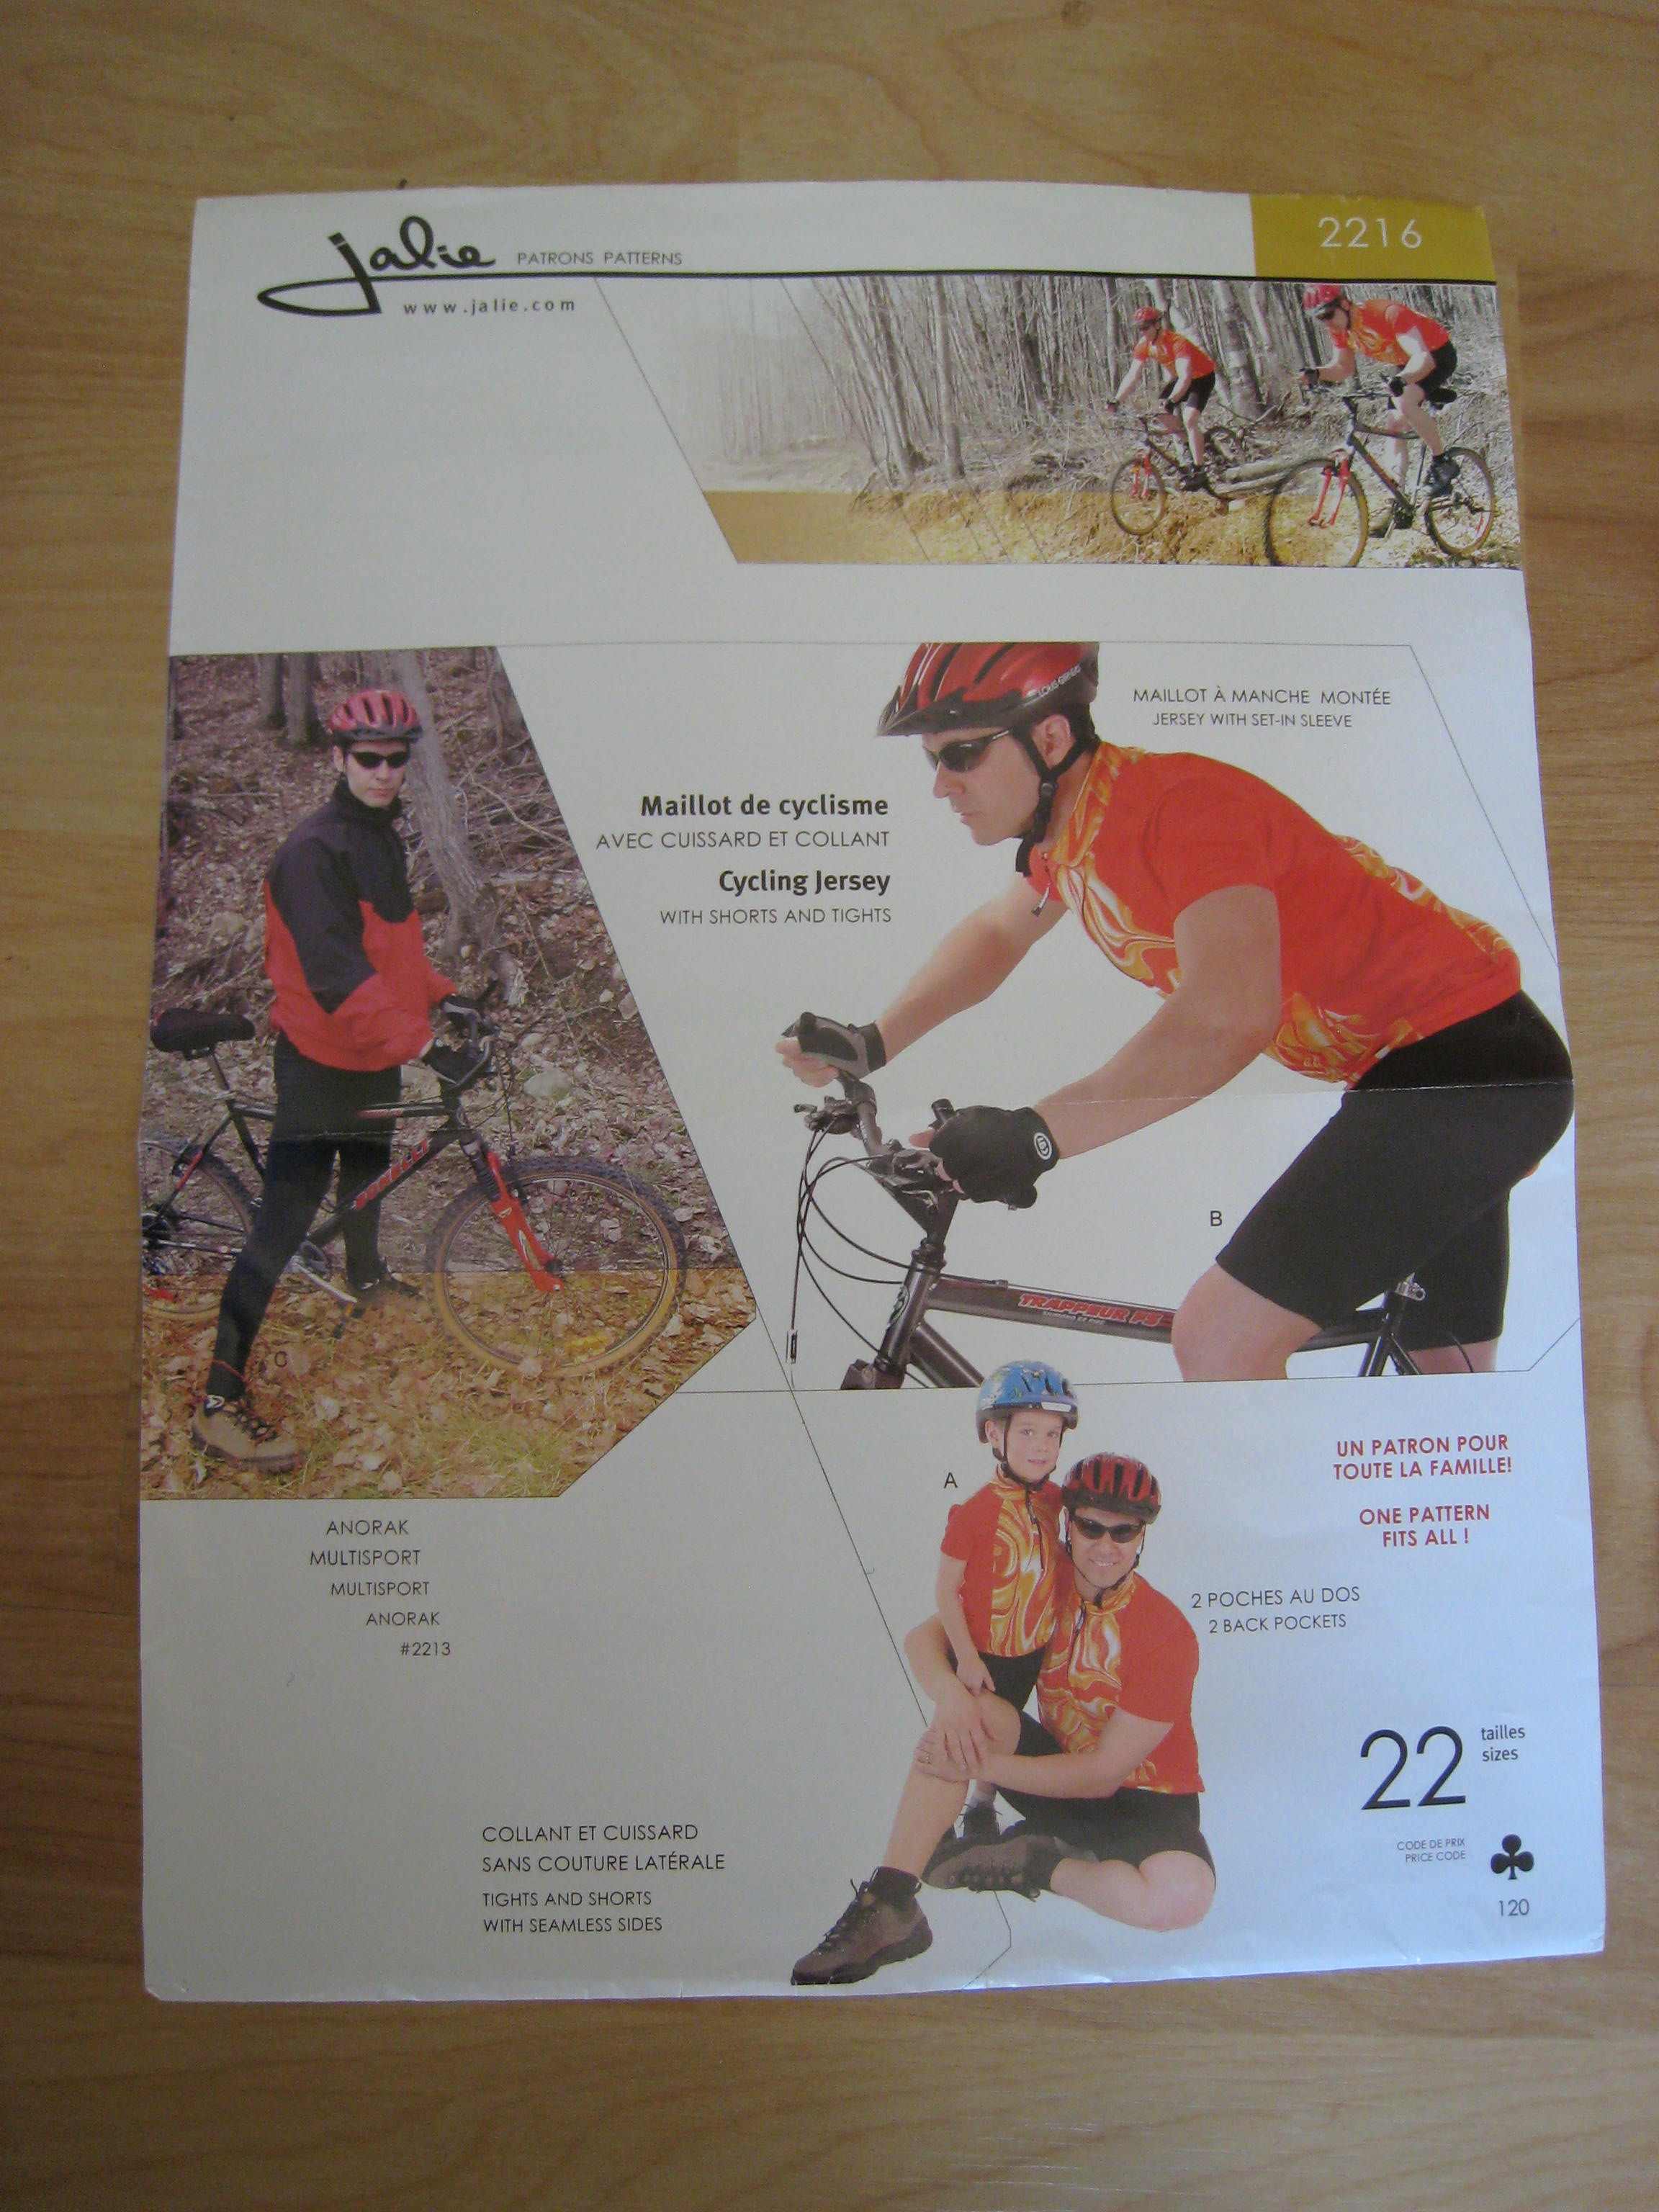
Jalie 2216
Sewing notes: For seams, a serger with wooly nylon in the loopers is best. If you only have a regular machine for your seams, use a good thread, sharp knit needles and a stretch stitch.
Look and see if your machine does this stitch: __//__//__//__ ; it is an excellent stitch for seaming lycra.
Fit and adjustments to pattern: Most commercial jersey patterns are fairly long. If you like your jerseys short, you will want to check the length and adjust all the panels of the patterns accordingly. The back pocket may need to be redrawn to match the adjustments. On the GP pattern you may want to alter the neckline. I have dropped the CF neckline curve about 1/2″ as it was too high for my liking. I also like my collars more narrow than the patterns provide.
Zippers: A 9″ neckline zipper suits me just fine. I use a regular dressmaker nylon zipper in matching colors. If you like to open your jerseys all the way down or close to it, just substitute the length you want. You could also use an invisible zipper but these require a special zipper foot.
Assembly Order: This is the order that I assemble the jerseys as I prefer to work flat as much as possible; this varies from the pattern directions.
1. Put zipper in front, using my method further down on this page. I do not pre-slit the zipper opening.
2. Put pocket on back panel
3. Sew side front panels to front, sew side back panels to back, sew shoulder seams.
4. Put collar on.
5. If you are going to put in sleeves, do them now, before you close up the side seams.
6. Close up side seams, hem sleeves or bind armholes, hem. I do not like elastic in my jersey hem.
Zipper tricks: The following is the best way I’ve found to insert a zipper into the front of a lightweight knit. This method is courtesy Jalie patterns.
You need Scotch-type tape, “Invisible Wonder Tape”, a few pins and a zipper foot for your machine.
Pictures of this zipper technique:
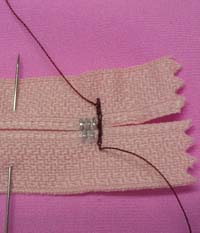
1. Mark bottom stop of zipper on RS (right side) with a pin.
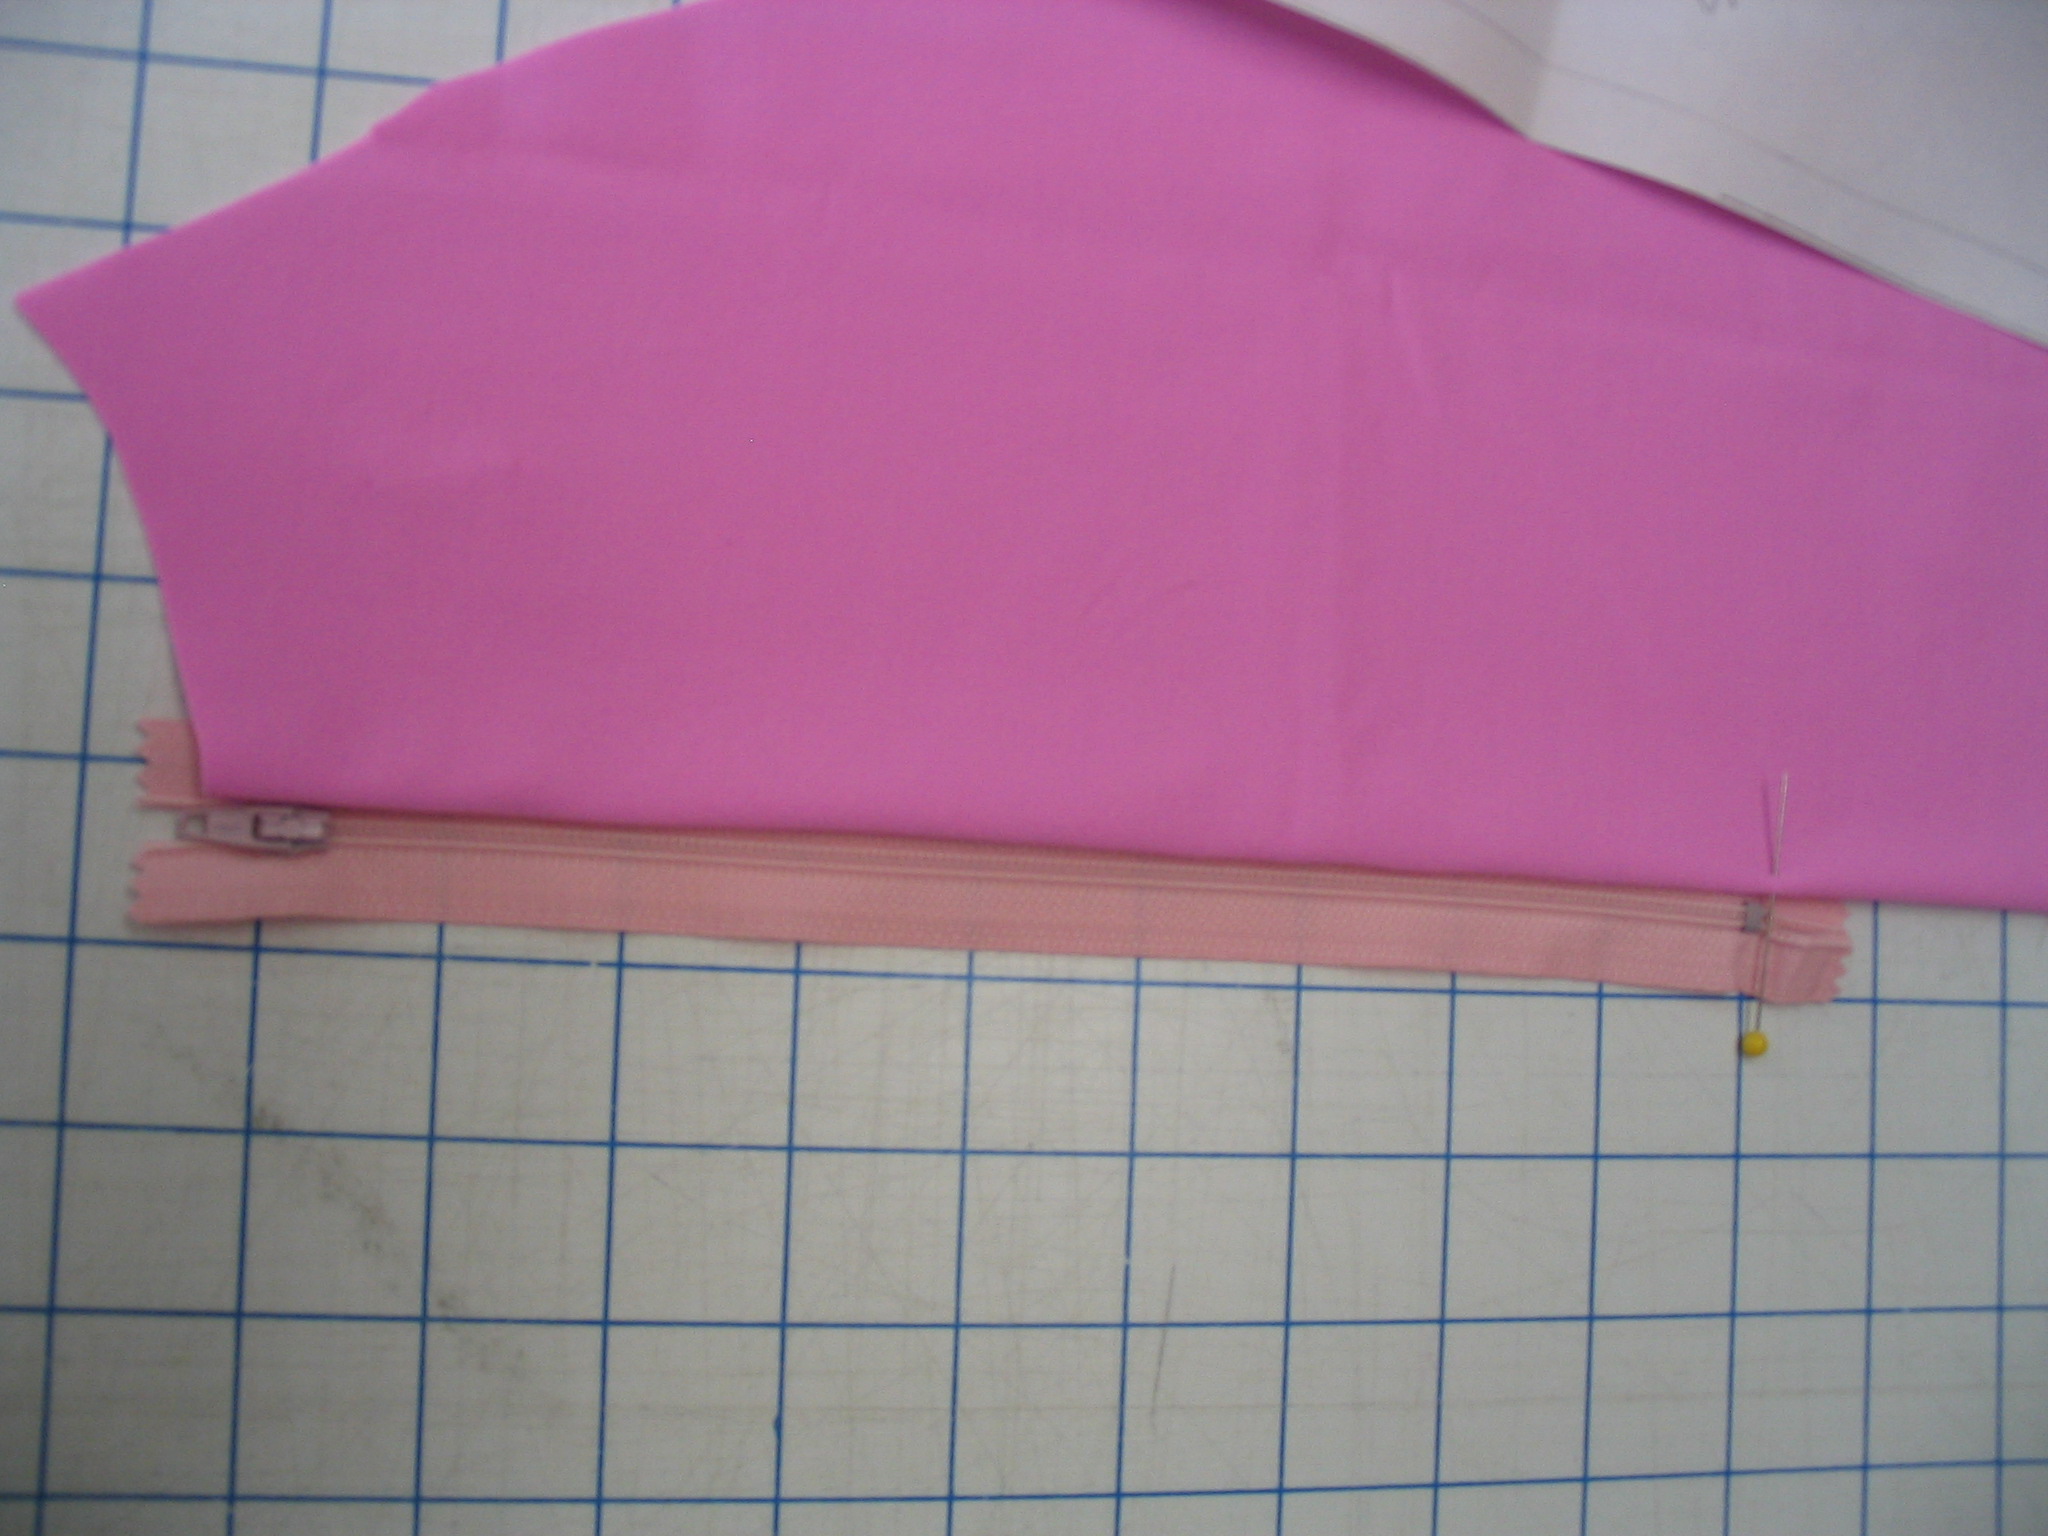
2. Put a square of tape on the WS (wrong side) over the pin. This stabilizes the knit fabric and prevents distortion.
3. On RS, put zipper face down, reversed ( pointing to bottom of garment) on the front, aligning bottom stop with mark.

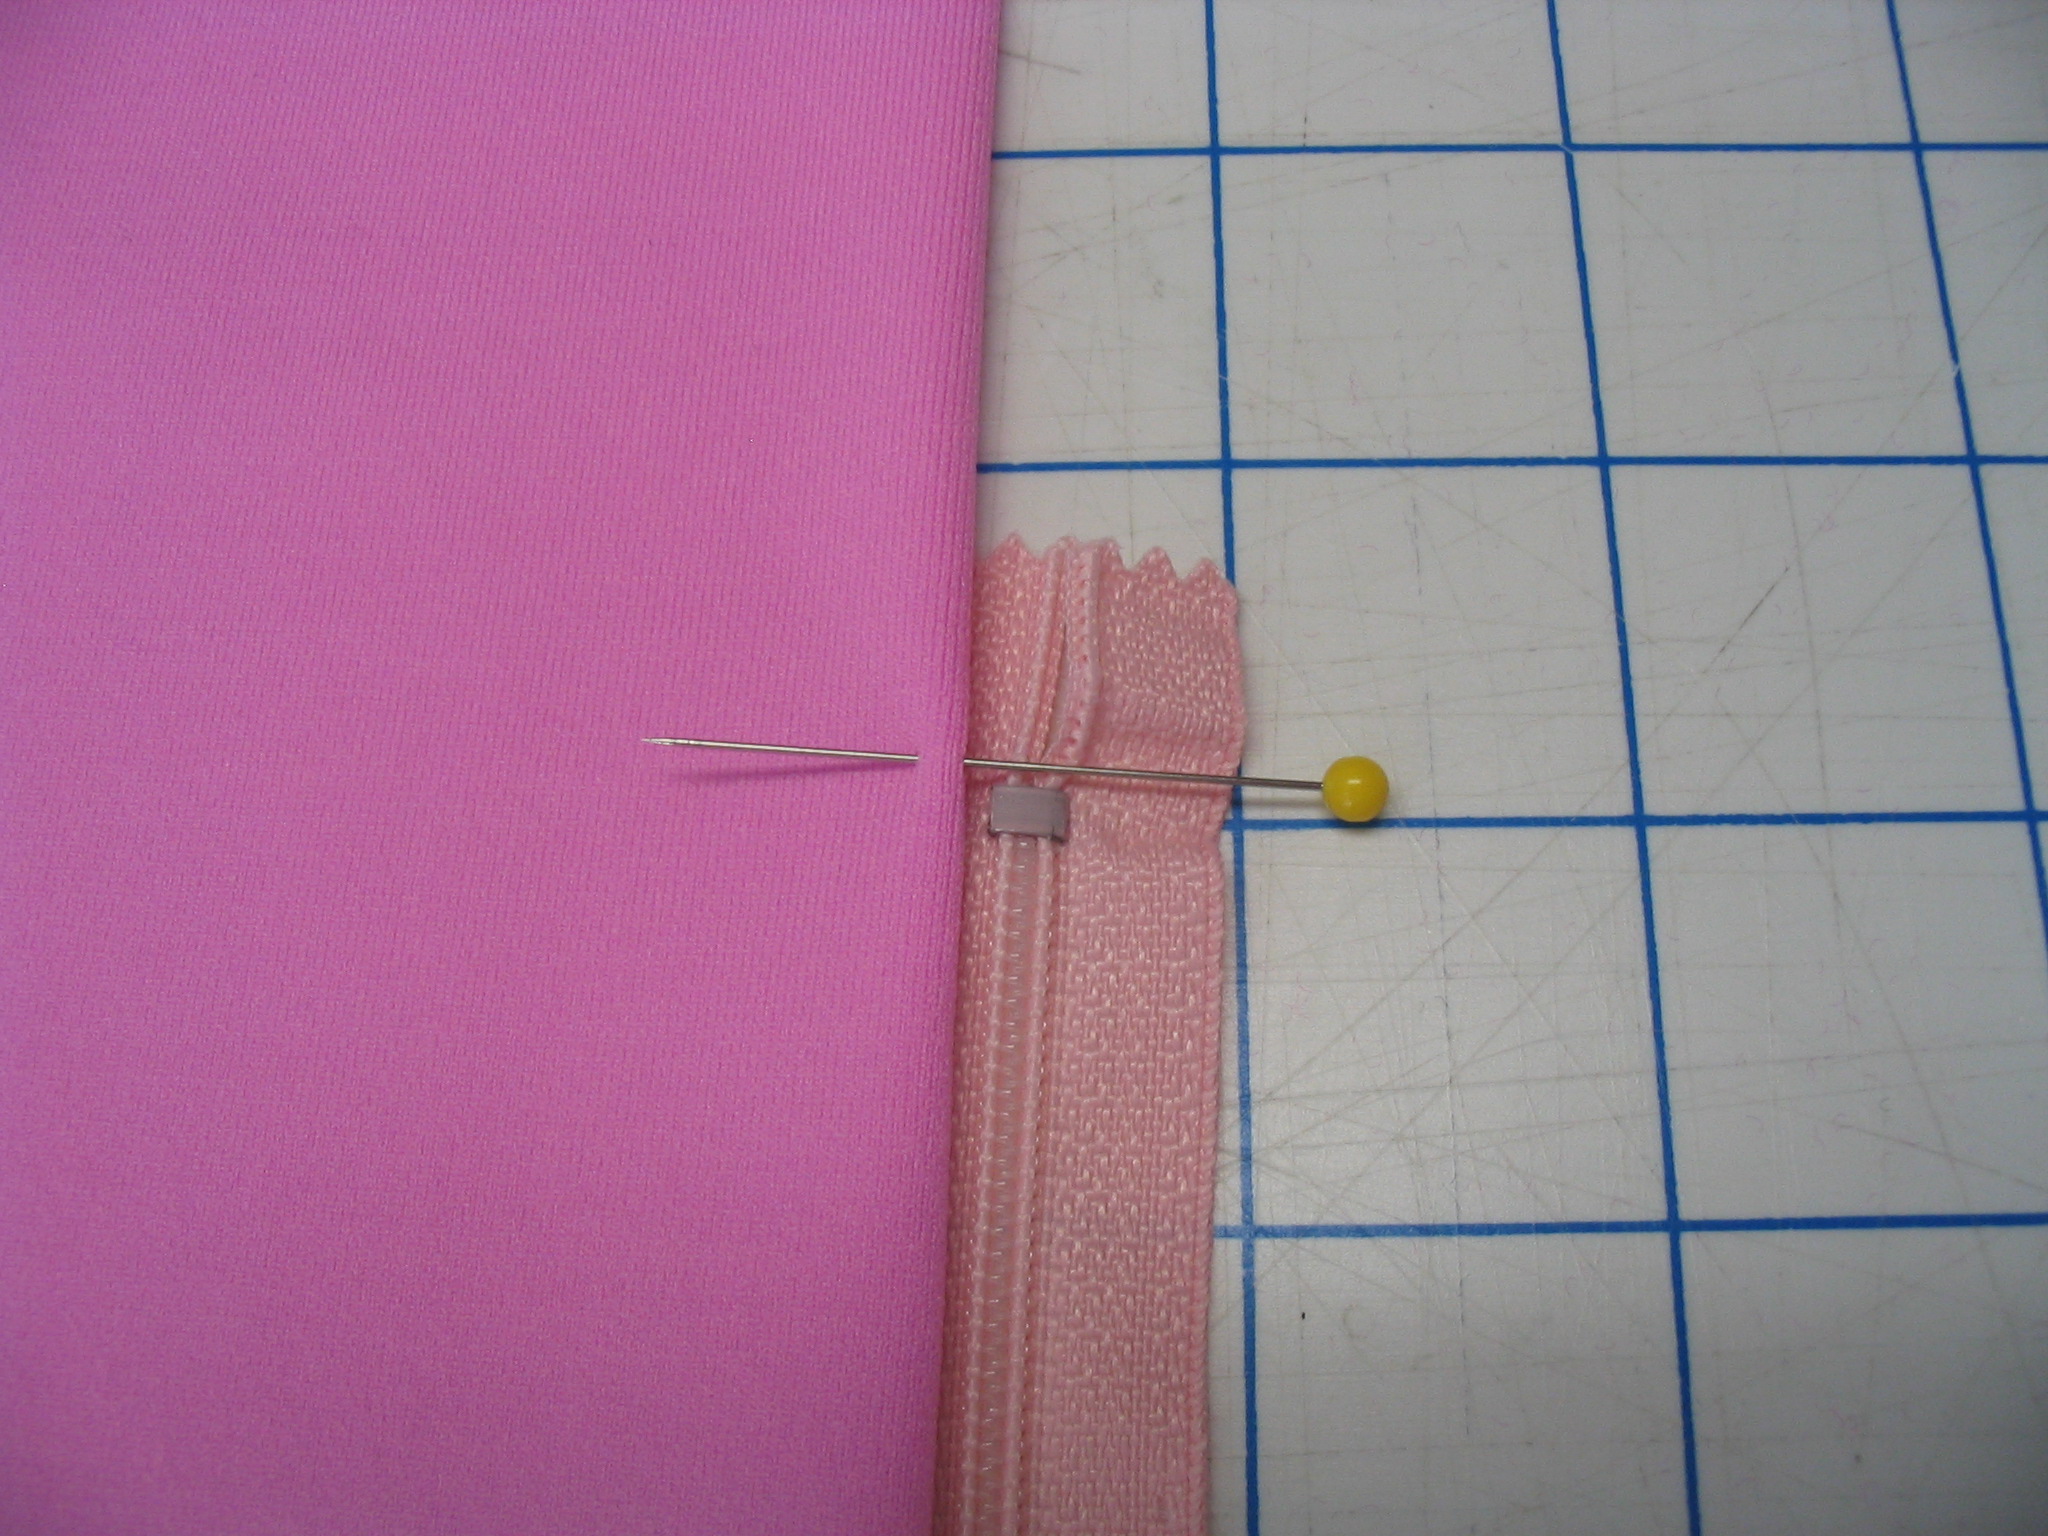
4. Be sure you are over the tape that is on the other side, this stabilizes the bottom of the zipper. From the RS, stitch across the end of the zipper, right next to the stop, taking only 3 or 4 stitches, and back stitch. Remove the pin.
5. Now, slit the front very carefully from CF (you should have this marked) at the neckline stopping about 1/2″ above the stitching at the end of the zipper, and then make angled cuts to the bartack. Crux move: you need to snip to the stitching, angling your cuts to the exact end of the stitching, like this —
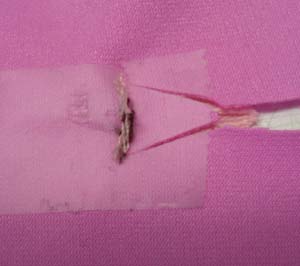
6. For the next step of actually sewing the zipper tape to the fabric, a nifty notion called Wonder Tape is very helpful. It is washable, and really keeps knits from distorting during this step. Apply the Wonder Tape to the RS of the zipper.

7. Peel the backing off the Wonder Tape, and turn cut edge at the “v ”, and press along the zipper edge to secure, making sure there is no distortion. Stitch carefully, starting exactly at the apex of the “V” cut. You can use the zipper foot to get nice and close to the coil if you want.
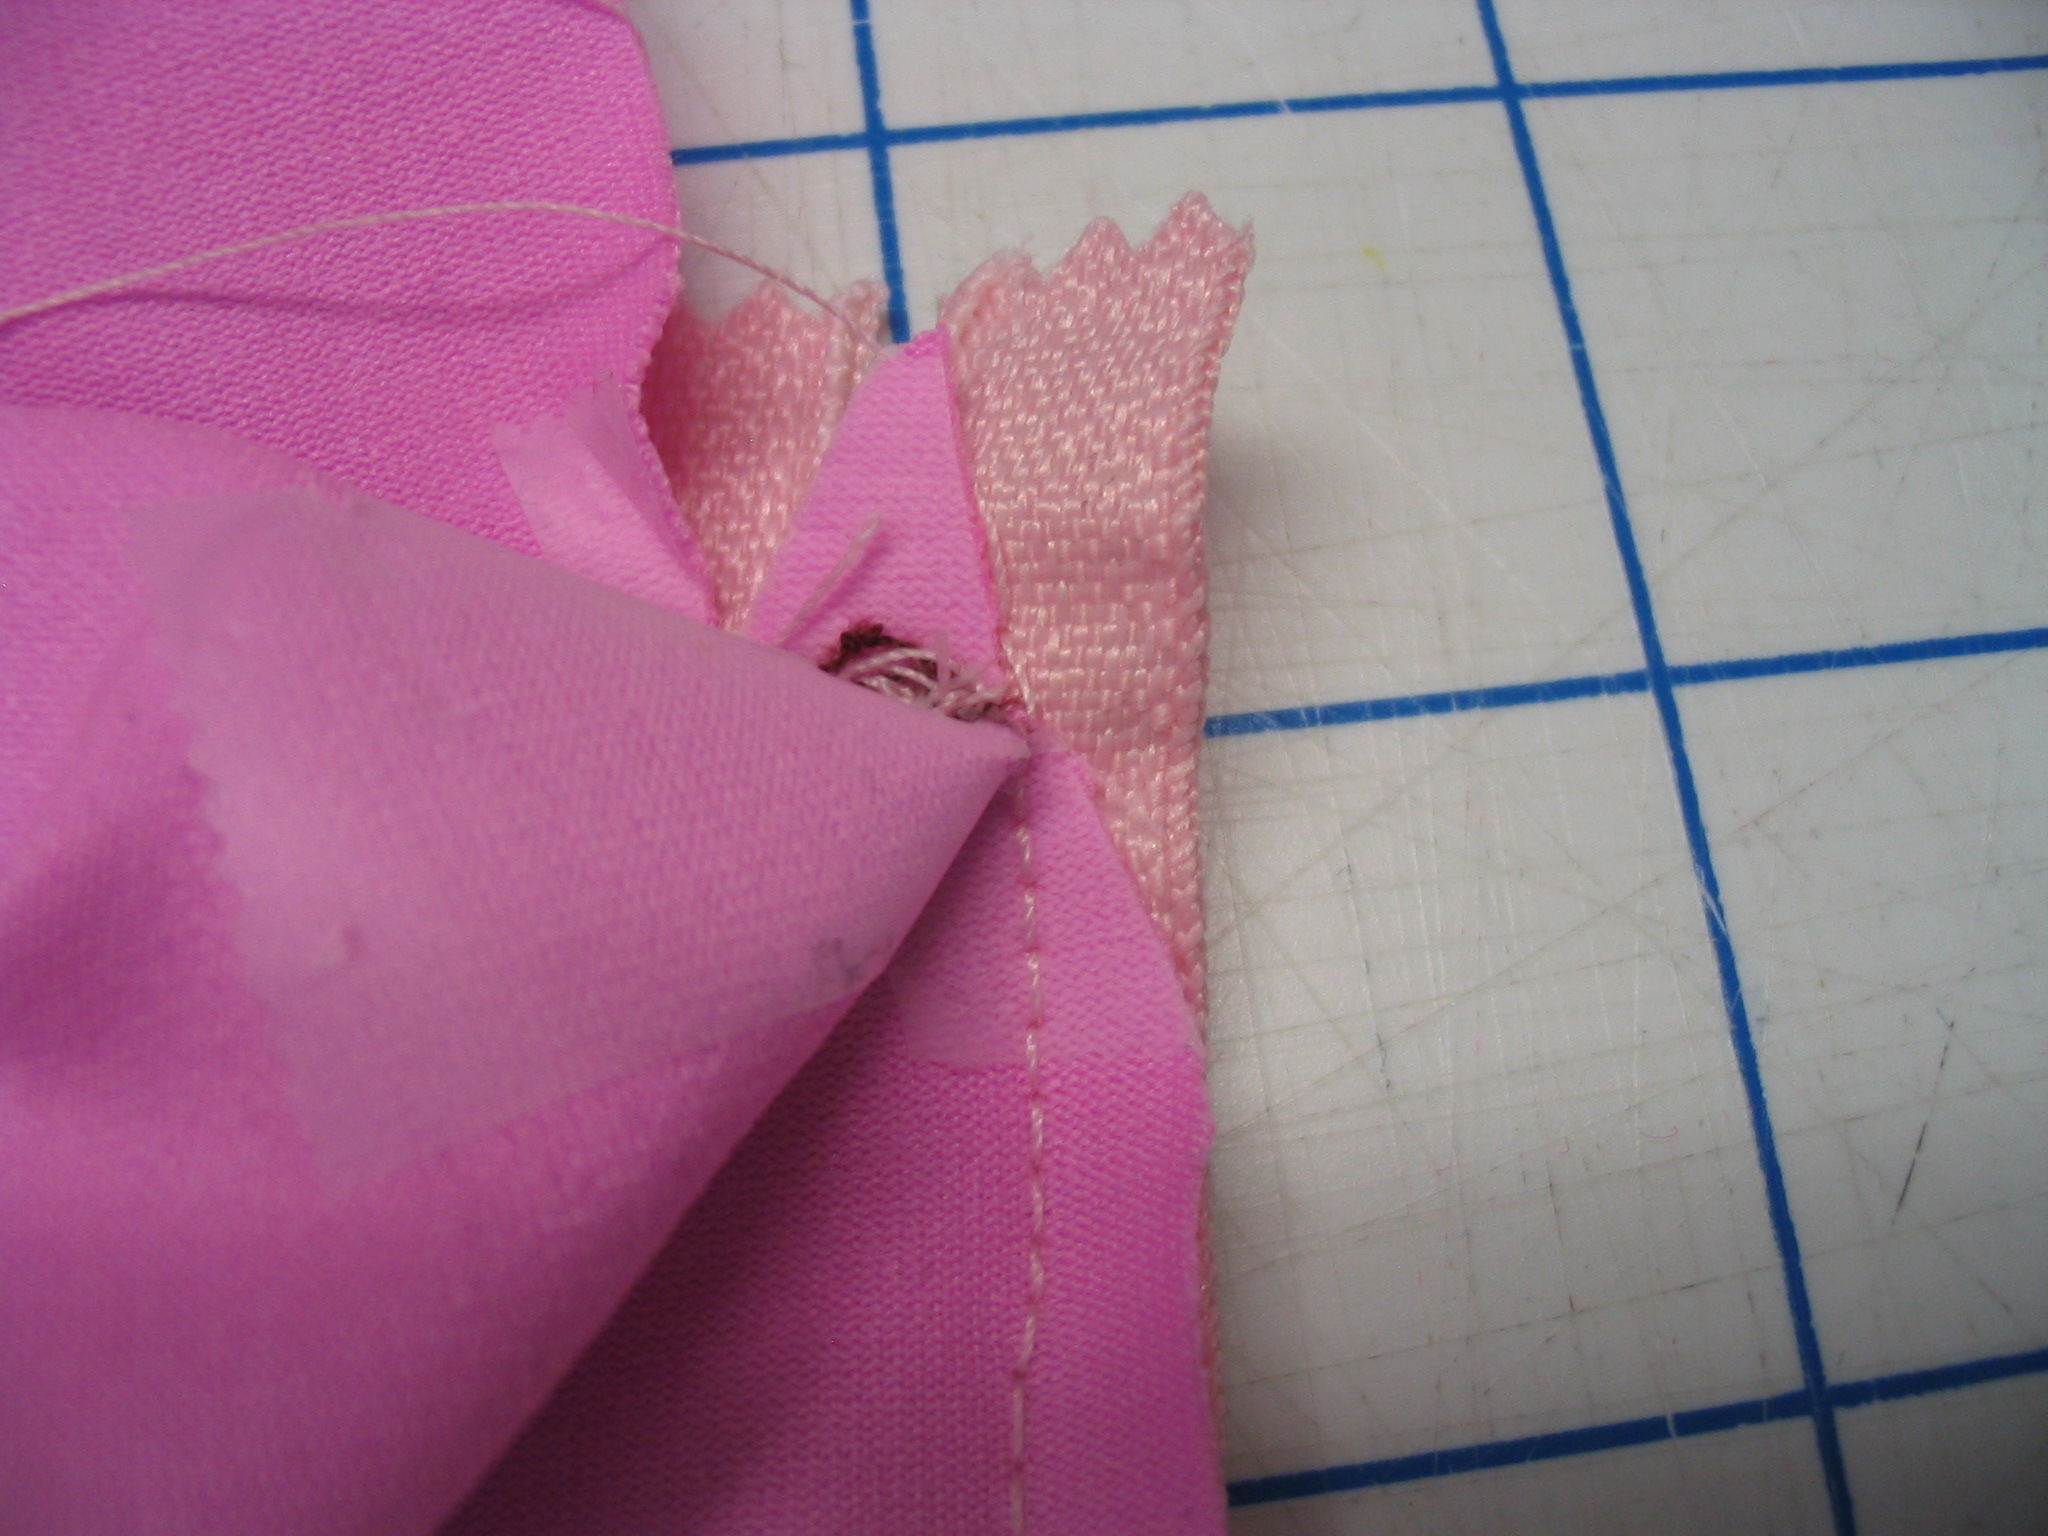
8. Finish both sides of the zipper. If you have been careful, you’ll have a nice, even opening like the photo below.

Do you want to change the collar? I think the collars with these patterns are lame. They are too wide and uncomfortable. I much prefer a binding.
Measure the neck edge of the collar pattern piece, and cut a strip of your fabric (contrast or main) that length, to what ever width you want of binding, x2 as you’ll be folding, plus 2-1/4″ seam allowances. Fold strip in half longways, right sides out. Mark CB and match up with RS CB on the jersey. Your binding will be smaller than the jersey neckline. Cut with the stretch going longways.
Sew front/back together at shoulder seams. Make CF is marked: I use a tiny snip and then pins to mark the centerline. Slit front on center, about 2″. Now, put on collar binding. The, put in zipper. Adjust zipper length so that the stop is about 1/4″ below top of collar, and install zipper using the above method. You can top stitch an anchor on the collar, or all the way around.
Armhole binding. Cut your binding strips the same length as the armhole plus seam allowance, or just a hair smaller.
Have fun!