Category Archives: Workroom Musings

Bike Bags Binge

Of course I’m making my own. I did very few orders before I closed the shop. Now, I’ve been experimenting and making some just because I can. It’s a THING now…you will see lots of variations from lots of different makers out there.

I’m fortunate in that I know professional bag makers out there who have been generous with tips. I’ve also got years of experience making all sorts of weird bags but not specifically for bikes.

The first one I made (if you can count as a bag) was for my husband’s BOB trailer, the first time he rode the Great Divide Route from Jasper AB to Seely Lake MT. He wanted something he could attach his solar panels to for charging, that also could hold a bit of gear:
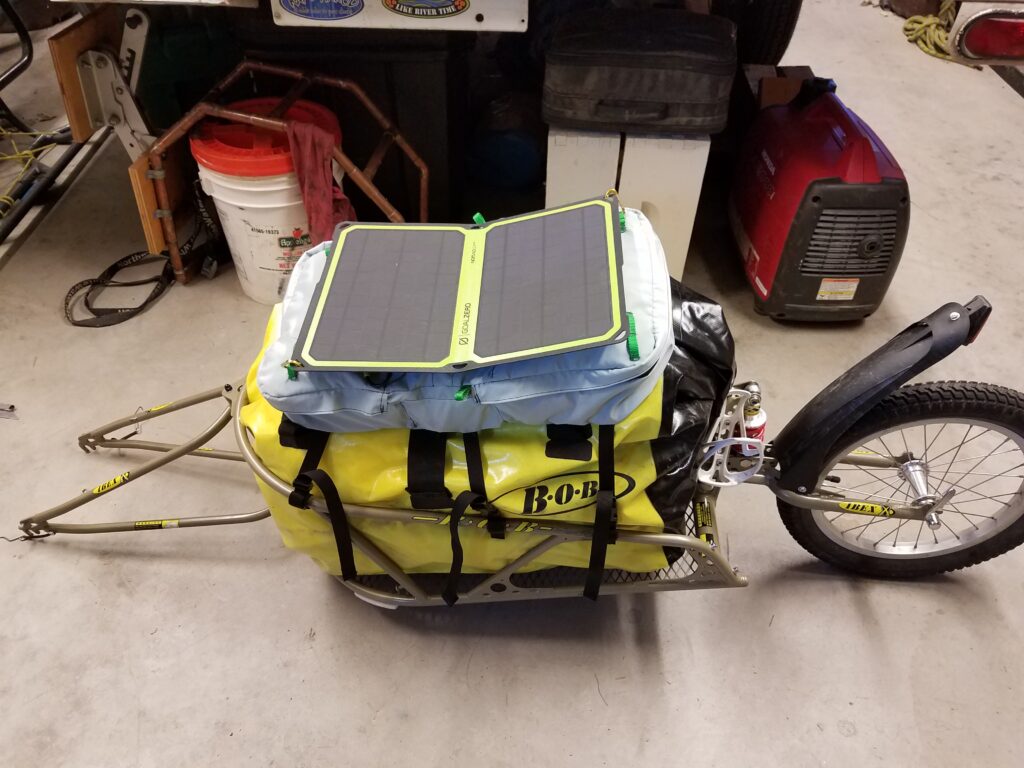
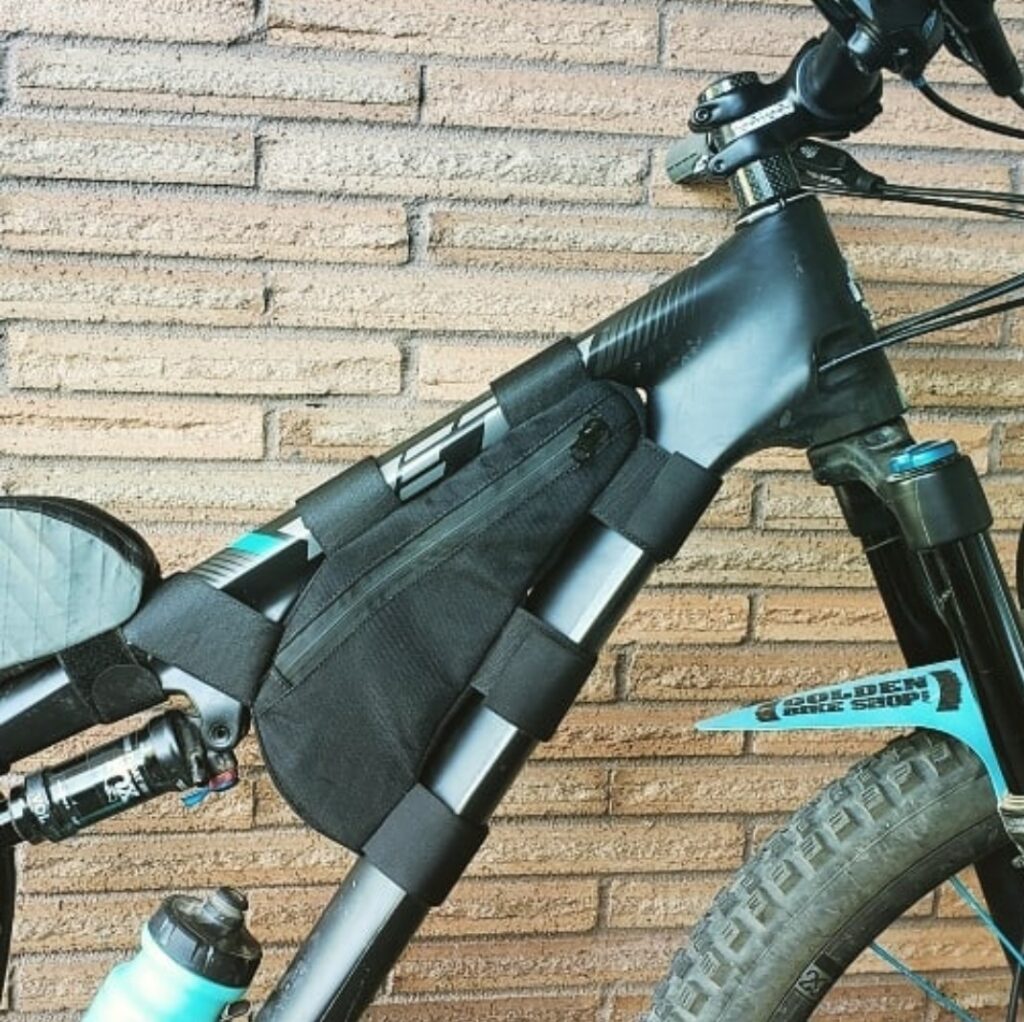
Then a friend asked for a small bag for a mountain bike. This one took some fitting skillz because of the shock on the frame:
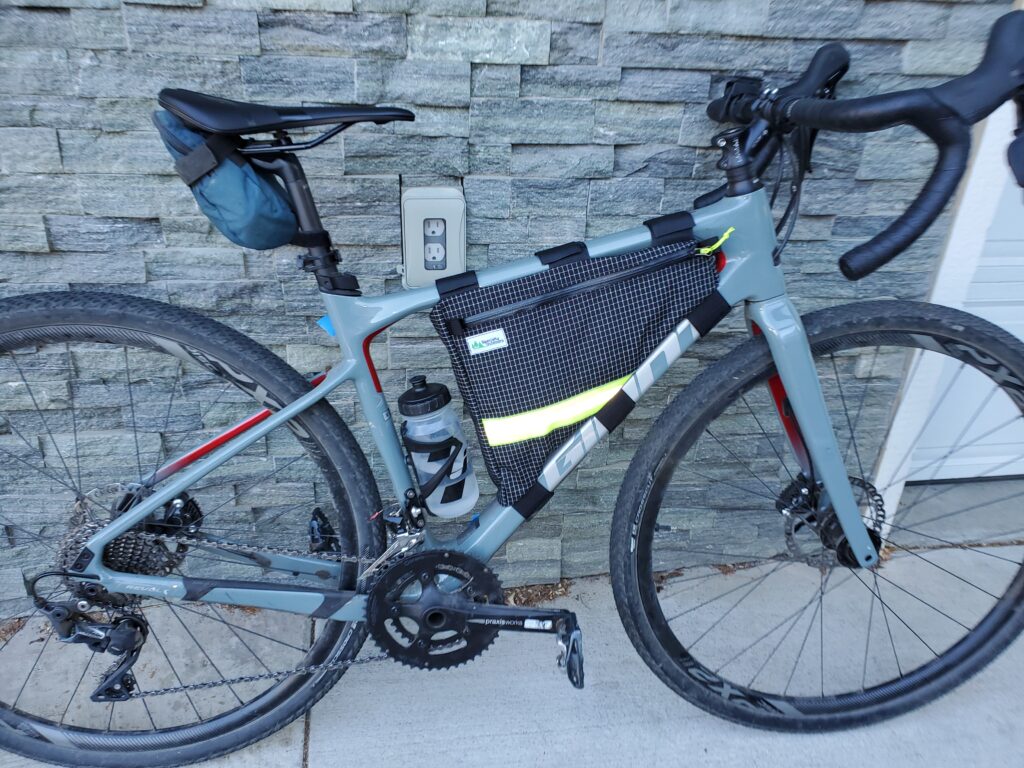
Then it was time to get a little more serious. I picked up a gravel bike, and all the cool kids had custom frame bags. This was my first attempt at a custom fit triangle bag:
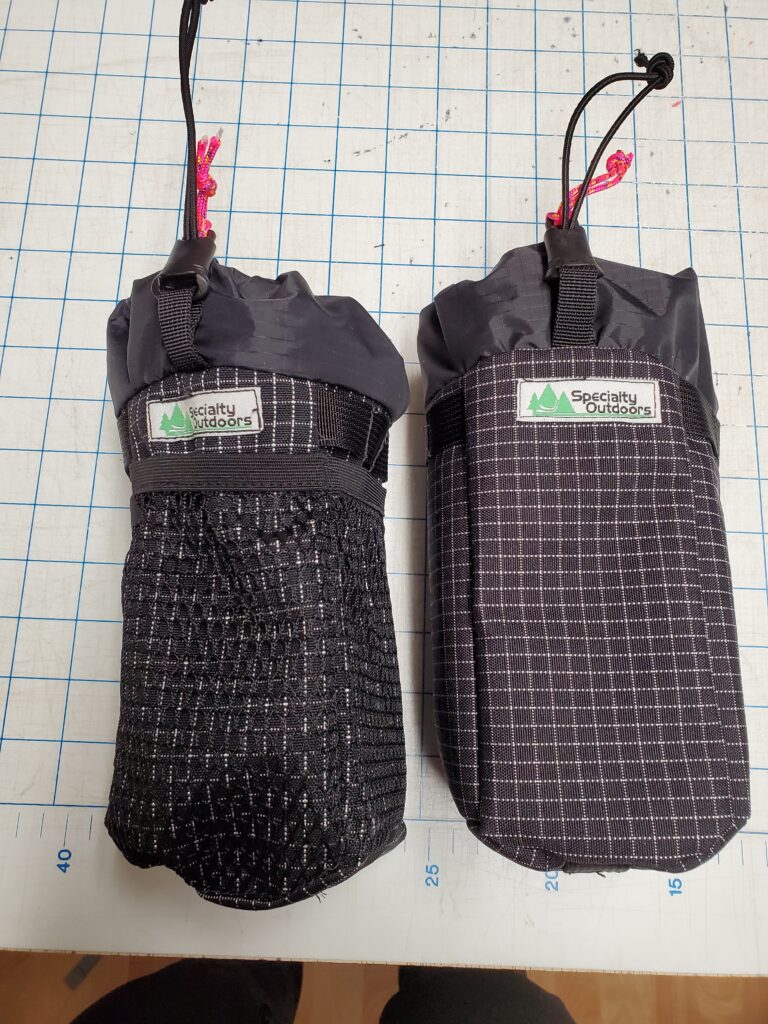
And then of course I just had to make matching snack bags:
(tutorial here)
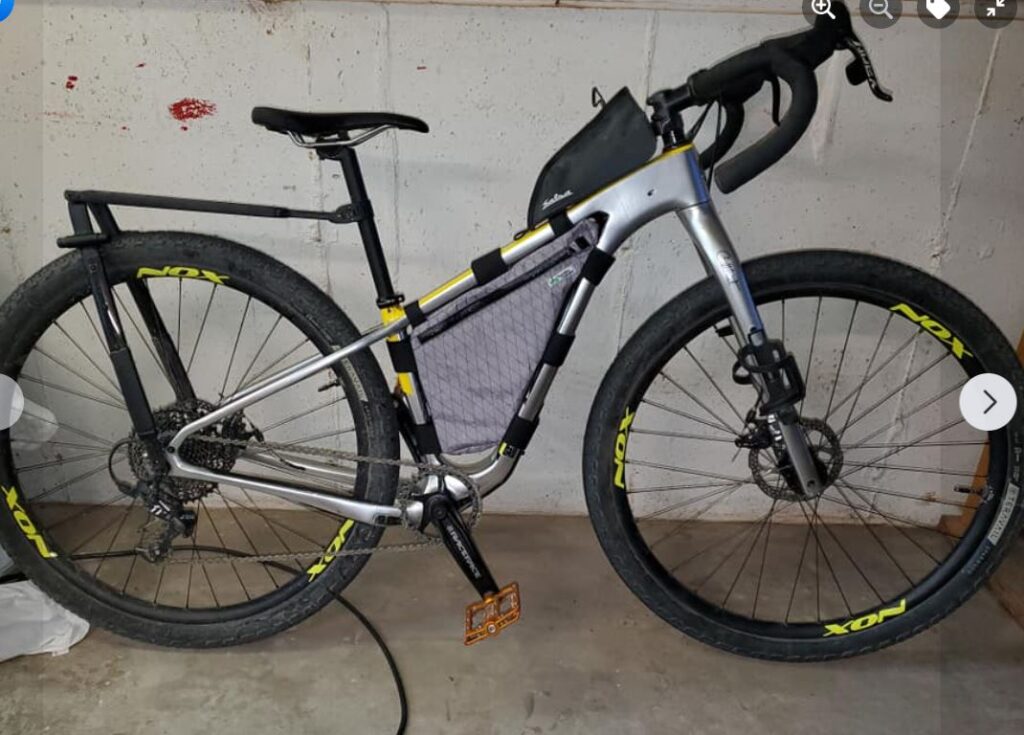
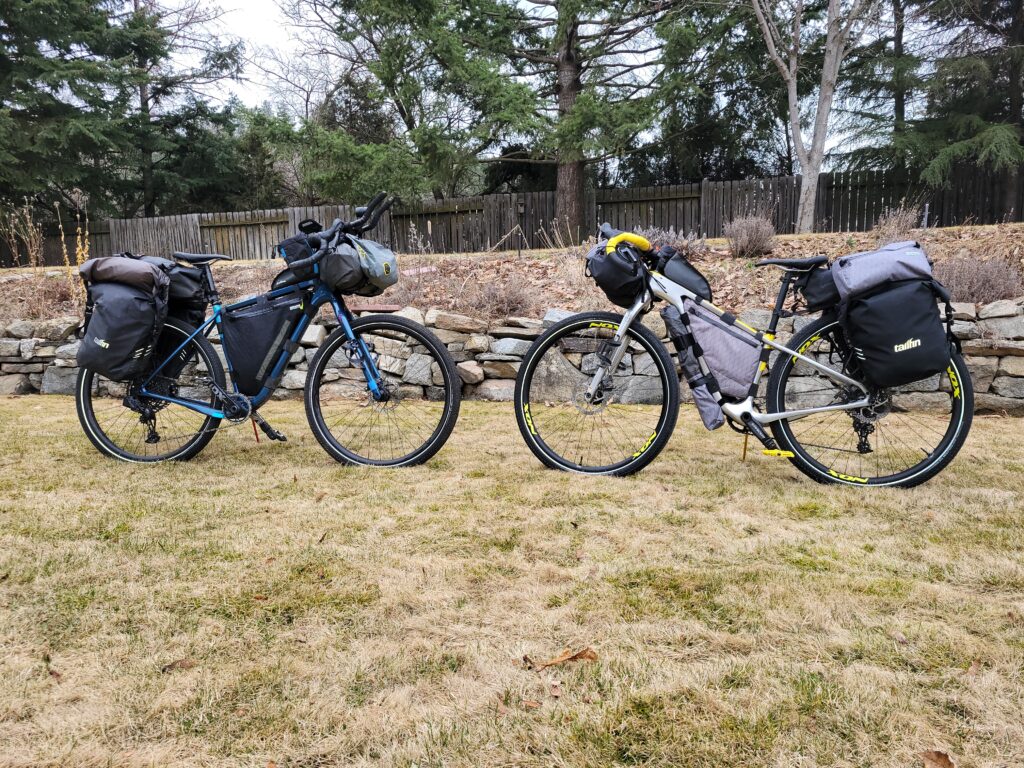
It turns out that particular gravel bike didn’t meet my needs. If you must know, I couldn’t put wide tires on it; not enough mounts for stuff, and it was geared way too high for the hilly terrain around here. My dear sweet hub bought me a Salsa Cutthroat, which of course needed new bags. Plus he got a new bike and he needed some bags. You know how it goes…
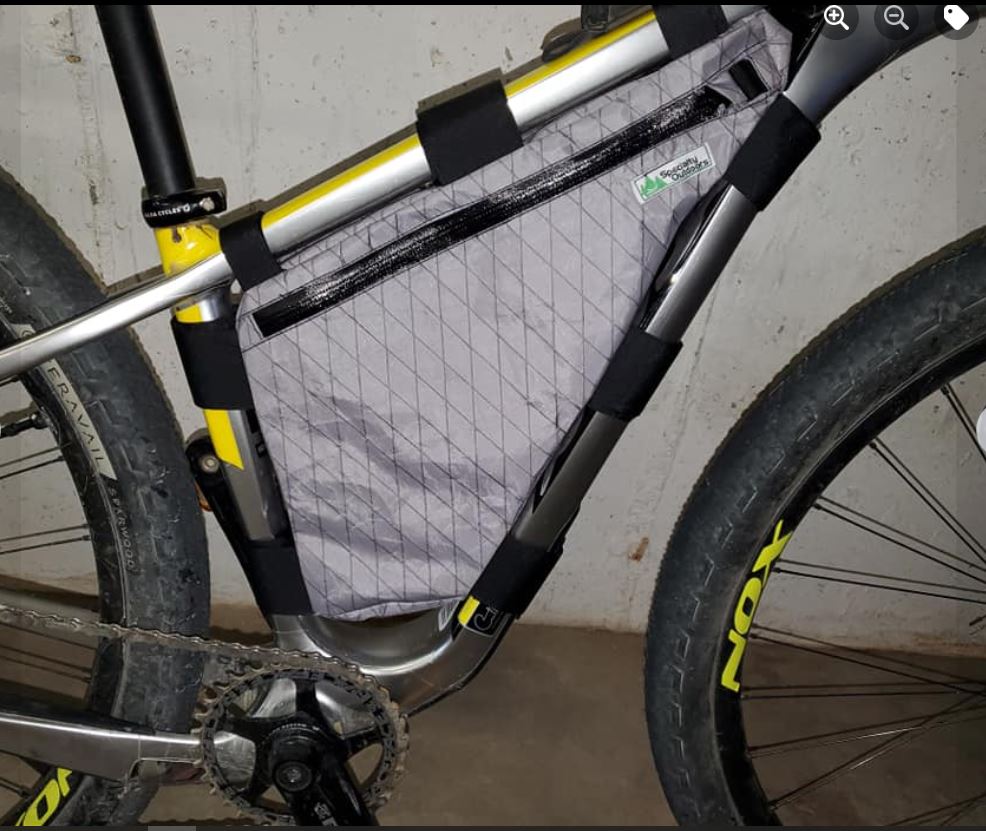
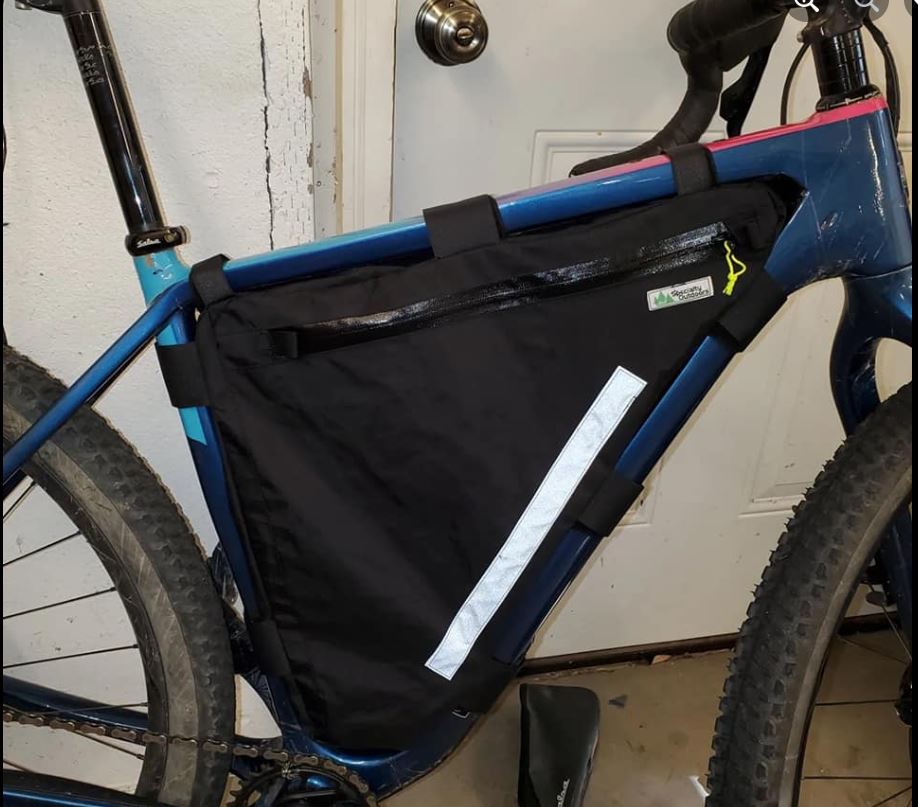
Bag on 52″ Salsa Cutthroat

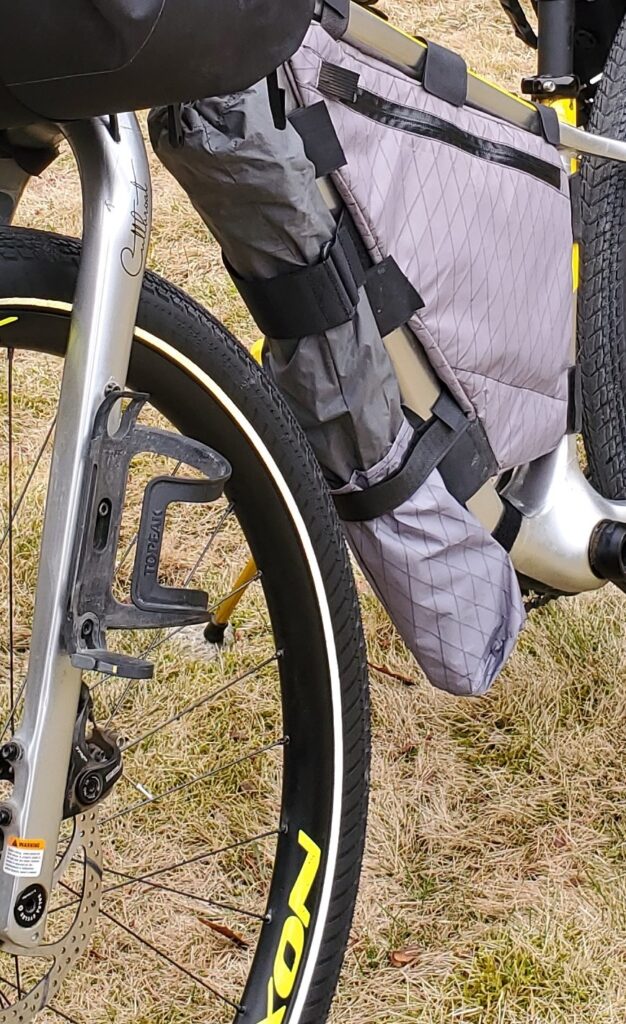
Next up, we are leaving for a few months in Europe spring 2023. This means a few more bags! First off, I had to come up with a system to hold the tent poles to the down tube. It’s not really a bag; more like a contraption. But it works!!
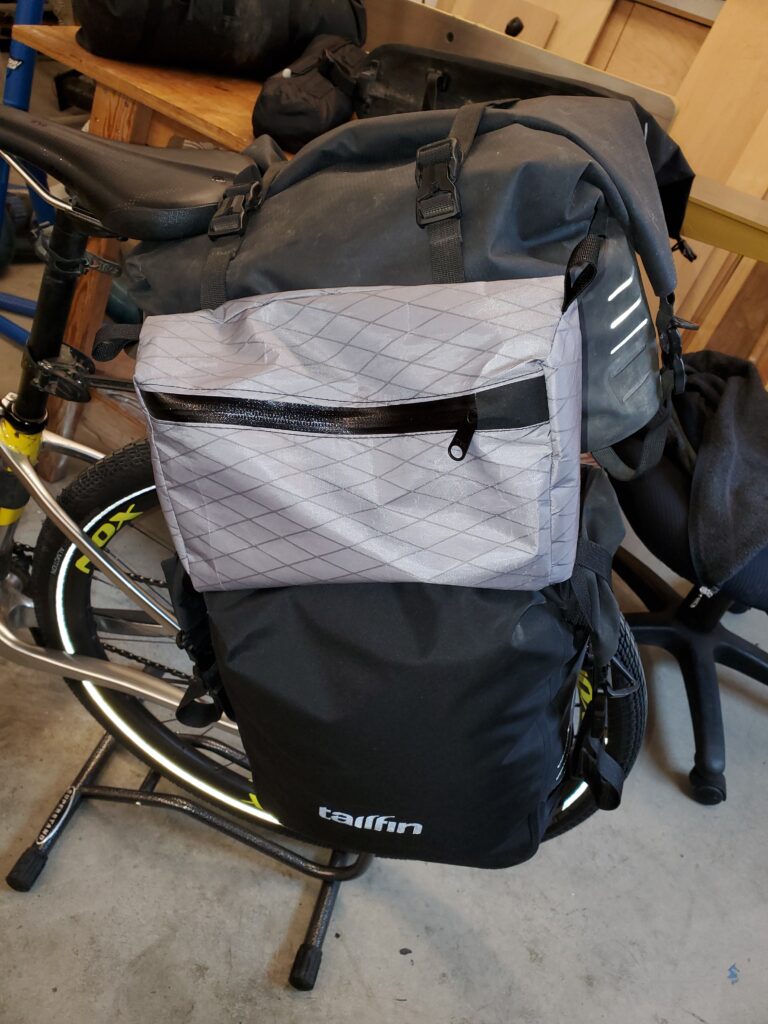
My hub has outfitted our Cutthroats with the Tailfin system. These panniers are quite a bit smaller than some, so I decided we needed a moderate size bag that would fit on top of the pannier, nesting next to the “trunk” bag.
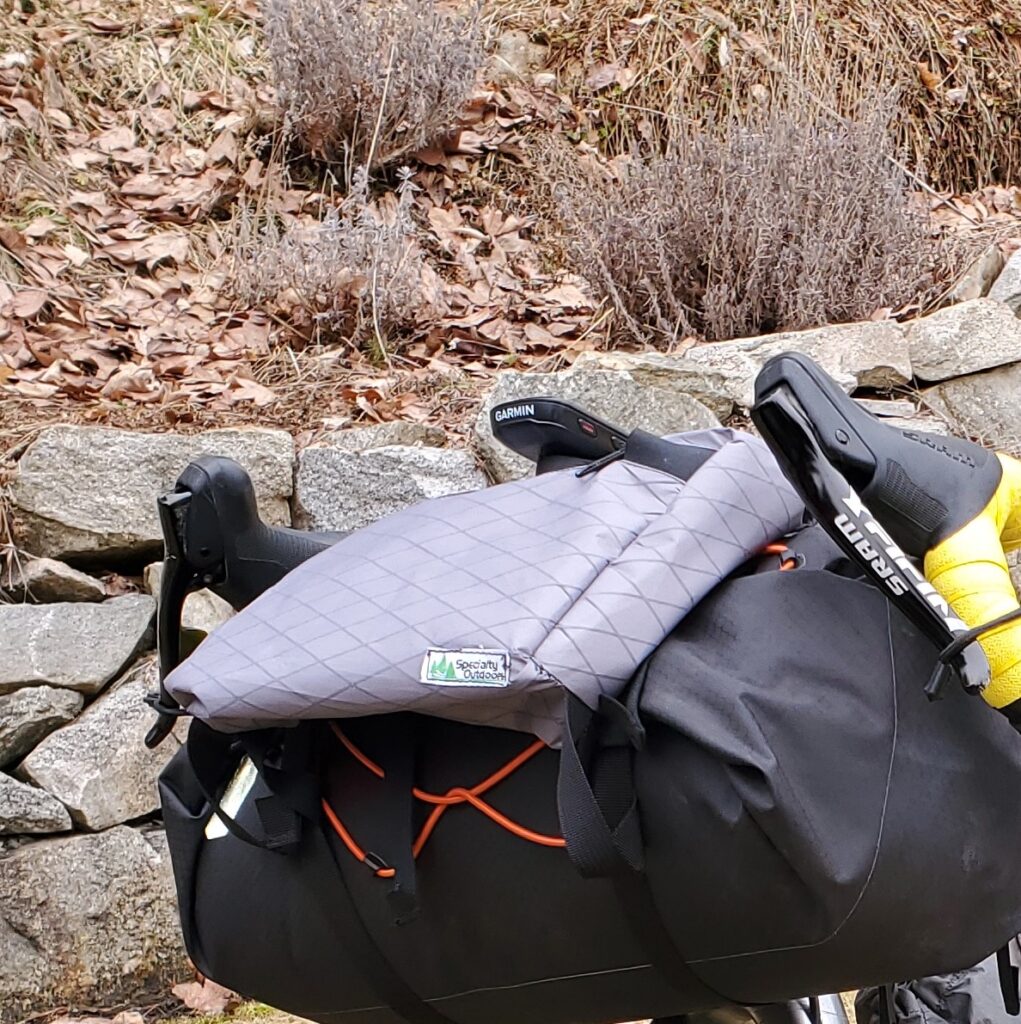
I then added a small front “handy” bag to go on top of my bar mounted Ortleib drybag that holds my sleeping bag:
Last but not least, I made a dry bag with some heat seal fabric as an experiment. It’s not pretty but will do the job of holding a wet tent fly.
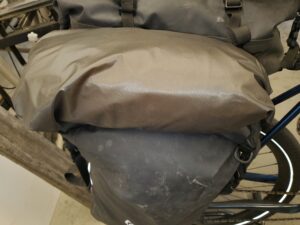
I think we are pretty well set!


The main fabrics I used were Dyneema cordura from Outdoors Wilderness Fabrics and X-Pac from Ripstop By The Roll.
Happy Trails.
If you want to follow along on our ride up the Loire and down the Danube, check the EV 6 page in the top menu.
Zipper Magic

Sometimes being considered an expert is an awkward place to be. Sure, I know a lot of things and have cultivated that knowledge for many years, but also – there are many things I DON’T have a good knowledge of. And there are many areas where I know just enough to be dangerous and am not getting the result I want. I am always looking for opportunities to learn more and I get very excited when I meet people that can help me learn and answer my questions.

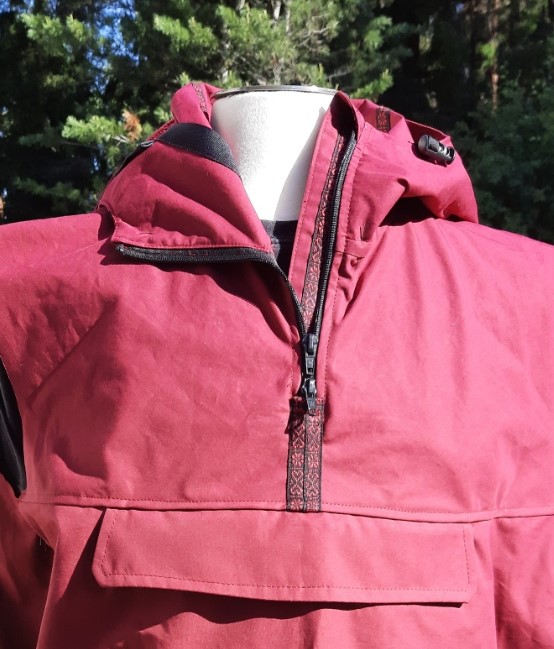
This brings me to Tailor Birgit of Pattern Adventure. I think I stumbled on Birgit when she joined my Outdoors Gear Repair Shop. She has a very special niche: custom outdoor clothing patterns and instructional courses geared towards outerwear. Her background is amazing, coming from a tailoring apprenticeship and fashion design/fashion house training, translated into custom outerwear. She offers several different online real-time workshops on project design and various aspects of construction. I started to explore course options through her appearances in the Sew Inspired by Discovery Fabrics Facebook group, of which I help admin.

What I am excited about is the new streaming course, “Sew a Zipper into a Jacket” available for purchase on Vimeo. The things you will learn, oh my. I was first exposed to her process via a Saturday morning general project course and couldn’t wait to learn more. For me, Birgit’s technique, process and tips has filled in the gaps in my quest to do nicer zipper finishes. Almost everything I’ve learned about zippers I have learned from reverse engineering and a few books here and there. I’ve been on quest to improve my jacket zippers for years but they were never quite perfect enough for me. I knew there was a better way but I was not getting there on my own.

Example of Birgit’s work.

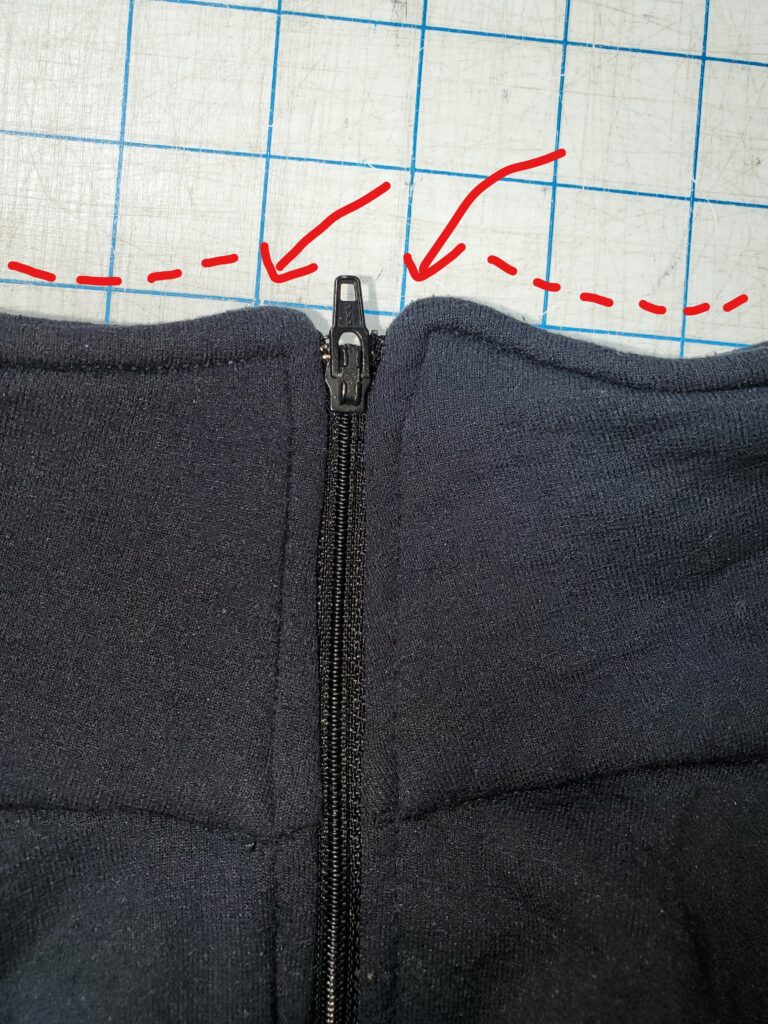
No matter what I tried, I haven’t been able to get the tops of my collars square. Granted this may be a galloping horse* issue, but it matters to me.


*can’t see it from the back of a galloping horse aka the three foot rule


Birgit will walk you through the jacket zipper process in great detail, step by step, with voice and video guidance. She will cover everything from precise zipper placement, guards, inside finishes, topstitching, matching points, and most importantly: how it all comes together for perfectly lined up zippers from top to bottom. You get the “why” on why things are done a certain way. Her instruction is suitable for new sewers wanting to get it right the first time and seasoned folks looking to up their game. As a course to purchase that you can watch over and over, it’s very well priced.

Is it magic? Not quite, but having the right techniques to use can feel like it.

Link to course trailer: Sew A Zipper Into A Jacket

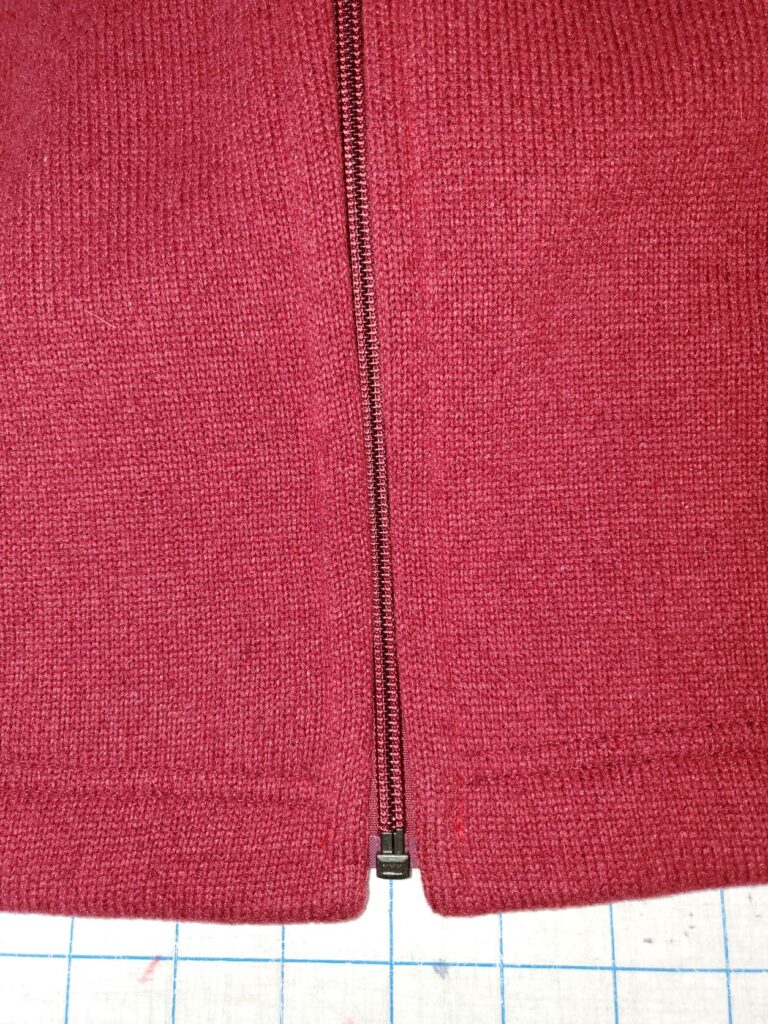
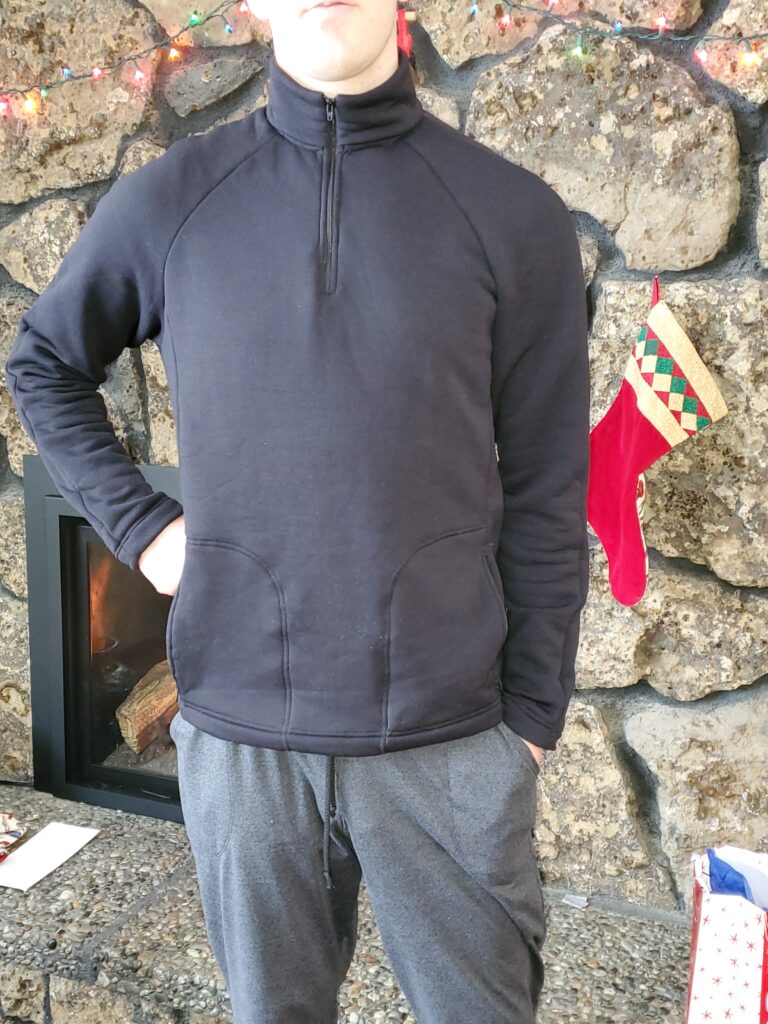
My first attempt. Not perfect but I learned so much in the process! The next one will be easier. This is a Polartec Thermal Pro (aka “Sweater Fleece”) Jacket using Wardrobe by Me Men’s Fleece Jacket pattern. Fabric is from Discovery Fabrics, my sponsor.

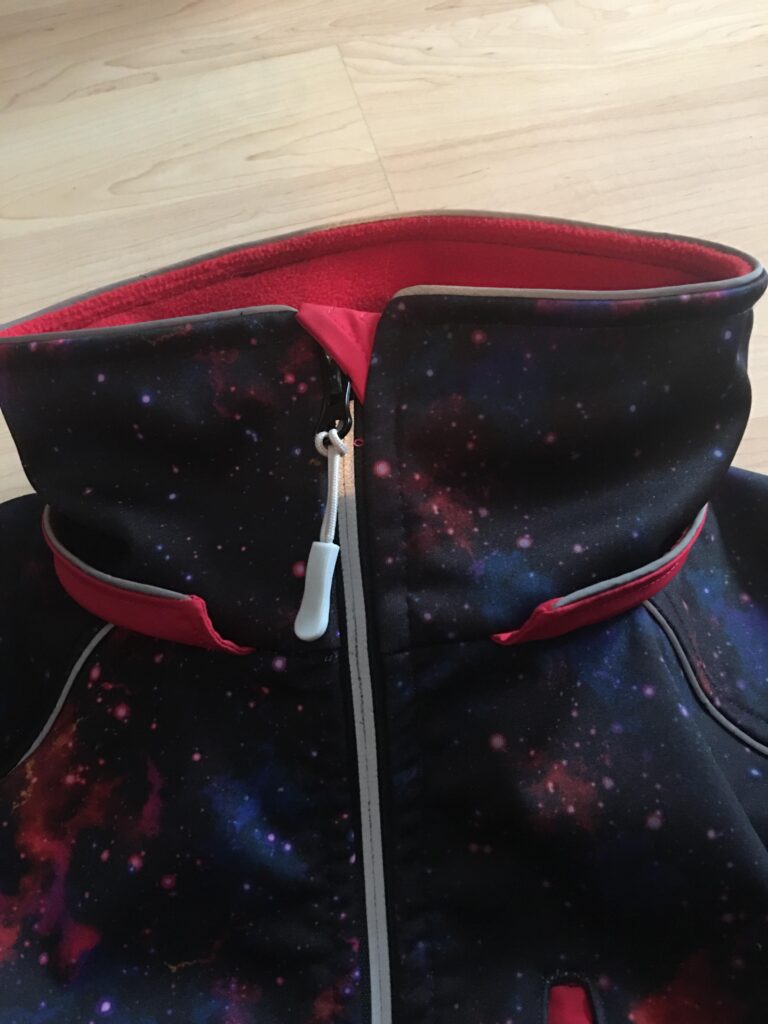
My friend Karen Dean is perfecting this method:

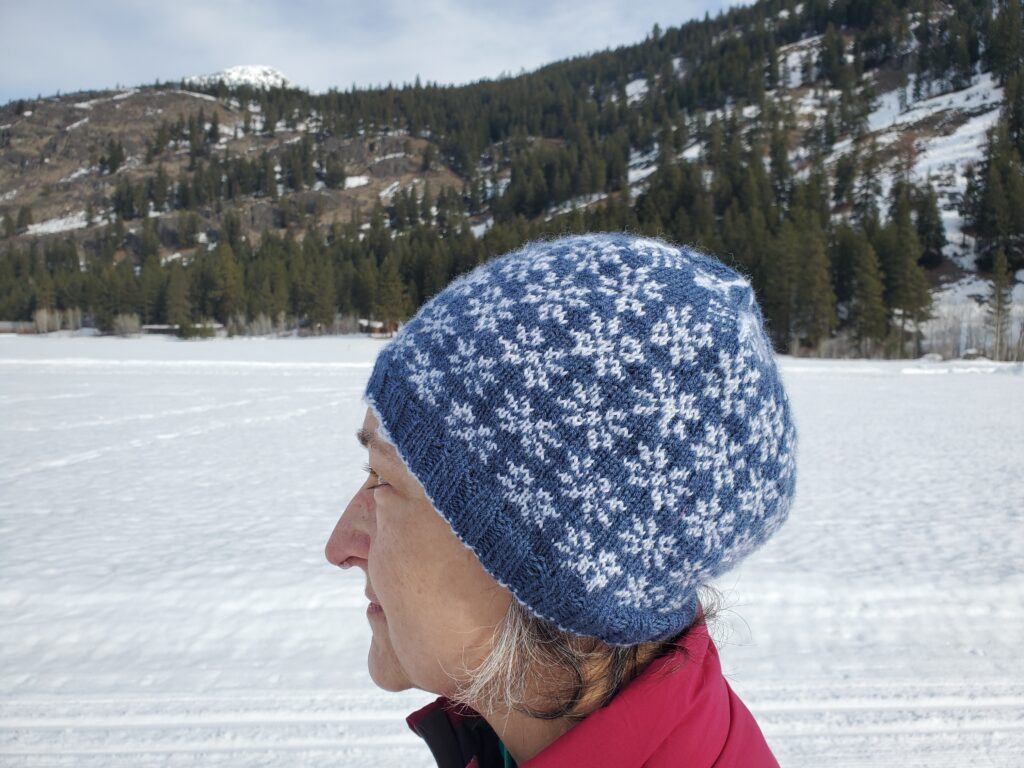
Retirement doesn’t mean no sewing.

It just means more fun sewing. Or sewing is more fun.

I am relieved and so pleased to have my joy aka sew-jo for sewing back!!! I do not miss the “work” aspect at all. I sold my heaviest walking foot to a budding upholsterer for a good price. I’ve reorganized a bit, and sold or given away some materials that maybe I shouldn’t have. It was making me crazy to look at a 25 year accumulation of colored jacket zips, most of which will never match anything current. I sold the collection to an an alterationist, keeping back only the obviously useful colors.

First off, I’ve been knitting. I used to knit a little 40+ years ago, and restarted with the help of a friend two winters ago.

I made some bike bags for my hub’s and my Salsa Cutthroats. The snack bags are slightly modified from this tutorial:
https://learnmyog.com/bpStemBag.html Of course we did some bikepacking!!

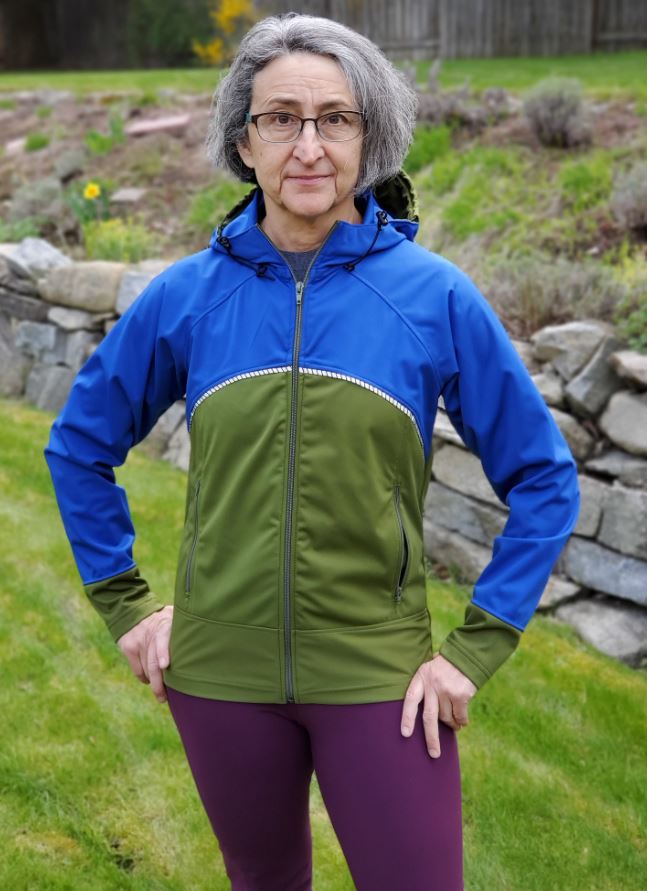
And then there’s more sewing. I am grateful to my sponsor, Discovery Fabrics, for giving me access to the most amazing tech fabrics ever. I am a “resident expert” in the store’s Facebook Page, https://www.facebook.com/groups/724102688417093 which is kind of funny as there are many amazing sewists in that group. I think I learn more than I share. It is a fantastic group if you Facebook: so much more than just inventory discussion. The level of inspiration, talent and support for sewing with tech fabrics is incredible. It’s a fun group of really fine people, very reminiscent of the old Usenet groups rec.sewing and alt.sewing for the quality of discussion
Anyway, I get state of the art tech fabrics from Discovery and have been sewing up a storm for myself and loved ones. I am very inspired by the new PDF Independent Designers out there but that is a post for another day.

There is more but I will have to dig for photos.

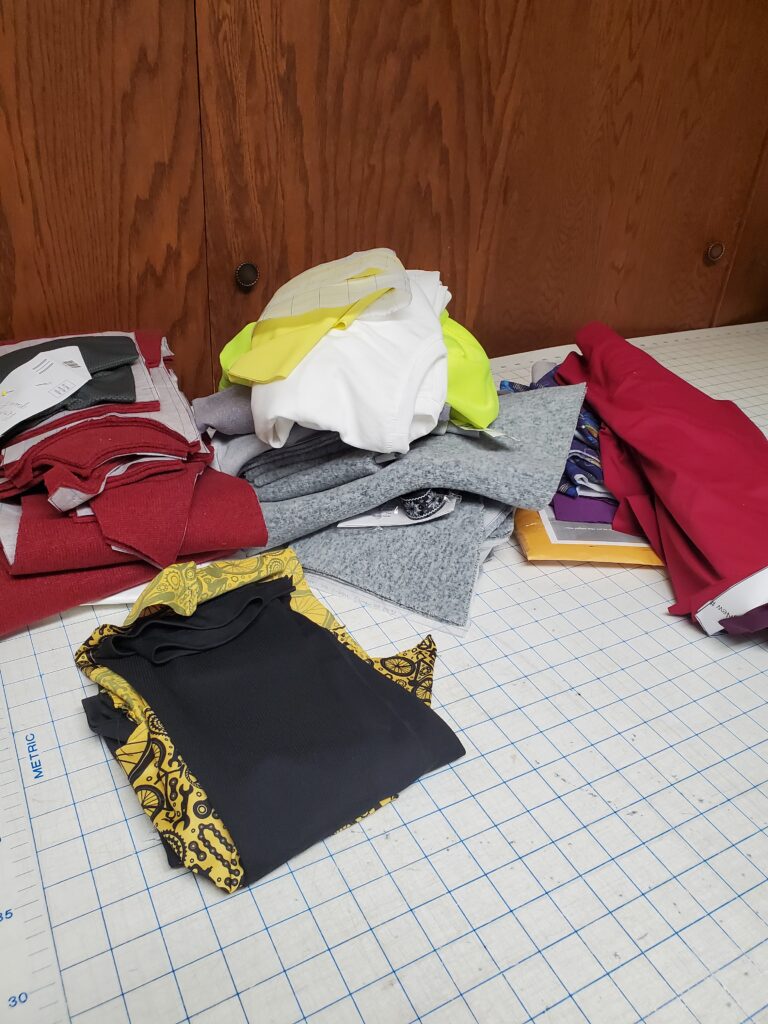
My husband retired this spring and we are out having adventures. I can barely keep up with my sewing list. This is the current stack of next up to sew:

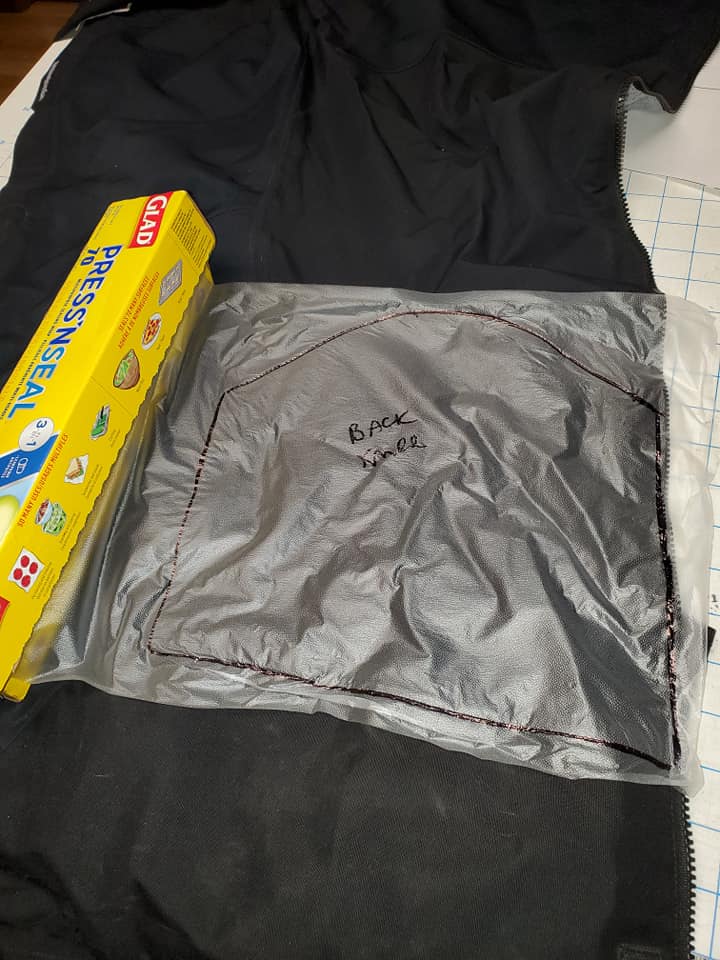
Press'nSeal on flat panel

Using plastic wrap to copy a garment… who knew?

another time-saving technique I learned.

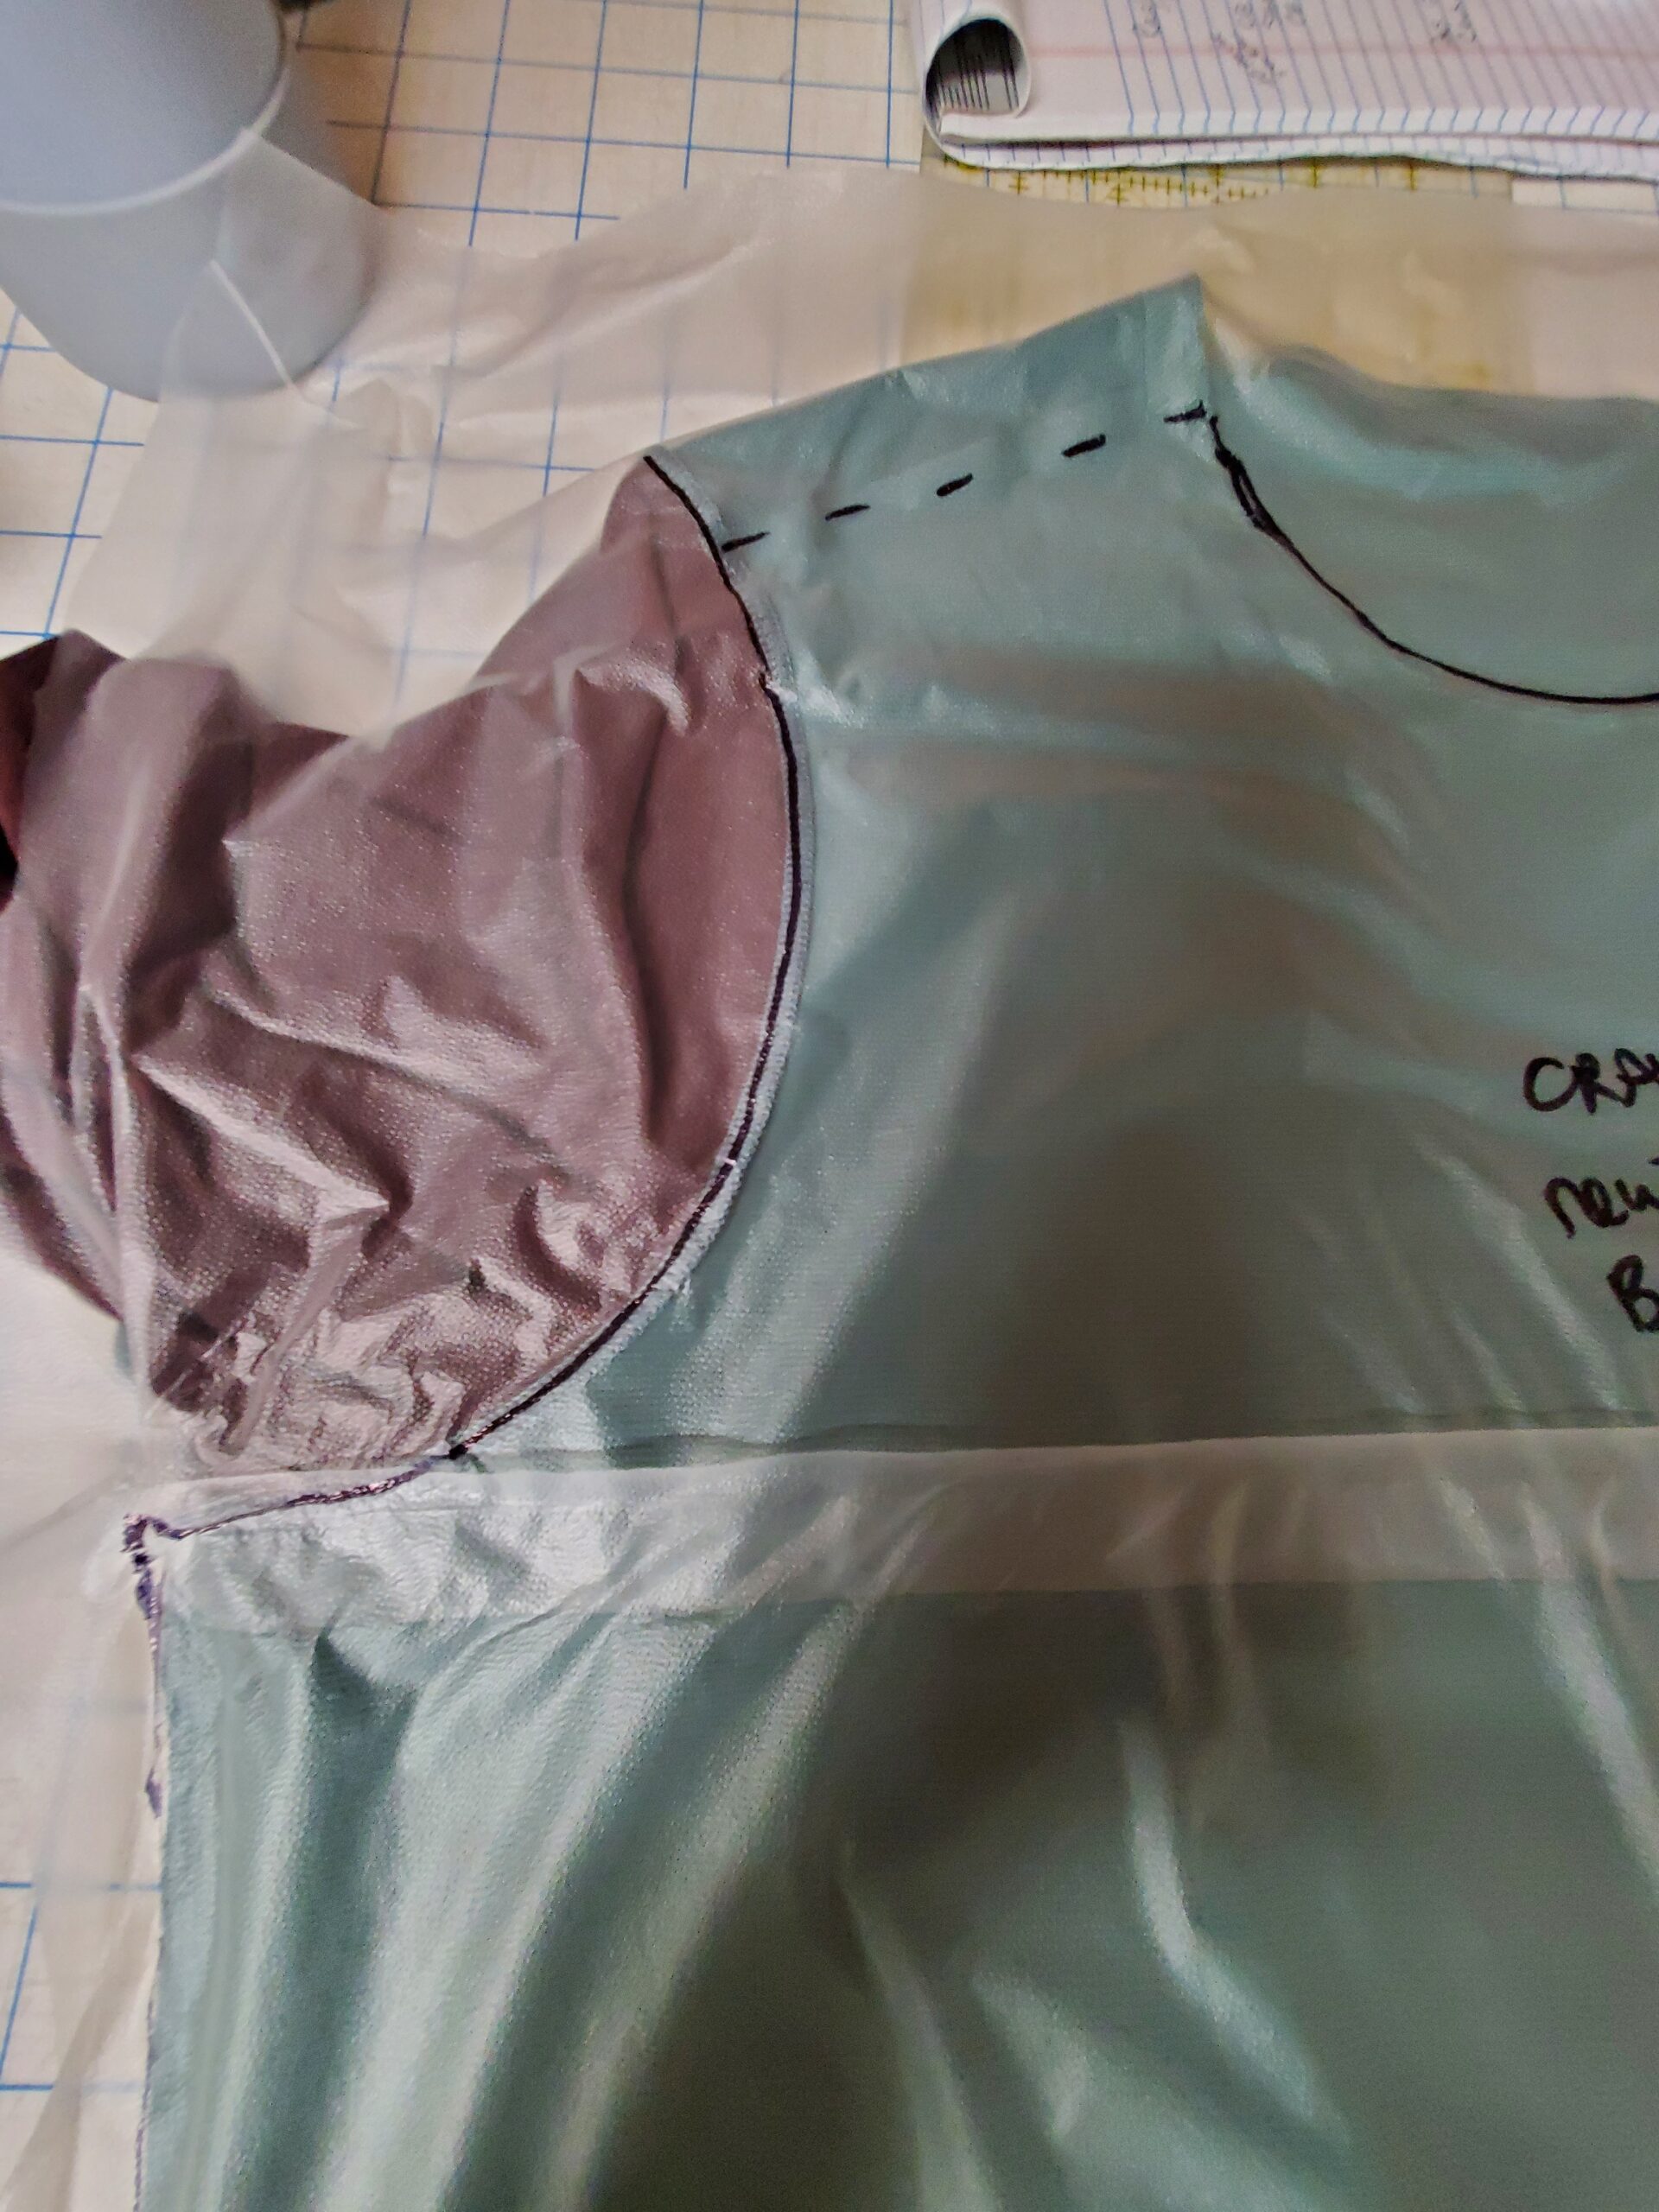
Recently I read a post on Facebook where someone described a technique use Glad Press N Seal to “slip” a copy of a garment. Whaaaaa? Sounded crazy but I was intrigued. I gave it a try and – yes- it is an amazing technique. I found it to be easy to do and very accurate. As someone who has copied numerous garments over the years with paper, pins, and needle wheel, I think this is vast improvement.

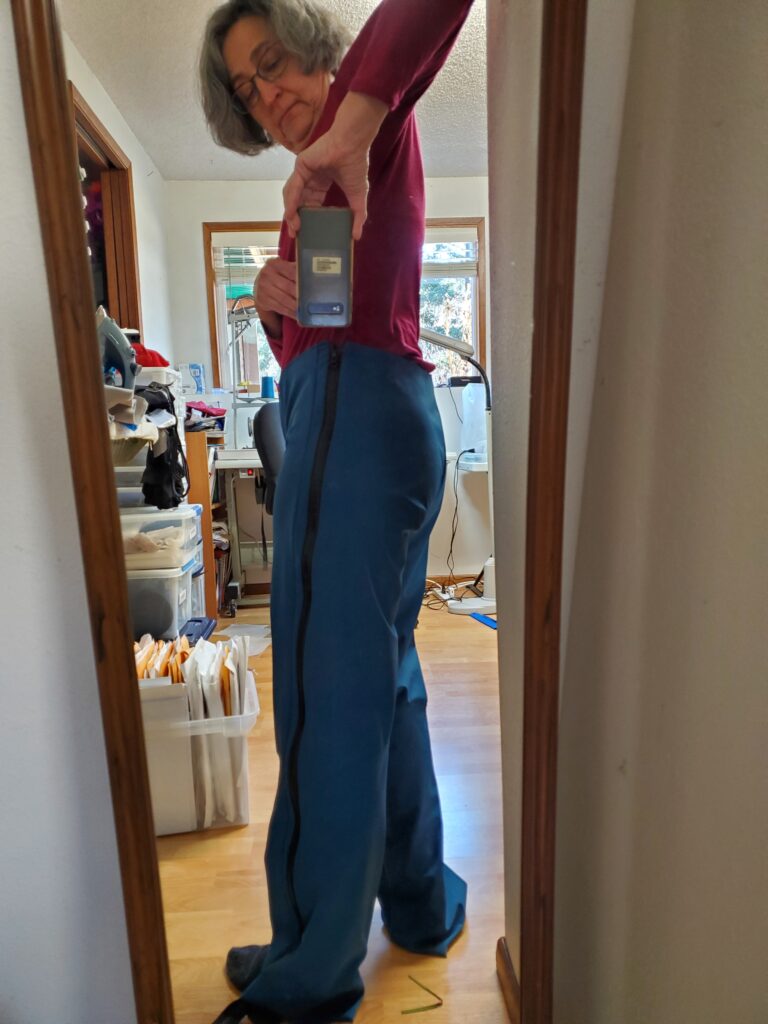
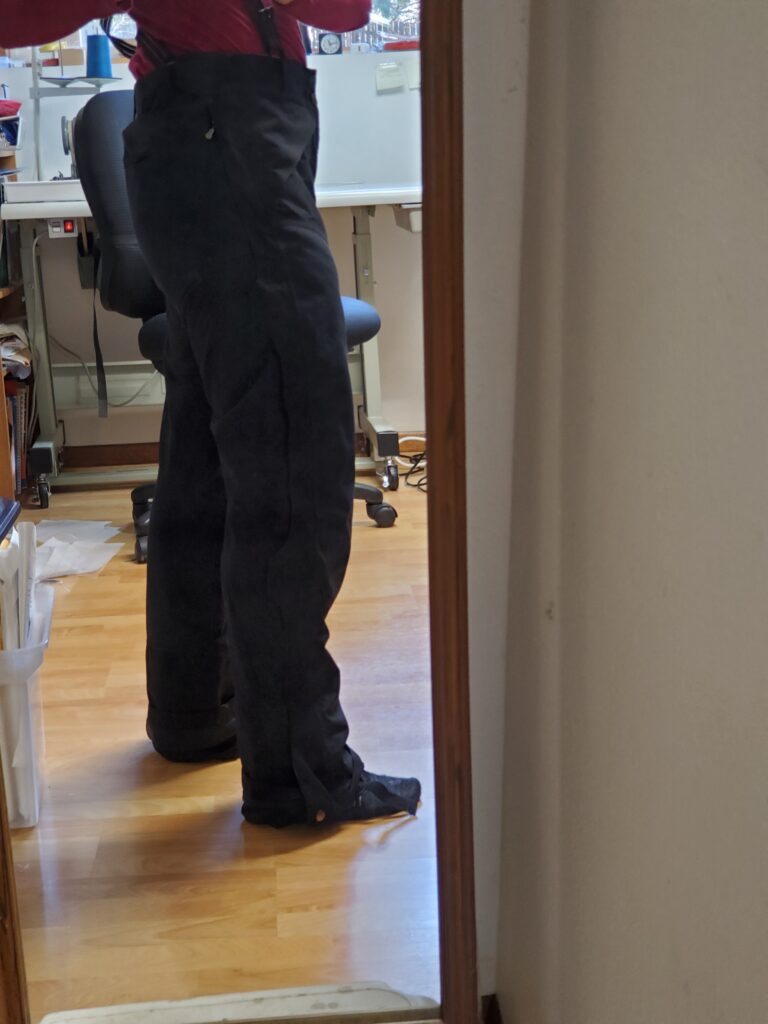
I put this method to the test copying my very favorite 25 year old Patagonia Ladies’ drop-seat ski pants which of course are not made any more. These pants are somewhat complicated with at least three different fabrics, darts, a gusset, and articulation. The pattern pieces I came up with required an absolute minimum of truing and re-drawing. It was very easy to make the changes I wanted to make in the process. Photos will be after the text explanation.

What you will need:

  • Glad Press n Seal (try Amazon if you can’t find it in a store)
  • A Sharpie
  • Pellon Grid
  • Assorted French curves and rulers
  • A garment to copy
  • A table to work on
  • Scissors (for cutting Pellon Grid)
  • Optional: Tailor’s Ham

Method of work:

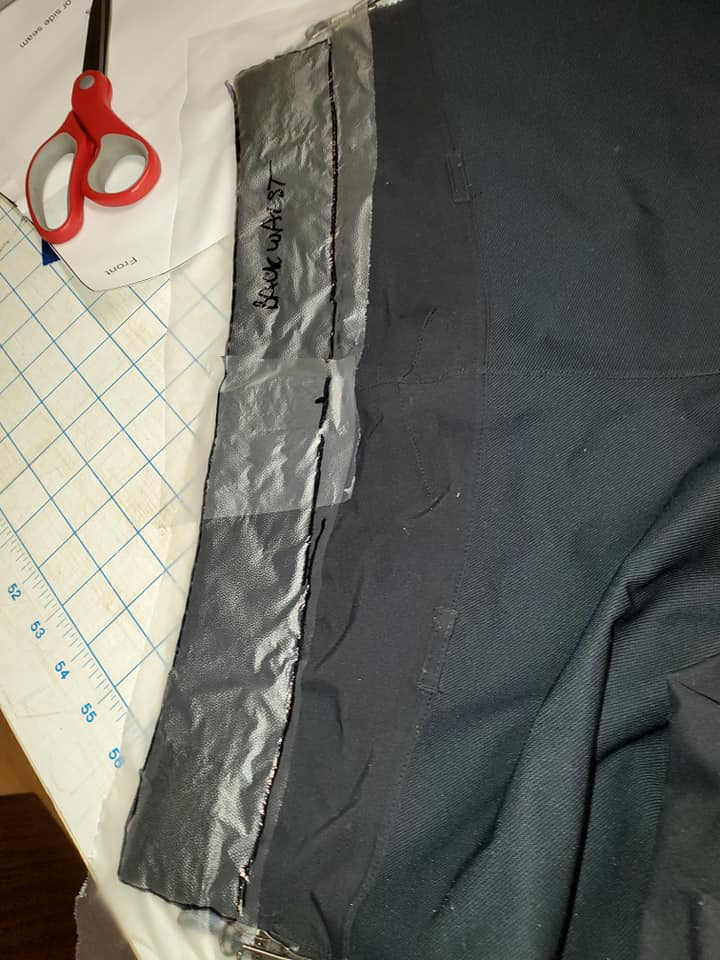
Spread your garment out flat on a table. Decide which panel/part area you want to copy first. A flat area without darts or shaping would be a good first piece to do. Cut some Glad Press n Seal a little bit bigger than your area. You may have to stick several pieces together if it is a large area or an odd shape. The wrap has a slightly sticky side to it. You will press the wrap to your garment area, sticky side down. Make sure your area is as flat as possible, then smooth the wrap, eliminating any wrinkles. Once you have the wrap totally smoothed out, take a Sharpie and outline the seamline. I found it is easy to carefully run the marker right along the seam line. Mark the grainline and/or direction of most stretch. You will add seam allowance later. At this point, peel off the wrap, label it, and set it aside. I found the pieces stack and can be separated later.


For curves and odd shaped areas you might want to shape that part of the garment over a tailor’s ham, the edge of an ironing board, or something with a similar shape. This will allow you to capture the shaping of curved seams or darts. What I found with darts is to smooth the wrap starting at the opposite end from where the dart is, then work the excess into an actual “dart” or fold in the wrap. Mark this with the pen so you don’t lose it when you flatten the piece in the next step. Trace the seamline as above with a Sharpie. Preserve this fold when you peel the wrap off the fabric. Label your piece and set it aside.

Front knee with multiple darts

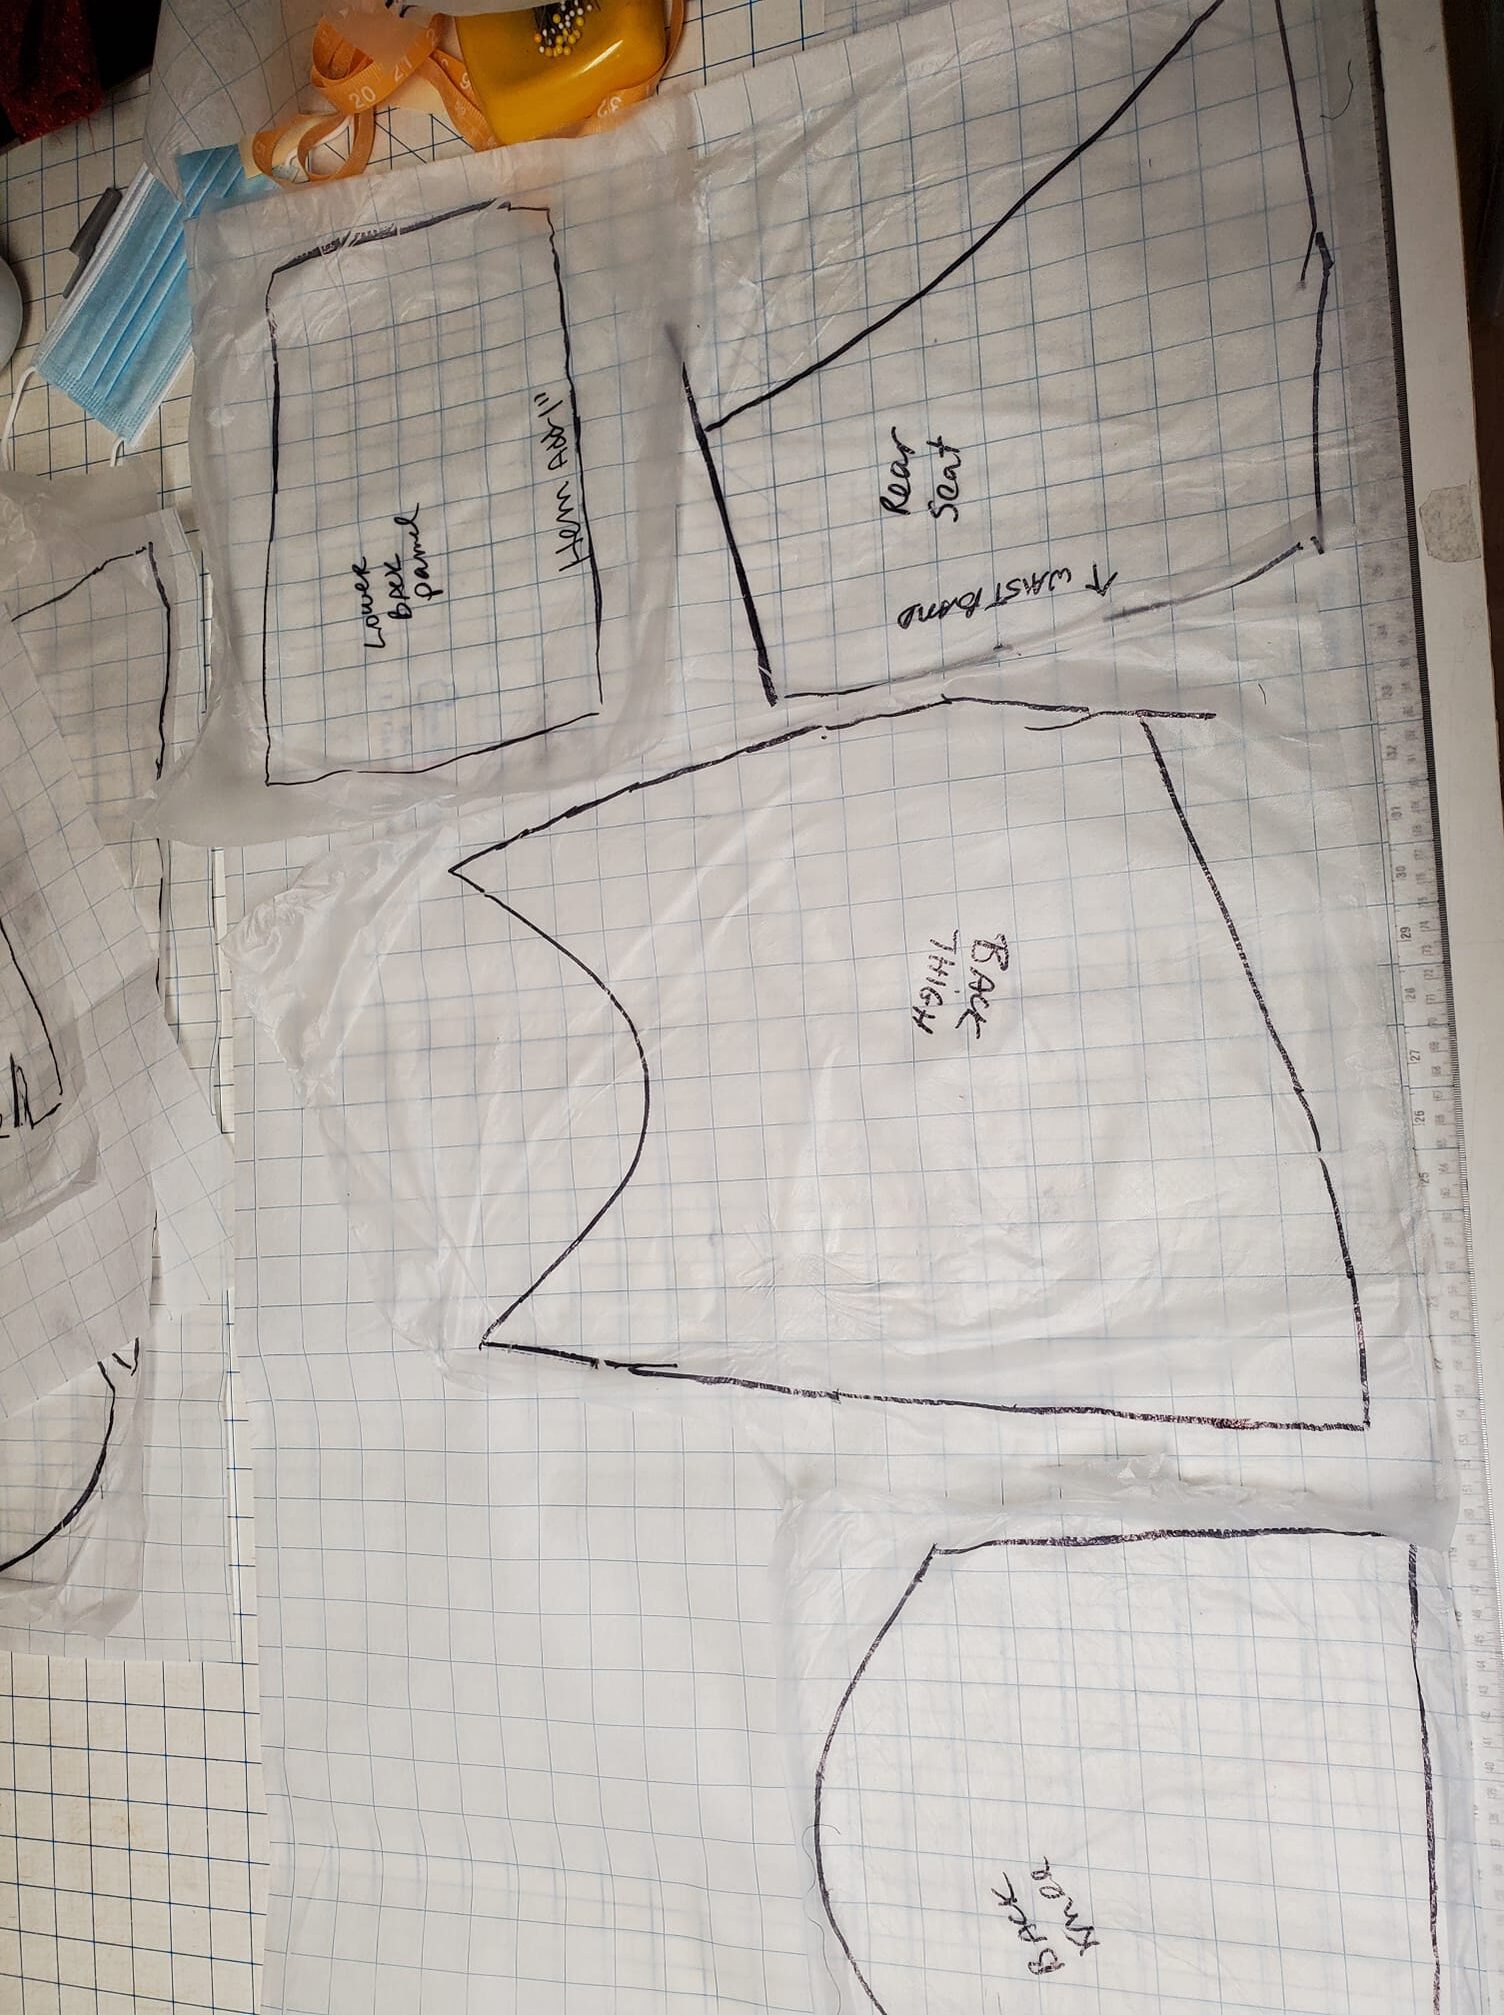
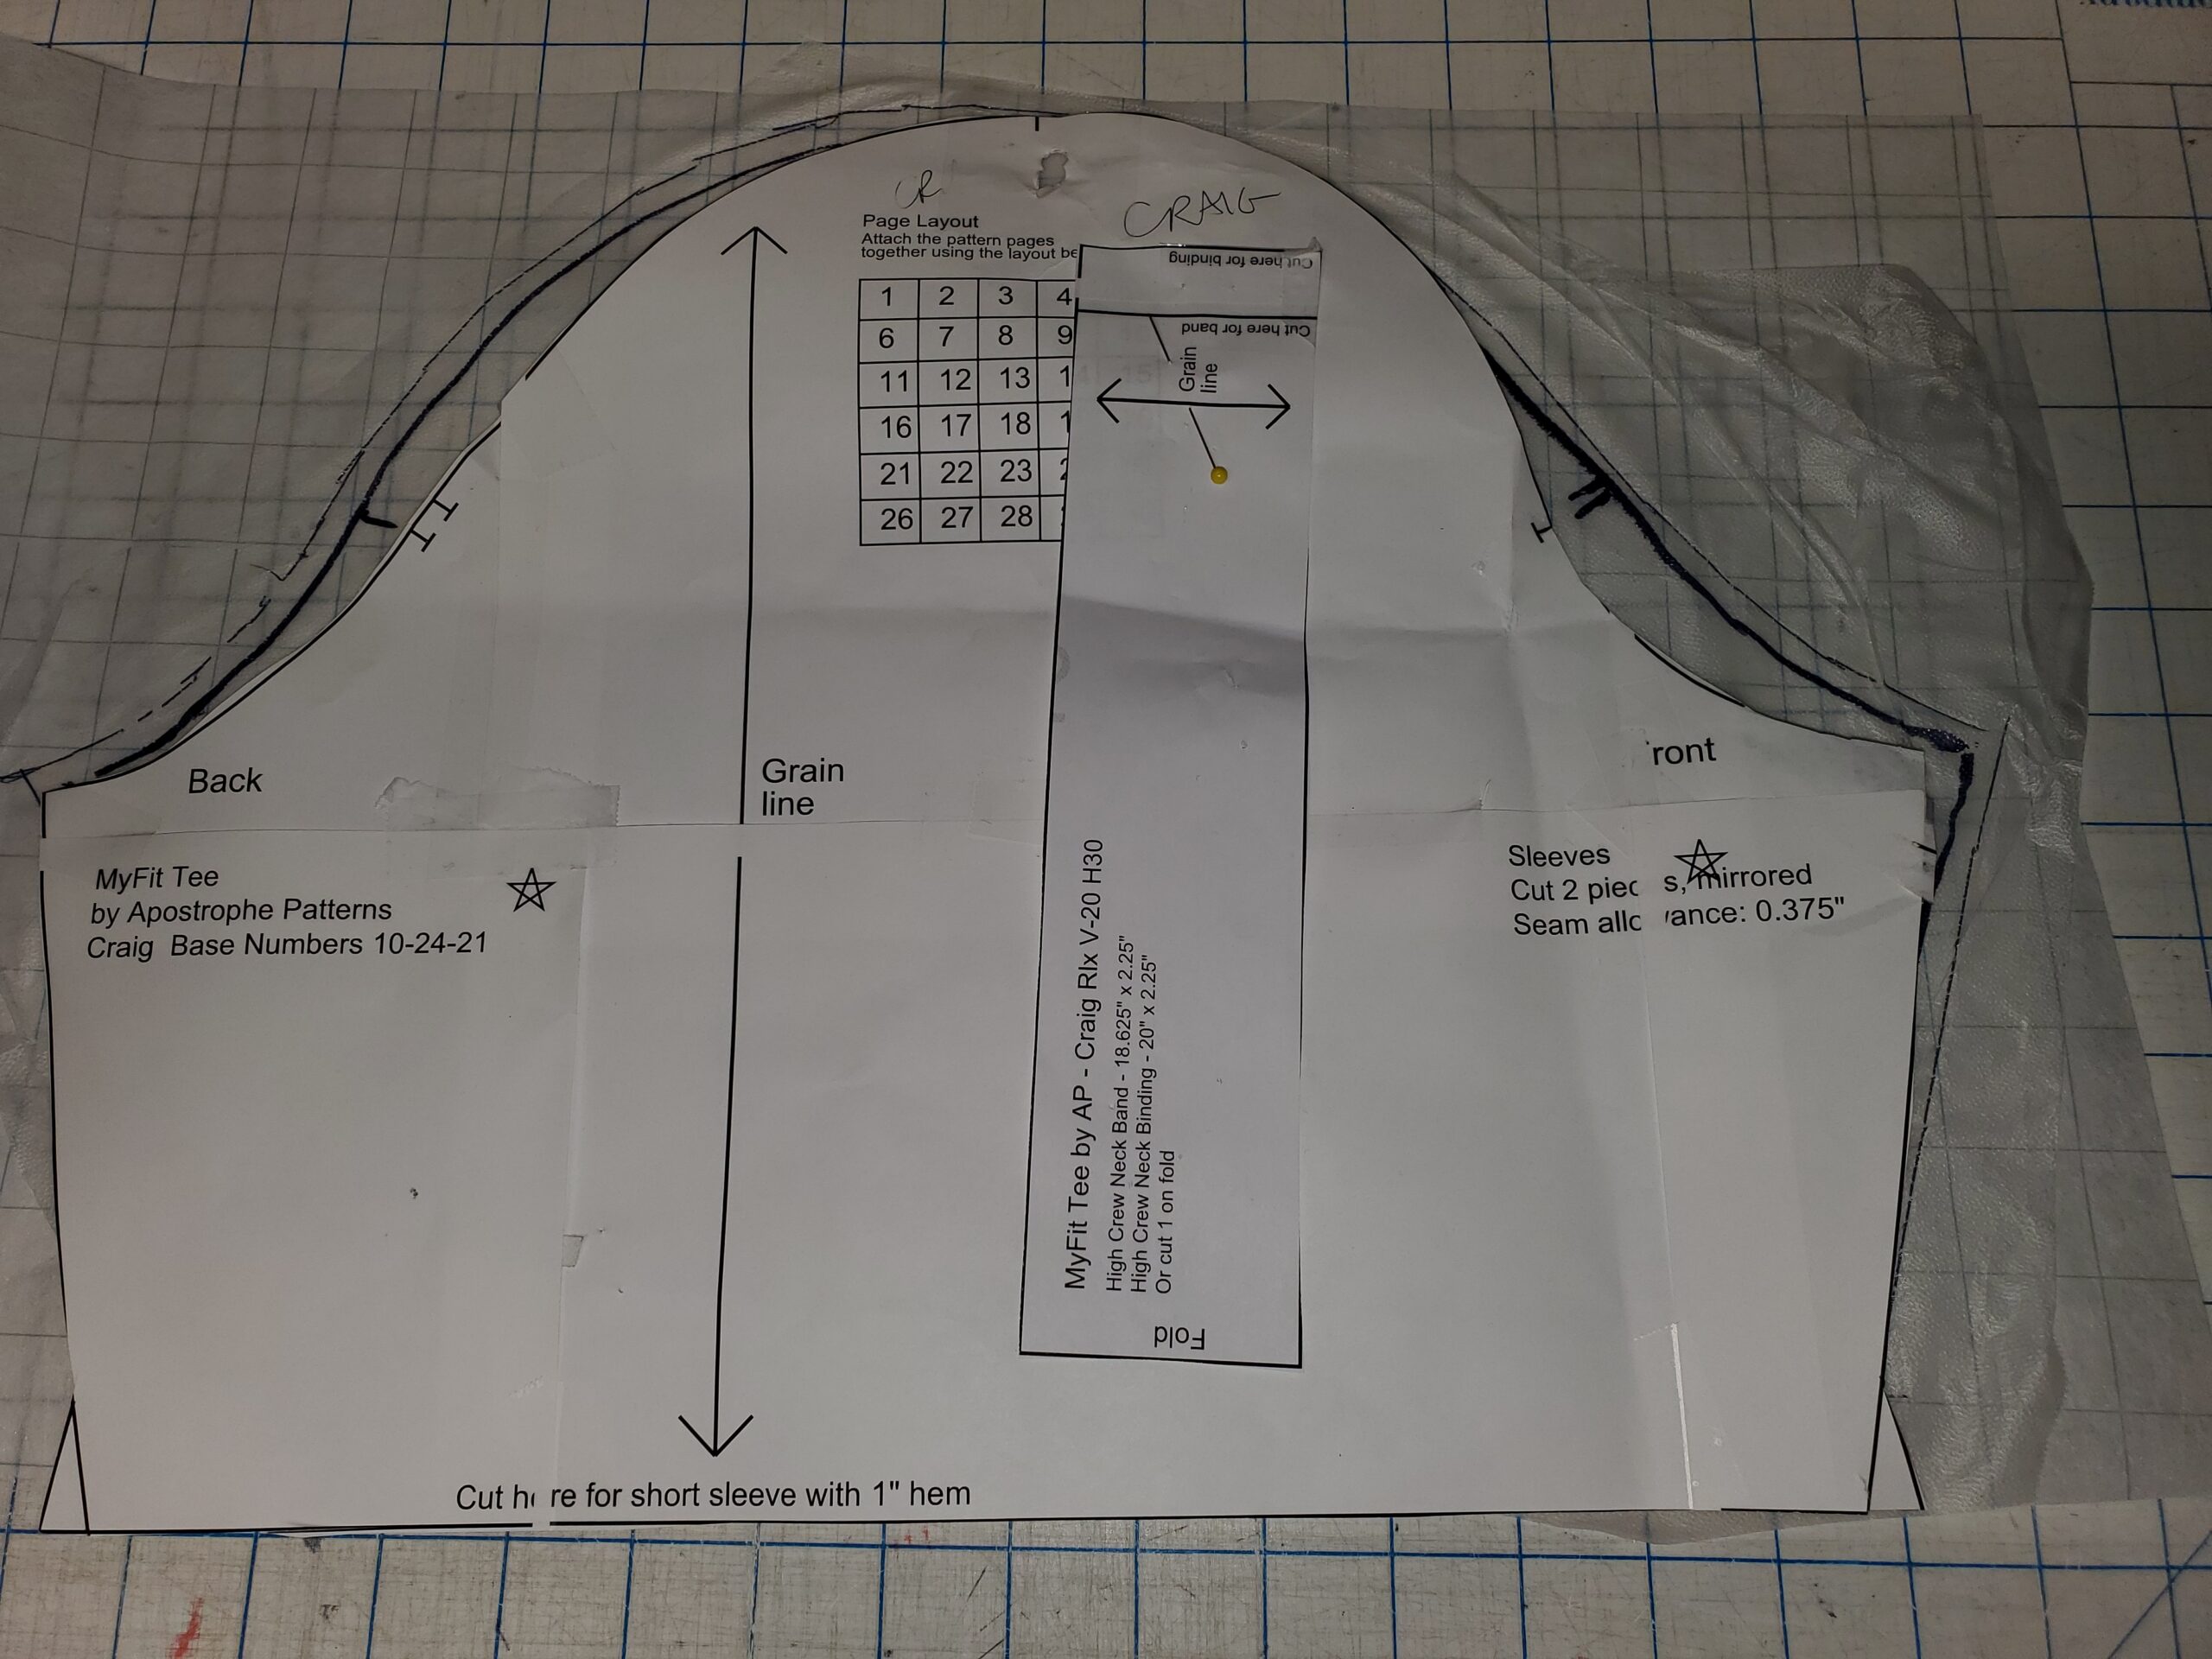
For every piece of the garment make a piece. Be sure to label each one. Once you have all your pieces traced, smooth each one onto the wrong side of a piece of Pellon a bit bigger. I like to line up the grainline. The pieces that have curves or darts should smooth out flat. If you marked a dart it should now lay flat. At this point, I touch up the seamlines if any are wonky, and make sure the piece has as needed notes and labelling. I might make some notches or other marks if it’s not obvious where it goes.

Once your wrap is onto the Pellon with all markings and seamlines, it’s time to check a few things. Using a tape measure, check your seamlines. When I did this, I found I was within 1/8″ on most seams, enough to mock it up in a muslin. If you are off any more than that, double check your garment and your tracing and correct it. Add your seam allowances, then peel the Pellon off and set it aside. You are now ready to make your mock up!


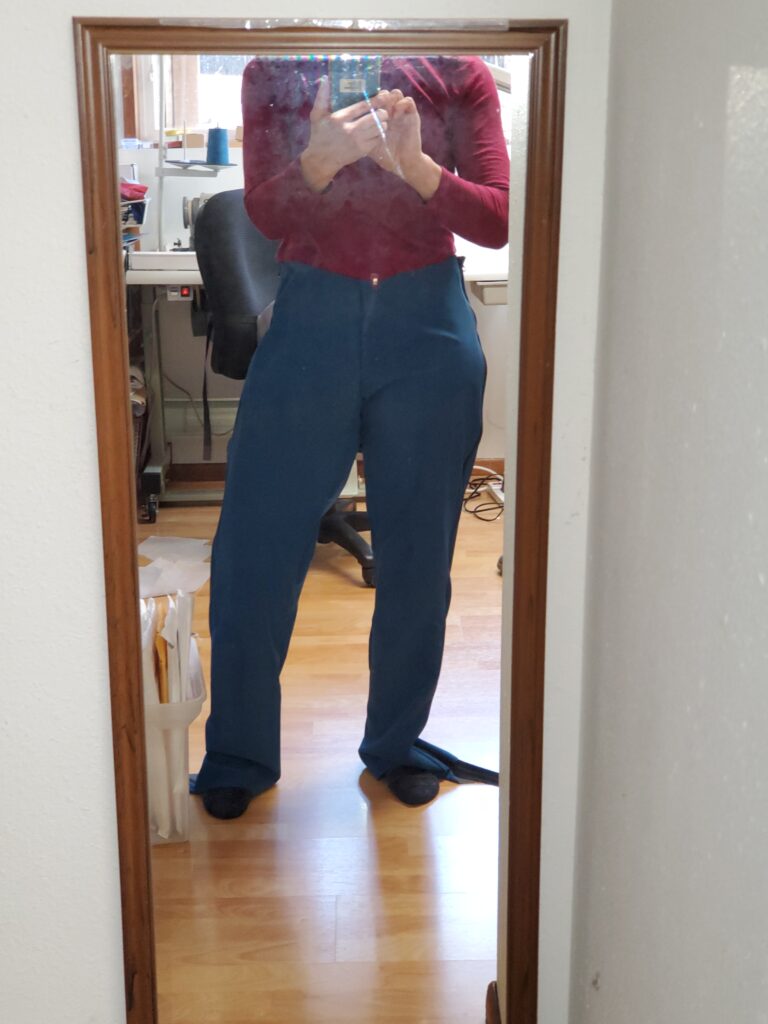
Here is the first mock up. It’s so close!!
Mock up out of a potential real fabric: Polartec Powershield from Discovery

Side view of Polartec Powershield mock up


25 year old Patagonia guide pants.

This fall I will make a finished pair with all the details out of Polartec Neoshell from Discovery Fabrics.

Update: I tried this technique copying a favorite wicking bike T of my husband’s. I was problem solving a sleeve issue, and copying this well fitting T was my solution to analyze sleeve problems in other patterns..

Welcome to Tutorials

Seeing as I am semi-retired, I have more time to make tutorials now. I call them my “Keeping It Real” series as in,…. keeping it real. Most our our sewing rooms are not Instagram perfect and I am no exception. I’d rather share my tips and experience when I’ve got the notion than take precious time out to make my workroom look perfect. I would rather spend my hard earned money on more fabric than matching organizers.

I’ve been sewing for 50 years, starting with horse blankets for my Breyer horses, and now slowing down as an outdoor clothing/technical sewing repair expert. I will be sharing what I get inspired to share so check back every now and then. I am learning as I go – both making tutorials and new things to share.

No theme…. just what I am inspired to share. My YouTube Channel has assortment of videos from masks to magnets, and specific tutorials are covered in blog posts.

Why? Read my blog post on Hoarding Information.

Make a Bike Jersey

Base Layer and Collar Finish

Insulated Van Shades with Tabs

Soft Athletic Waistband

Make Lycra Bike Shorts

My Machines, part 4. Long overdue update.

I sold one. I retired two, one to the recycling bin. I bought three… all somewhat specialized for the garment end of things.

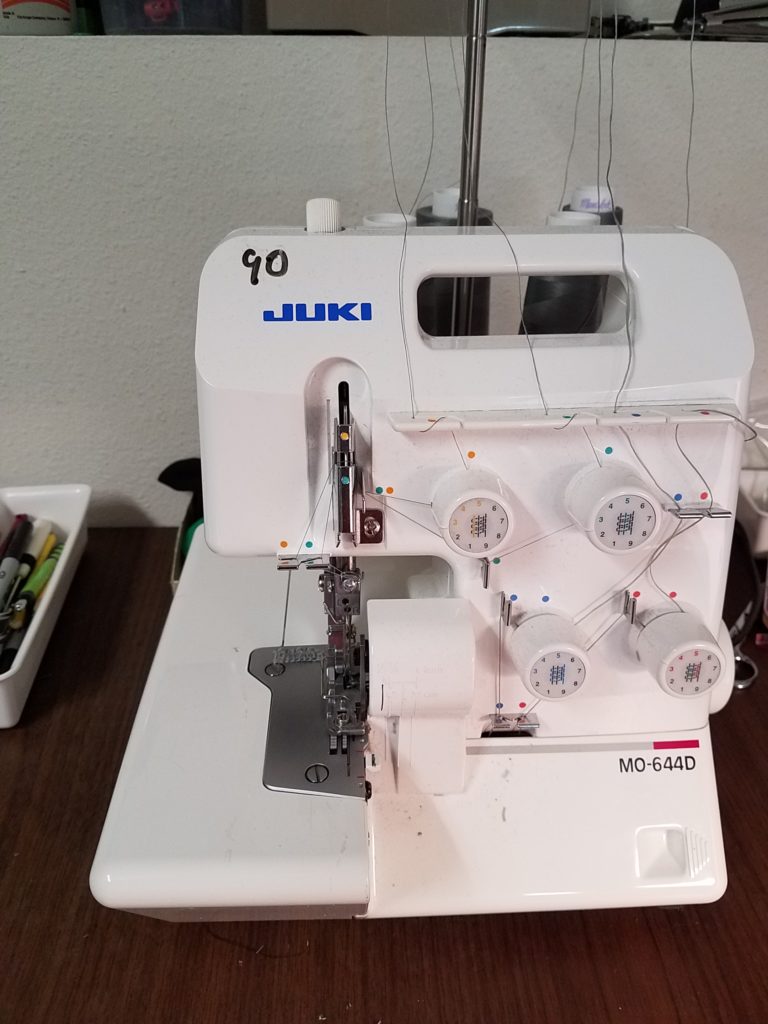
First off, it was so sad to retire the 1987 first generation Babylock serger to the recycling bin. It was beyond repair, rebuild, or service. Every piece of metal in the thing was worn beyond repair. Every time I tried to use it something wouldn’t work. I turned to one of my trusted advisers, Ron of A1 Sewing Machine, for a recommendation. He recommended a Juki 644 as a reliable workroom 3/4 serger and he was right on. Sometimes you don’t realize how old and worn something is until you replace it with new. Helpful hint: you can write on your machine with a dry erase: this is the current needle installed. Trust me on this: If you are battling an old machine or one that just never works quite right, quit torturing yourself, especially if you are working professionally. I hate spending money and kick myself every time I hold off getting the right tool.

Juki serger, reliable workhorse

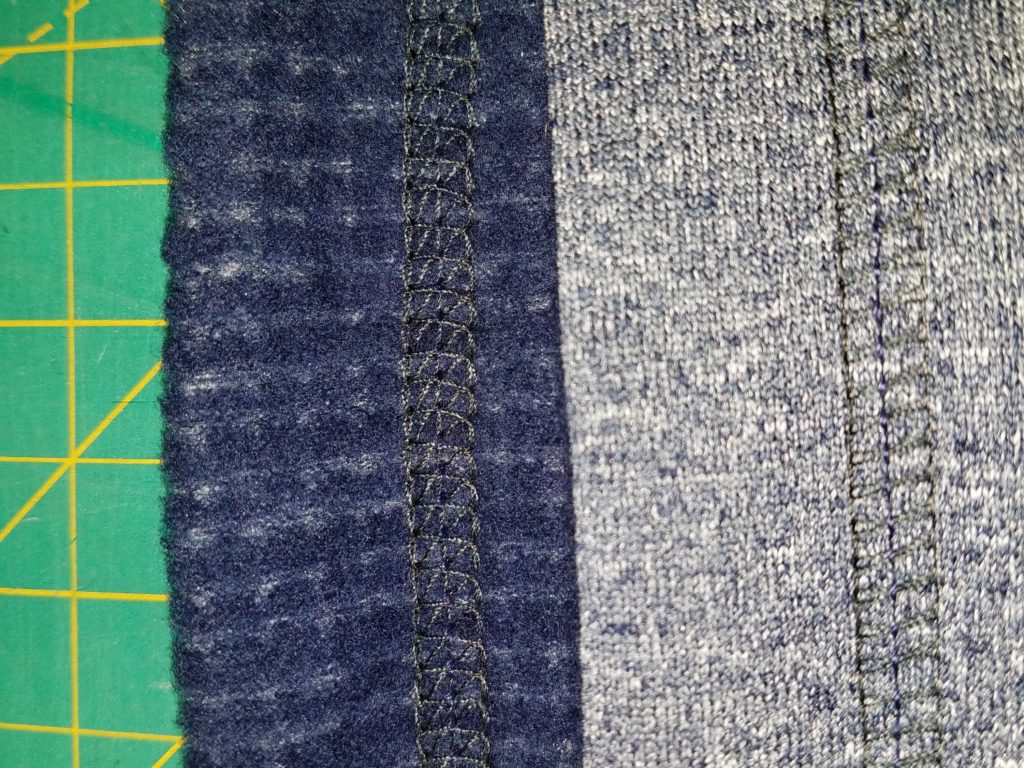
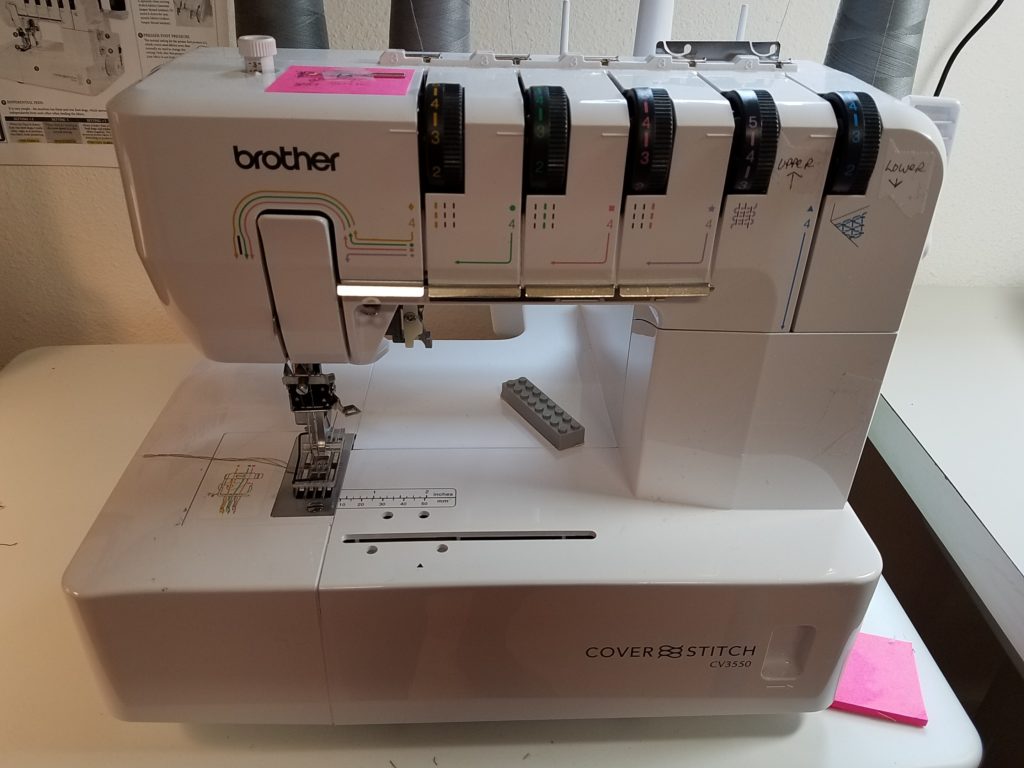
Next, I sold my Pfaff combo serger/coverhem. I had originally purchased it for the triple needle coverhem function, but I never loved the performance of the machine. When I heard that Brother came out with a top cover hem home machine, the 3550, that was it… ordered one sight unseen. This machine is amazing and easy to use once you understand the learning curve that all coverhem machines come with. I absolutely LOVE being able to provide an ultra-professional, finished look when I am altering activewear, baselayers, sweaters or other fleece, softshell garments.

Grey side is top cover stitch; navy is the underside, three needle cover hem.
Brother 3550 Coverhem, top spreader removed.

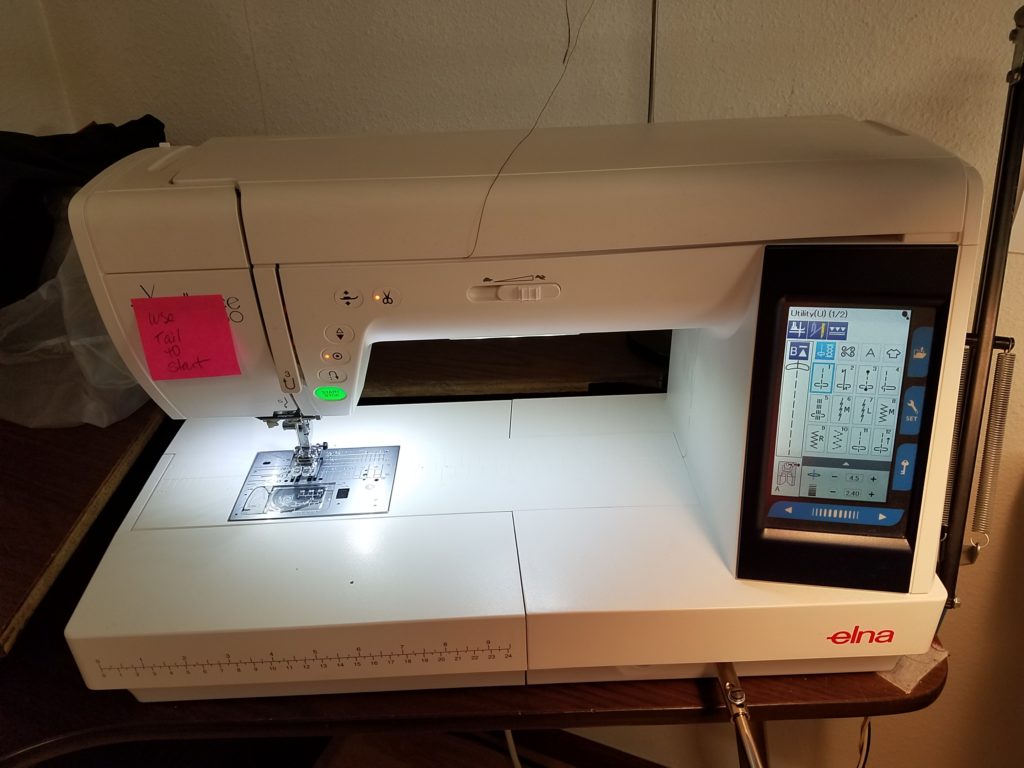
Why stop there? With retirement looming, I wanted to replace my trusty 33 year old Bernina while I am still working. While it’s very reliable, mostly, once in a while I get a vibe that it might croak on me. I was able to find an Elna 780 floor model and my-o-my it is rather amazing. I appreciated the control and features that I use specifically on garment projects. The harp space is huge and it does everything but make toast. Maybe I am modern but I like the ease of computer controls for eyelets and darning. It has a very wide stitch – up to 9mm for some functions which is very handy for certain repairs.

I still have my needle feed and walking foot and several other machines stashed away.

Tent Tips: Care and Selection

I repair dozens of tent zippers every season. Many people seem surprised when their tent zipper fails. Zipper slider failure is extremely common, and it is caused mostly through normal wear and damage.

The most common symptom  of slider failure is that the zipper coil will not zip closed,  or separates at a certain point on the zipper. This is typically an indicator of a worn slider. Worn sliders can easily be replaced, provided they are not an off brand. Damaged (bent) sliders will also exhibit this behavior. Coatings on zipper sliders are not particularly durable and wear down easily.

If your tent zipper is not zipping, the slider most likely worn from dirt and grit, or it has been bent from hard use, getting stepped on, being squeezed with pliers, or similar. The whole zipper does not need to be replaced, just the sliders.


A good example of how dirty tent coil gets.

A good example of how dirty tent coil gets. This tent had been hosed down but they did not hose the zippers out.

Here are important tips on tent care:

KEEP YOUR ZIPPERS DIRT, SILT, AND GRIT FREE!!!! Depending on where you camp, shaking/sweeping the tent out may be sufficient. More likely, you will want to clean your tent. Set it up in the yard, and take a hose to it. Do not use any cleaners or brushes. A rag made from an old towel will pull micro dirt off the floor really well. Wipe down the seams and spray the zipper coils with the sprayer. Dry thoroughly.

dog ran through tent door

Door Damage, dog ran through tent door

TRAIN YOUR TENT PARTNERS. Do not leave the door lying in the dirt. Watch the kids and the dogs. Open doors fully, do not leave zippers part way open. Roll up the tent door and keep it out of the dirt.


DO NOT FORCE ZIPPERS! If there is a fold of fabric caught in the zipper, work to gently free it. You can pull hard enough on the slider to damage the slider, the coil, or tear the fabric.

CLEAN YOUR TENT: Hose tent off and let air dry, thoroughly. If tent is gritty, use a sponge or rag to wipe dirt off. Never use a scrub brush, harsh detergent, or put tent in the washer. Pay special attention to hosing off the zippers. Note: I have been hearing good reports from people who have washed tents without detergent in a front loader  (non-agitator) machine. I have not tried this myself but you are welcome to experiment. Agitators can tear doors and ties downs, and detergent will strip the waterproofing. YMMV.

NEVER PUT A TENT AWAY DAMP: This is the number one cause of mildew, which eats away at the waterproof coating on your tent. There is no fixing mildew.

Commonly asked questions about tent care, and a few comments.

Lubing zippers? If you want to use a dry lube, McNett sells a zipper lube. Do not use Vaseline or any grease product on the zipper. It’s better just to keep your tent zipper clean and grit free.

Re-waterproofing the fly? Both Nikwax and Grangers’ make excellent products to renew waterproofing and/or DWR (Durable Water Repellency). Grangers’ also makes a combination waterproof/UV protector for fabrics. Order from www.mgear.com  I have not had good success with “K-kote” but others have tried it. It might be easier to just pitch a blue tarp over the tent if the fly is leaking that bad.

Smelly tent? It’s one of two things (unless it got skunked or peed on by a dog): mildew, or hydrolyzation of the polyurethane coating. Neither is fixable. Mildew is from moisture, and hydrolyzing of the PU is due to age and exposure to environmental conditions.

Zipper separates when the tent is staked out taut? Don’t stake it so tight. If it is impossible to not stake it taut without a zipper pulling apart, that is a design flaw. A new zipper or a beefier is not going to fix this.

Floor leaks? You can try to recoat the floor with K-kote. It is a really messy project and results are iffy at best. My suggestion is to cut a piece of blue tarp the same size as the tent floor and place that down inside the tent.

Make a new fly? Absolutely not. If your friend lost the fly when they borrowed the tent, make them buy you a new tent. If  “the rest of the tent is in good shape, it’s just the fly that’s old”, the rest of the tent is NOT in good shape; it’s just as old as the fly. The body of the tent may  not show the age that the  UV-baked fly is showing, but trust me, it’s old.

I’m going to close with my soapbox: “You really do get what you pay for”. Yes, I know you’ve camped successfully for years in your $99 box-store special. I’m happy for you and glad it’s working out. However, here is why I don’t love them:

  1. Low thread count fabric. It’s not very dense which is less weather repellent
  2. Fewer stitches per inch out of really crappy thread – seams are not as strong
  3. Off brand zippers have really soft metal zipper sliders that wear out faster
  4. Blue tarp floors
  5. Minimal fly

I’ll discuss how to identify sliders for replacement later on. Until next time…

Bad Things That Happen To Good Gear

I suppose I should keep a tally but I don’t.

The Top 10 Bad Things That Happen To Gear, in no particular order. Outside of normal wear and tear, more or less…

1. Melting (backed into the stove, embers, dryers, heaters…)

2. Ultralight gear breaking from being ultralight.

3. Dog or other animal ate it.

4. Tore a hole in it. (tree branches #1 cause).

5. Saggy pants splitting at the crotch (wear a belt, dude)

6. Straps pulling out of seams (mostly poor construction, more on this later).

7. Zipper sliders getting squashed.

8. Zippers breaking from dirt and general wear.

9. Zippers breaking from not being threaded correctly at the bottom.

10. Lack of care: salt and dirt degradation of fabric

Now, for normal wear and tear –

  1. Worn down zipper sliders.
  2. Worn plastic on male pin at the bottom of a zipper.
  3. Worn out Velcro.
  4. Worn out elastic.
  5. Aged fabric – worn through, UV degraded, weakened
  6. PU  and other treatments/coatings flaking off

Zippers, Velcro and elastic are all fixable, more or less. The rest? Not so much.


My Machines, Part 3

{yes, I still have a few more}

This is the workhorse. I couldn’t do what I do with out it. Silly me, I was advised to get this machine a long time ago, but being a cheapskate I procrastinated for years. I fought with an inappropriate machine for way too long.

Artisan Needle Feed with quiet servo motor

Artisan Needle Feed with quiet servo motor

This is a no-frills needle feed machine.  What is a needle feed?  The needle “walks” (feeds) as it pierces the fabric, moving the fabric back in conjunction with  the feed dogs. This makes for incredibly even feed of varying weights and thicknesses of fabric at any speed. Unlike a walking foot machine, the  presser foot does not walk; only the  needle does.  It does not have an automatic backtack or thread cutter, but that’s fine with me. It has a nice, quiet servo motor.  The needle feed has an incredible range. I can sew ripstop to Cordura with webbing. The key is to have the correct needle and thread.

If you want an industrial machine, and do not have someone local you feel good about, please contact Ron Anderson of A1 Sewing Machines

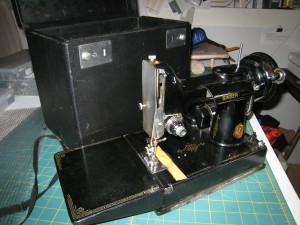
Last, for now, but certainly not least is my Singer Featherweight. IMG_4948


This machine used to belong to my mother-in-law, who was a very talented quilter. She also taught me to quilt; not like I do much of that lately but that is beside the point. This machine is hugely sentimental for me as it is the only thing of hers I got when she passed. And truthfully, this one belongs to my husband’s sister, but she has given it into my caretaking. There was another one that was to be mine, but…(insert family drama).  A funny story about this machine: I brought it up from the SF Bay Area to Washington shortly after 9/11. TSA officials didn’t like this item at all and I was pulled aside for the full meal deal bomb residue wipedown – for a little old lady’s quilting machine.

Coming up – more about different industrial machines, and “what machine should I buy”.

My Machines, Part 2

Sergers

I have the luxury of two sergers. Sergers are a wonderful tool for working with knits and finishing fabrics.

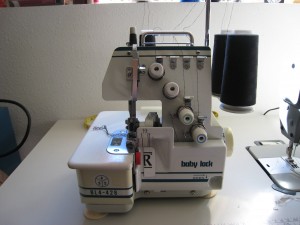
IMG_4630This Babylock may qualify as an antique. It certainly is of the first generation of sergers that came out for home use. I purchased it in 1987 and it still going strong. I’ve probably used it on hundreds of fleece items at this point. It is a 2/3/4 serger in that it will do 2-thread rolled hem, and both a 3- and 4-thread stretch seam/edge finish.


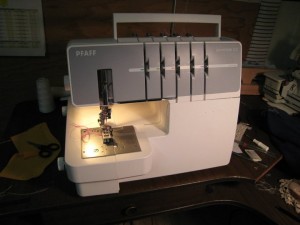
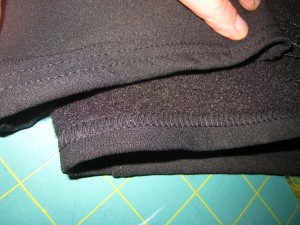
36268_492350889711_4849173_nThis is my Pfaff Coverlock that does several varieties of cover stitch hemming, and this is what a coverstitch hem looks like:

coverstitch on wool knit

What is a cover stitch? It hems and finishes all at once. This machine has been invaluable for professional looking finishes on stretch items, softshells, fleece and more. This serger  also does everything the Babylock does, but I keep it set up just for coverstitching. I don’t use this machine tons, but I am glad I have it for the results it can produce.

triple coverstitch on fleecey baselayer

209930_10150147387229712_4185666_o

coverstitch on powerstretch

Part 3 coming soon!

My Machines, Part 1

I get asked a lot about what machine to use or buy, and what machines I have. I confess I have amassed somewhat of a collection over the years. Some I use more, some I use less. I have pretty much run out of room to add anything new to the stable.  There are  some specialty machines that I would love to have, but needed something three times a years doesn’t necessarily justify the expense or the space.

Some things to consider are that many machines have a limited range of what they can do either in terms of specialty work or the materials that can be handled. With one  partial exception, there is no machine that can do it all. So here is what I have currently:

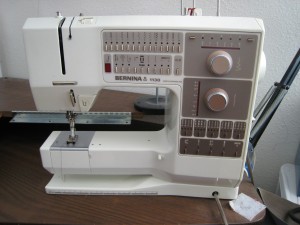
IMG_4629Bernina 1130. I purchased this machine in 1987  to replace a Viking 6000 that I burned the motor up on. For many years, this machine has done almost everything I have asked of it. It is limited by speed, and for heavy fabrics both by  piercing power and the inability to run heavy thread.  However, it is incredibly precise with beautiful stitches. I love the “needle-down” function, the ability to one stitch at a time, and the buttonhole. I don’t use it nearly as much as I used to, but for precision work, button holes and certain repairs it is still very handy. It has even survived lightning strikes to the tune of $300 in circuit board replacement.

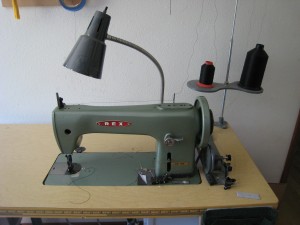
IMG_4628This Rex walking foot has been a shop mainstay for many years. I purchased  it out of the nickel ads 15 years ago. It was a true “driven on Sunday by a little old lady” find.  While the foot is not as high lift as some other walking feet machines out there, it will handle just about anything tough I can stuff under the foot. It lacks real speed, and is not suitable for lighter fabrics. This video illustrates exactly what a walking foot aka compound feed machine does. Additionally, it is designed to run heavy thread and use big needles. Nowadays I use it primarily for repairs involving packs and heavy materials.

More about the rest of my machines soon!

Hoarding Information

When I was working on the new site, my graphics guy asked me, “why is keeping the Tips section so important to you?” The reply was simple: it’s not my information to hoard. Since the beginning of Specialty Outdoors, that has been my philosophy. Competition doesn’t concern me: I would much rather respect and support my professional peers, sharing a few tricks here and there, instead of worrying about whether they might steal ideas or customers. Heaven forbid helping the enthusiastic hobbyist to success with a project!

Here’s why I don’t hoard information. First of all, it’s not rocket science. It’s more a hammer-and-nail scenario. Most of my information I have either found online, in books, or through generous mentors and others willing to answer my questions. They weren’t hoarding: they gave it freely where they thought it could be used, and I do the same.

Sharing information was the very first lesson I learned when I got online back in… 90-something. I ventured onto Usenet, (rec.backcountry) posted my services, and was immediately and thoroughly flamed for advertising on a non-commercial board. Oops. I didn’t know any better as I had read about Usenet in Better Homes and Gardens, of all places. Anyway, some kind soul, and to this day I do not know who it was, emailed me and let me know that the way in was to participate. So I did – advice on repairing gear, cleaning gear, where to find fabrics and other tips, with a one line signature. It has been been fun being a resource, and of course people think of me when it’s out of their comfort zone to do some work.

But – I’m not going to do your homework for you. Please, don’t be lazy as it’s a real turn off. The most common example is someone who wants to do small scale manufacturing, finds me online, and wants me to tell them everything I know so that they can get started. Here’s what I tell them: You need this book. I read it to get informed, and they can too. The author, Kathleen Fasanella, shares her knowledge freely and tirelessly. Don’t email me asking where to get something. That is why there is a sources page!
Kathleen and many others have been great role models  and mentors to me. I am forever thankful, and do my best to carry on the tradition. Thank you to Kathleen, Joe, Judith, Kevin, Patrick, Patrick  and Greg… the range of knowledge you have shared with me has been immense and I am ever grateful.


Demystifying Waterproof Breathable Fabrics

On the old site, I had a page about waterproof breathable fabrics. It was an attempt to decode the technical jargon and explain the differences in the various types of waterproof breathable fabrics. Two-layer? Three-layer? Monolithic coatings? It’s very overwhelming for we fabric tech people, much less the lay person.  Instead of trying to explain all this myself in a new, updated article, I am sharing this excellent article that is current and does a fantastic job of cutting through the BS and obfuscation that surrounds fabric technology. Even if you are like me and all the tech-speak starts to sound like Charlie Brown’s teacher (“wrrrrrr-wrrrrrr-wrrrr”), this one is highly readable.

The following article comes from Blister Gear Review,  an independent adventure sport website whose mission is to publish the most in-depth and honest gear reviews on the planet.   I really like this blog for its non-nonsense, real world reviews. My original intent was to reprint the article here, but at 5+ pages with images it’s easier to link. This article is a “must read” if you have any interest at all in understanding the technology that drives outerwear design and technical fabric development and use.

Outerwear 101

Excerpt:
2L vs. 3L Shells

Here is an important question when purchasing a shell: 2 Layer or 3 Layer? And does it really matter?

2L – The Original

2L garments are constructed with two layers; a nylon face fabric (generally with a DWR) that is bonded to a WP/BR laminate. 2L garments are always lined with some sort of lining fabric. These linings are generally made of thin nylon or mesh, and serve two purposes. First, the lining keeps the laminate from direct contact with the skin. This is important because the laminate generally has a plastic feel to it and can be quite uncomfortable.

The lining’s main purpose, however, is to protect the laminate. Even though the laminates are engineered to be resistant to fouling, without further protection of the laminate, its durability can suffer greatly. 2L garments are generally constructed with some amount of seam taping. Seam taping keeps water and wind out at the seams, but does not breathe.

2L outerwear dominates the market for many reasons. 2L construction lends itself quite well to making insulating garments, which dominate the consumer market. (People want their coats to be warm. Who knew?) 2L construction is also less expensive because the technology has been around much longer. The construction of the garments is easier because the lining allows many sewing options with less need for seam taping, and the design is easier because of the ability to work with a lining.

3L – Or, Why does this jacket cost $600???

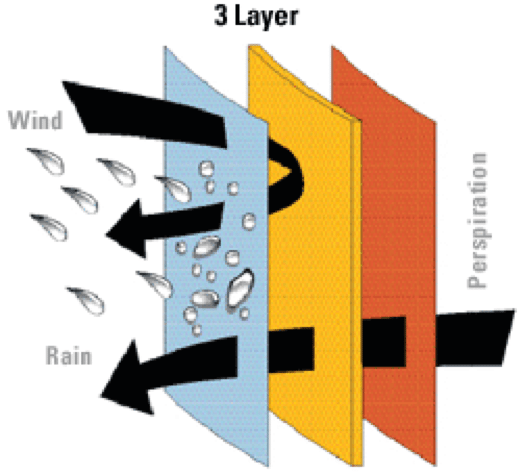
3L garments are constructed with 3 layers: (1) a nylon face fabric (with a DWR) that is bonded to (2) a WP/BR laminate, which is bonded to (3) a tricot layer on the inside.

3L construction: blue = nylon face, yellow = WP/BR laminate, orange = tricot liner

3L construction: Blue = nylon face; Yellow = WP/BR laminate; Orange = tricot liner.

3L garments are not constructed with a lining and are therefore often shells. 3L pieces generally use the most advanced (and therefore expensive) fabrics and laminates. These fabrics make up some of the most technical pieces of outerwear available. Construction of 3L garments is difficult. Every seam has to be taped or welded, and every cut greatly modifies the look of the garment. Given that both seam taping and the fabric are extremely expensive, and construction is difficult, 3L garments can be costly pieces of outerwear.

So why bother to make (or buy) a 3L jacket, when you could just produce or purchase a 2L jacket?

There are a few reasons why 3L construction has gained a lot of momentum in the industry lately. First is performance: the addition of the bonded tricot liner increases the breathability of the garment. The tricot is hydrophilic and, as you sweat, the tricot preferentially absorbs your sweat and transports it to the laminate so it can diffuse out. Contrast this with a 2L garment, where the water vapor has to randomly bump into the laminate while navigating between your skin and the lining to diffuse out.

The next advantage is weight. 3L garments can be made without a lining, and therefore, save a substantial amount of weight when compared to their 2L counterparts.

The final advantage is the durability of 3L construction. The addition of the tricot liner adds a significant amount of support and protection for the laminate that is not present in a 2L garment. In short, a 3L garment will have better performance, with less weight, and be more durable than a comparable 2L design—albeit at about twice the cost.

2.5L – Or, What in the hell is a half a layer?

This is not a very common construction in the world of winter outerwear, but it is a common source of confusion, so we’ll briefly touch on it.

A 2.5L fabric is made up of two and half layers—sort of. It has a nylon face fabric (with a DWR), a WP/BR laminate, and then a printed lining. This printed lining is present for the sake of protecting the laminate, but does little to eliminate the clammy, plastic feeling of the laminate directly on the skin; hence the designation of a half of a layer. 2.5L fabrics are used on active rainwear because they are easier to produce and end up being lighter than 3L garments, though less comfortable.


“How Did You Get Into This?”

I get asked a lot, “how did you get into this”? I’ve been sewing my whole life, starting with little blankets for my Breyer horses. I was first exposed to the outdoors industry working for Pat Smith and MountainSmith in 1983 when he was still in his garage and made the move to the  first facility. There,  I was a jill-of-all-trades batching packs for the sewers, inspecting packs, shipping and almost anything else. This was my first exposure to entrepreneurship, outdoors goods, industrial machines and production.

I cobbled together most of an apparel design degree but  did not complete it due to life happening.  I spent a lot of years doing custom clothing and bridal. When we moved to Spokane it was a great opportunity to quit that niche. Honestly, as a jeans-coated-with-dog-hair kind of gal, and piles of gear all over the place, it never was a good fit.  In the meantime, I was rummaging through the back tables in fabric stores as the first fleeces were just starting to come out.   A few patterns became available and I was able to outfit my husband and little boys with fleece garments. Adult fleece garments were spendy, and there was nothing for kids. In my quest to make affordable gear, I began to reverse engineer, tweak, and search out information that was not obvious for the home sewer.  This was noticed in the community, and a guy said to me, “you should be repairing gear”. What a great idea!

Spokane is the kind of place where small businesses are supported by the community, and we have a very active outdoors community here. It wasn’t long at all before I was getting known as “The Zipper Lady”.  I got the bright idea to build a website in ’97 or so, and established an online presence. Back then it was easy: hand code some HTML, add some links and voila`: a website is born.

I had read about Usenet in a women’s magazine and I sought out rec.backcountry. My Usenet newbie “hello, I can fix your gear” post did not go over well, and the trolls had a field day. I do not remember who it was, but I am ever grateful to the kind soul who emailed me and gently explained the Usenet faux pas I had made and let me know the correct way to (non) advertise on a non-commercial newsgroup. The key was participation and a one line signature, so that’s what I did. I helped people do their own repairs, told them where to find materials, advised them on gear care, and in return, they called on me when it was time for a pro. In addition, I was for many years a moderator and participant in the Gear Makers forum at the Backpacking.net site.

Throughout all this, the work started coming in. Whether it was a referral from a website, friend-of-a-friend, search engine, an outdoors club, or a referral from a manufacturer I confess I never kept track after I got to 45/50 states and some international work.  I now have arrangements with  local stores to collect local work, in addition to contract work and all the great folks that somehow find me. I’ve never consciously advertised, but I do believe that the willingness to share information and help other when I can contributes to things coming my way.  This leads me to thoughts on hoarding information, which will be posted another day.

Love, Attachment, and Saying Goodbye

very old REI tag

very old REI tag

Over the years, I have seen some amazing classics come through the shop. It’s always amusing when I have the same thing buried in the gear room somewhere. This happens more often than you think. Snow Lion, Petzl, first generation Patagonia and Marmot, Gerry; REI labels from the 70s….great old stuff. Some of it is terrific shape, and some of it is beat to shreds.

I DO understand your relationship with your gear. I get that you romanced and honeymooned in that tent, and your children were conceived in it. Perhaps you summited a particular peak with a certain coat or pack. Maybe you’ve had that day pack forever, taken it around the world, and it still works. Or it did, except for the zipper, My job is to know when to repair and give an item a little TLC, and when to find a tactful way to say, “it’s done”. I always feel bad as I do empathize!

1980: Alpenlite backpack,  wool from Army Navy surplus and Goodwill, Pivetta  5 hiking boots, Epoke 900s and Narrona 3-pin boots in the backpack. Location: Snow Creek trail, Yosemite

1980: Alpenlite backpack, wool from Army Navy surplus and Goodwill, Pivetta 5 hiking boots, Epoke 900s and Narrona 3-pin boots in the backpack. Location: Snow Creek trail, Yosemite

I confess that I didn’t truly get this until we had a family event that underscored this attachment. We used to have a Jansport traildome. The green one with the fiberglass poles? You know it if you’ve been around as long as I have. It was actually my husbands, acquired sometime in the late ’70s.  He and I did our first winter ski trip in it and many many backpack trips in the Sierra, and the Colorado and Wyoming Rockies. We had K-Koted the leaking floor back in 1985, Fast forward to the mid 90’s, when my husband and I are stoked to finally have the kids in their own tent (the Jansport) on family trips. We were camping on the backside of Mt. St. Helens, and over night there was a torrential downpour. Our kids roused us because the inside of the tent was a lake. Sigh. It was obvious: this tent was at the end of its life. How could that be? All I know is that it felt horrible and somehow wrong to toss it in a dumpster, but that’s what I did. Would a little farewell ceremony have been better? I’m not sure about that but I still recall the angst.


How do you know when it’s time to toss? Things like Velcro, snaps, zippers, and drawstrings are an easy fix. If the item needs patching, is the patch now going to be the strongest part of the item? This is not a good thing. How about the base fabric? Is it in good condition or is it showing signs of fading, thread breakdown, or UV-induced weakness? For tents especially, UV breakdown of the fabric and breakdown of the coatings is a sure sign of an elderly tent. Mildew and flakey coatings are unrepairable. In my experience, there is no good fix for worn floors or worn flies.  If you must use your tent on its last legs, the blue tarp fix (over the tent,  and/ or another one inside and on the floor) is the only real way to stay dry.

I can’t tell you the right way to say goodbye to beloved old gear. Whether you toss it,  tuck it into the rafters of your garage, or have a memorial ritual is up to you. What I can tell you is how to take care of what you do have, and make it last as long as it possibly can.

Happy Trails until next time…