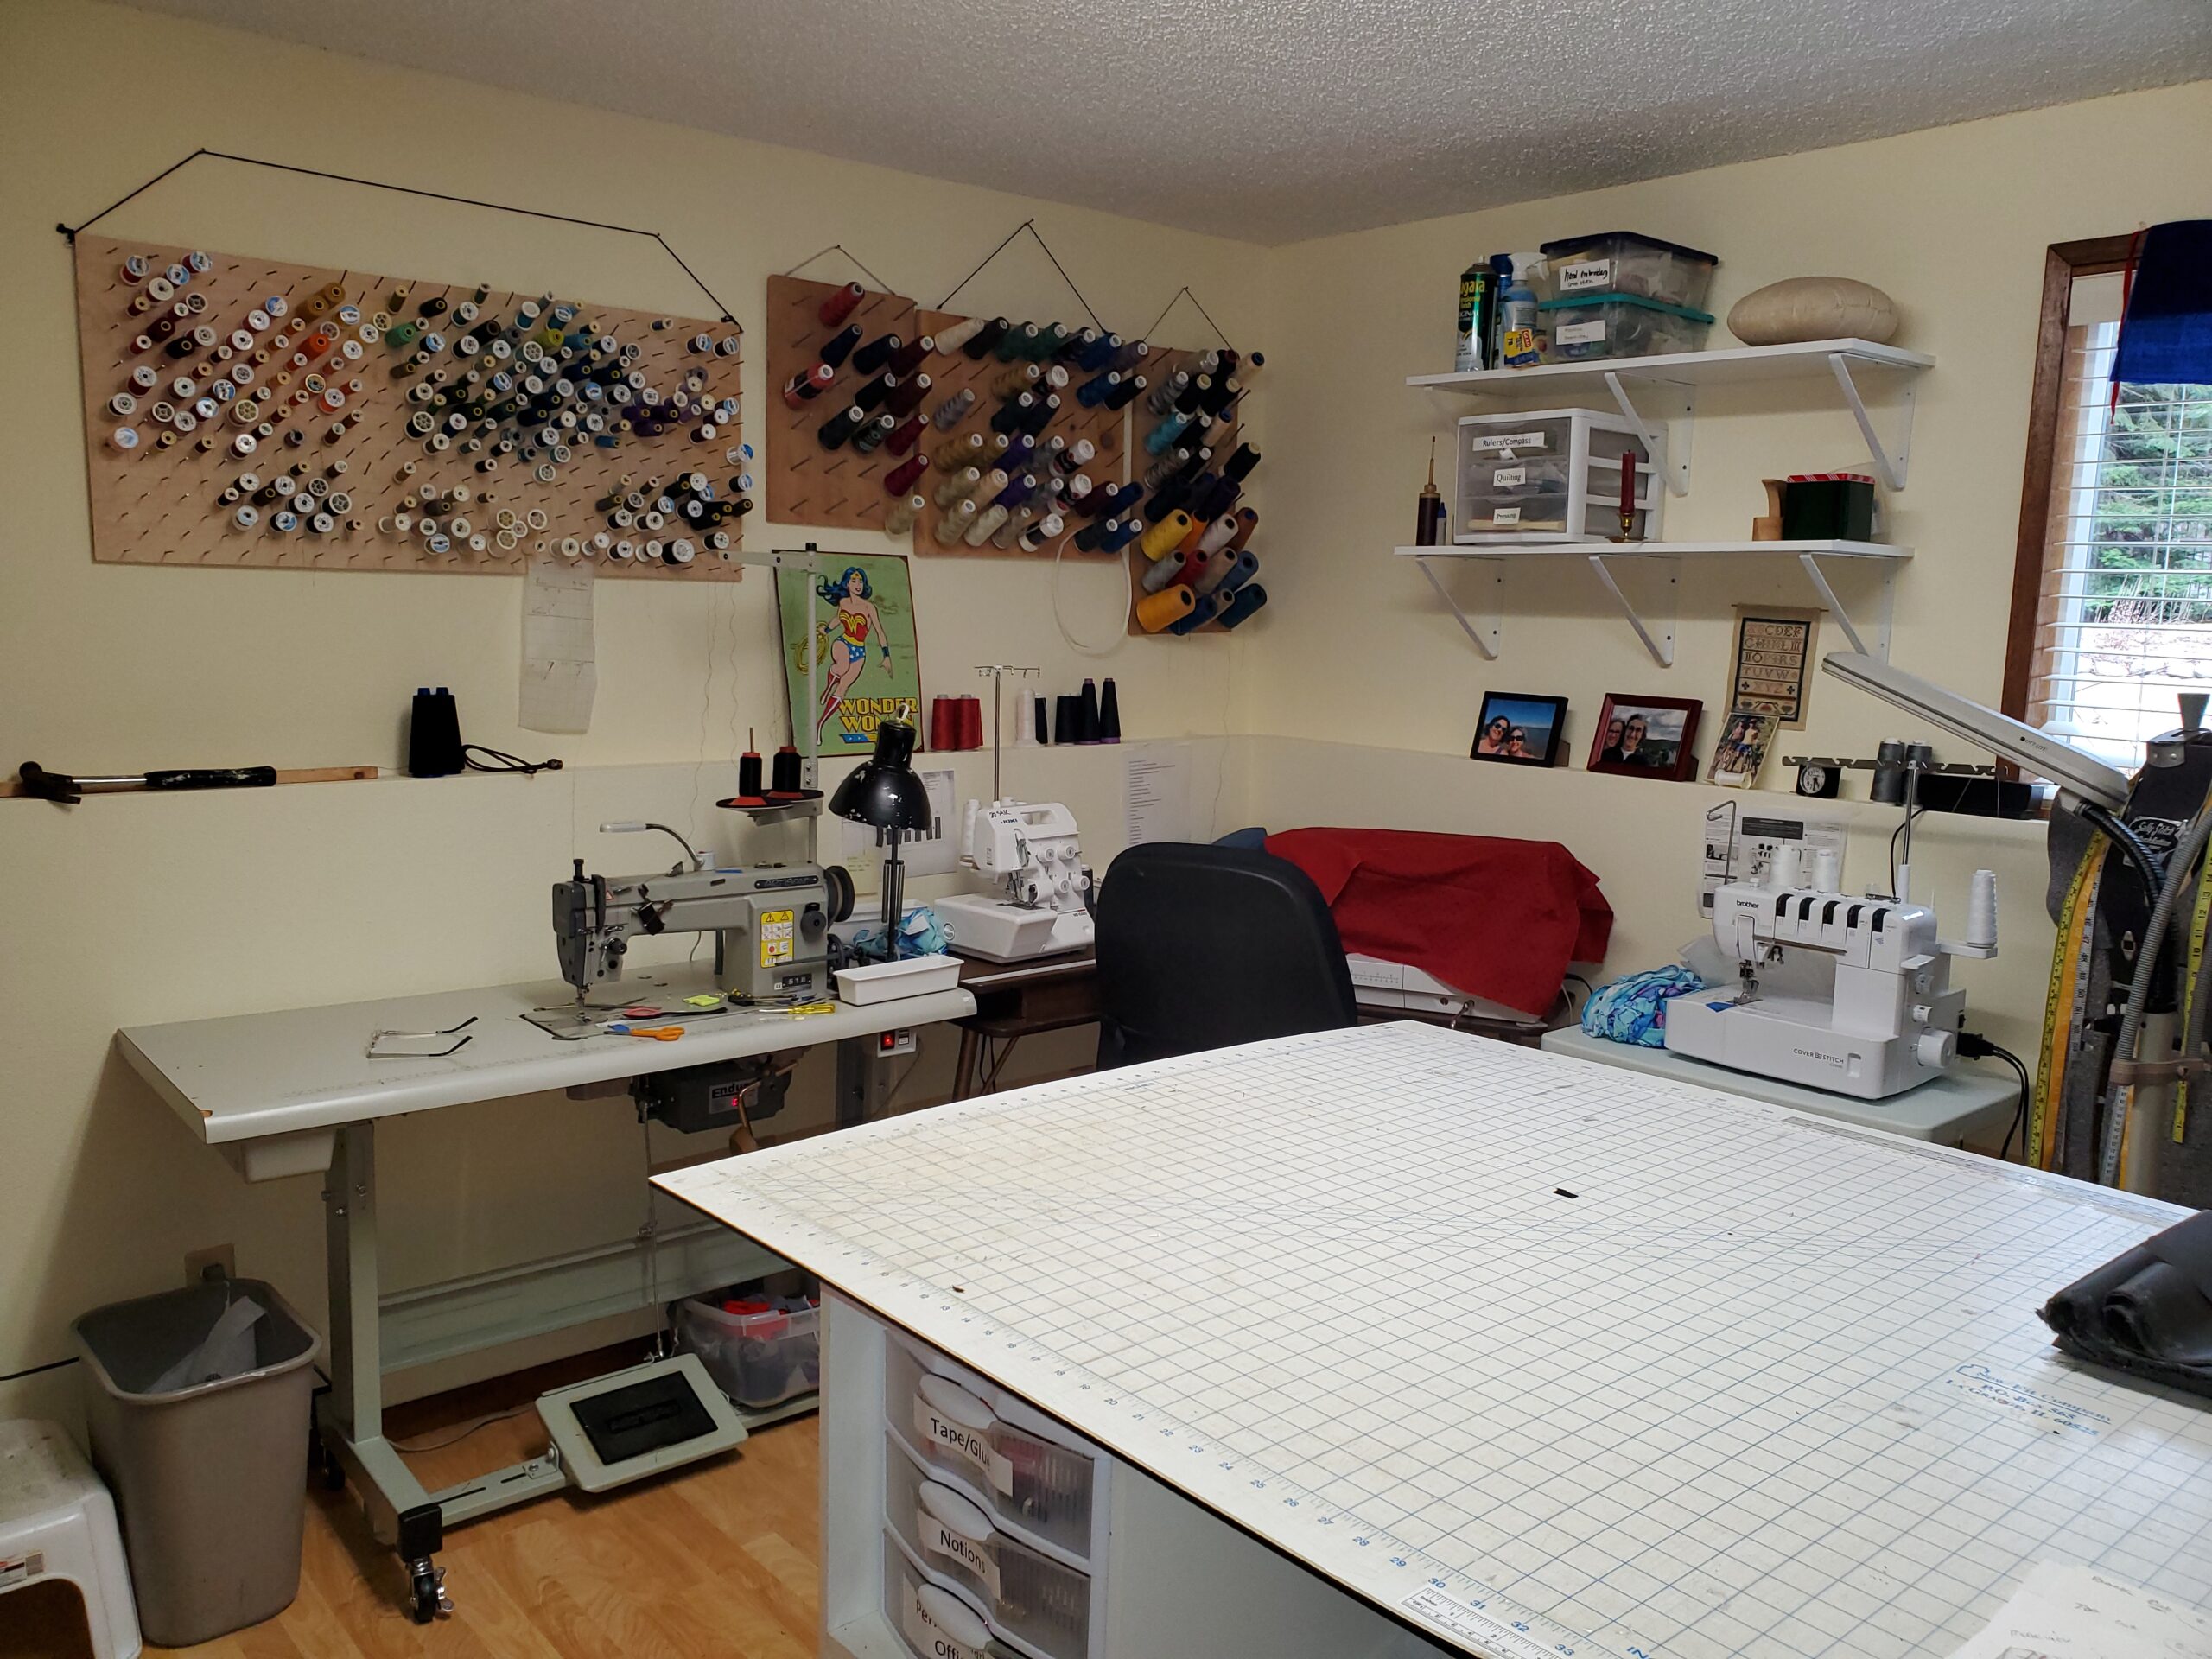
(new reformatted page coming soon, apologies for formatting)
Hello all, I know it’s been ages since I posted anything new. Here is a tutorial from the archives. If you are looking for a smooth, foolproof way to insert a zipper into knits or baselayers, look no further.
I will show you how to do an enclosed inside finish,
Even and matching seams,
And a very tidy zipper insertion:
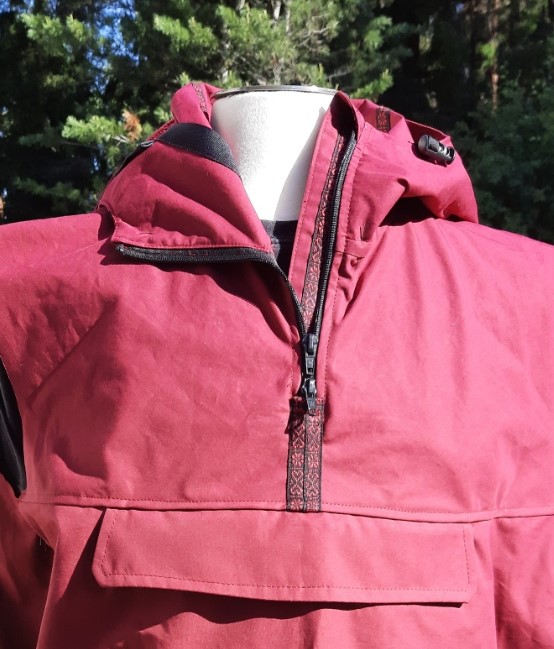
First, thanks to Jalie Patterns for the the zipper insertion technique. Grey garment pictured is the Vuokatti baselayer pattern, offered free by Shelby Kaava Outfitters.
Let’s get started!!
Zipper Insertion
Part 1, preparation
(CF=Center Front, WS=Wrong Side, RS=Right Side)
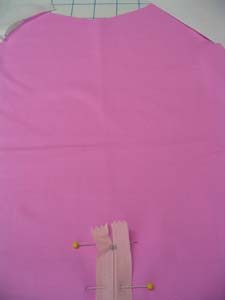
Adjust, layout and cut your pattern as usual. Figure out how long you want the front zipper to be, and mark the CF. Keep in mind collar width added to the front panel for the length of the zipper. Mark CF with dots and a 2″ slash at CF.
Sew sleeves, back and collar on. Do not sew side seams; you want to work flat.
Check length of zipper against collar fold point and your marks. I have the collar fold marked with a pin. This is the final width of the collar.
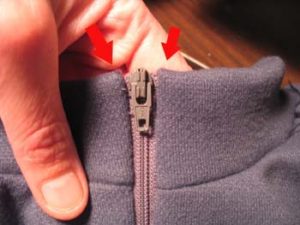
Now, noting the exact placement of bottom zipper stop, mark bottom of the zipper with a pin
Turn zipper RS down and going the opposite way it should, on the RS front. Secure the zipper.
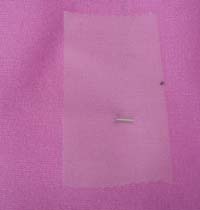
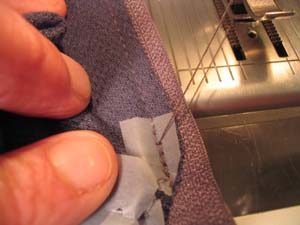
Where you have bottom of zipper marked with a pin, use a couple of pieces of clear tape on the WS. This will act as a stabilizer when you sew the bottom of the zipper.
Part 2, sewing
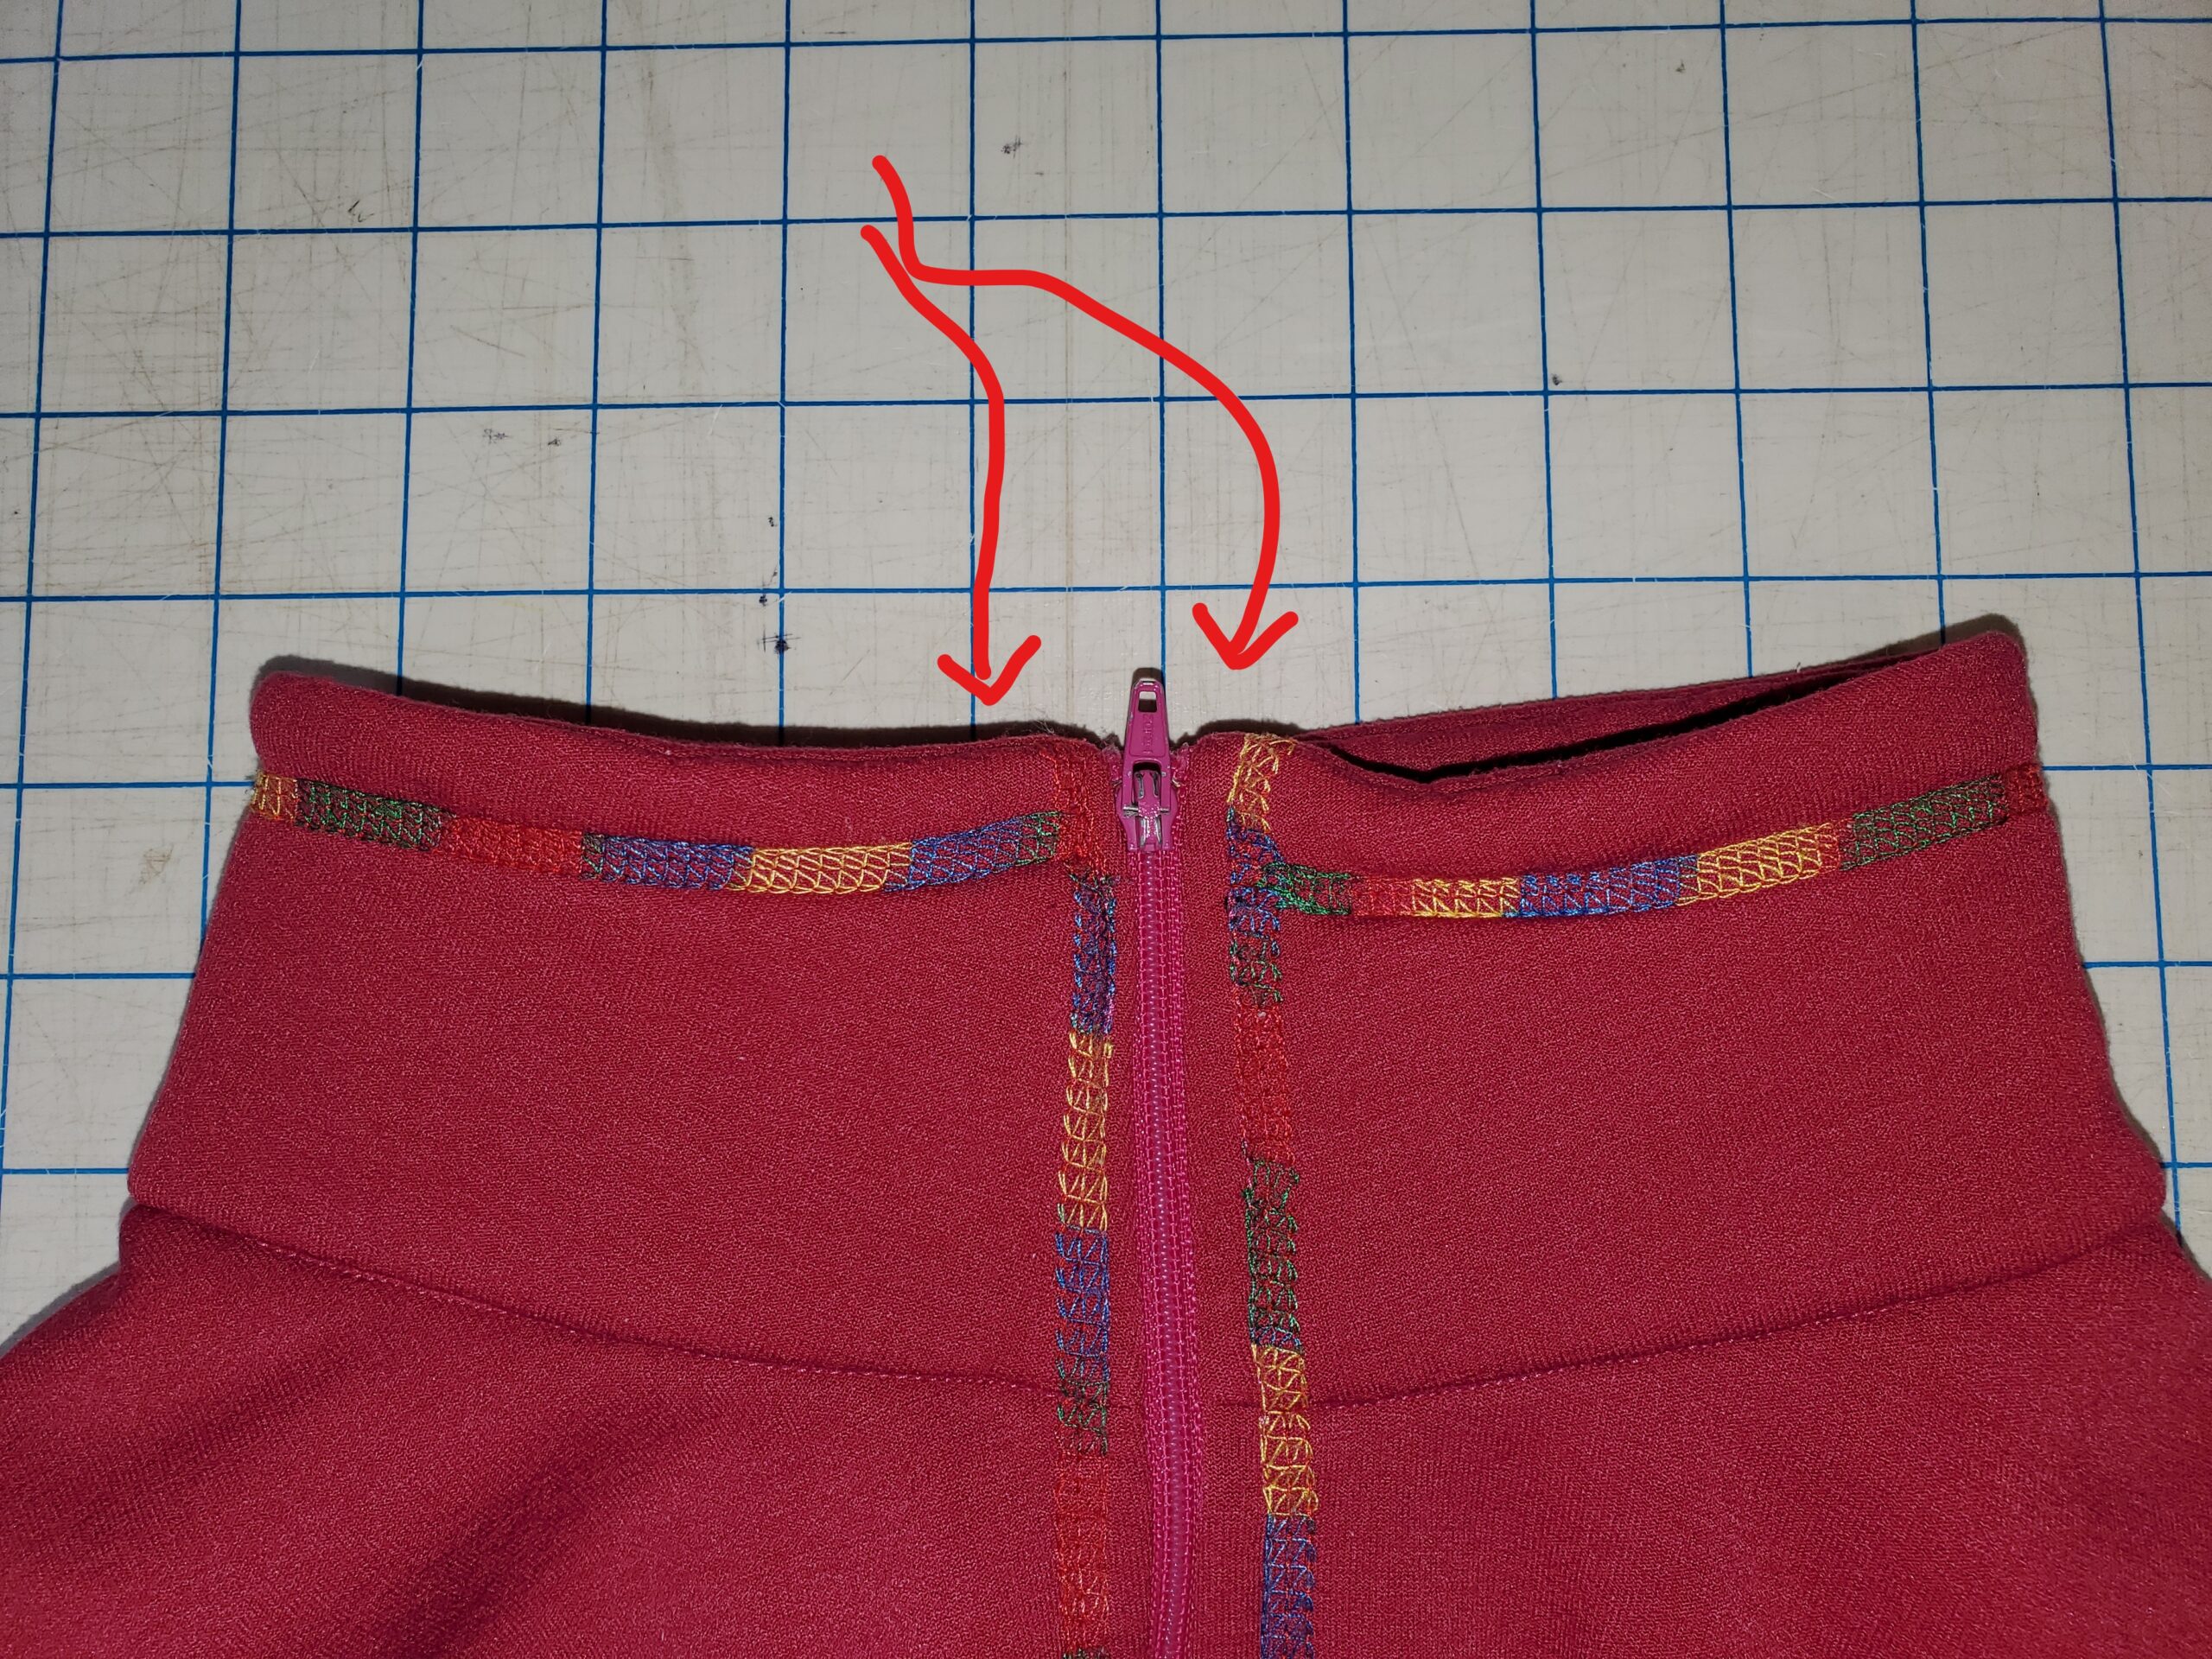
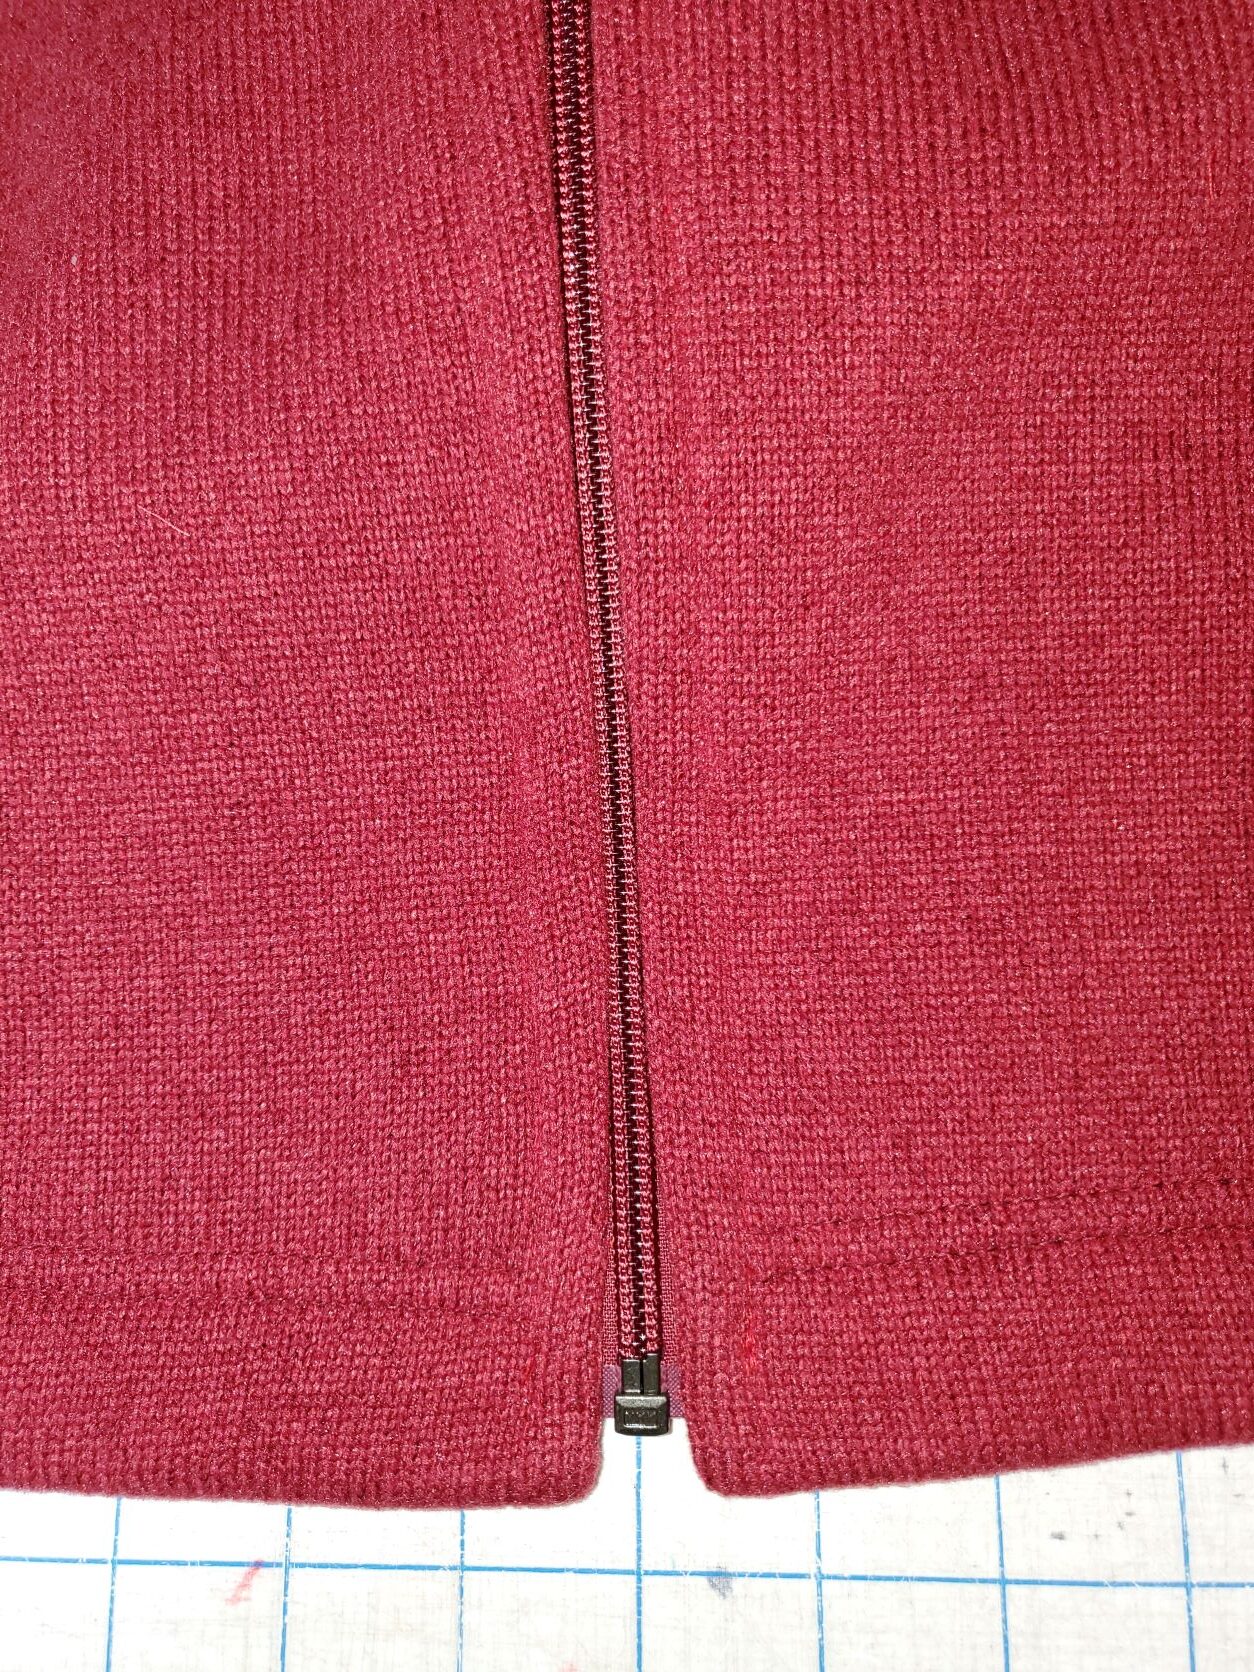
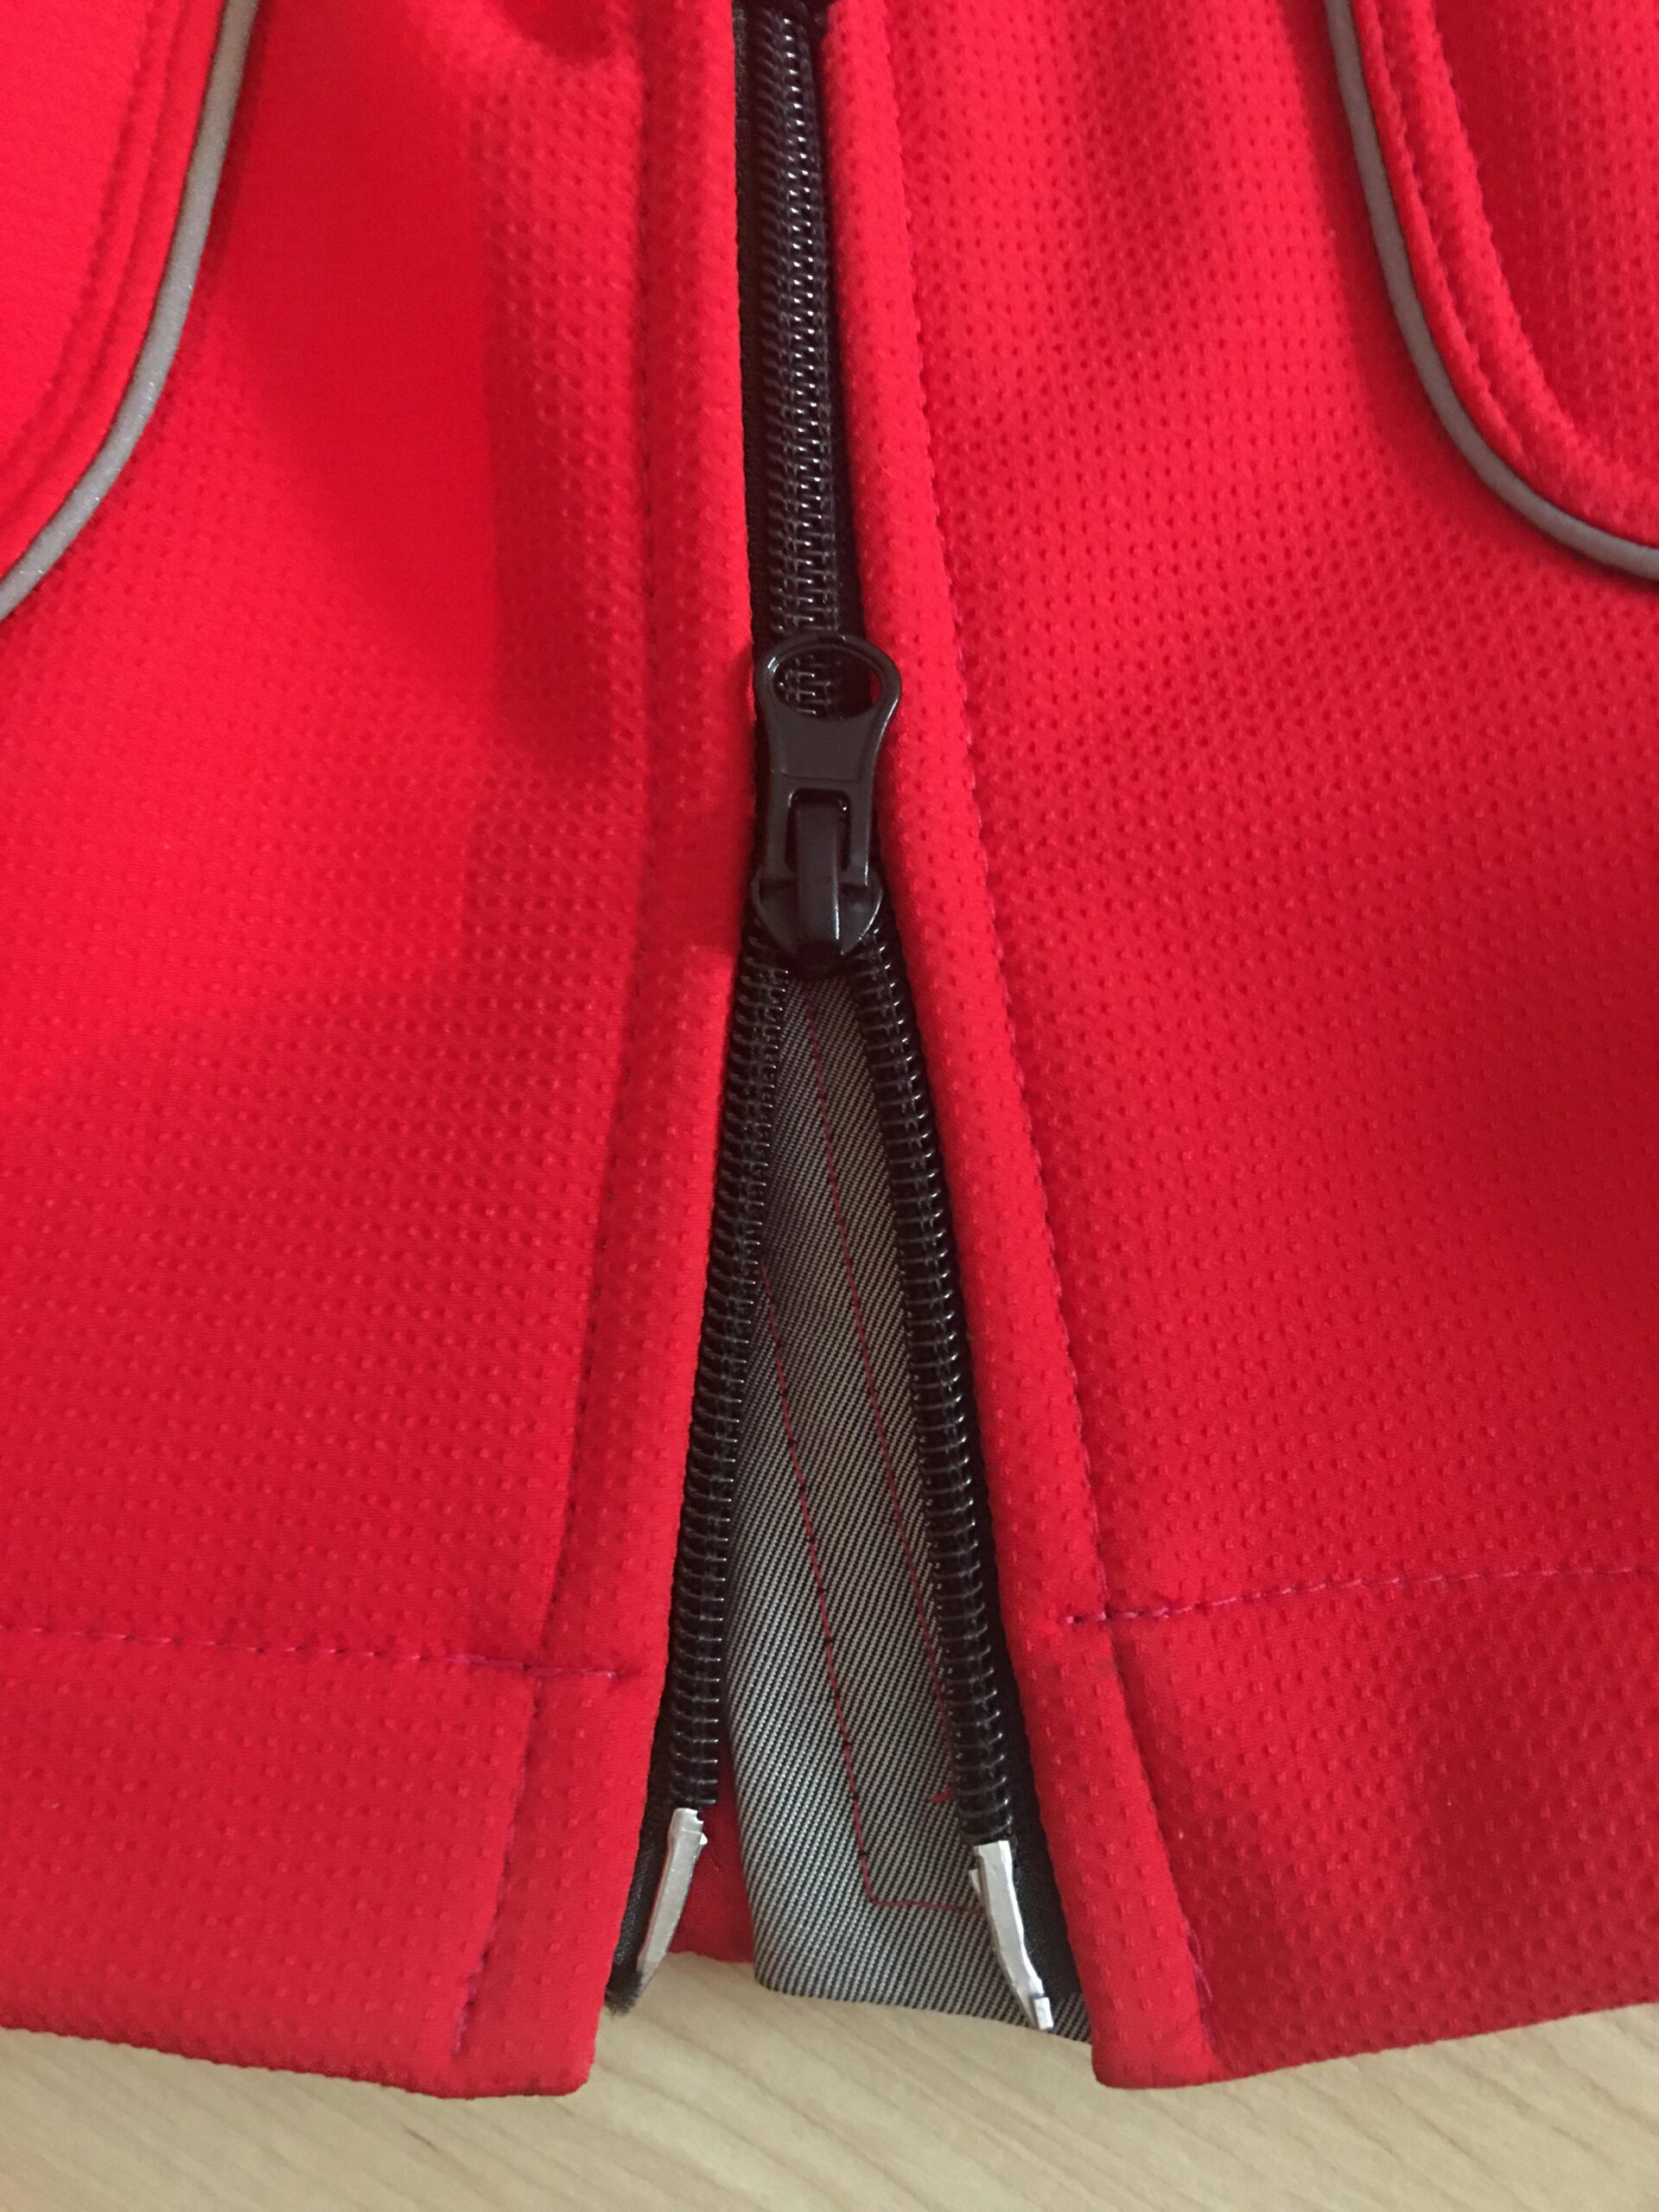
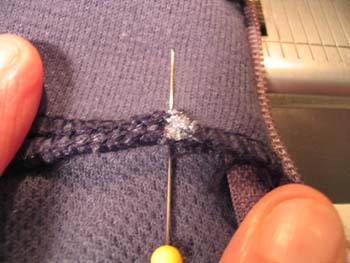
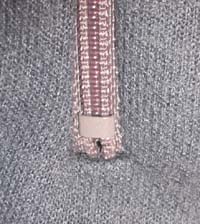
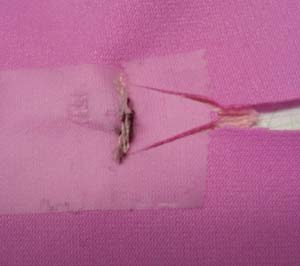
Now, stitching very carefully, stitch across the bottom of the zipper, RS of shirt up, zipper is RS down and pointing the wrong way. Take just a very few stitches, and backstitch. Even as pictured I took a few too many. You just want to secure the end of the zipper, no wider.
Then, you will carefully cut down the CF of your shirt from the slash at top CF, making a “>” at the end of the zipper. Clip EXACTLY to the edge of your stitching and make sure the legs of the “>” are longer, not shorter.
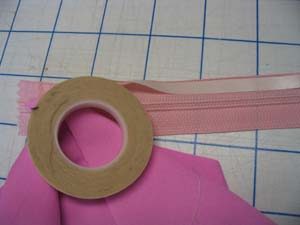
For the next step of actually sewing the zipper tape to the fabric, a nifty notion called Wonder Tape is very helpful. It is washable, and really keeps knits from distorting during this step.
Apply the Wonder Tape to the RS of the zipper.
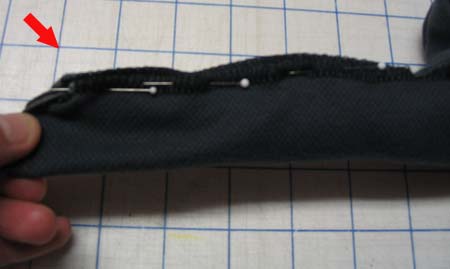
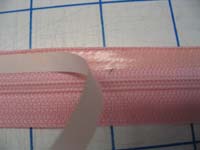
Turn the long cut edge and press to secure, making sure there is no distortion. Stitch carefully, starting exactly at the apex of the “V” cut. Use the zipper foot to get close to the coil. Note that on the grey fabric, the edge of the fabric opening is placed only part way to the edge of the zipper tape. This is done deliberately, to keep the opening narrow and undistorted.
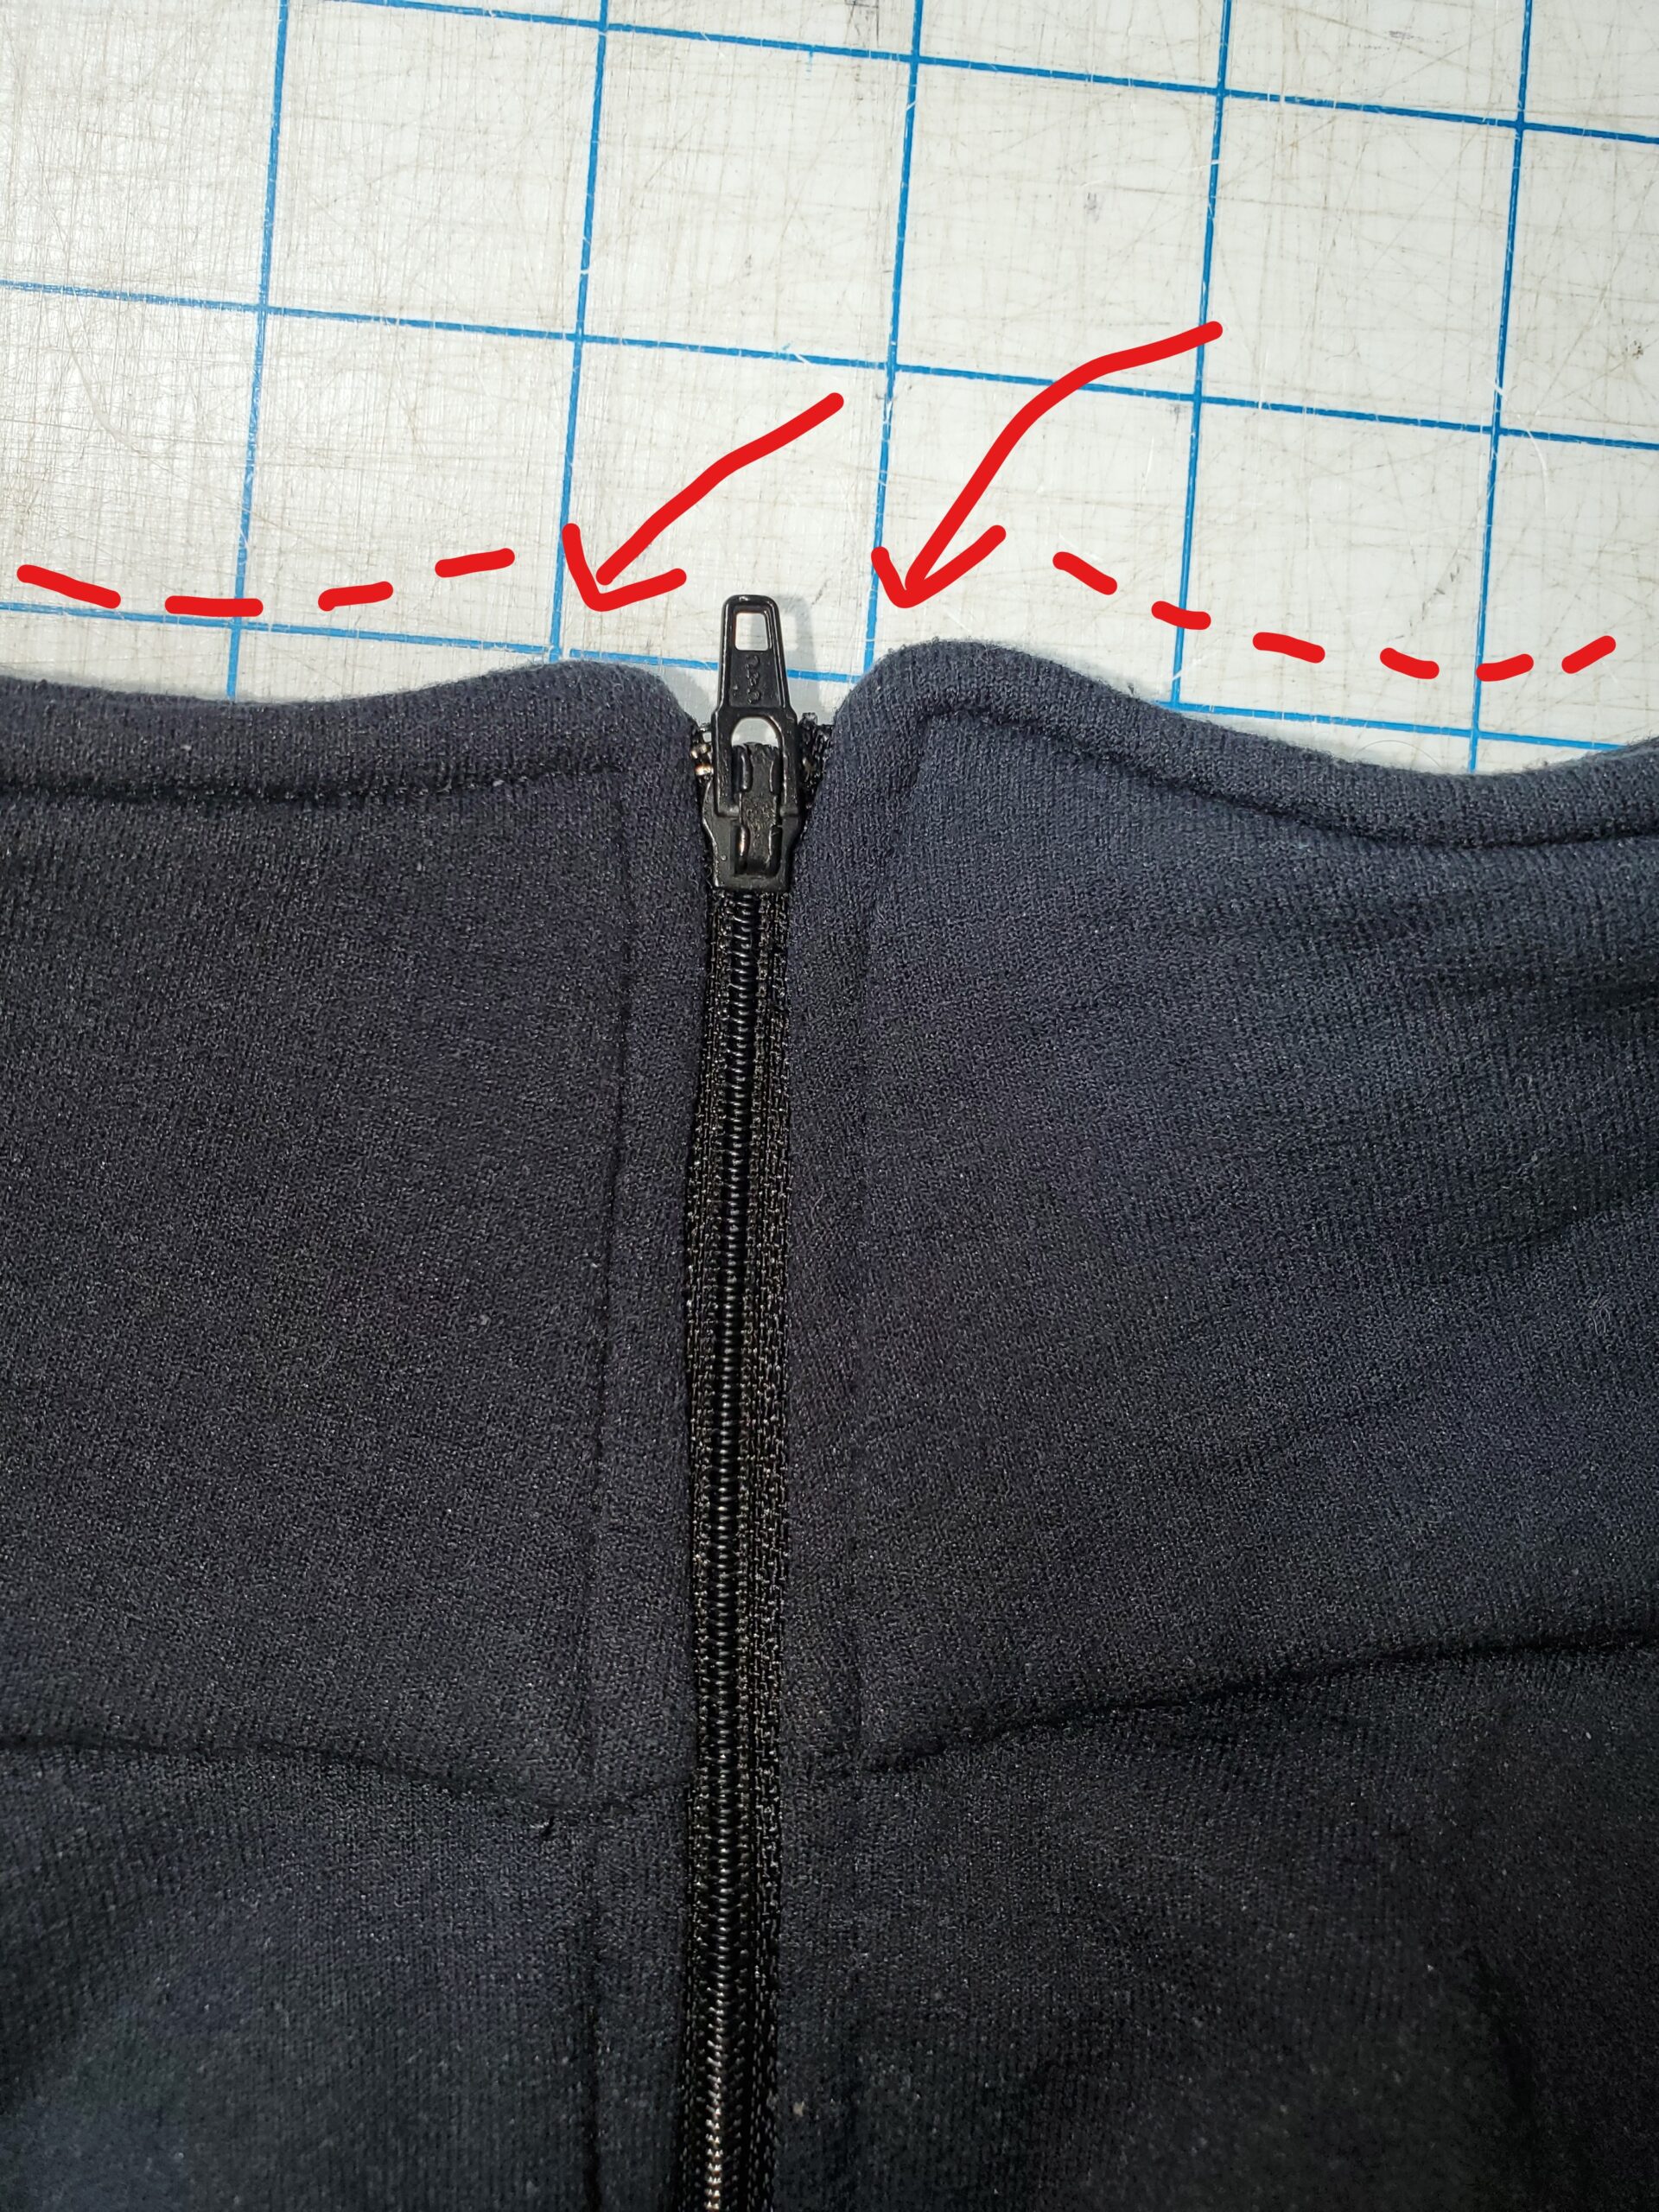
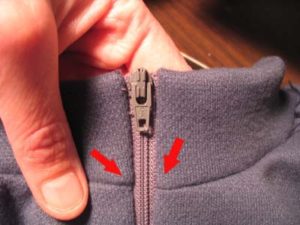
Finish both sides of the zipper. If you have been careful, you’ll have a nice, even, small opening like pictured below. When you are crossing the collar seams, make sure that they match up on either side Check this before you stitch. Fold the seam allowances towards the collar. This will also help with the collar treatment. Pick off any excess wonder tape you can see. The rest will wash out.
Collar Finish
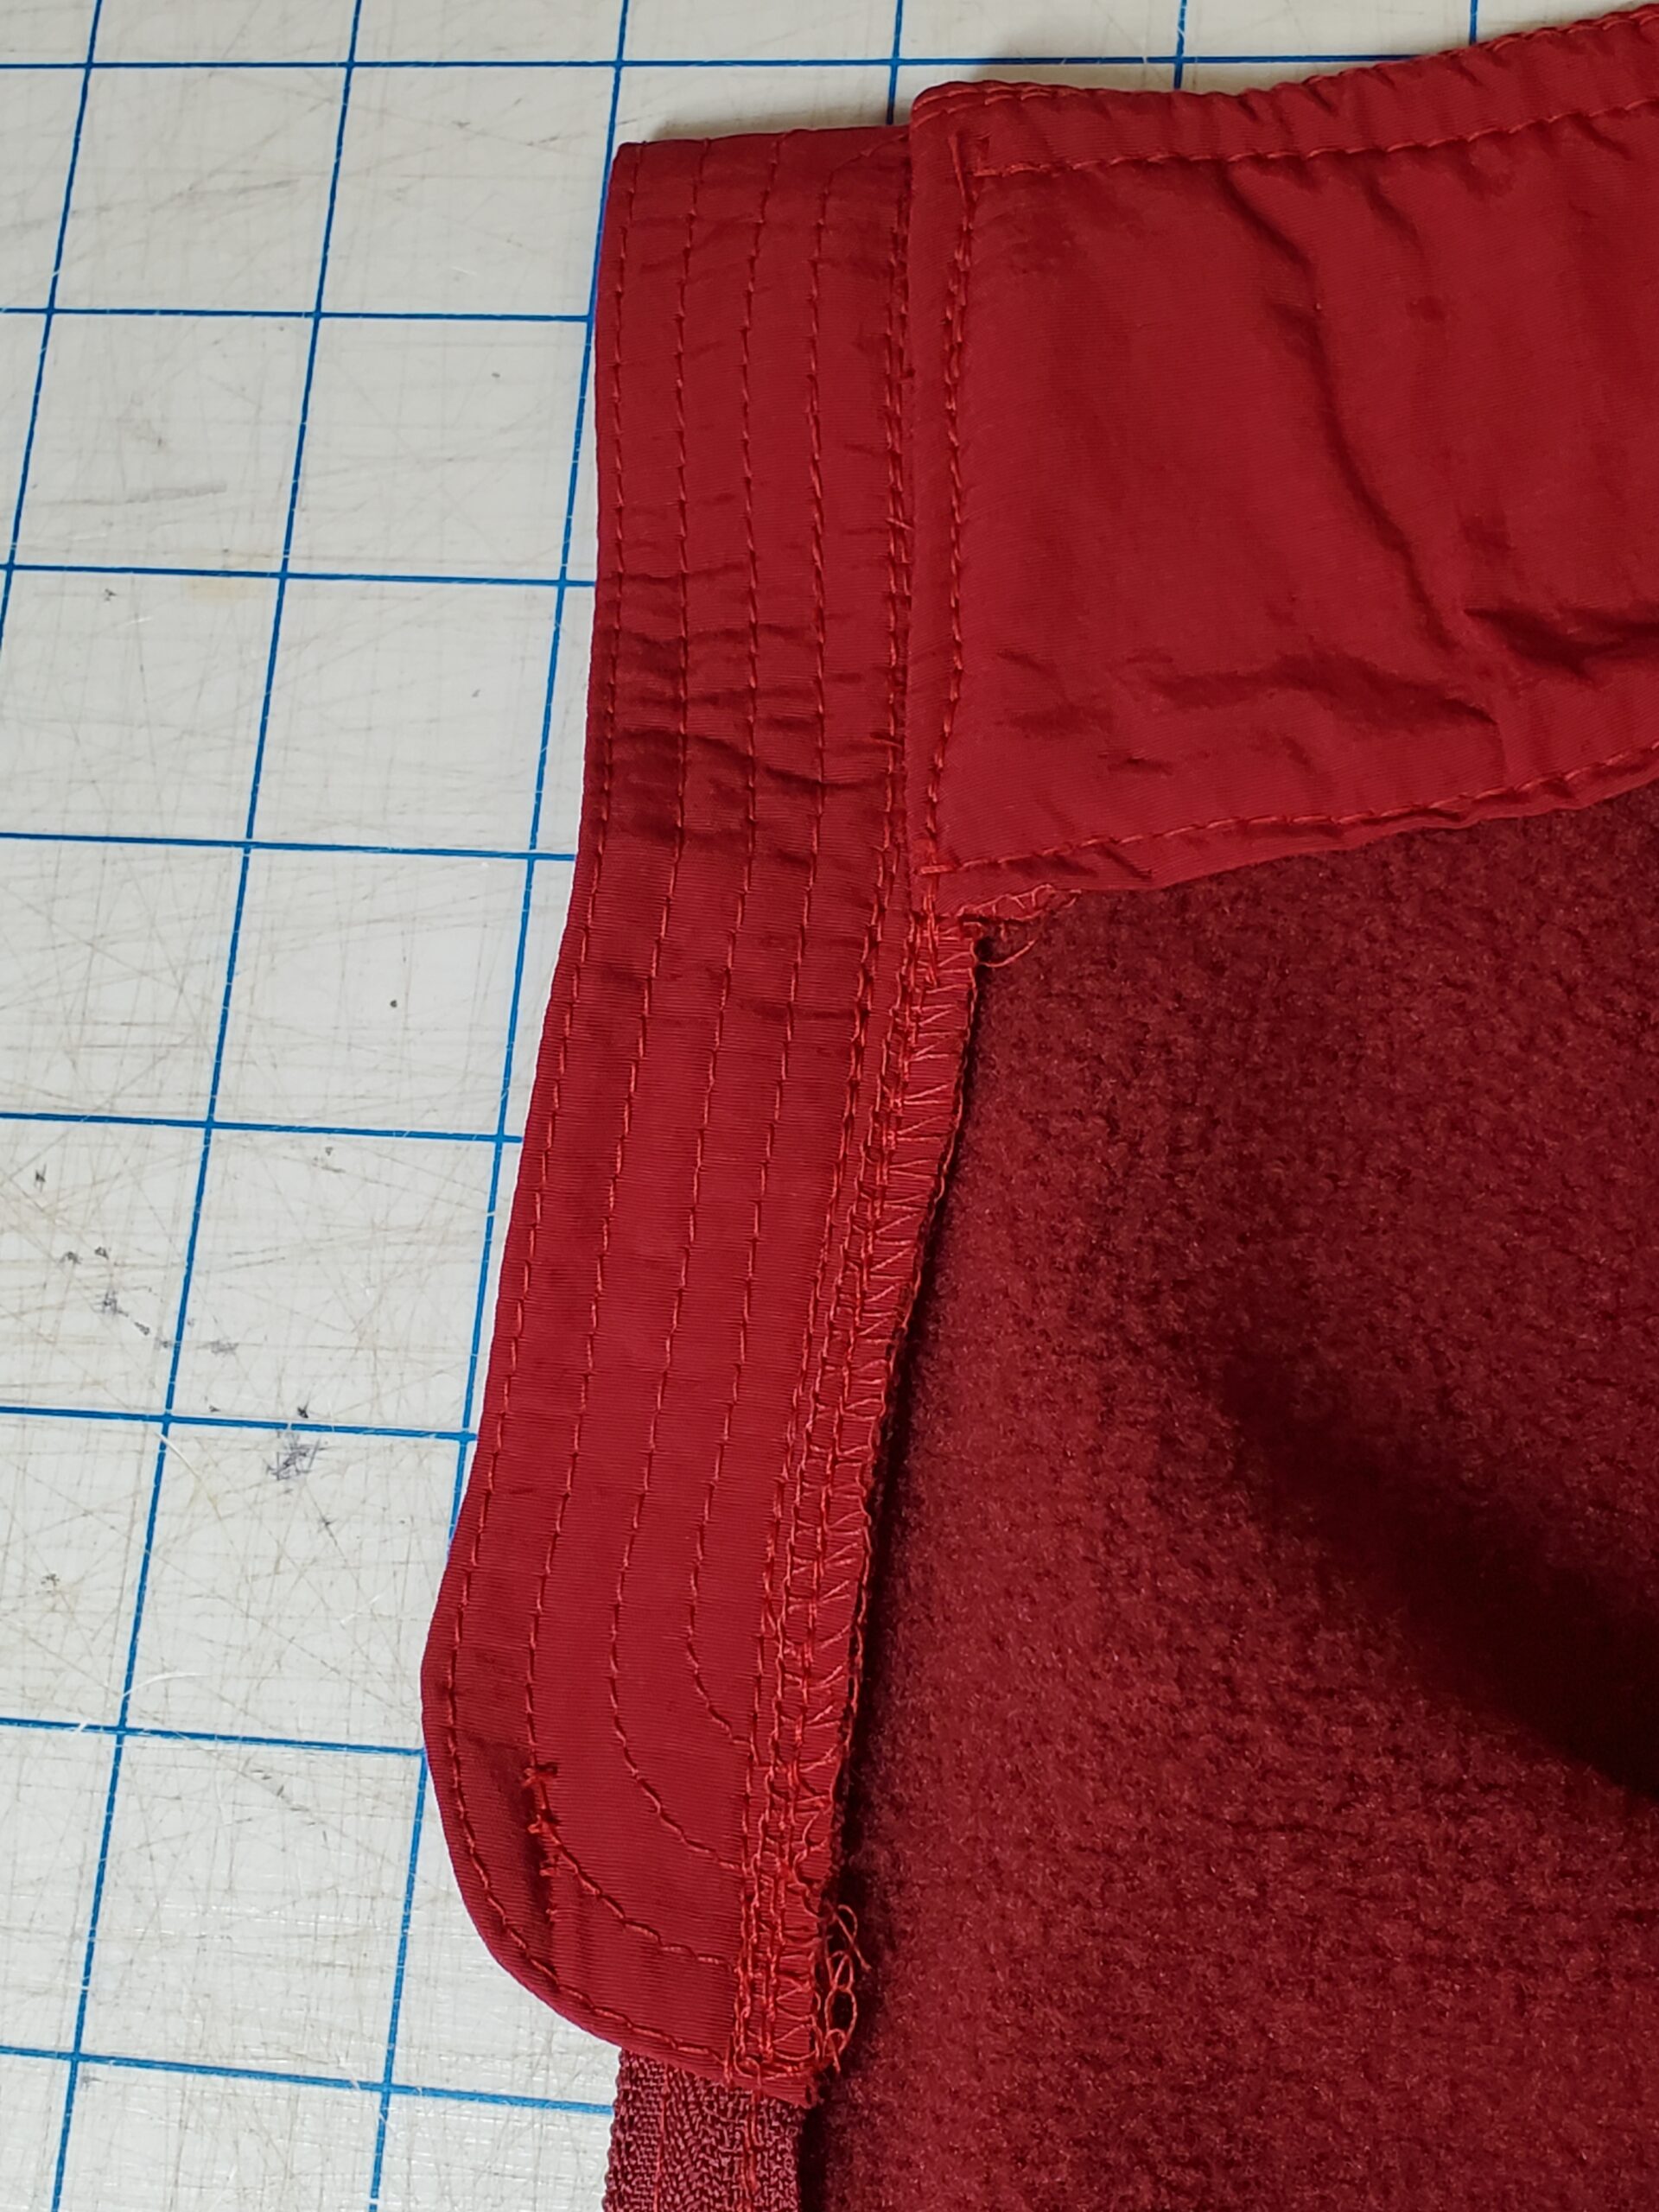
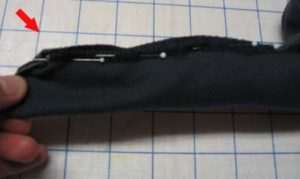
If you’ve done the prior steps correctly, you’ll have a collar attached to your top The zipper should be about 1/2 way up the collar, with the top of the zipper at the desired height of the collar. One some patterns you may want to trim the collar down. Reserge the cut edge.
Once the collar is trimmed, finish the top of the zipper by folding it over twice. You can secure the folds with a pin, then fold the collar facing over the zipper tape, RS facing to RS collar. Make sure the top stop of the zipper is at the fold line for the collar, and that the serged edge of the facing is lined up with the collar/neckline seam. Then stitch carefully using zipper foot, to secure the collar facing.
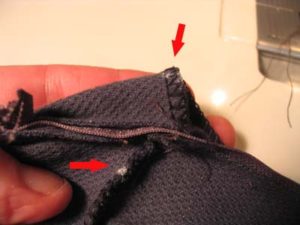
Do both sides. Check that collar seams and top corners/top stops are even by zipping the zipper closed and checking from the right side. Adjust as needed.
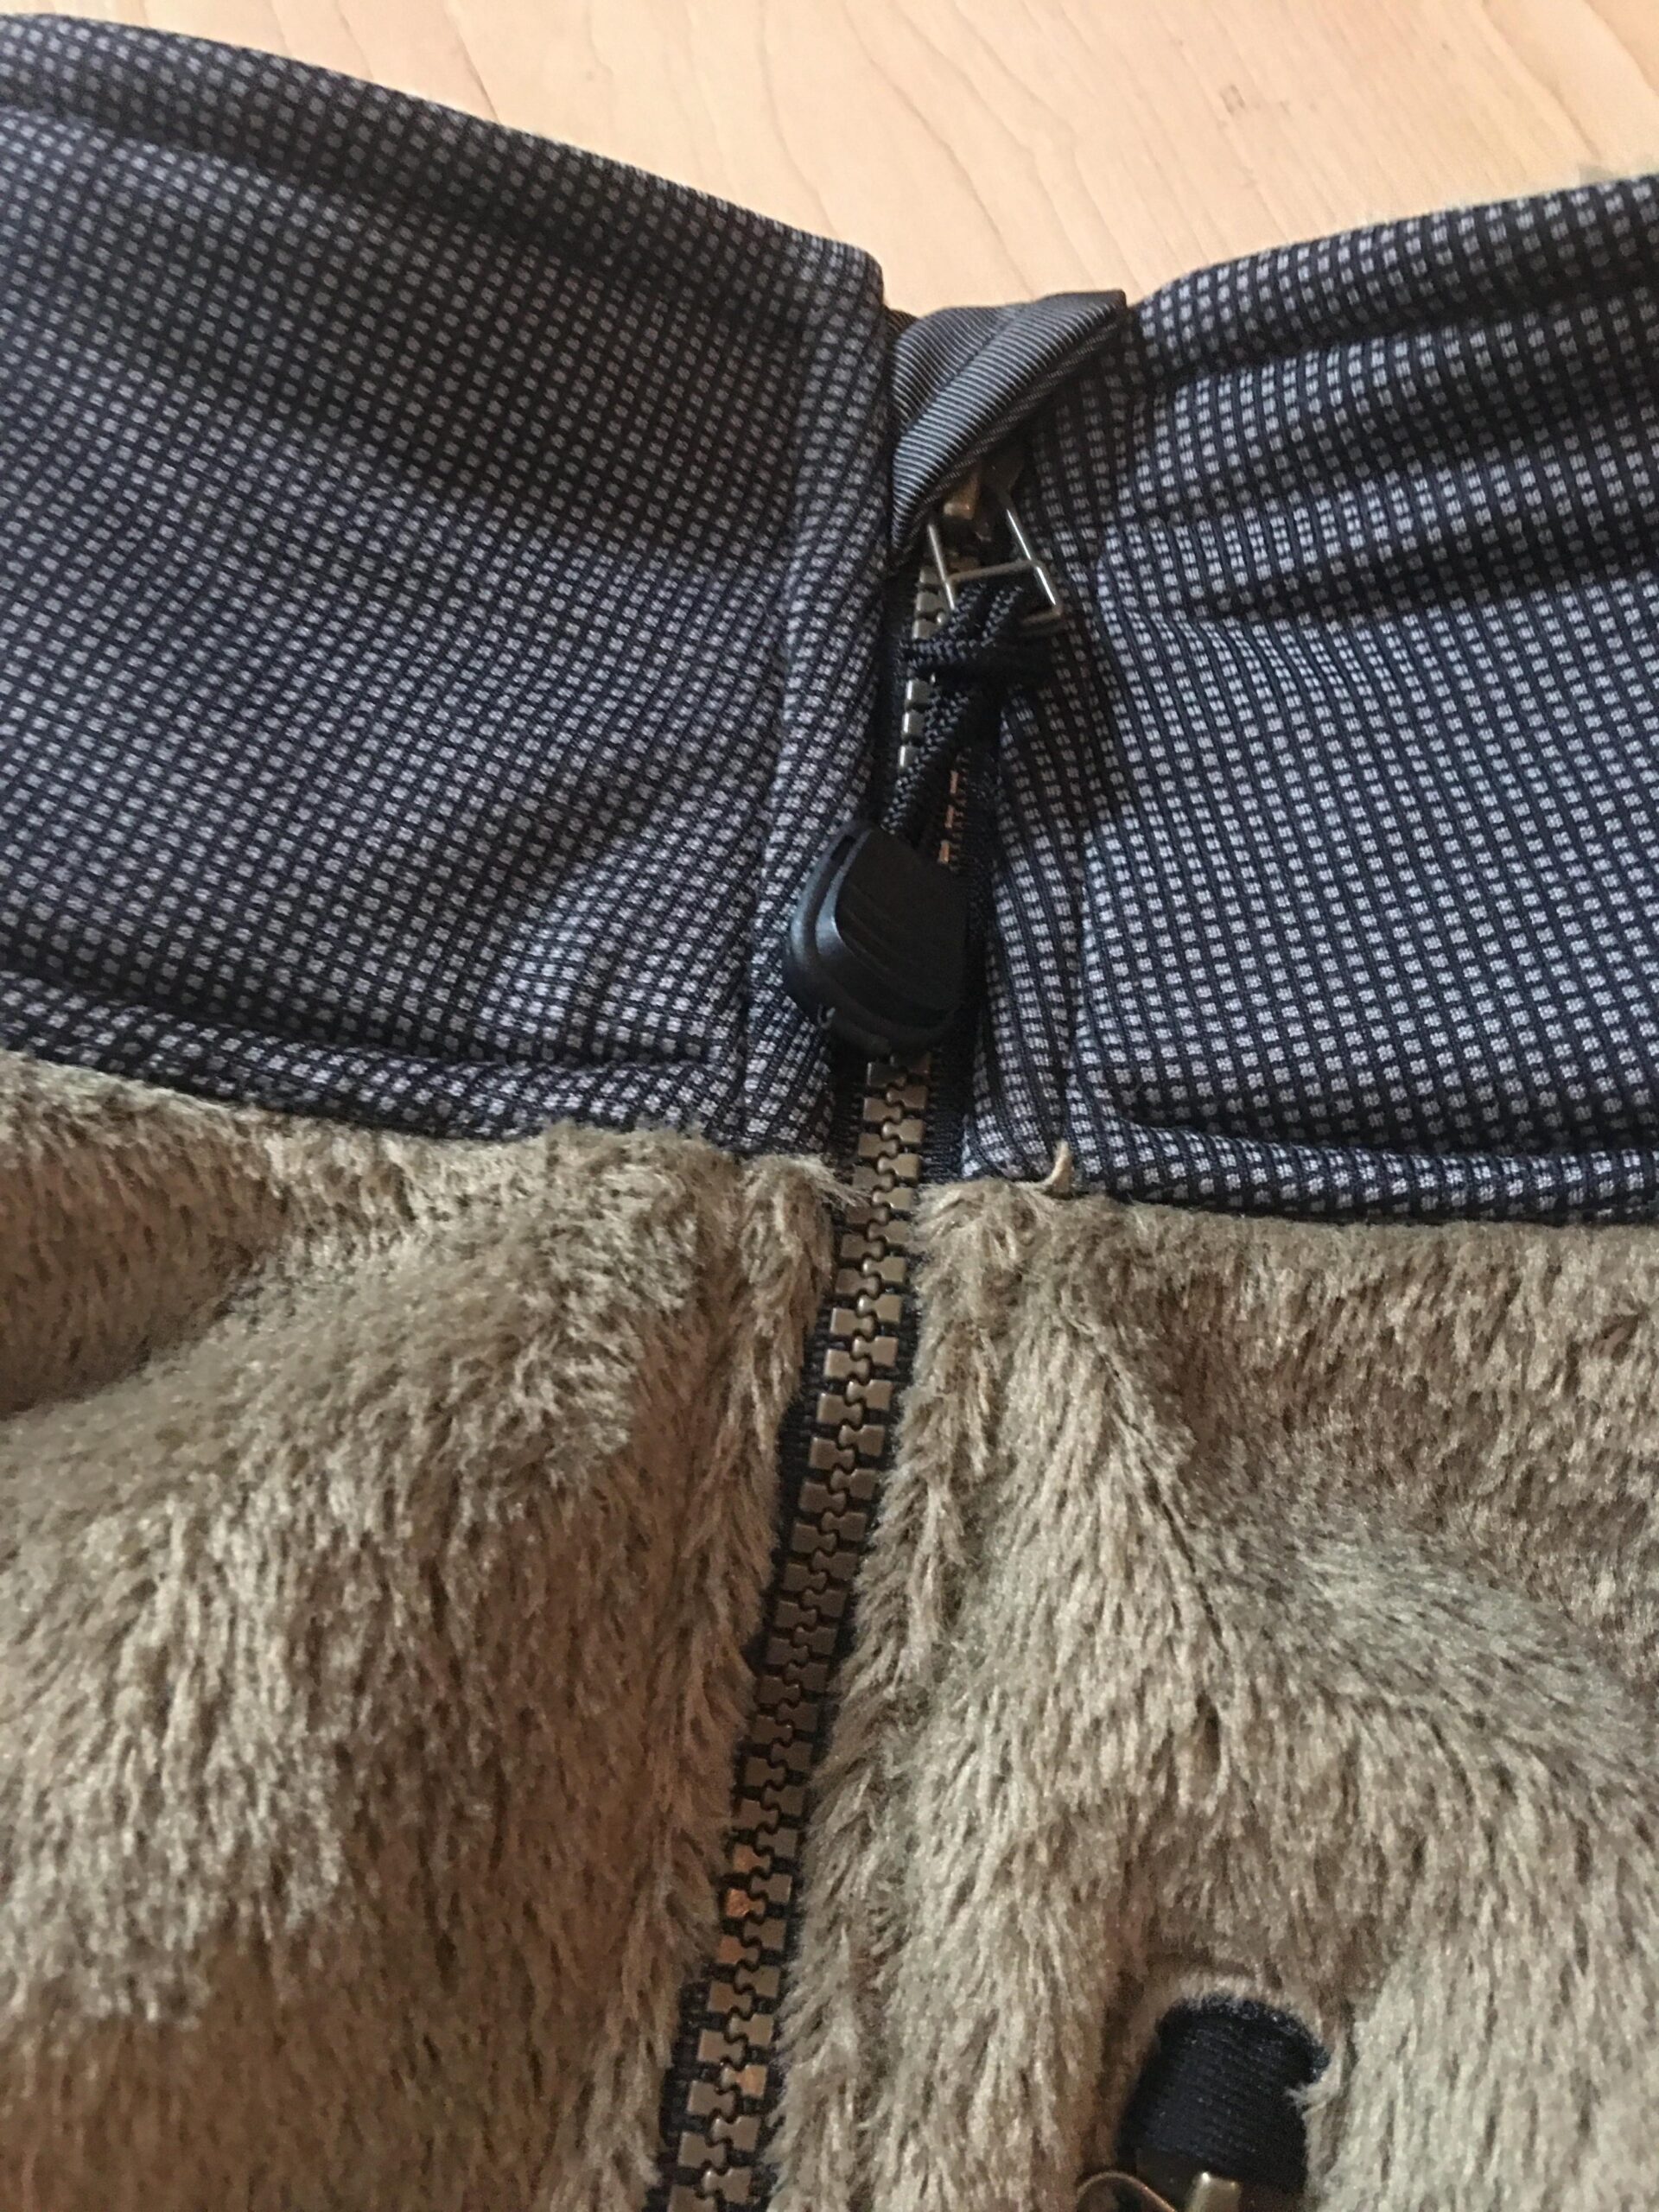
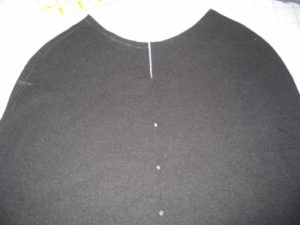
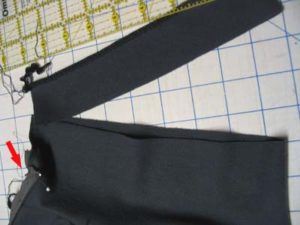
Now for the fun part. We are going to do a “Burrito Style” enclosed finish of the facing. Fold the facing to inside. Use a pin to secure it about 3/8 from the edge of the zipper, and a chalk or other pencil to make visible marks for that point on both the collar and the facing. (pictured) You might also want to make a marks on the collar facing where it meets the shoulder seam .(not pictured)
Make sure that both the facing and the collar marked:
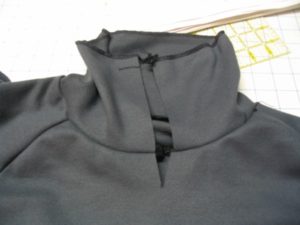
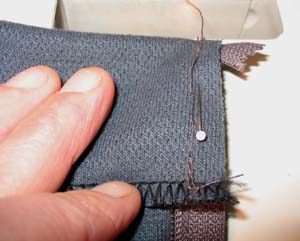
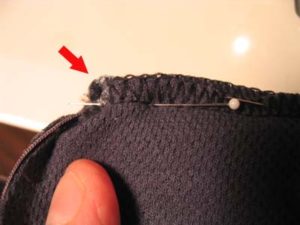
Matching the marks, fold the zipper tape down, and bring the collar facing to the collar seam, seams together, RS of collar facing to WS of shirt front body. Match your marks, and secure the two seams together. The zipper tape and the shirt front will be enclosed in the “burrito”. You should have something that looks like:
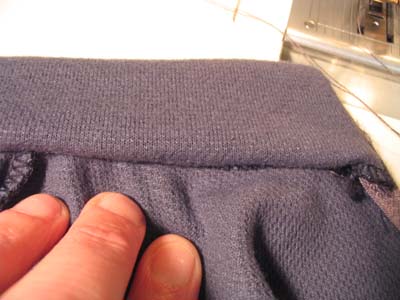
Note that the zipper is folded down under my fingers on the left side of the image.
Continue to pin, securing seams all the way from the zipper to the where the shoulder seam intersects the collar, if not farther. Keep checking to make sure the shirt front and the zipper are not getting caught.
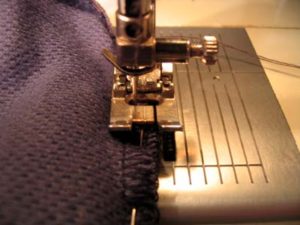
Close up view of the start:
Use a narrow to medium zig-zag, sew your burrito. Start at the chalk marks by the zipper, and the two seam allowances together. Catch only the seam allowances, not the body of the shirt. Go at least to the shoulder seams if not farther.
Go as far as you can before you get to so much bulk folded inside that you have to stop. On most fabrics, you can go at least to where the shoulder seam meets the collar, and on light fabrics, farther. So go as far as you can, then back tack. Carefully undo the burrito checking to make sure you haven’t made any pleats. If you have done it correctly, you will have a nice finished facing. After you have burritoed both sides, to finish the CB part of the facing, just lap the collar facing edge on top of the collar seam edge and stitch in the ditch to hold the facing down.