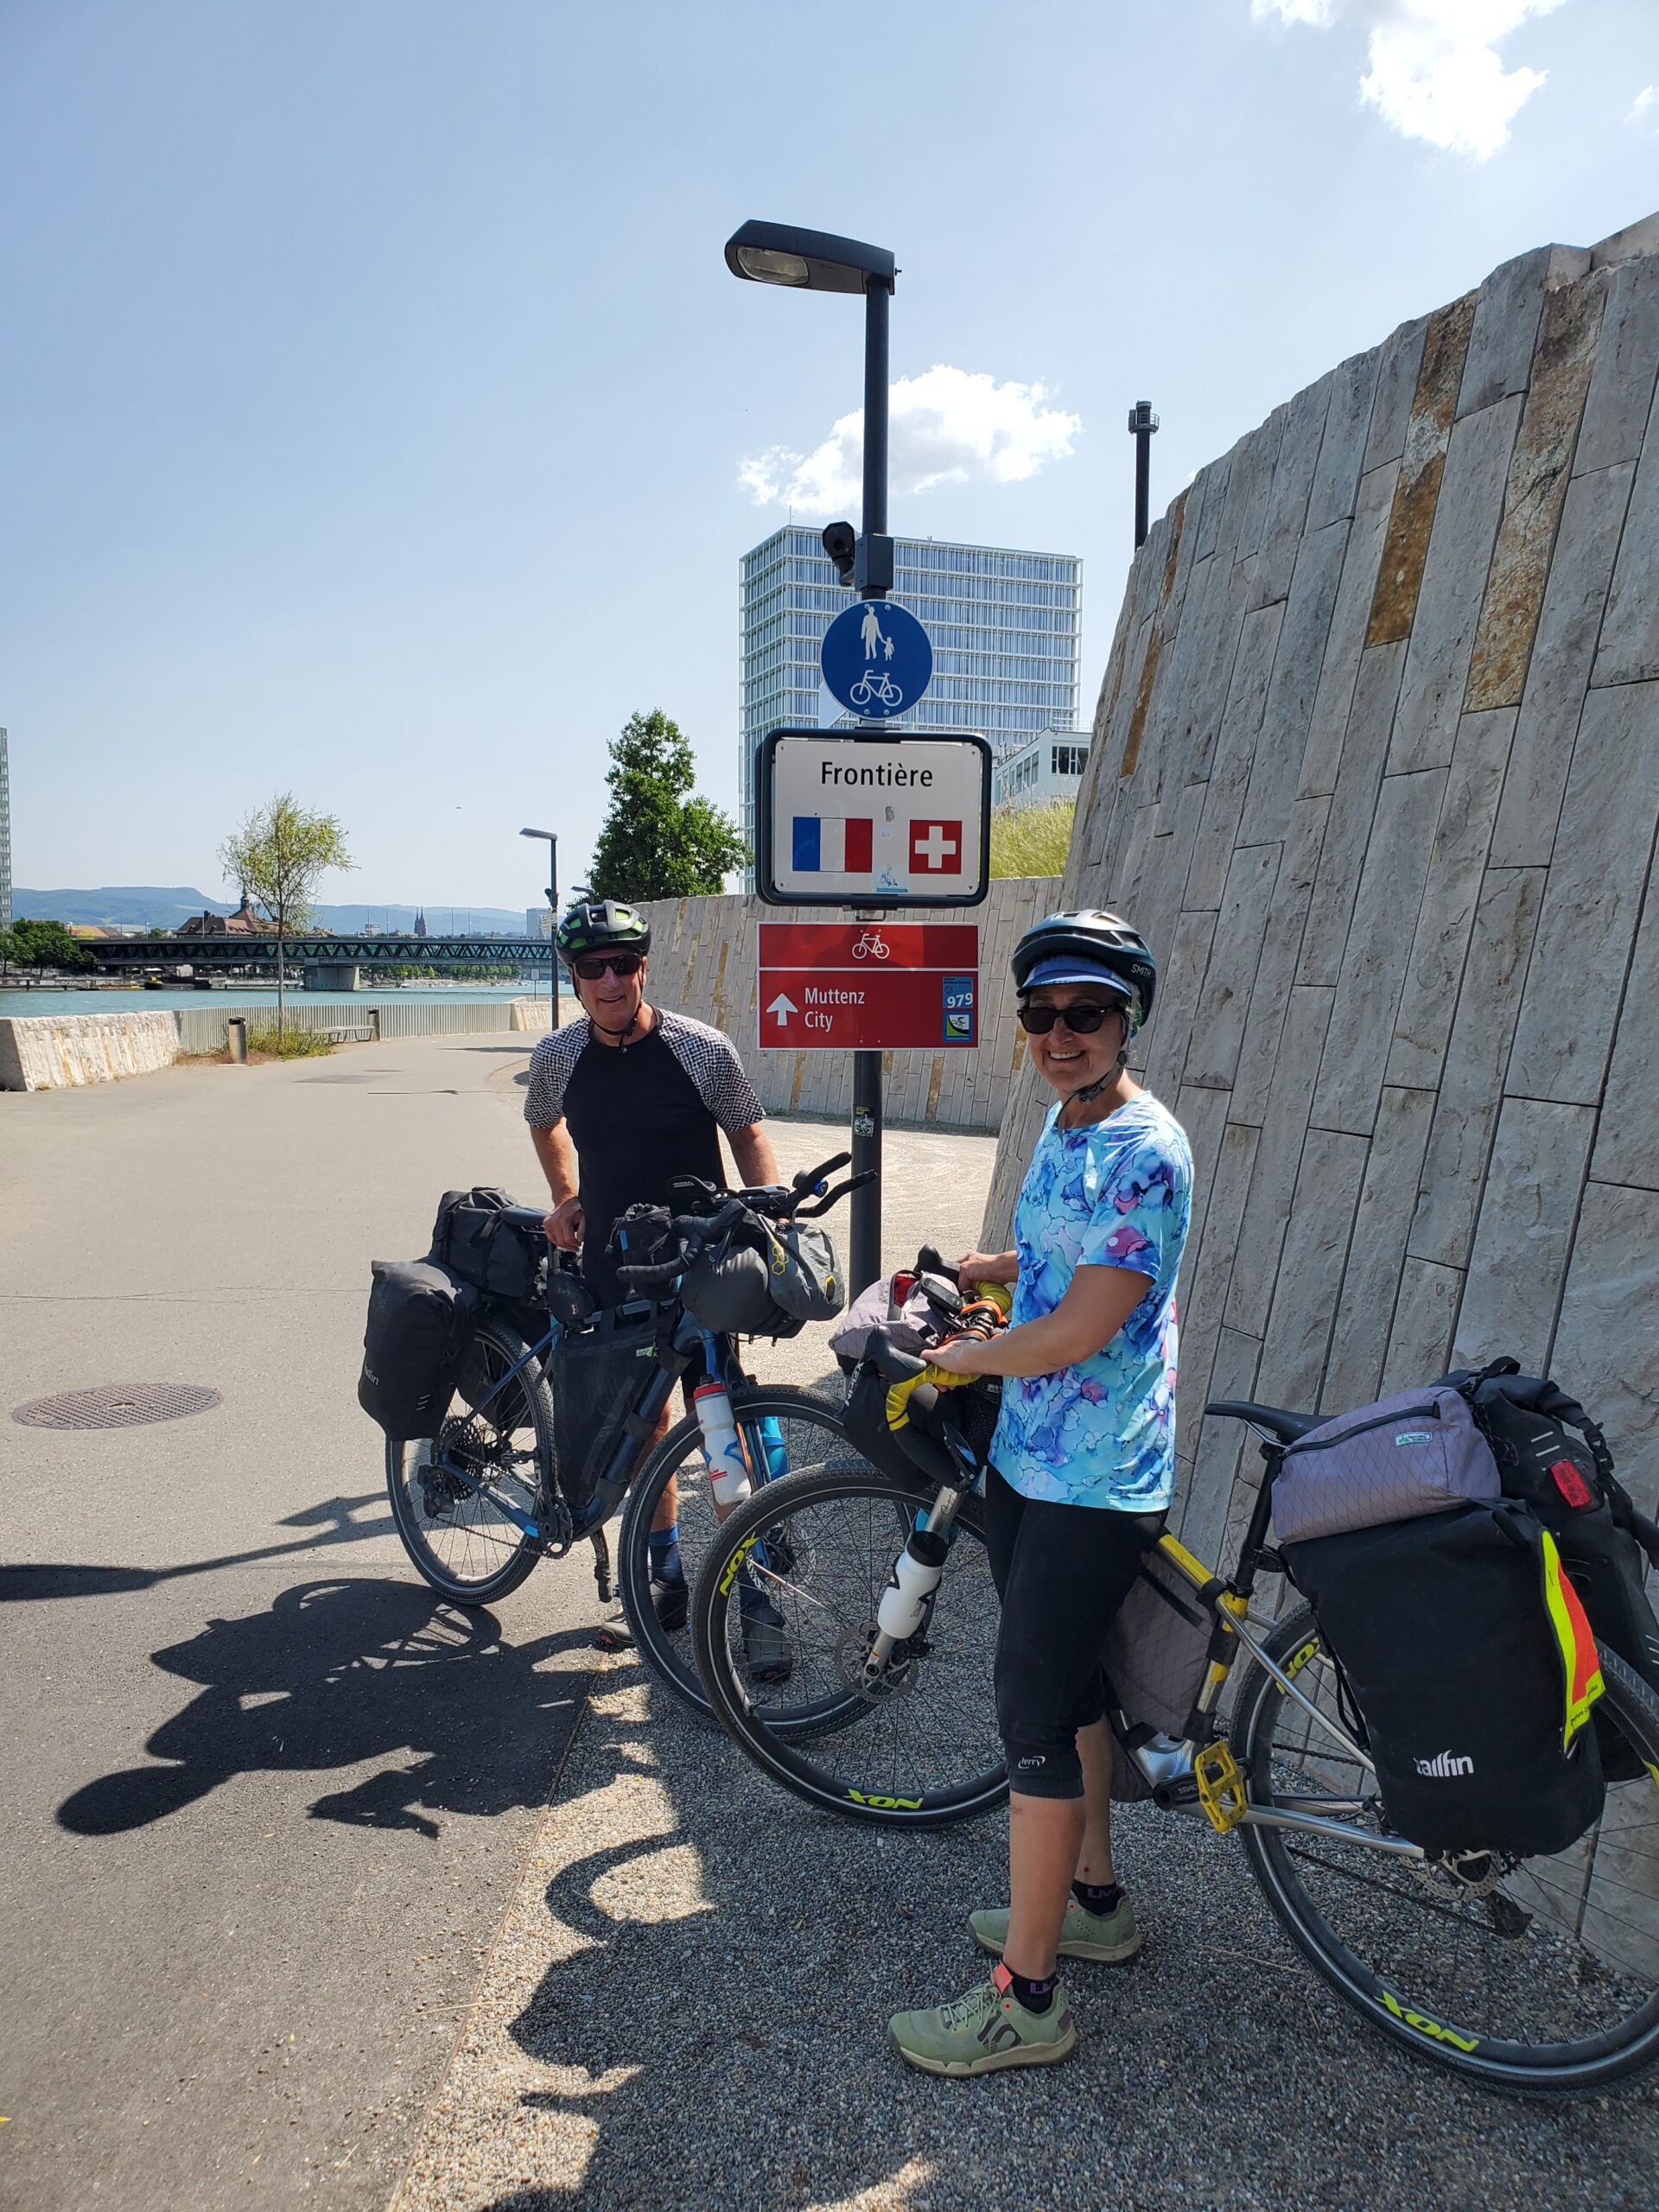
Wow, way overdue!! Sorry about that. Retirement and life got a hold of me. I spent last summer biking across Europe with my hub. We did 8 countries, 2200 miles in 63 days on the Eurovelo 6 route. We then came home and decided to sell our home and ski condo in order to build our retirement home. So, things got a little crazy for a bit. The worst part of the whole process is packing up the sewing room for six months. In order to maximize the sale of our home, we packed almost everything into storage in order to stage it and show off the storage, large shop and more.
Border of France and Switzerland along the Rhine
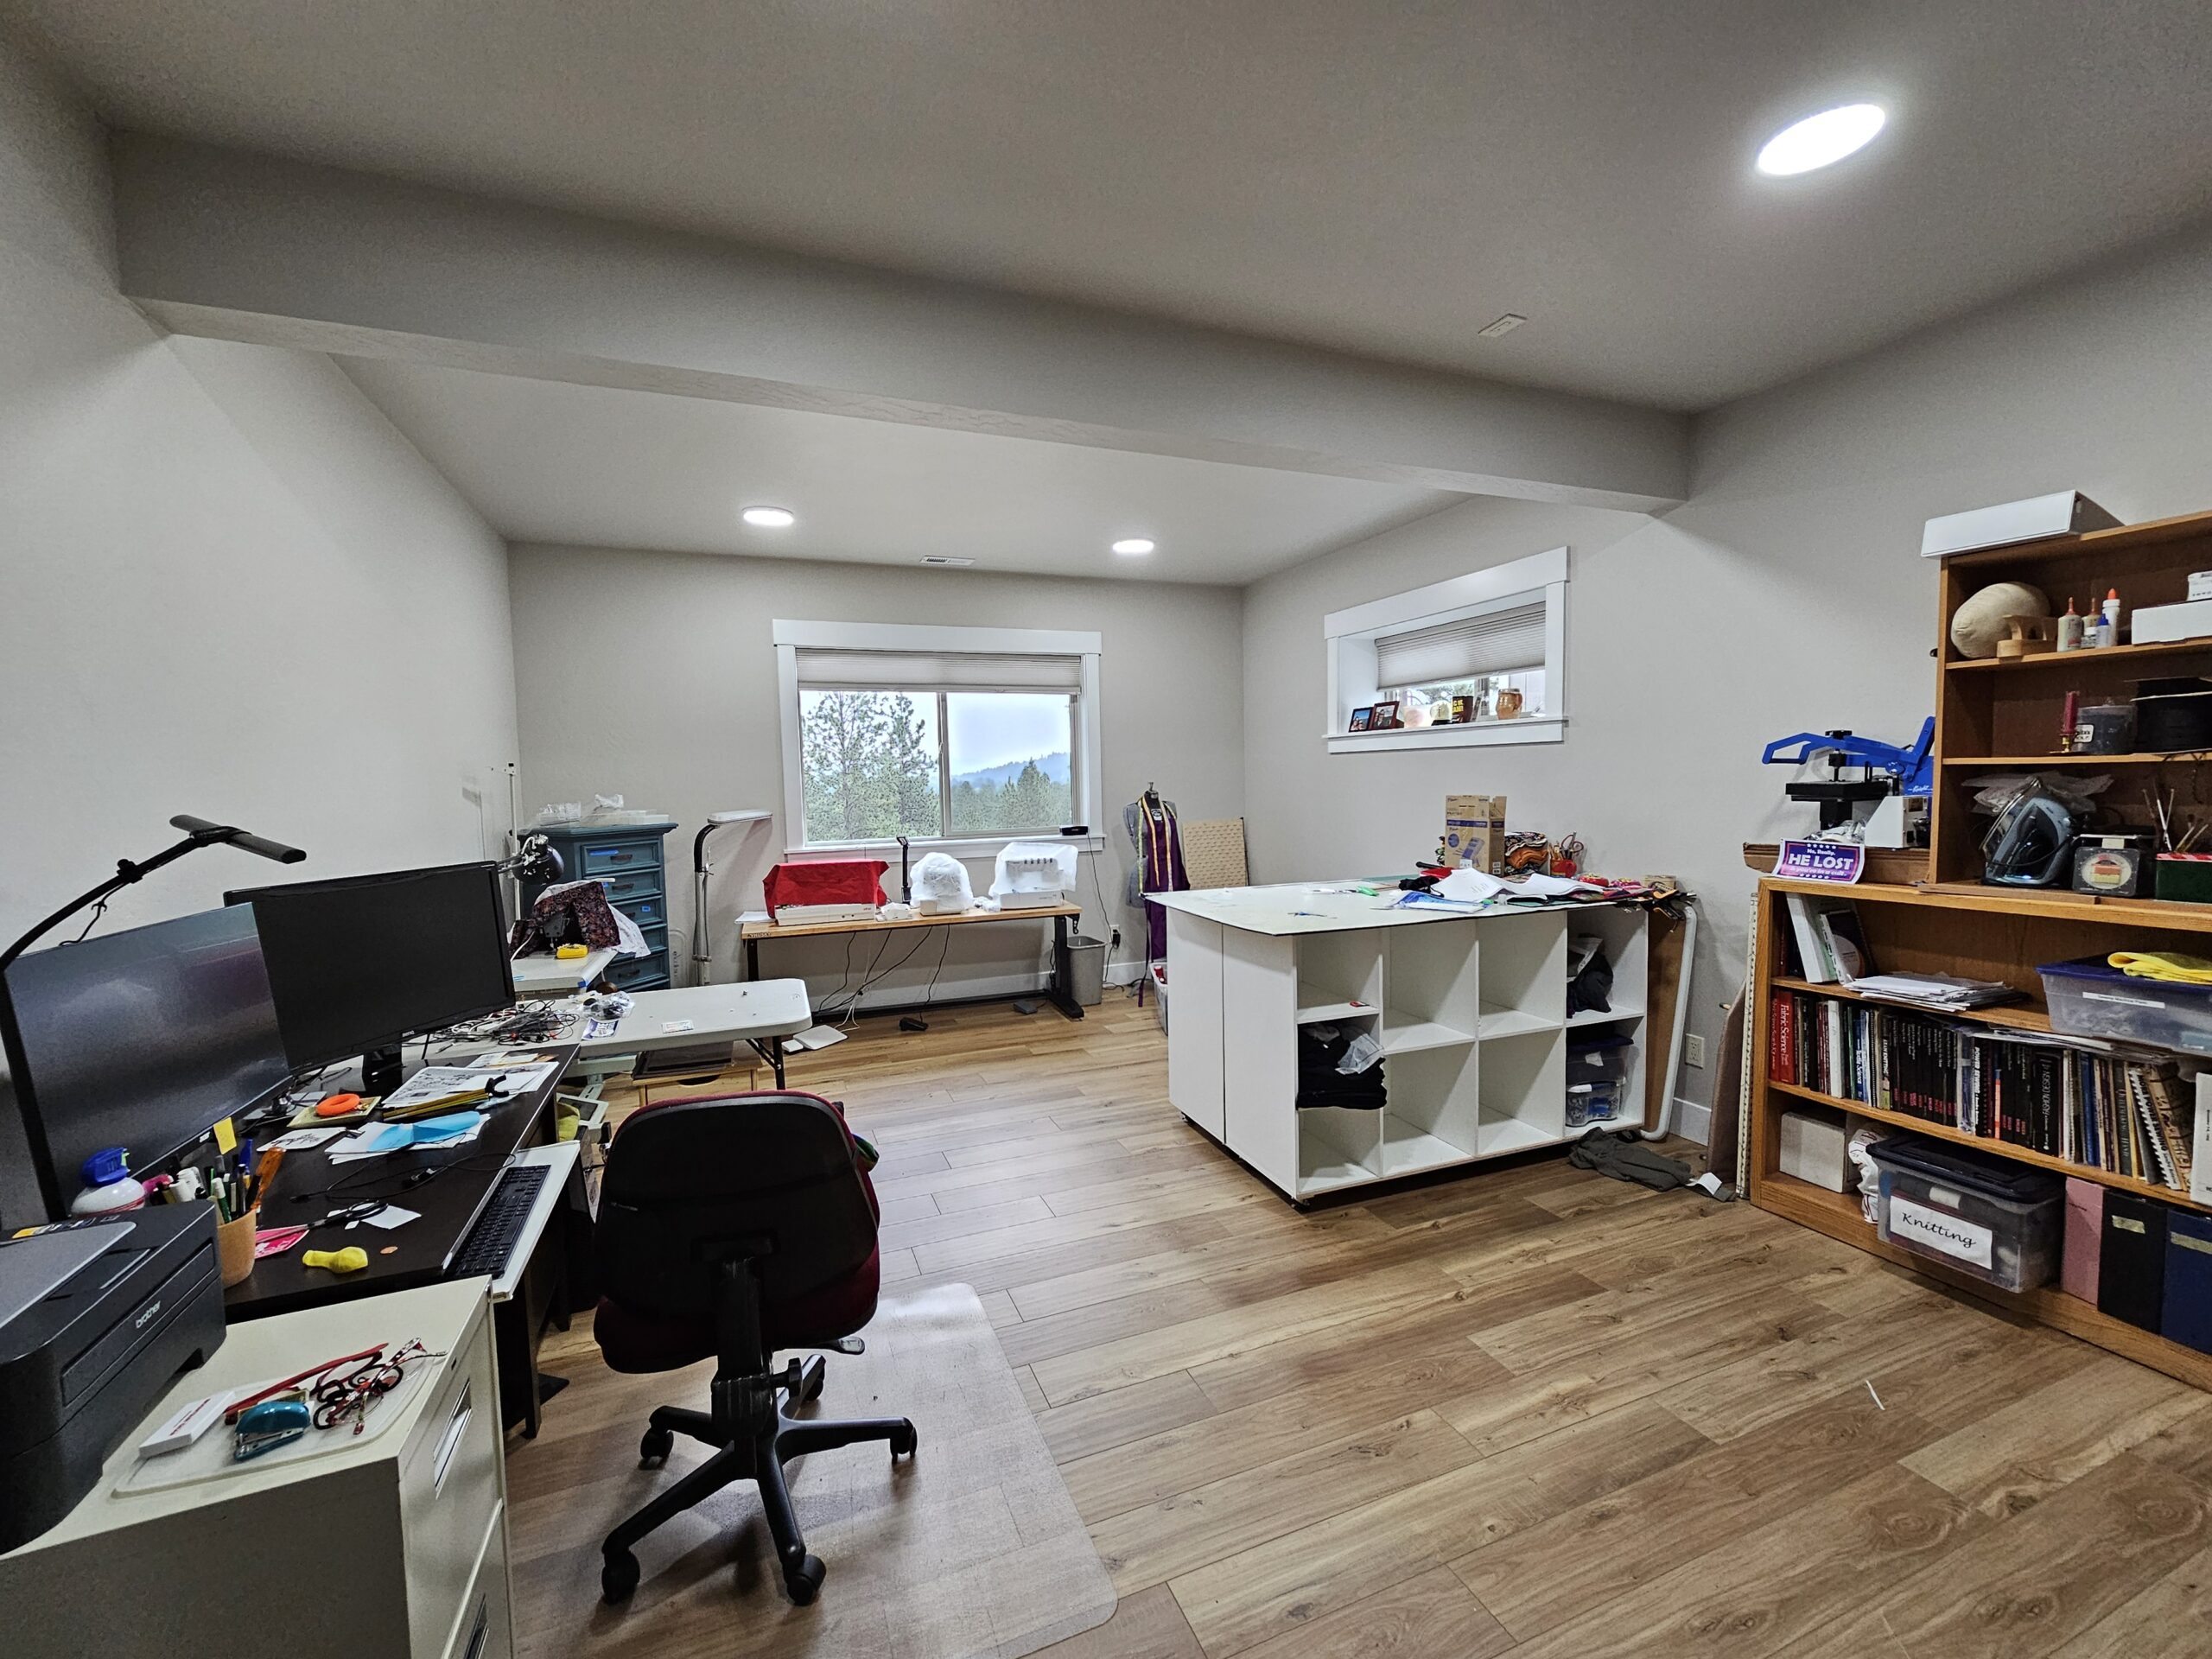
Success. We moved into our new home, designed for aging in place, in July ’24. My new sewing studio is my favorite part, of course. It took three months to get the new place unpacked and organized. My old sewing room was a large spare bedroom in a daylight basement. My last post was about fixing it up post retirement… little did I know that I’d be relocating my sewing room! A little over a year later, here we are!
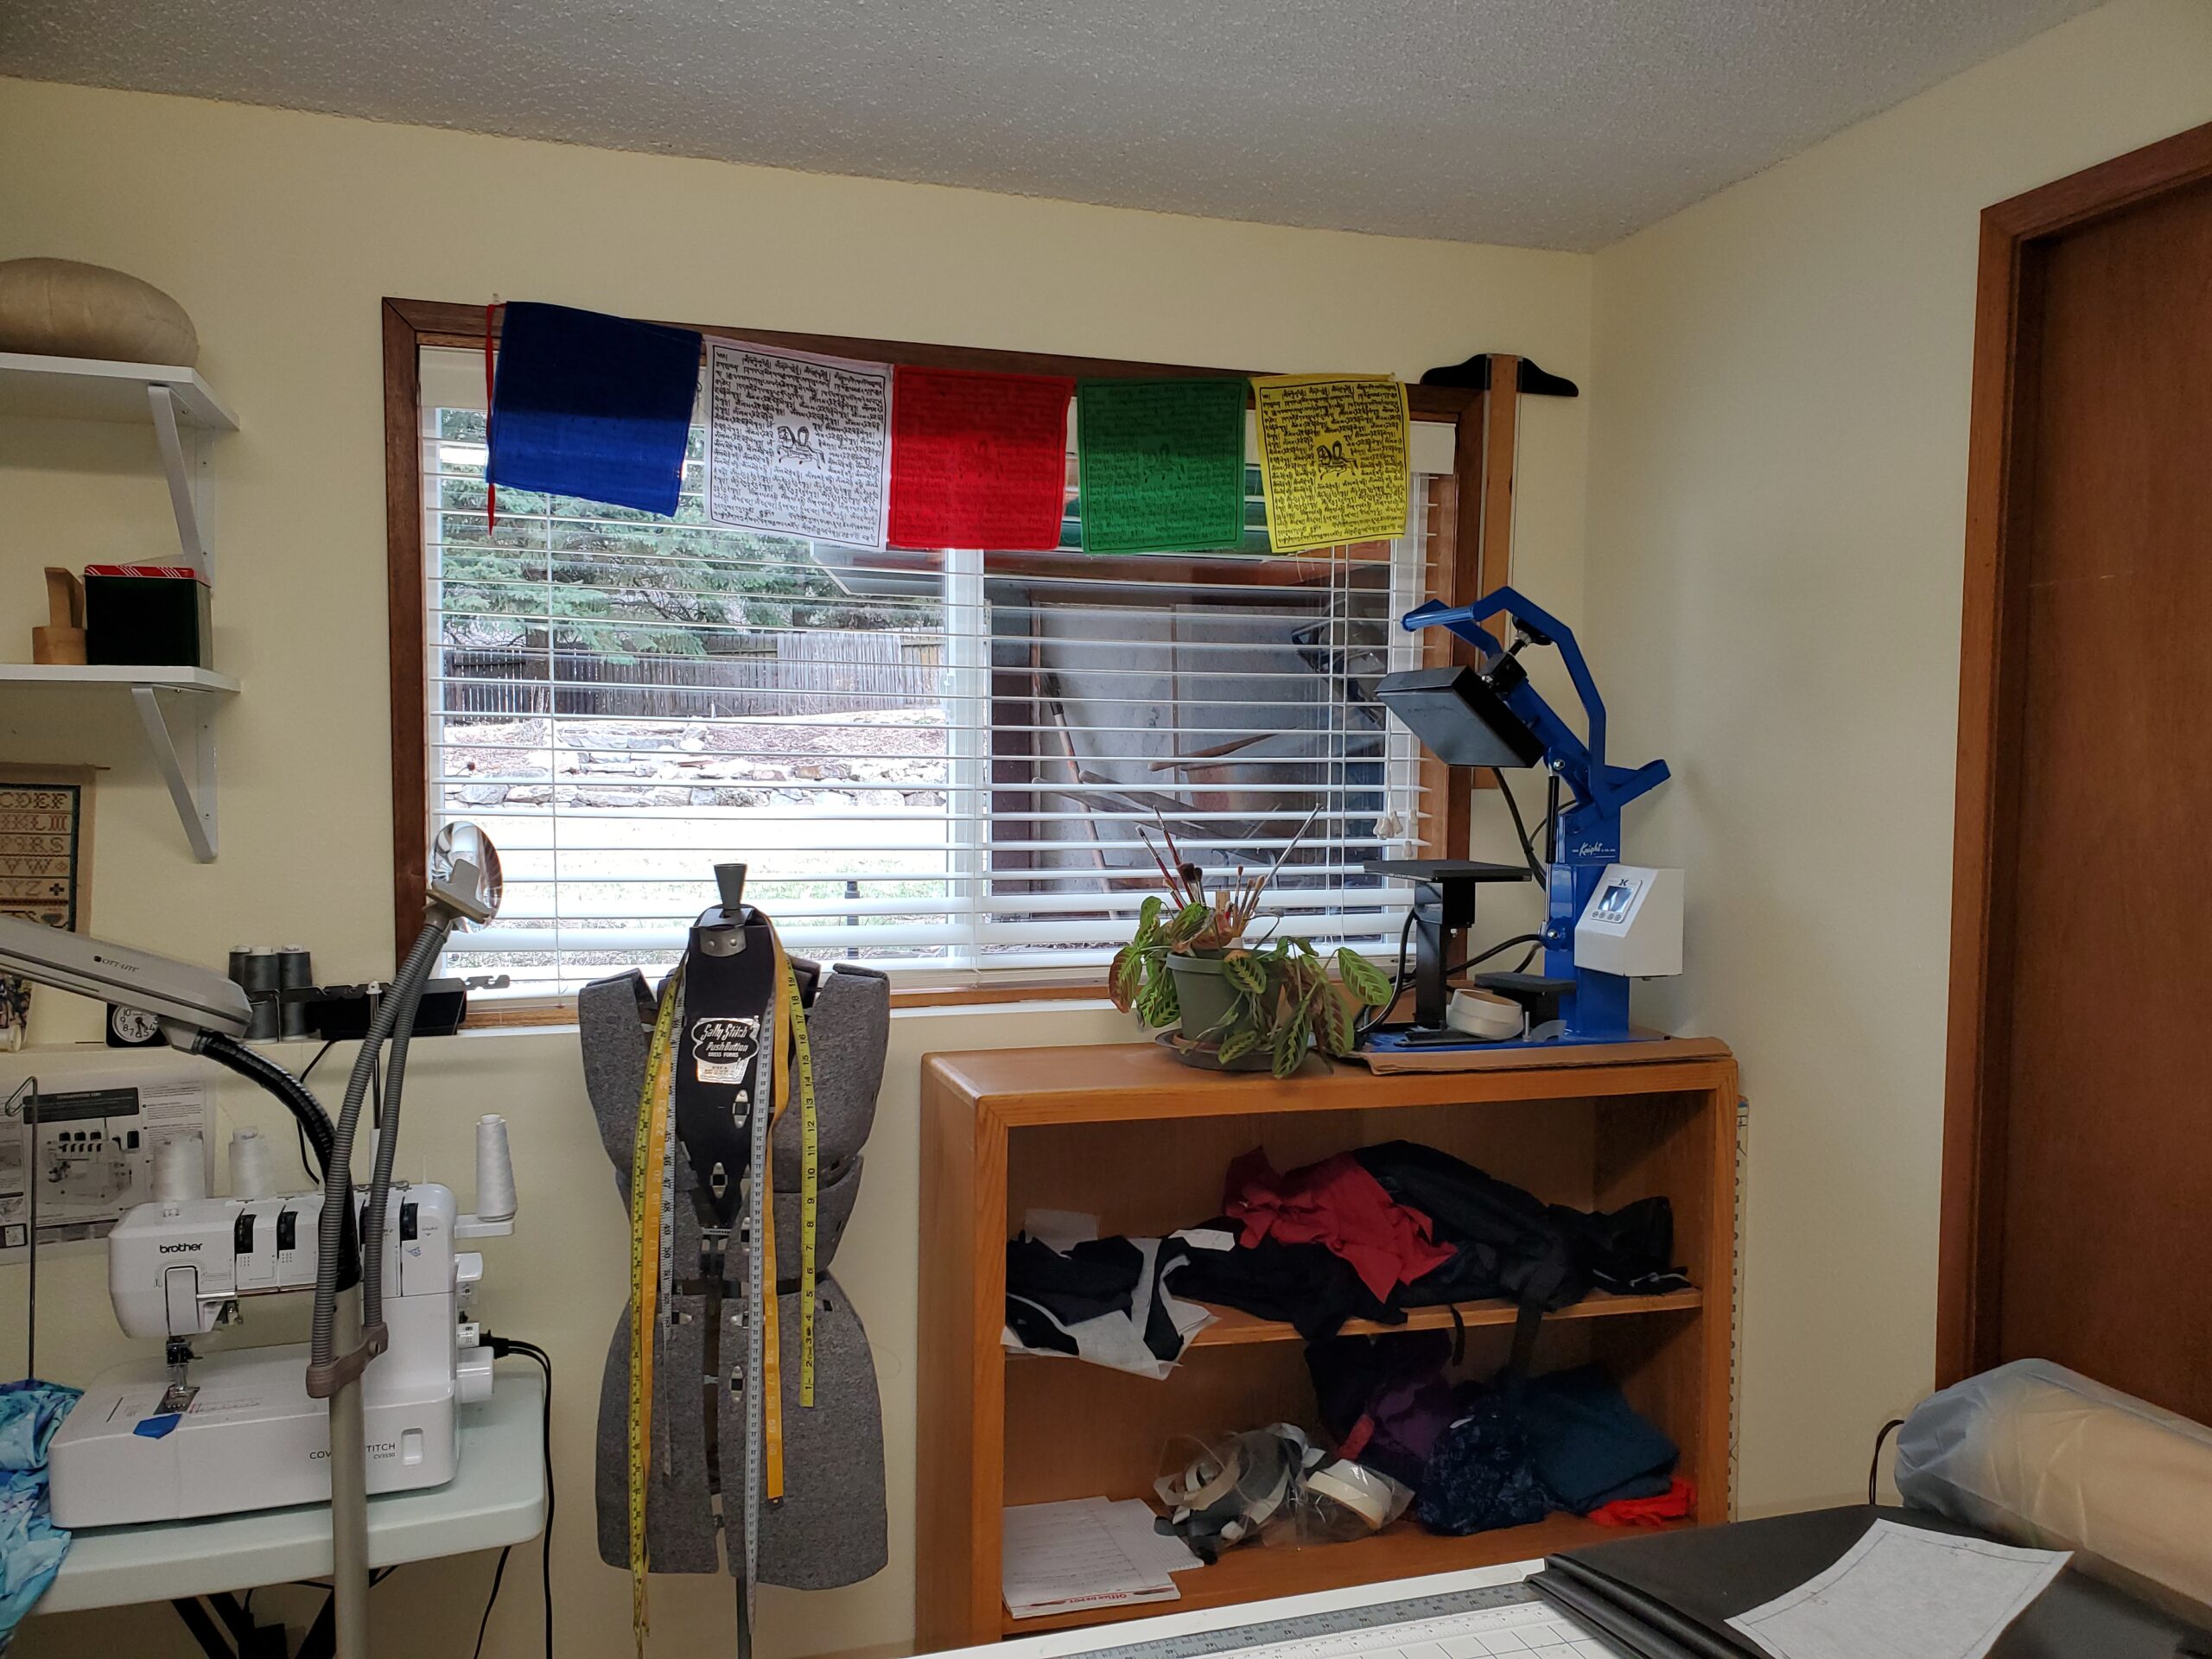
I have a beautiful naturally lit studio space on the daylight level of our new home. The exposure is north with a large window that give me a view of Rathdrum Peak in Idaho, plus a east facing clerestory window. The natural light is amazing. I had added a pattern projector to the took kit. When I’m in available, I continue to mentor sewist through the Discovery Fabrics “Sew Inspired by Discovery” group on Facebook.
We are doing a lot of play and travel – so my sewing is intermittent but I tell you I love my new space.
Anyway, here are some photos….I’ll get back to sewing/craft posts one of these days…
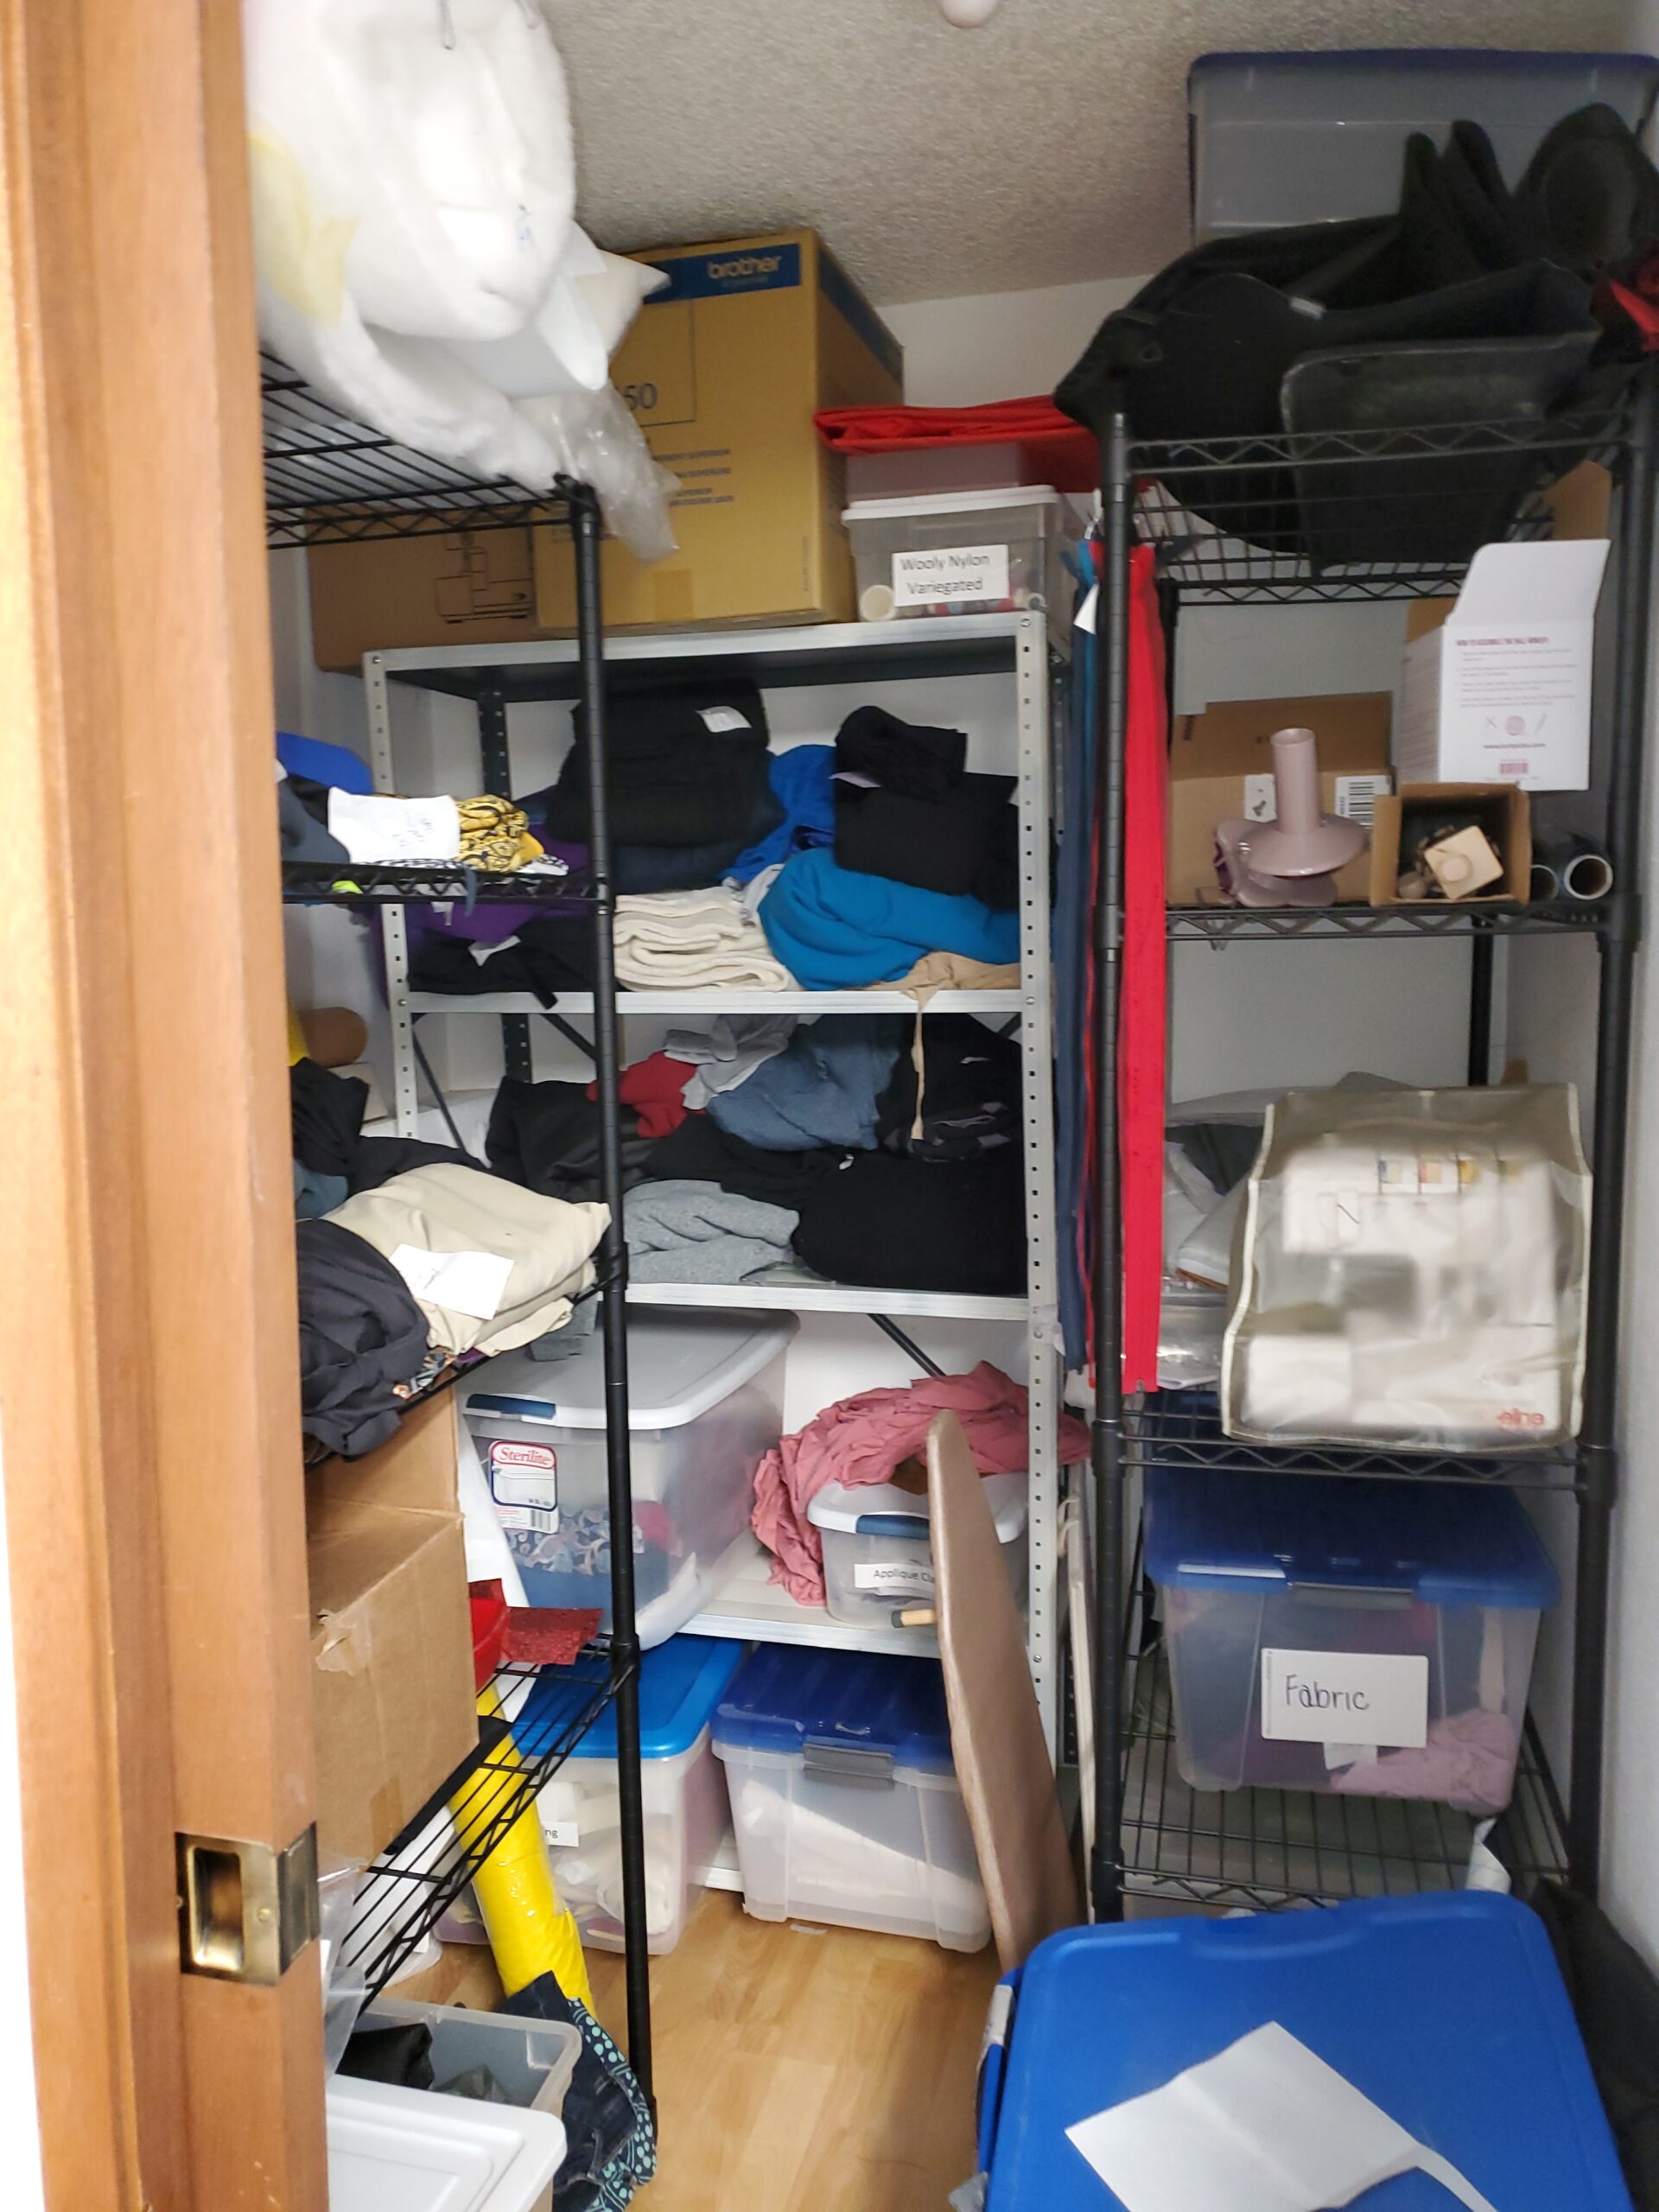
My sewing room/workroom has always been a large basement bedroom downstairs. I have a large window that looks out on the garden, a store room, and a large closet. When I was working I was always in “make it work” mode. I also got stuck in a rut. It was not very conducive to try different space use things out. Why bother painting when the room gets trashed with dirty tents and gear?
Retiring gave me a chance to rethink my space. One of the goals of retirement was to find my joy in creating again. So what would that look like? More/better storage, a cutting table, freshening things up and slightly improved organization was the plan.
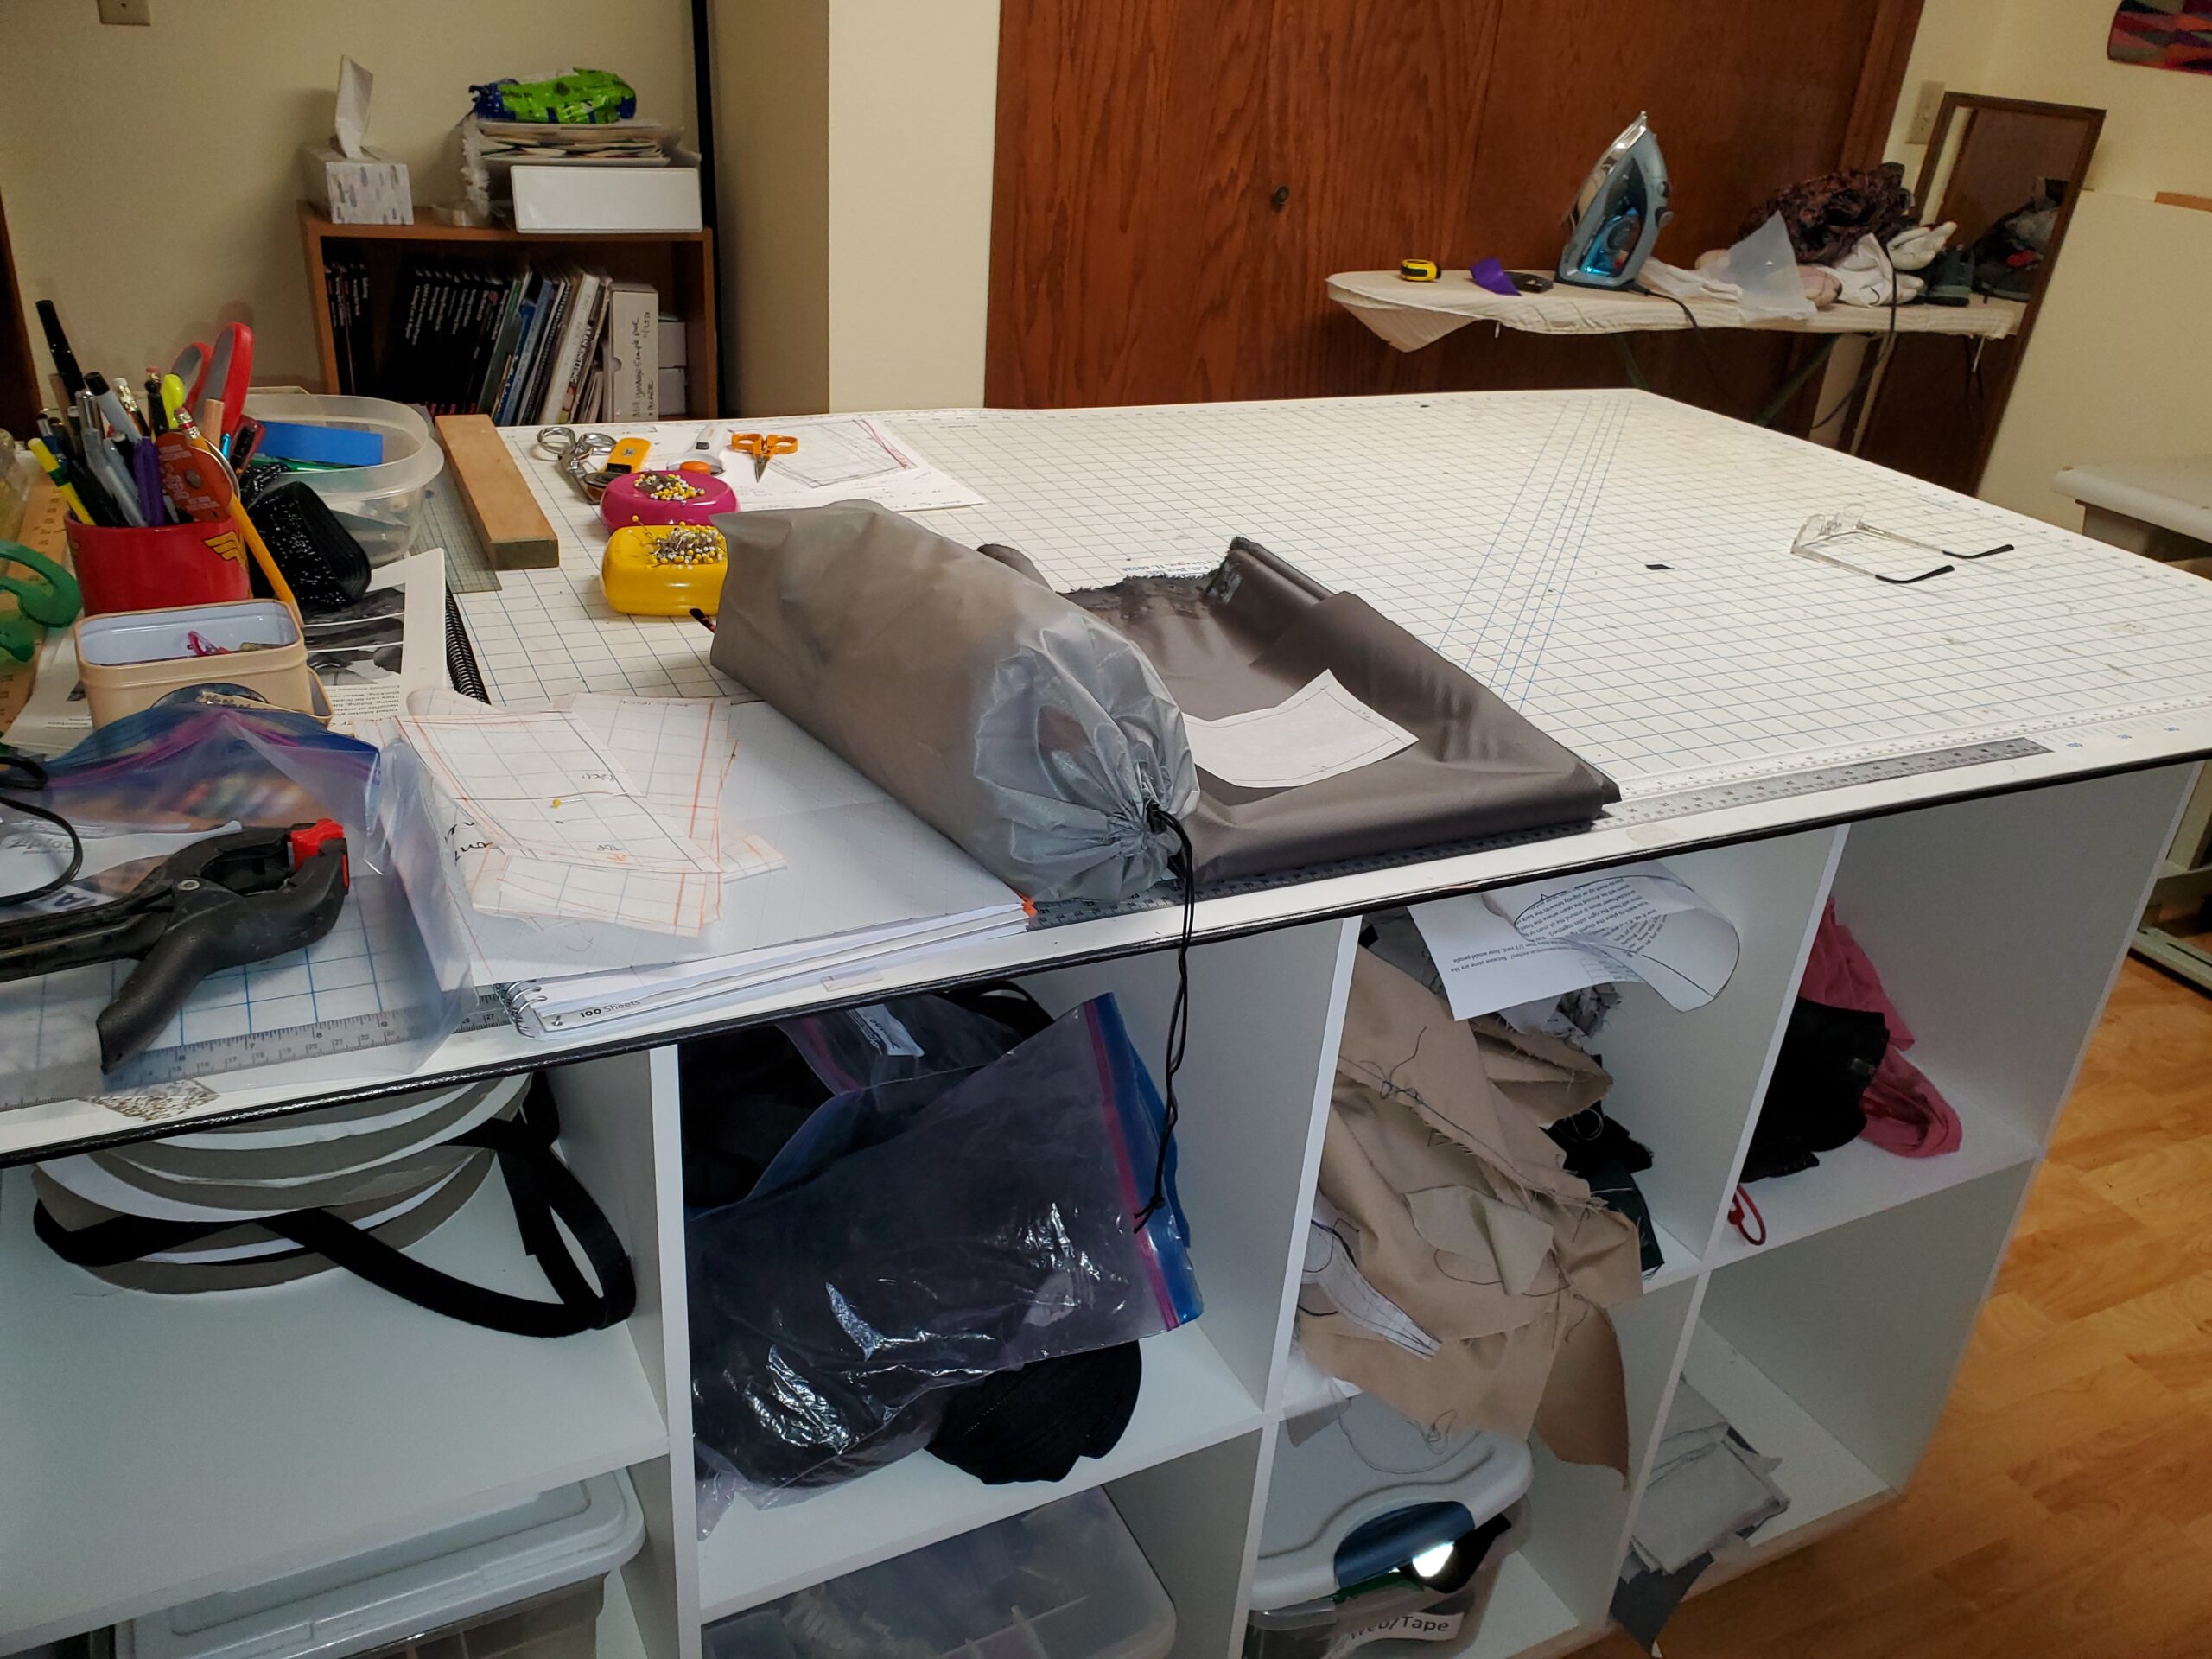
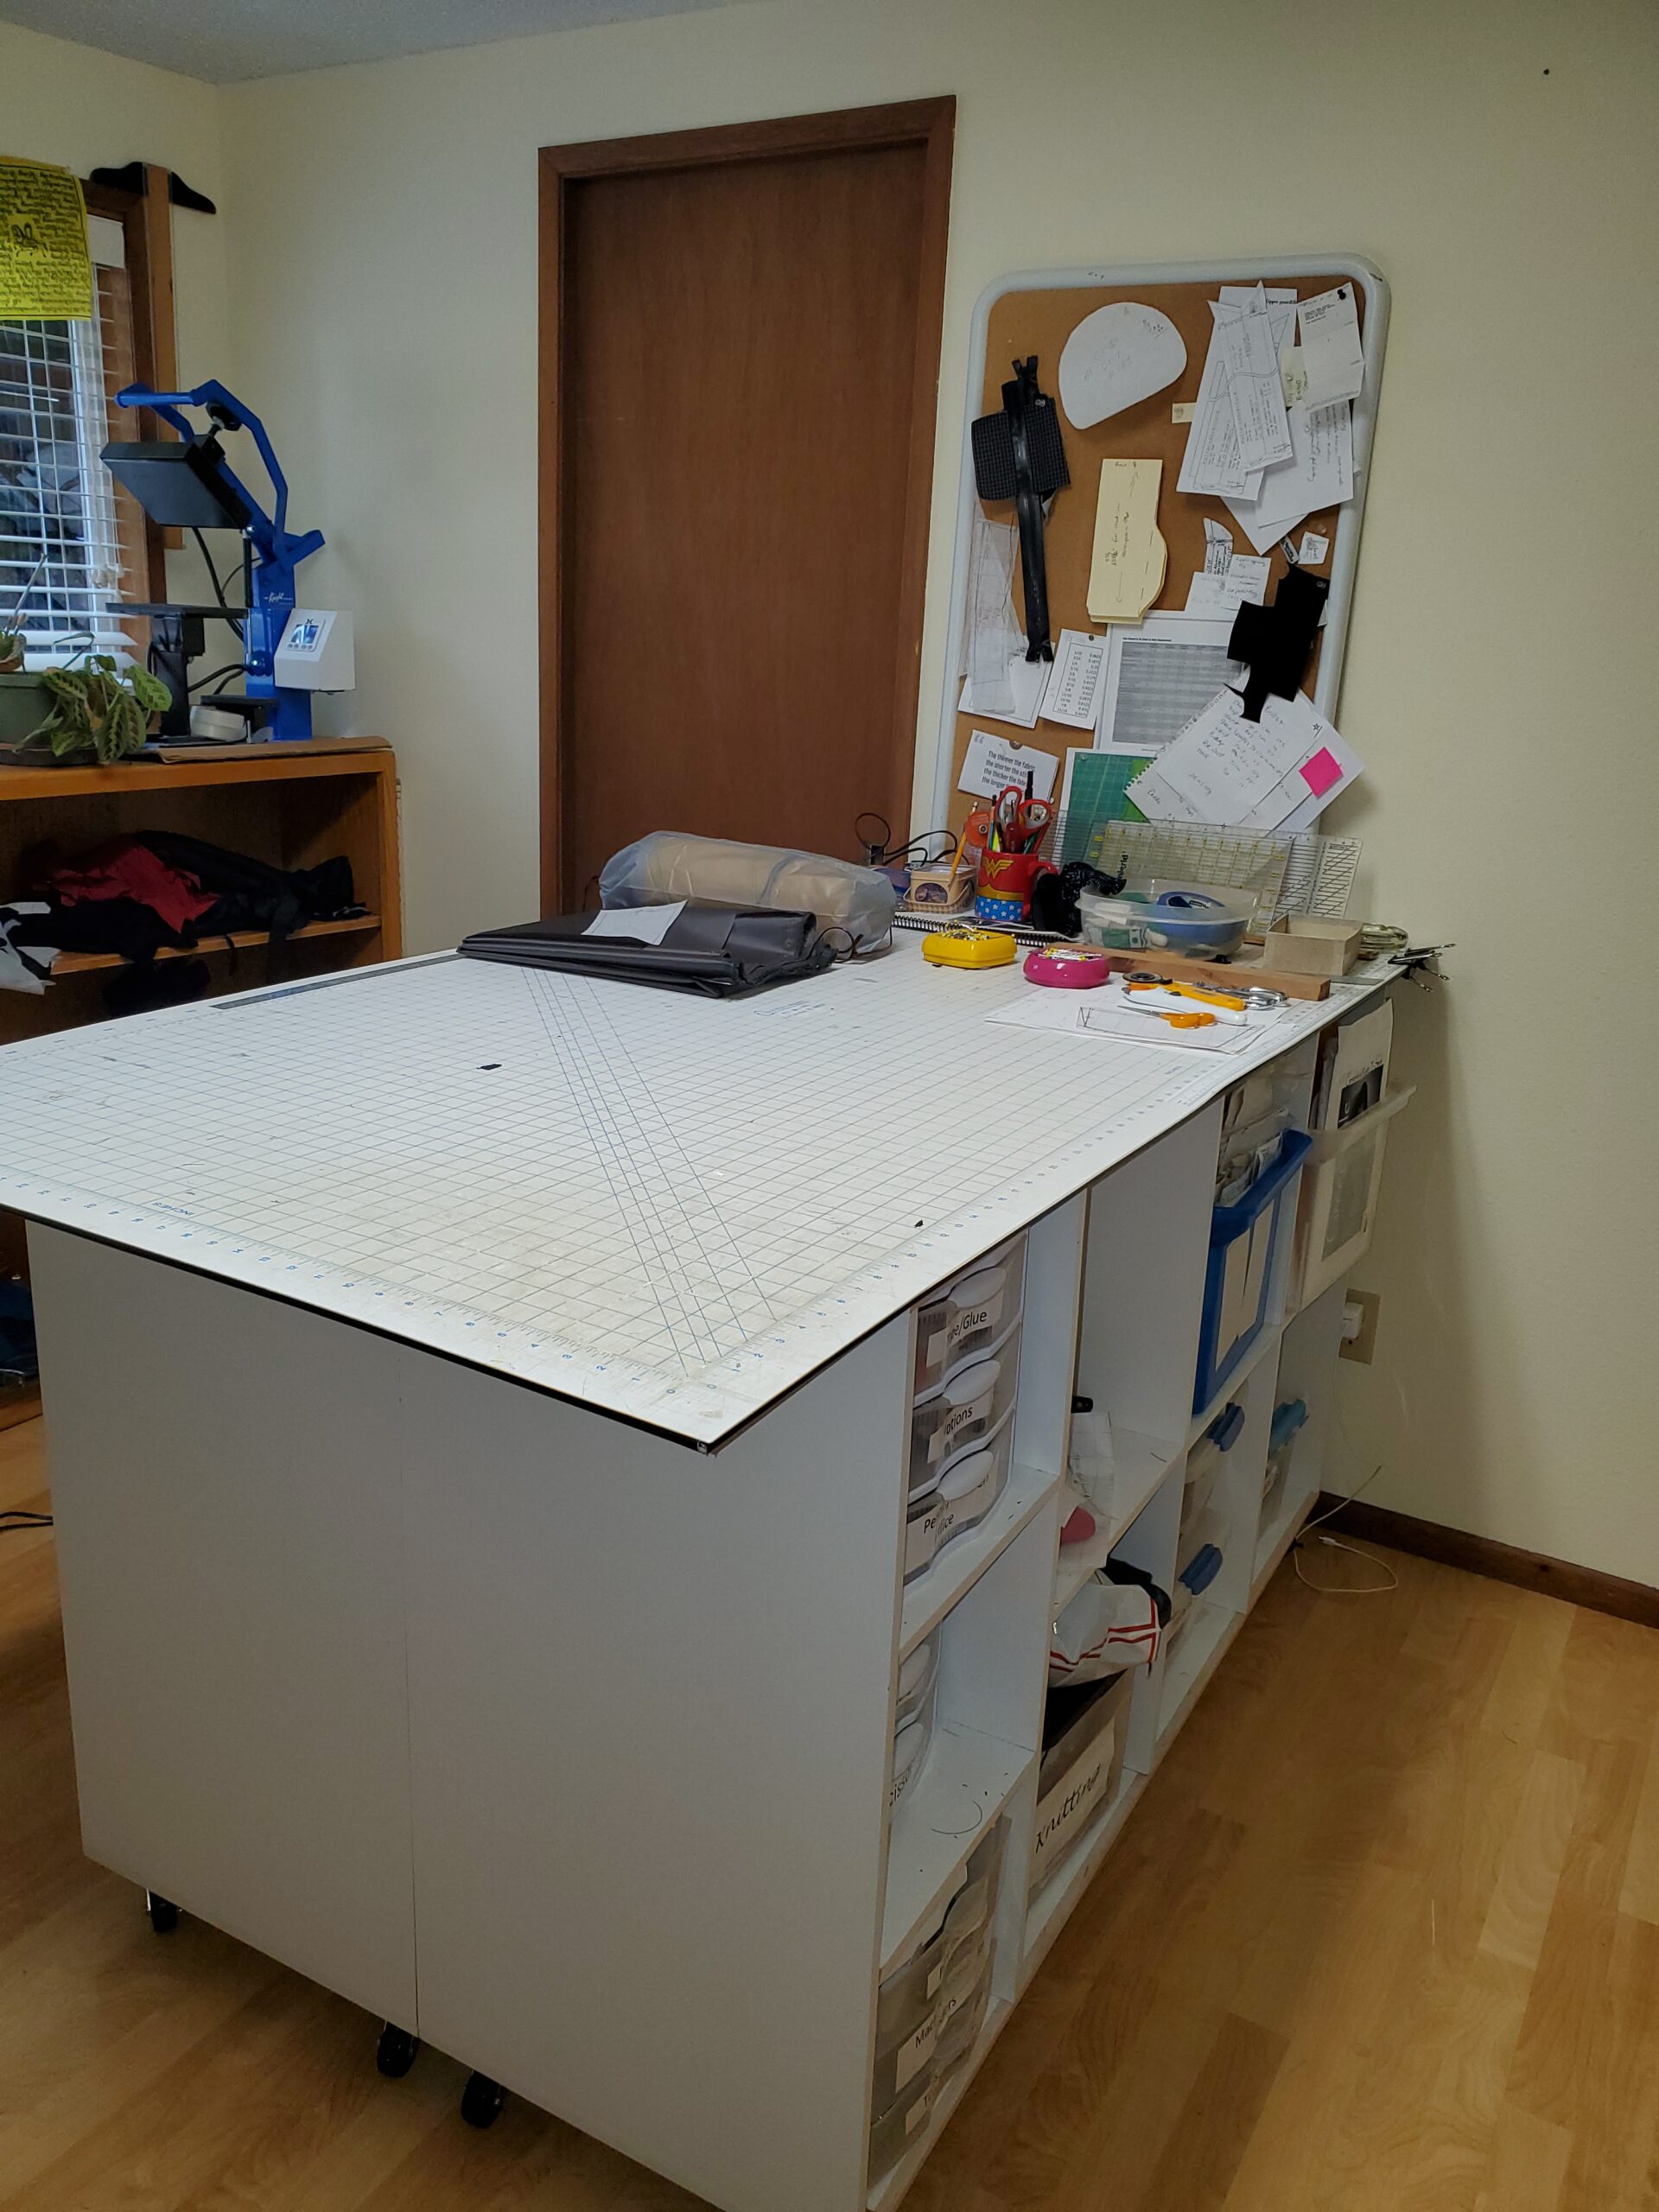
I have a huge cutting mat. It’s 70 x 48 and it’s 35 years old. It’s pretty worn. It will be hard to replace as I have not seen one that big in years. I saw an IKEA hack for a cutting table that looked amazing. My hub builds furniture for fun and hates IKEA, so I ordered up my own version of the IKEA Kallax hack table. My cutting mat is on the top which is perfectly sized to fit. The table is custom height for me. The cubbies are customized for storage bins and it’s on wheels. The best part is you can break it down into two cupboards if you don’t need the cutting part. It’s fantastic and I love it.
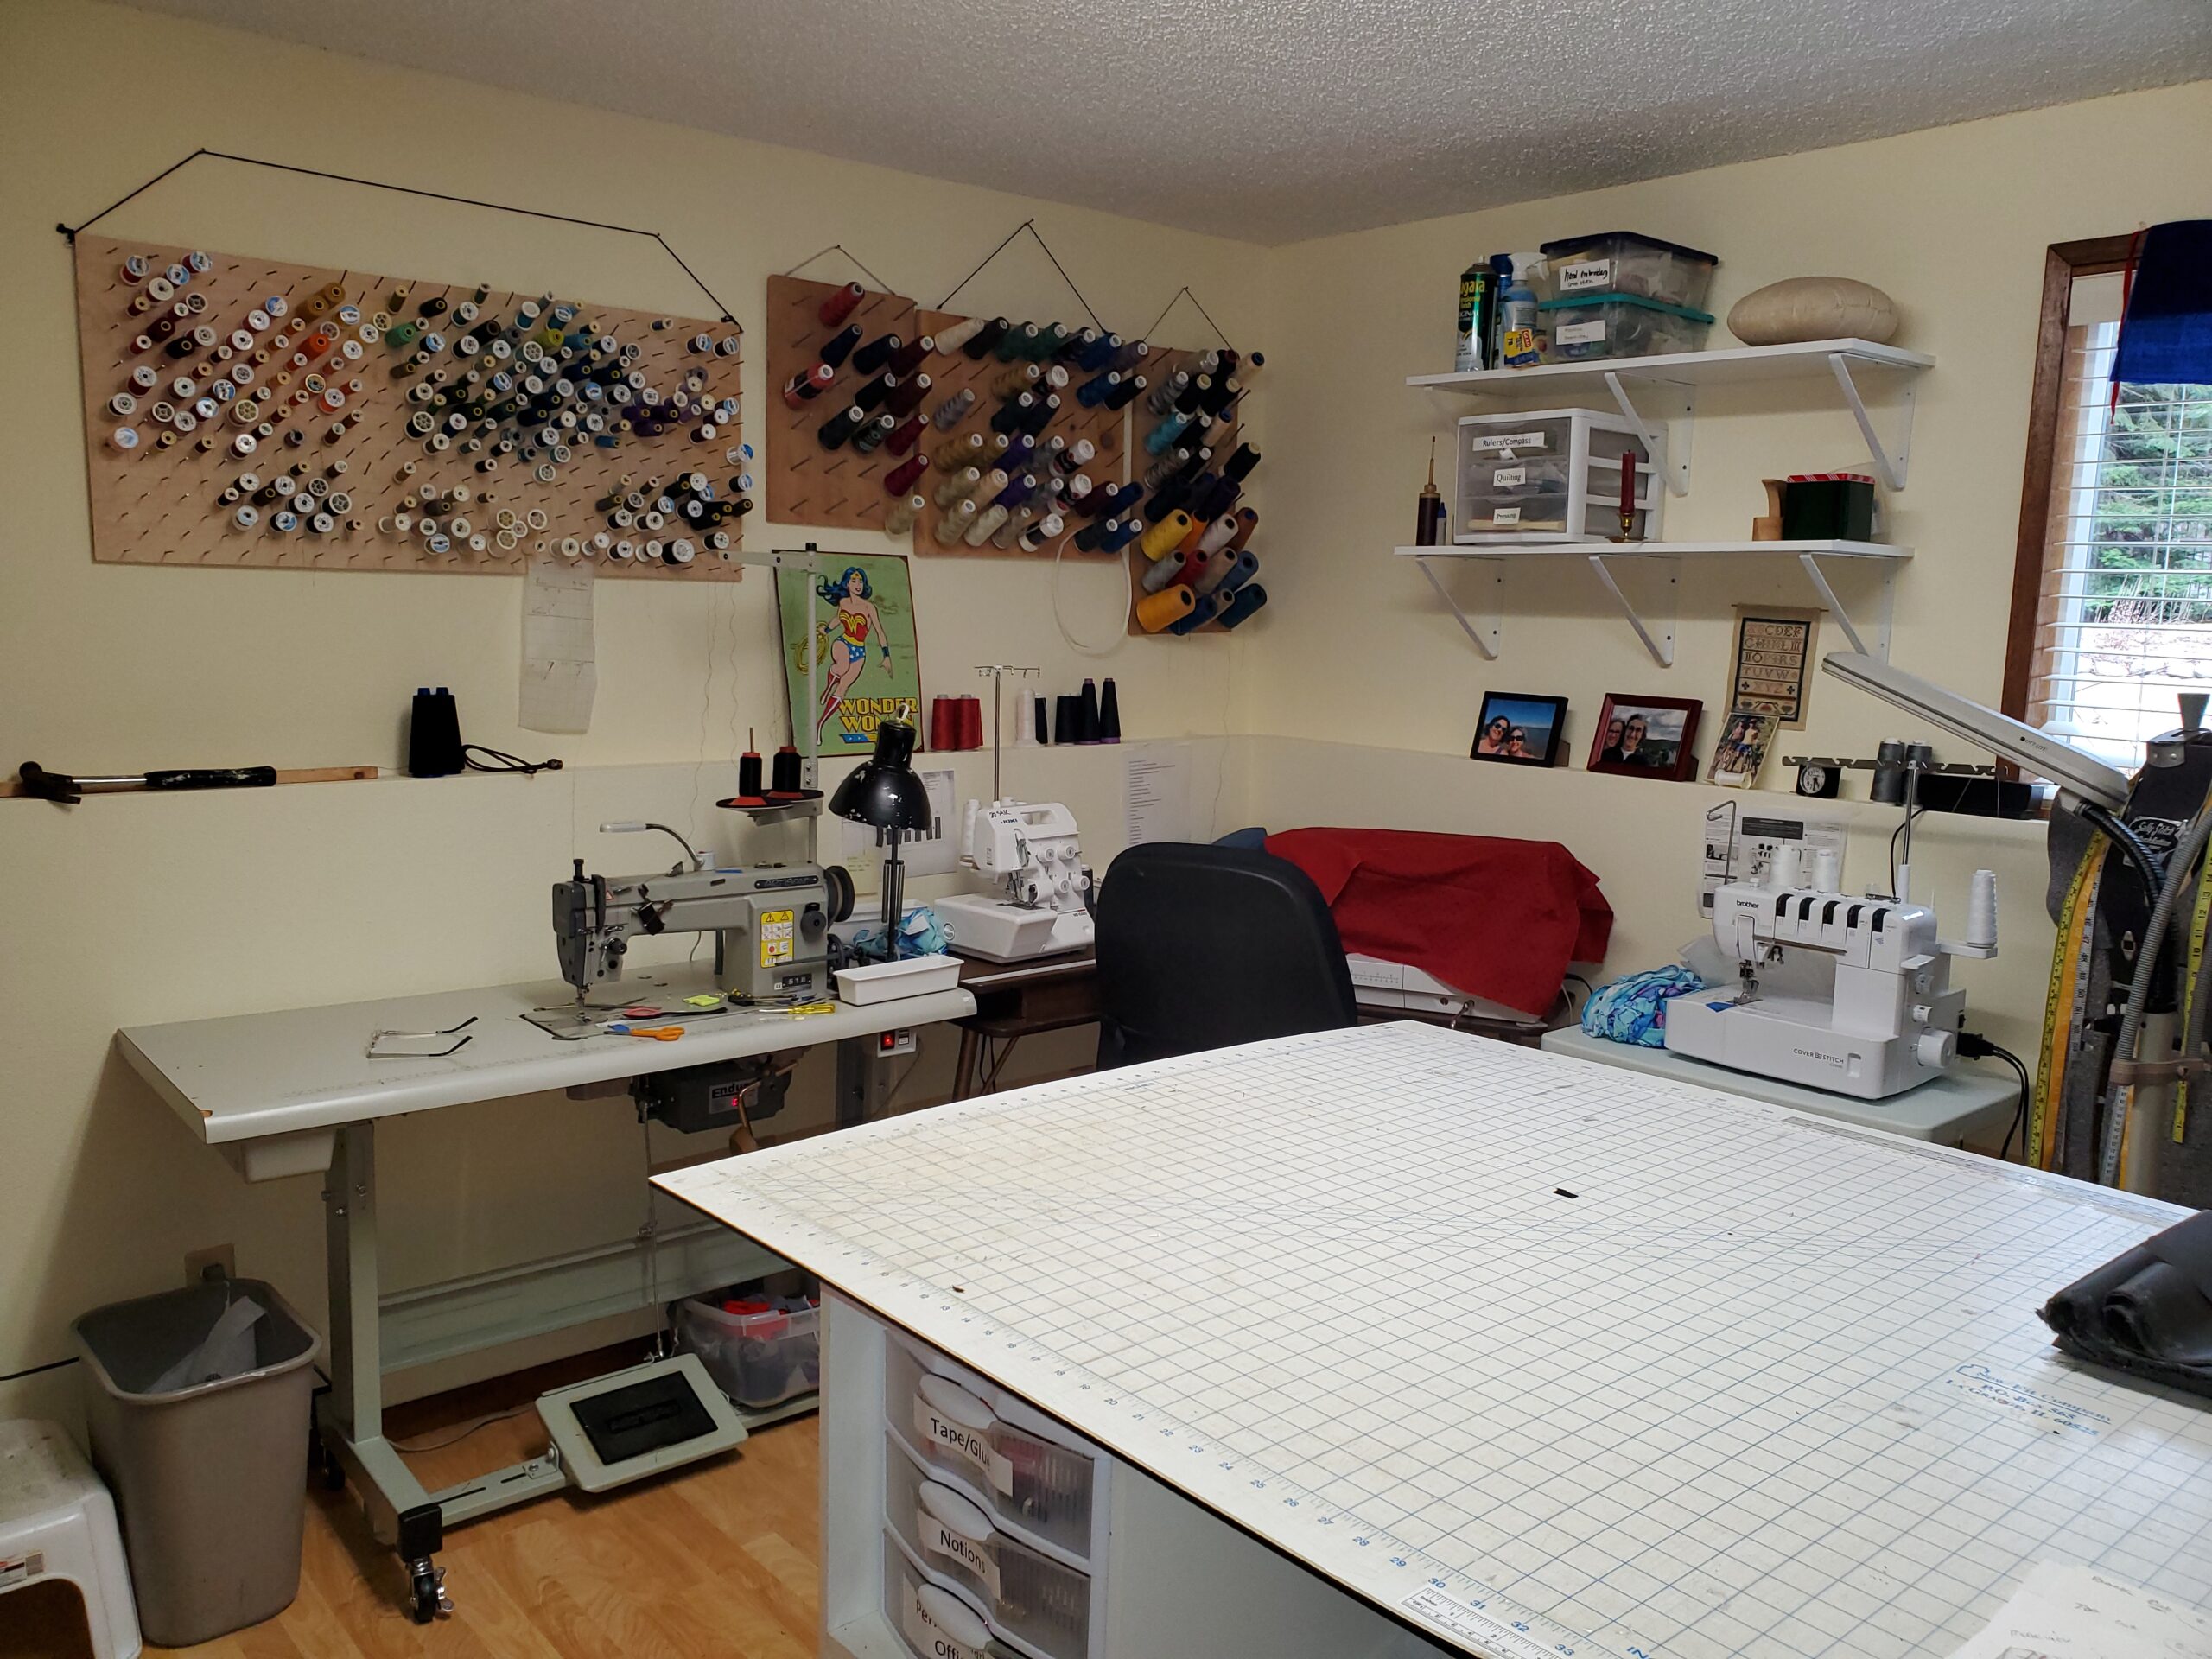
I wanted a sunny color. I wanted yellow: not too yellow to affect my color use but enough to augment daylight and be a happy color. I’m thrilled with my paint color. I put up some new shelves and my prayer flags. I acquired a bookcase from my retired husband that fit perfectly under the window. Last but not least, I played with various floor plan configurations of cutting table and machines. The fact that I sold my walking foot industrial made it much easier to squeeze four machine into the space. The table being on wheels is excellent.
What would complete the dream is a suite of industrial machines: a cover hemmer, a serger, and 5- or 6-thread flatlock.
Machines currently in use from L to R: Artisan needle feed, Babylock 644 serger, Elna 780 and a Brother 3550 coverhemmer.
Sometimes I am annoyed that I didn’t do this sooner, but as I’ve mentioned before I’d kind of lost my joy. Why would I be motivated to spruce it up when all I wanted was to close the door at the end of the day.
Of course I’m making my own. I did very few orders before I closed the shop. Now, I’ve been experimenting and making some just because I can. It’s a THING now…you will see lots of variations from lots of different makers out there.
I’m fortunate in that I know professional bag makers out there who have been generous with tips. I’ve also got years of experience making all sorts of weird bags but not specifically for bikes.
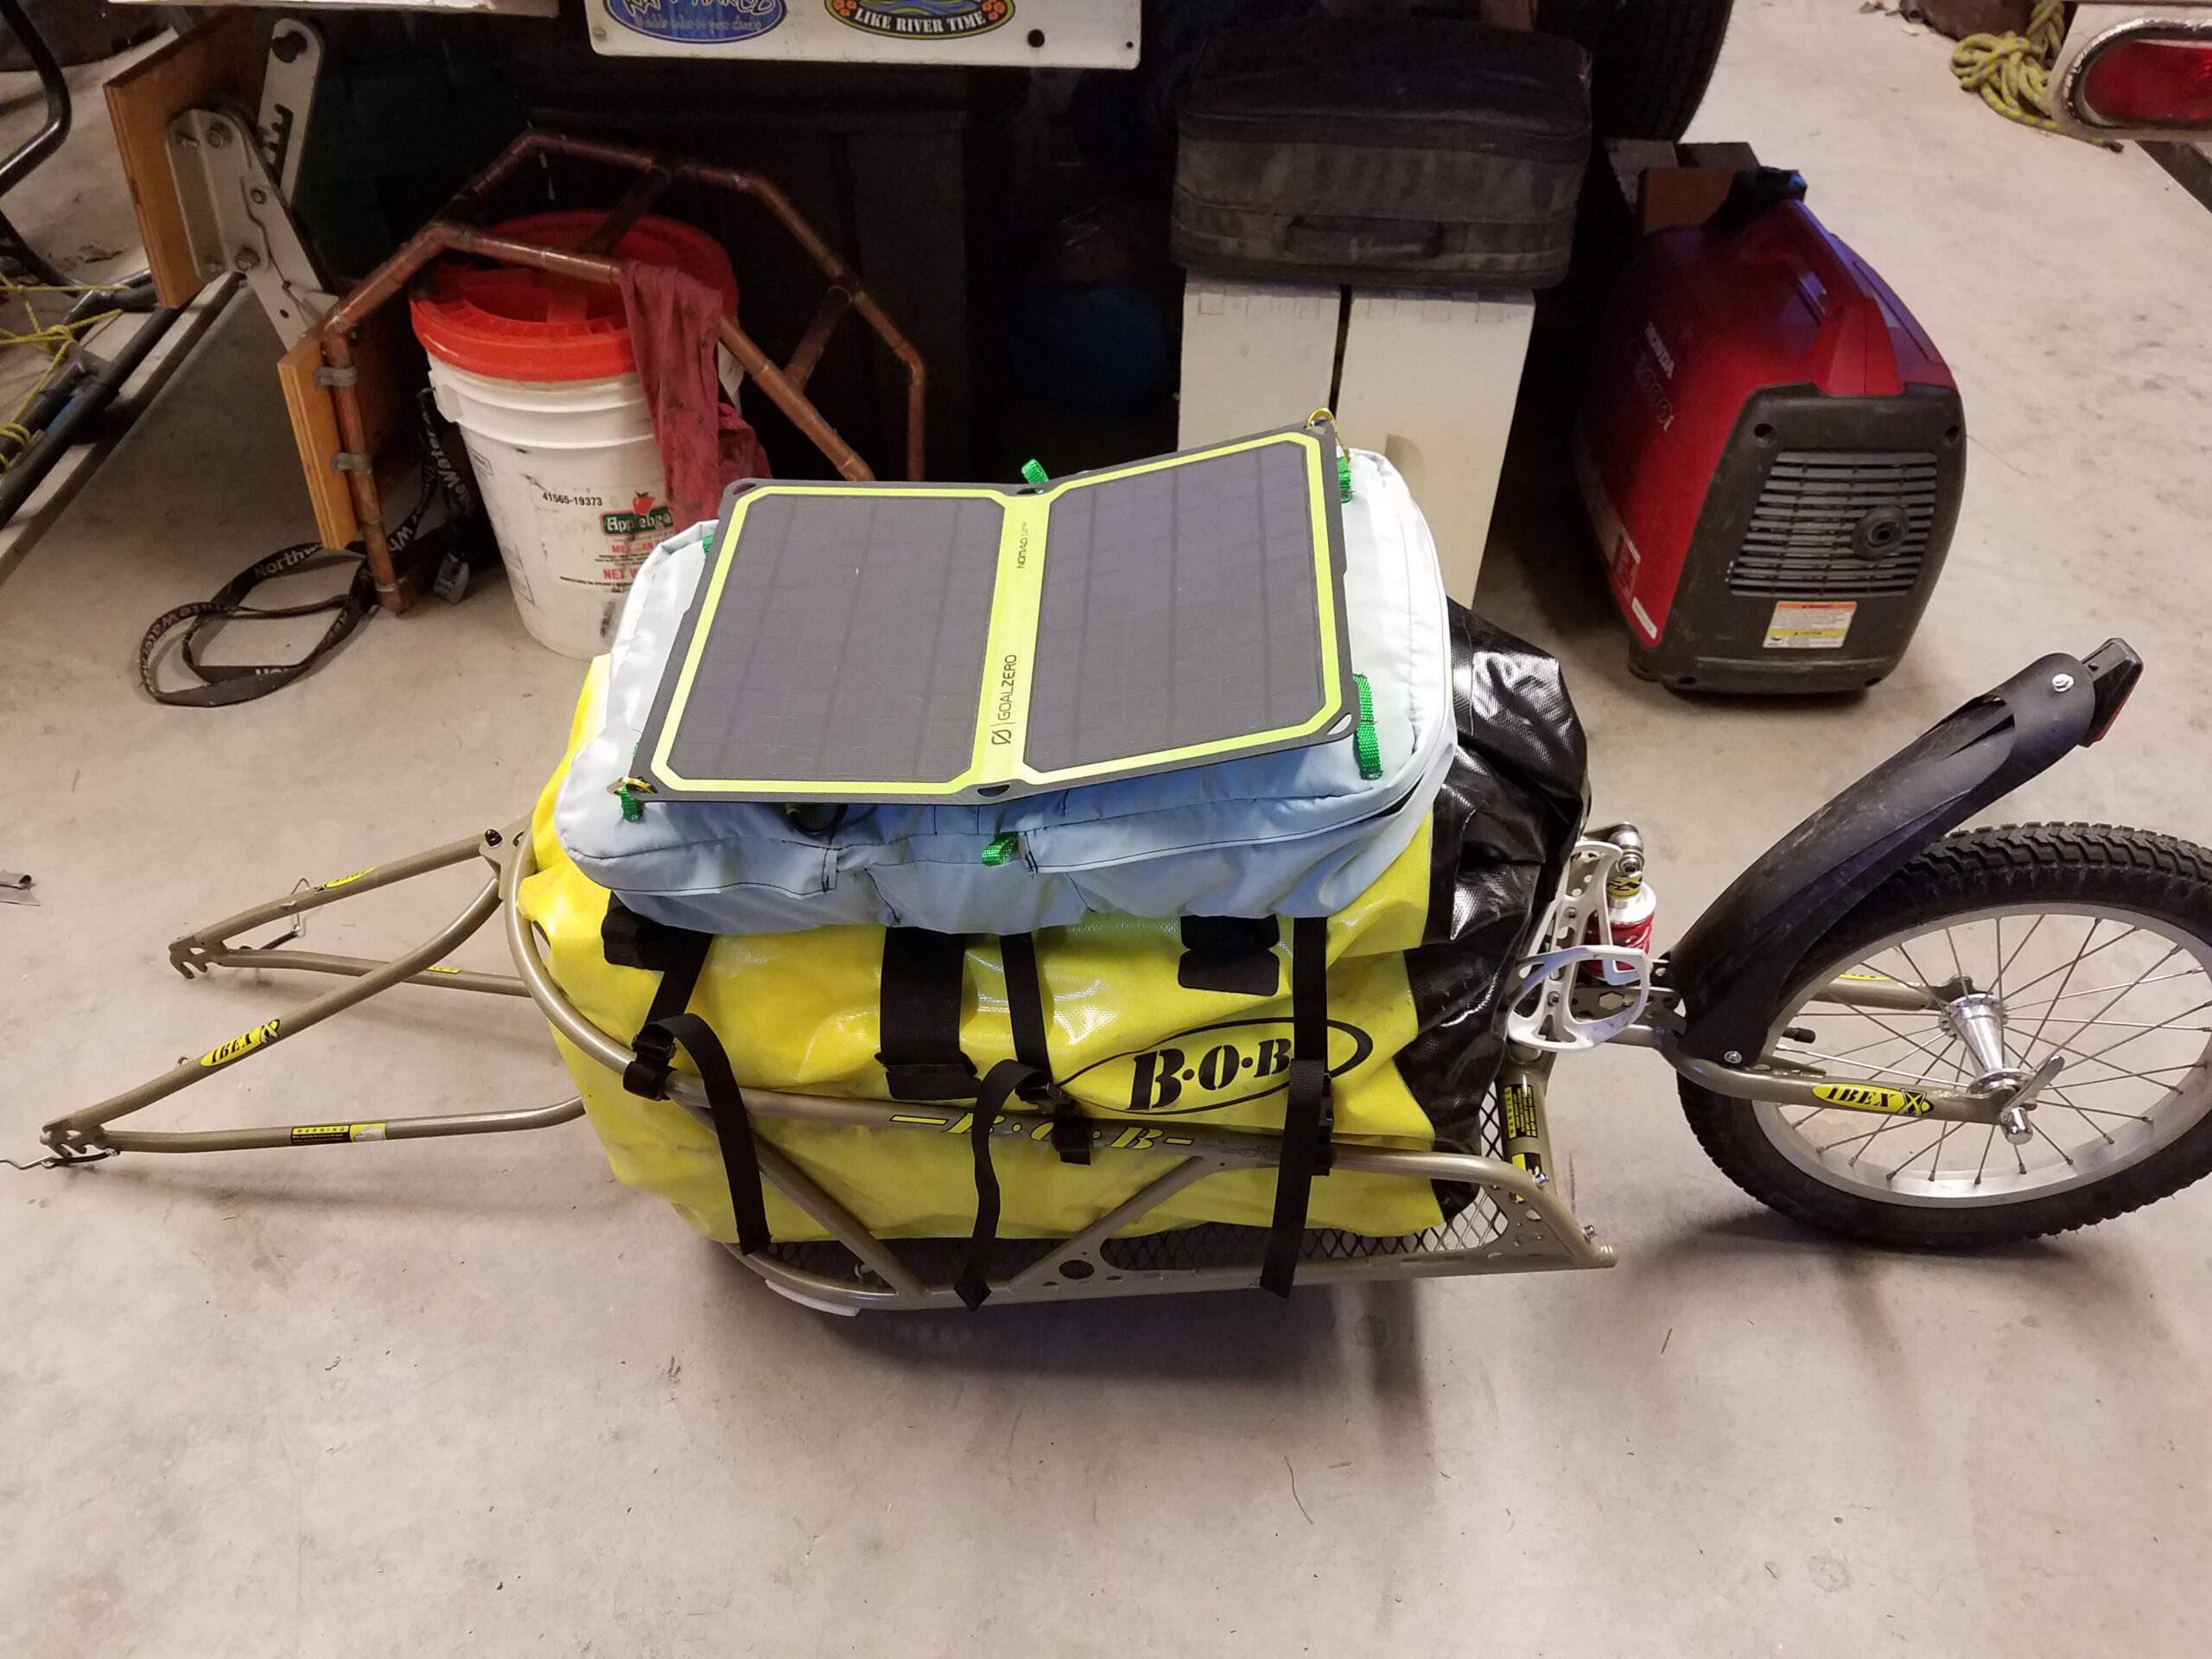
The first one I made (if you can count as a bag) was for my husband’s BOB trailer, the first time he rode the Great Divide Route from Jasper AB to Seely Lake MT. He wanted something he could attach his solar panels to for charging, that also could hold a bit of gear:
Then a friend asked for a small bag for a mountain bike. This one took some fitting skillz because of the shock on the frame:
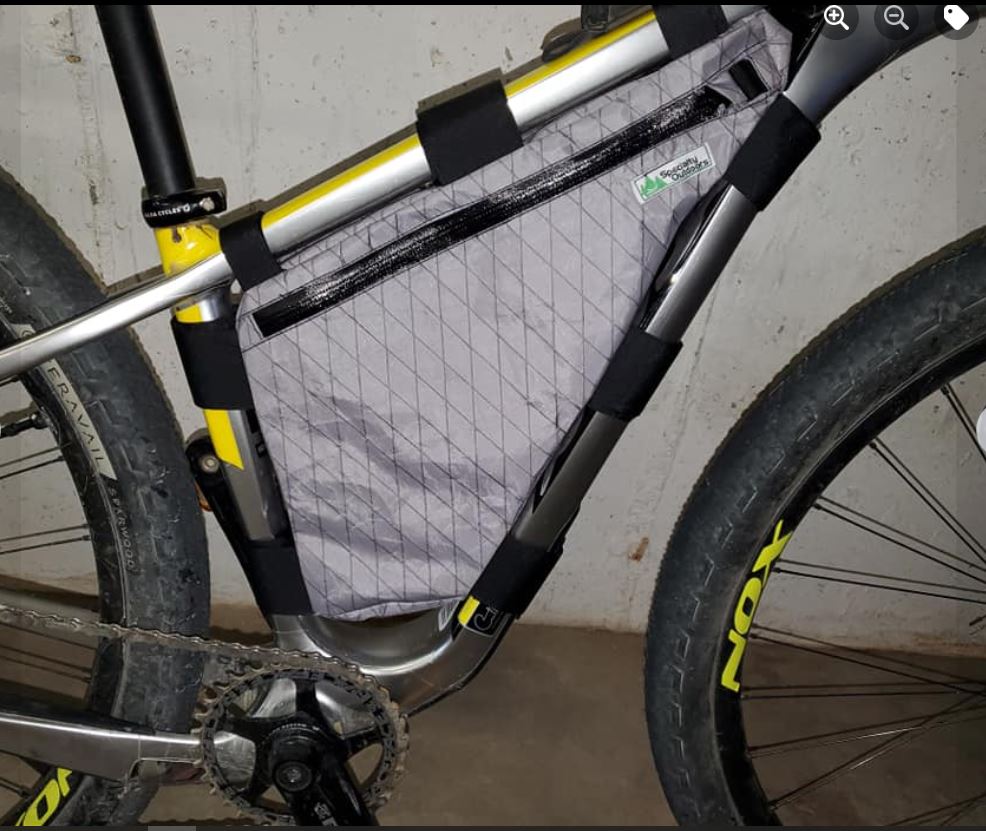
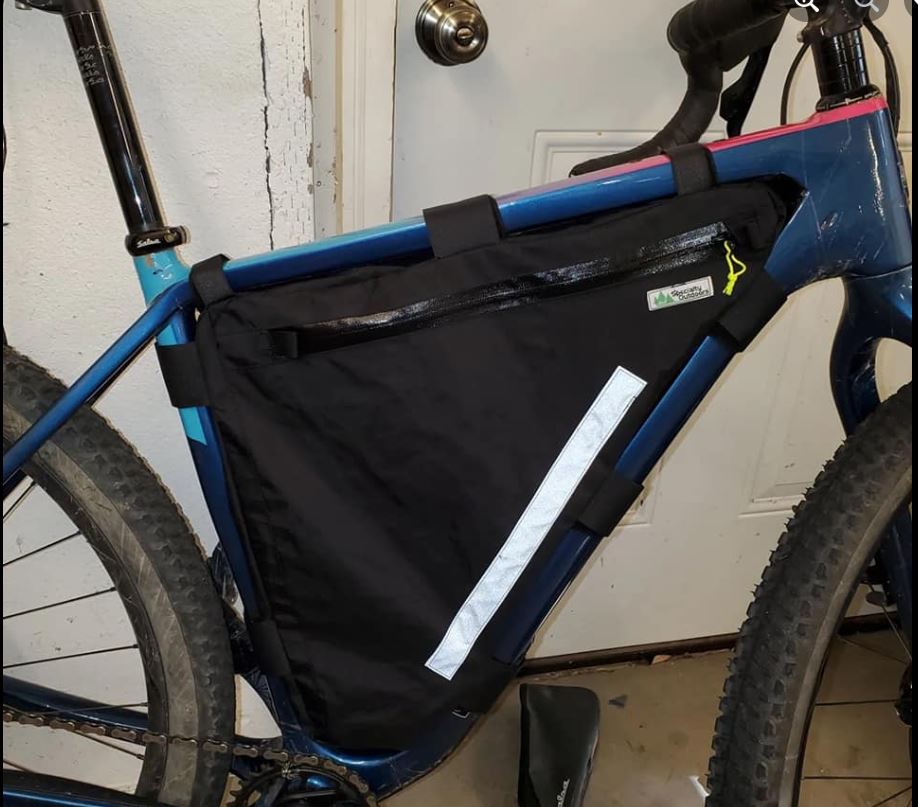
Then it was time to get a little more serious. I picked up a gravel bike, and all the cool kids had custom frame bags. This was my first attempt at a custom fit triangle bag:
And then of course I just had to make matching snack bags: (tutorial here)
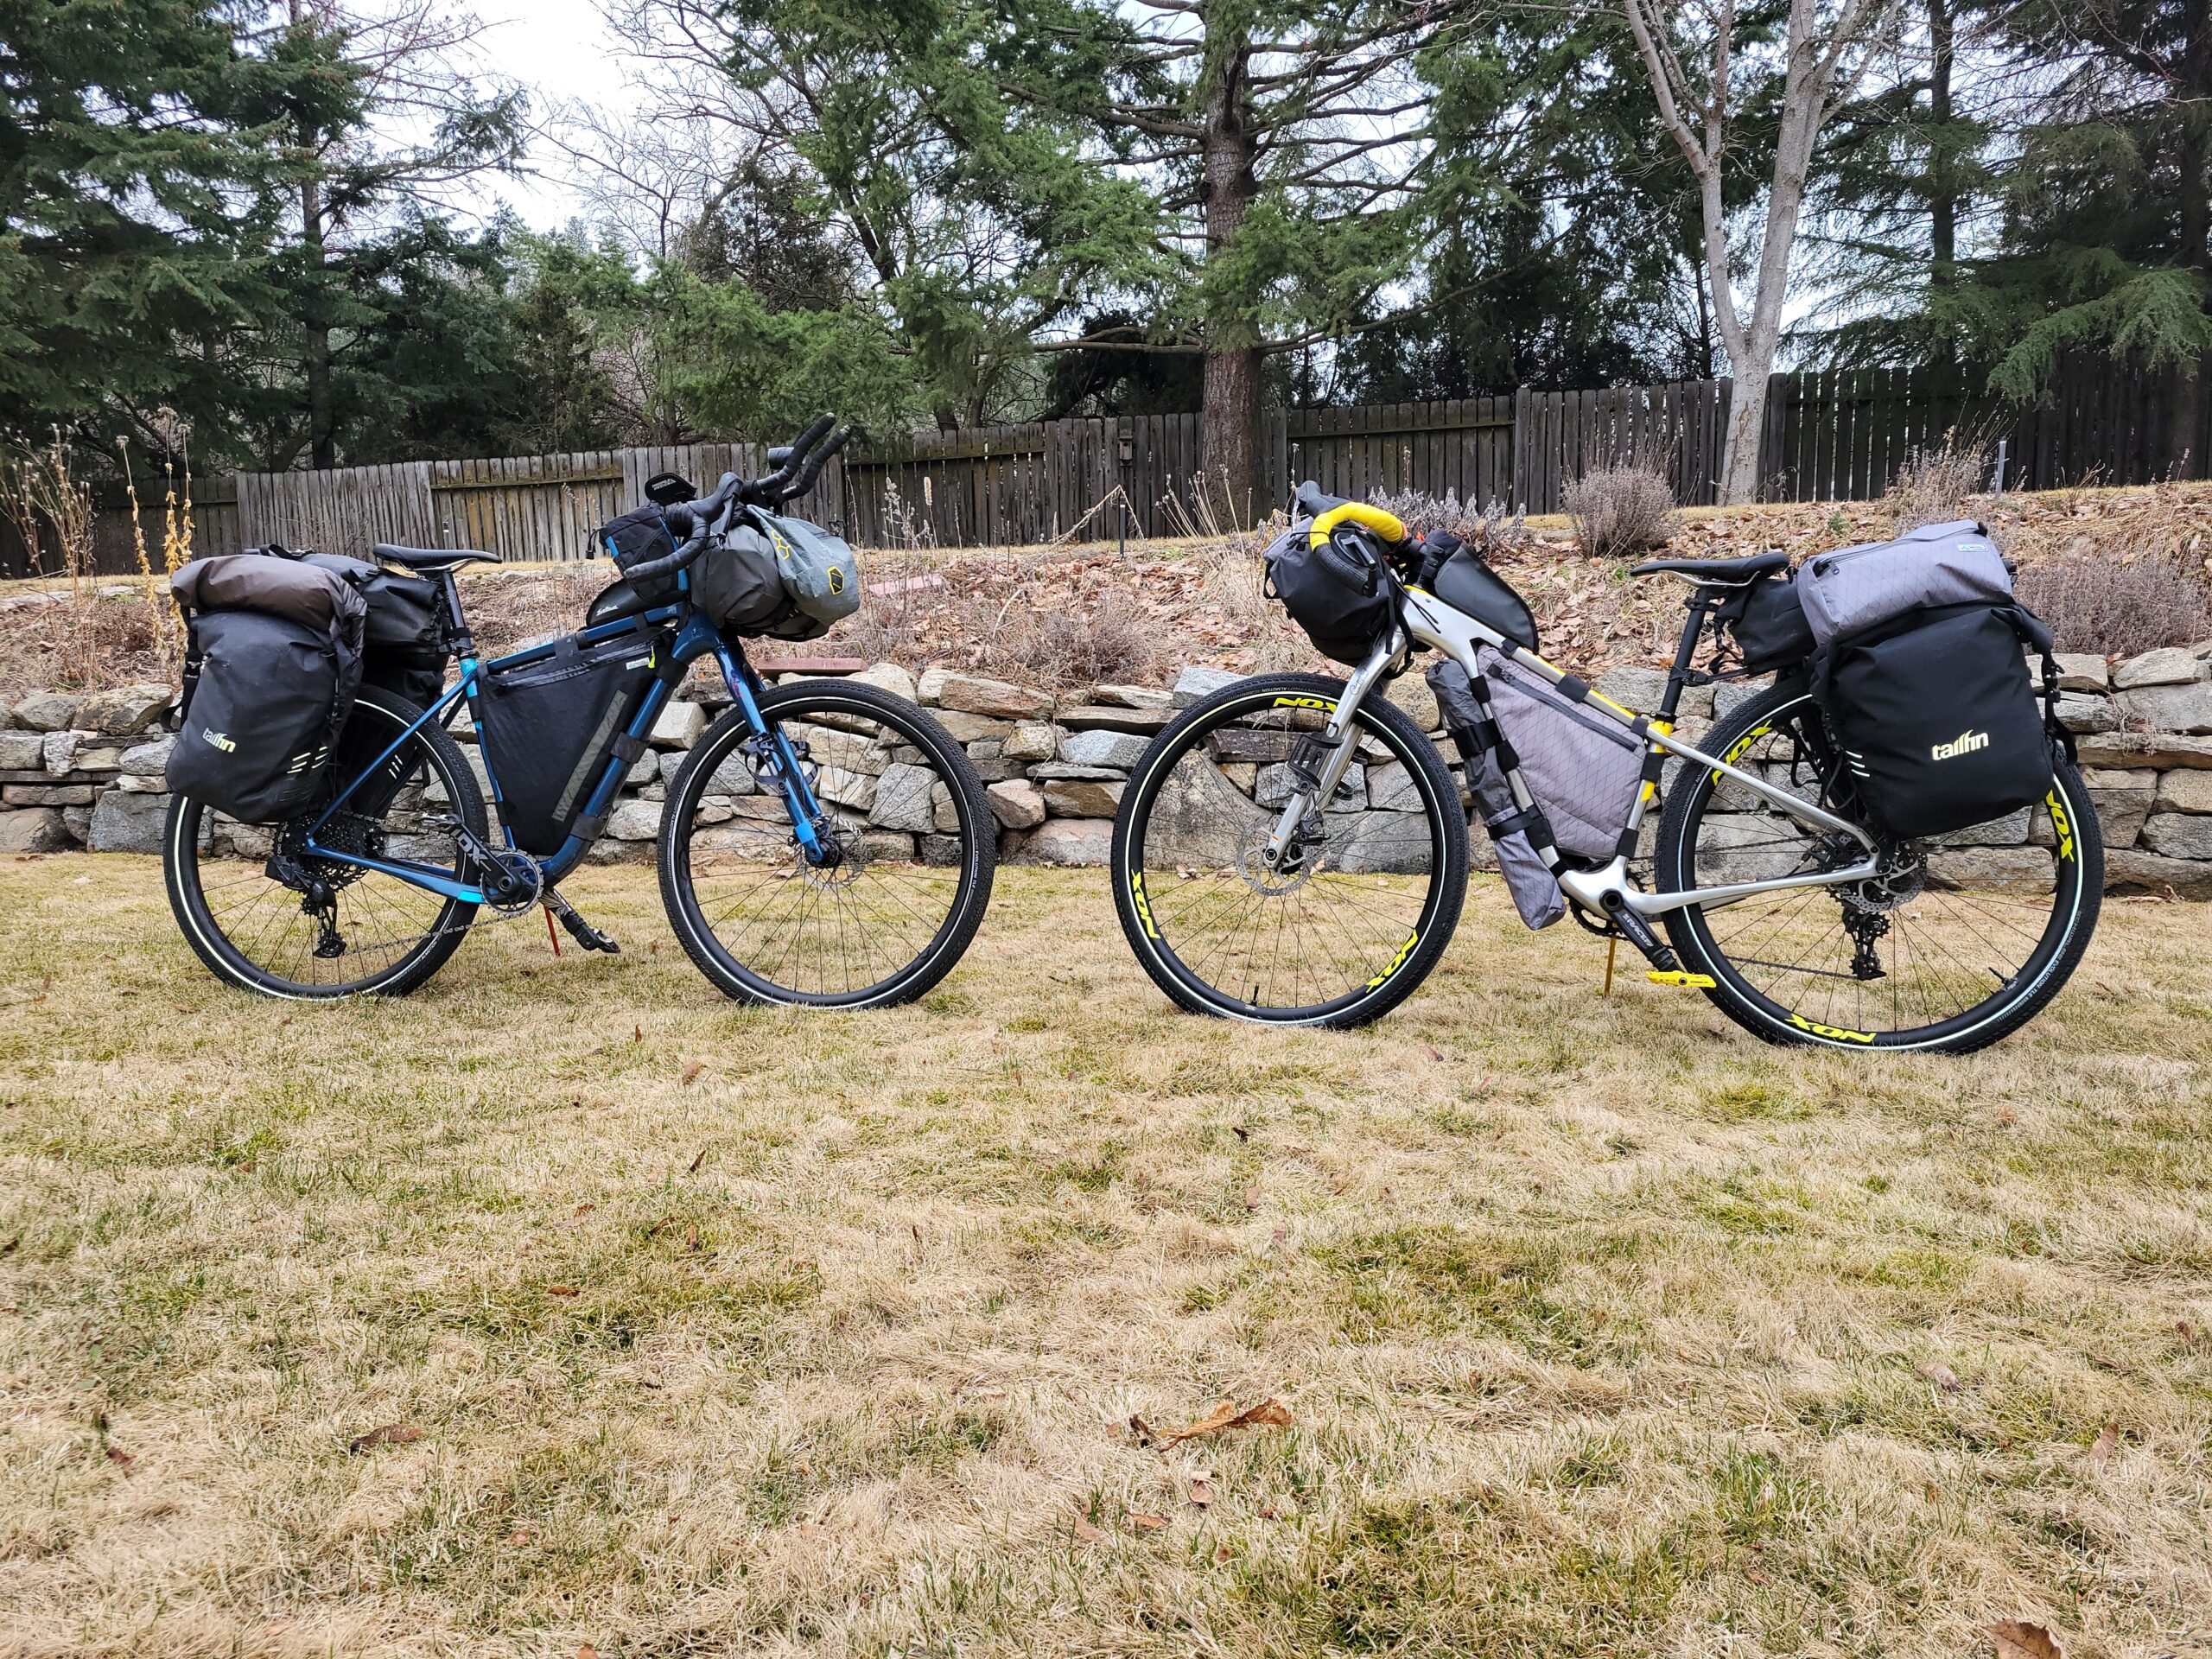
It turns out that particular gravel bike didn’t meet my needs. If you must know, I couldn’t put wide tires on it; not enough mounts for stuff, and it was geared way too high for the hilly terrain around here. My dear sweet hub bought me a Salsa Cutthroat, which of course needed new bags. Plus he got a new bike and he needed some bags. You know how it goes…
Bag on 52″ Salsa Cutthroat
Next up, we are leaving for a few months in Europe spring 2023. This means a few more bags! First off, I had to come up with a system to hold the tent poles to the down tube. It’s not really a bag; more like a contraption. But it works!!
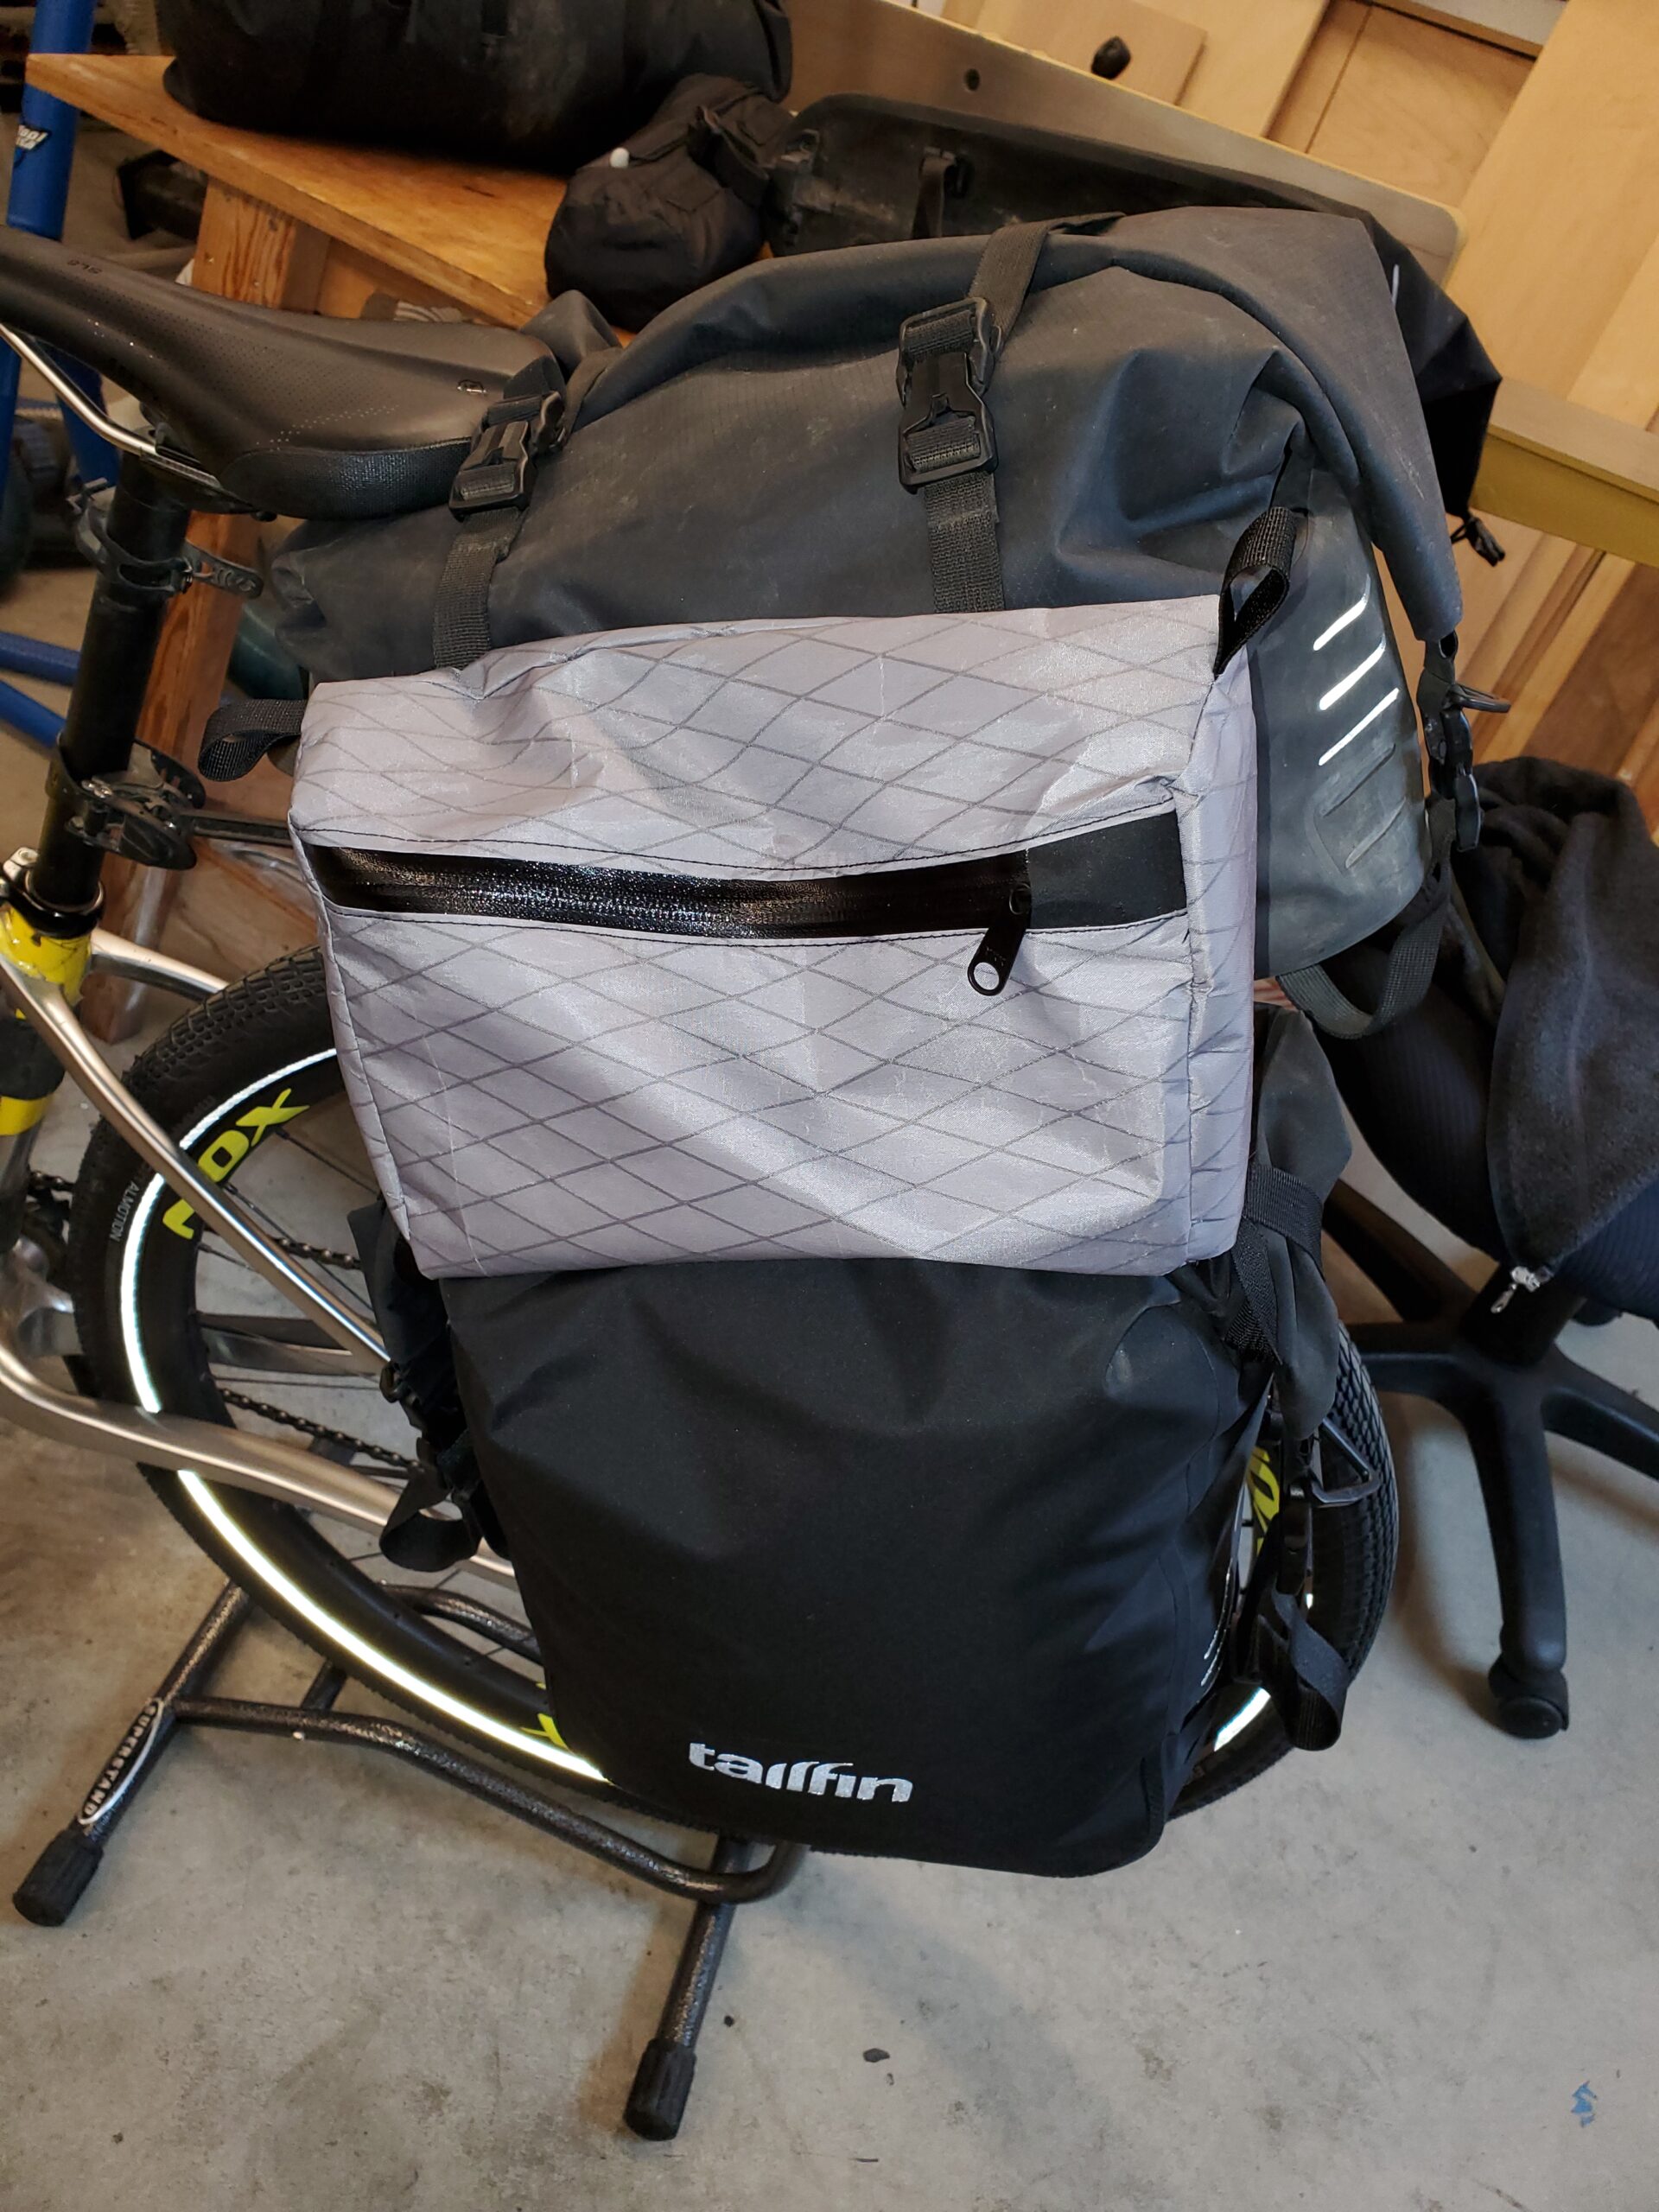
My hub has outfitted our Cutthroats with the Tailfin system. These panniers are quite a bit smaller than some, so I decided we needed a moderate size bag that would fit on top of the pannier, nesting next to the “trunk” bag.
I then added a small front “handy” bag to go on top of my bar mounted Ortleib drybag that holds my sleeping bag:
Last but not least, I made a dry bag with some heat seal fabric as an experiment. It’s not pretty but will do the job of holding a wet tent fly.
I think we are pretty well set!
The main fabrics I used were Dyneema cordura from Outdoors Wilderness Fabrics and X-Pac from Ripstop By The Roll. Happy Trails. If you want to follow along on our ride up the Loire and down the Danube, check the EV 6 page in the top menu.
My husband and I spent 15 days in a camper van on the Ring Road. Amazing does not begin to describe it. I have been getting lots of questions from friends so while it’s fresh, I will make notes. Any prices I mention are from August 2022.
First, a shout out to my blog sponsor, Discovery Fabrics. I had grand plans to sew everything for this trip but…life. However, I did an inventory and it looks like we were outfitted pretty well with Discovery Fabrics between me and my spouse: Neoshell jacket and pants, Polartec Powerwool pullover, Polartec Powerstretch pants, 2 Polartec Powerwool lightweight shirts, a Polartec Powergrid baselayer top, 2 Yoga Stretch leggings. These performance fabrics all did their jobs of keeping us warm, comfortable and dry in Iceland’s crazy weather.
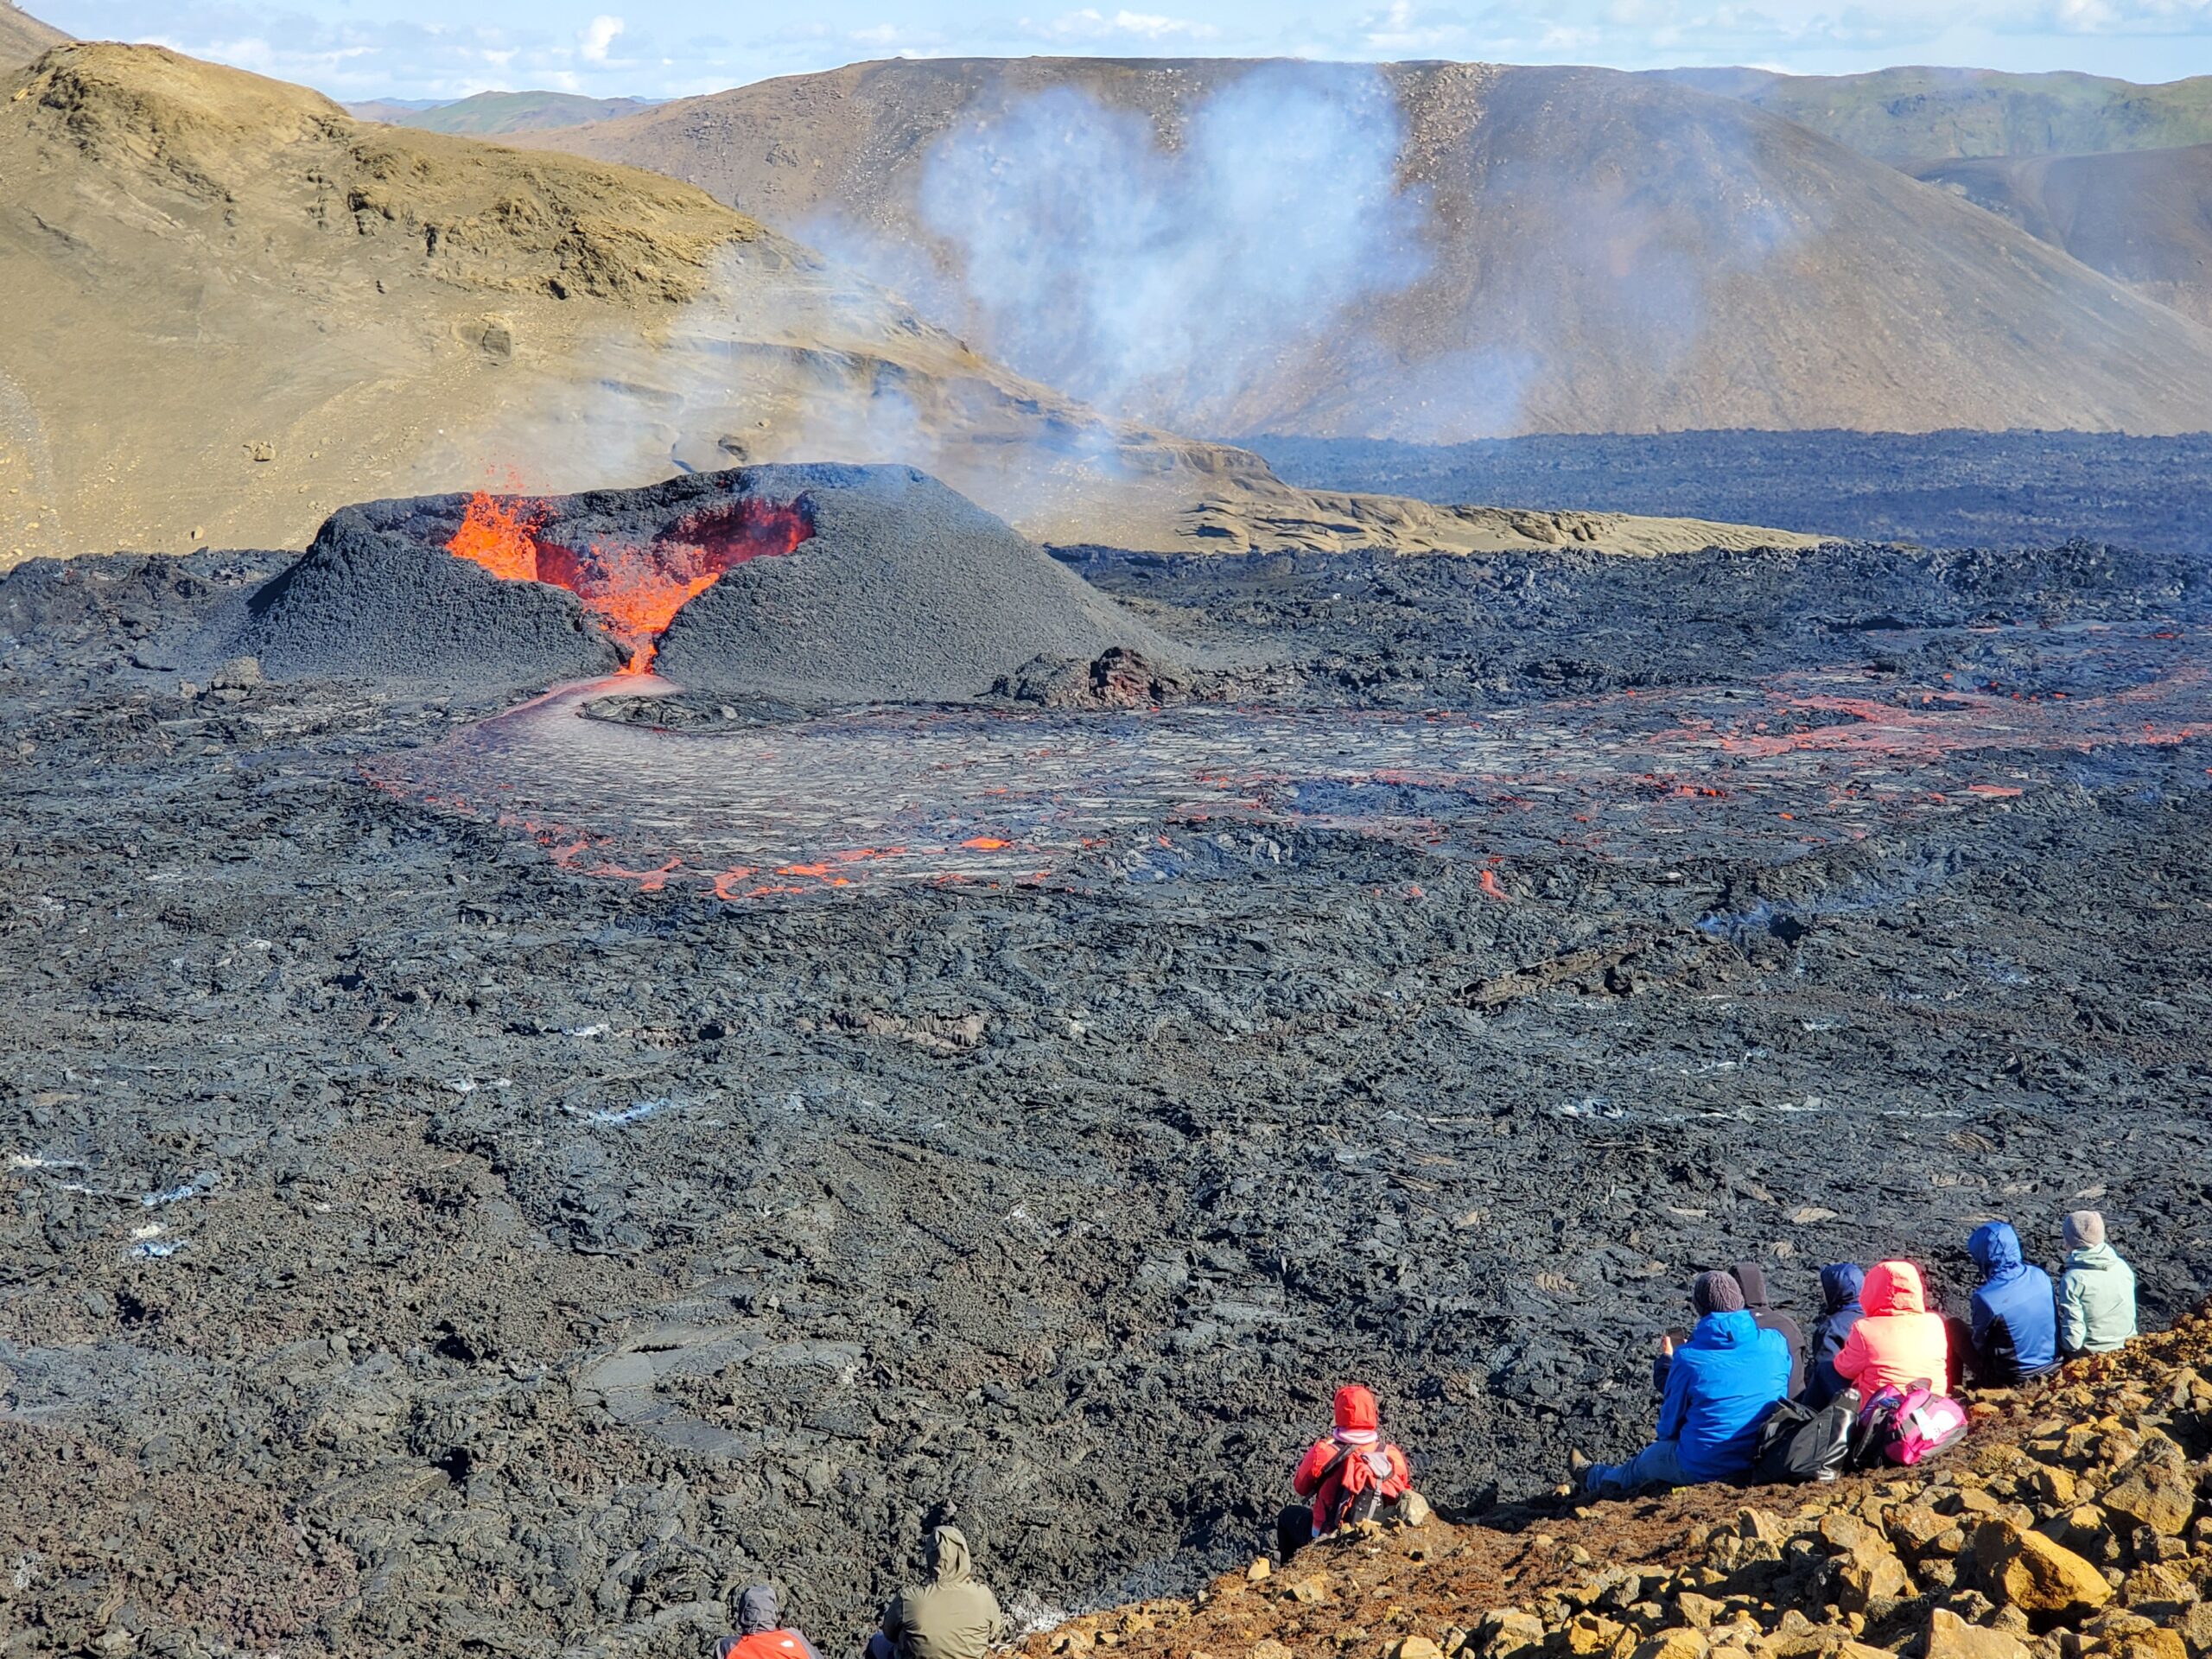
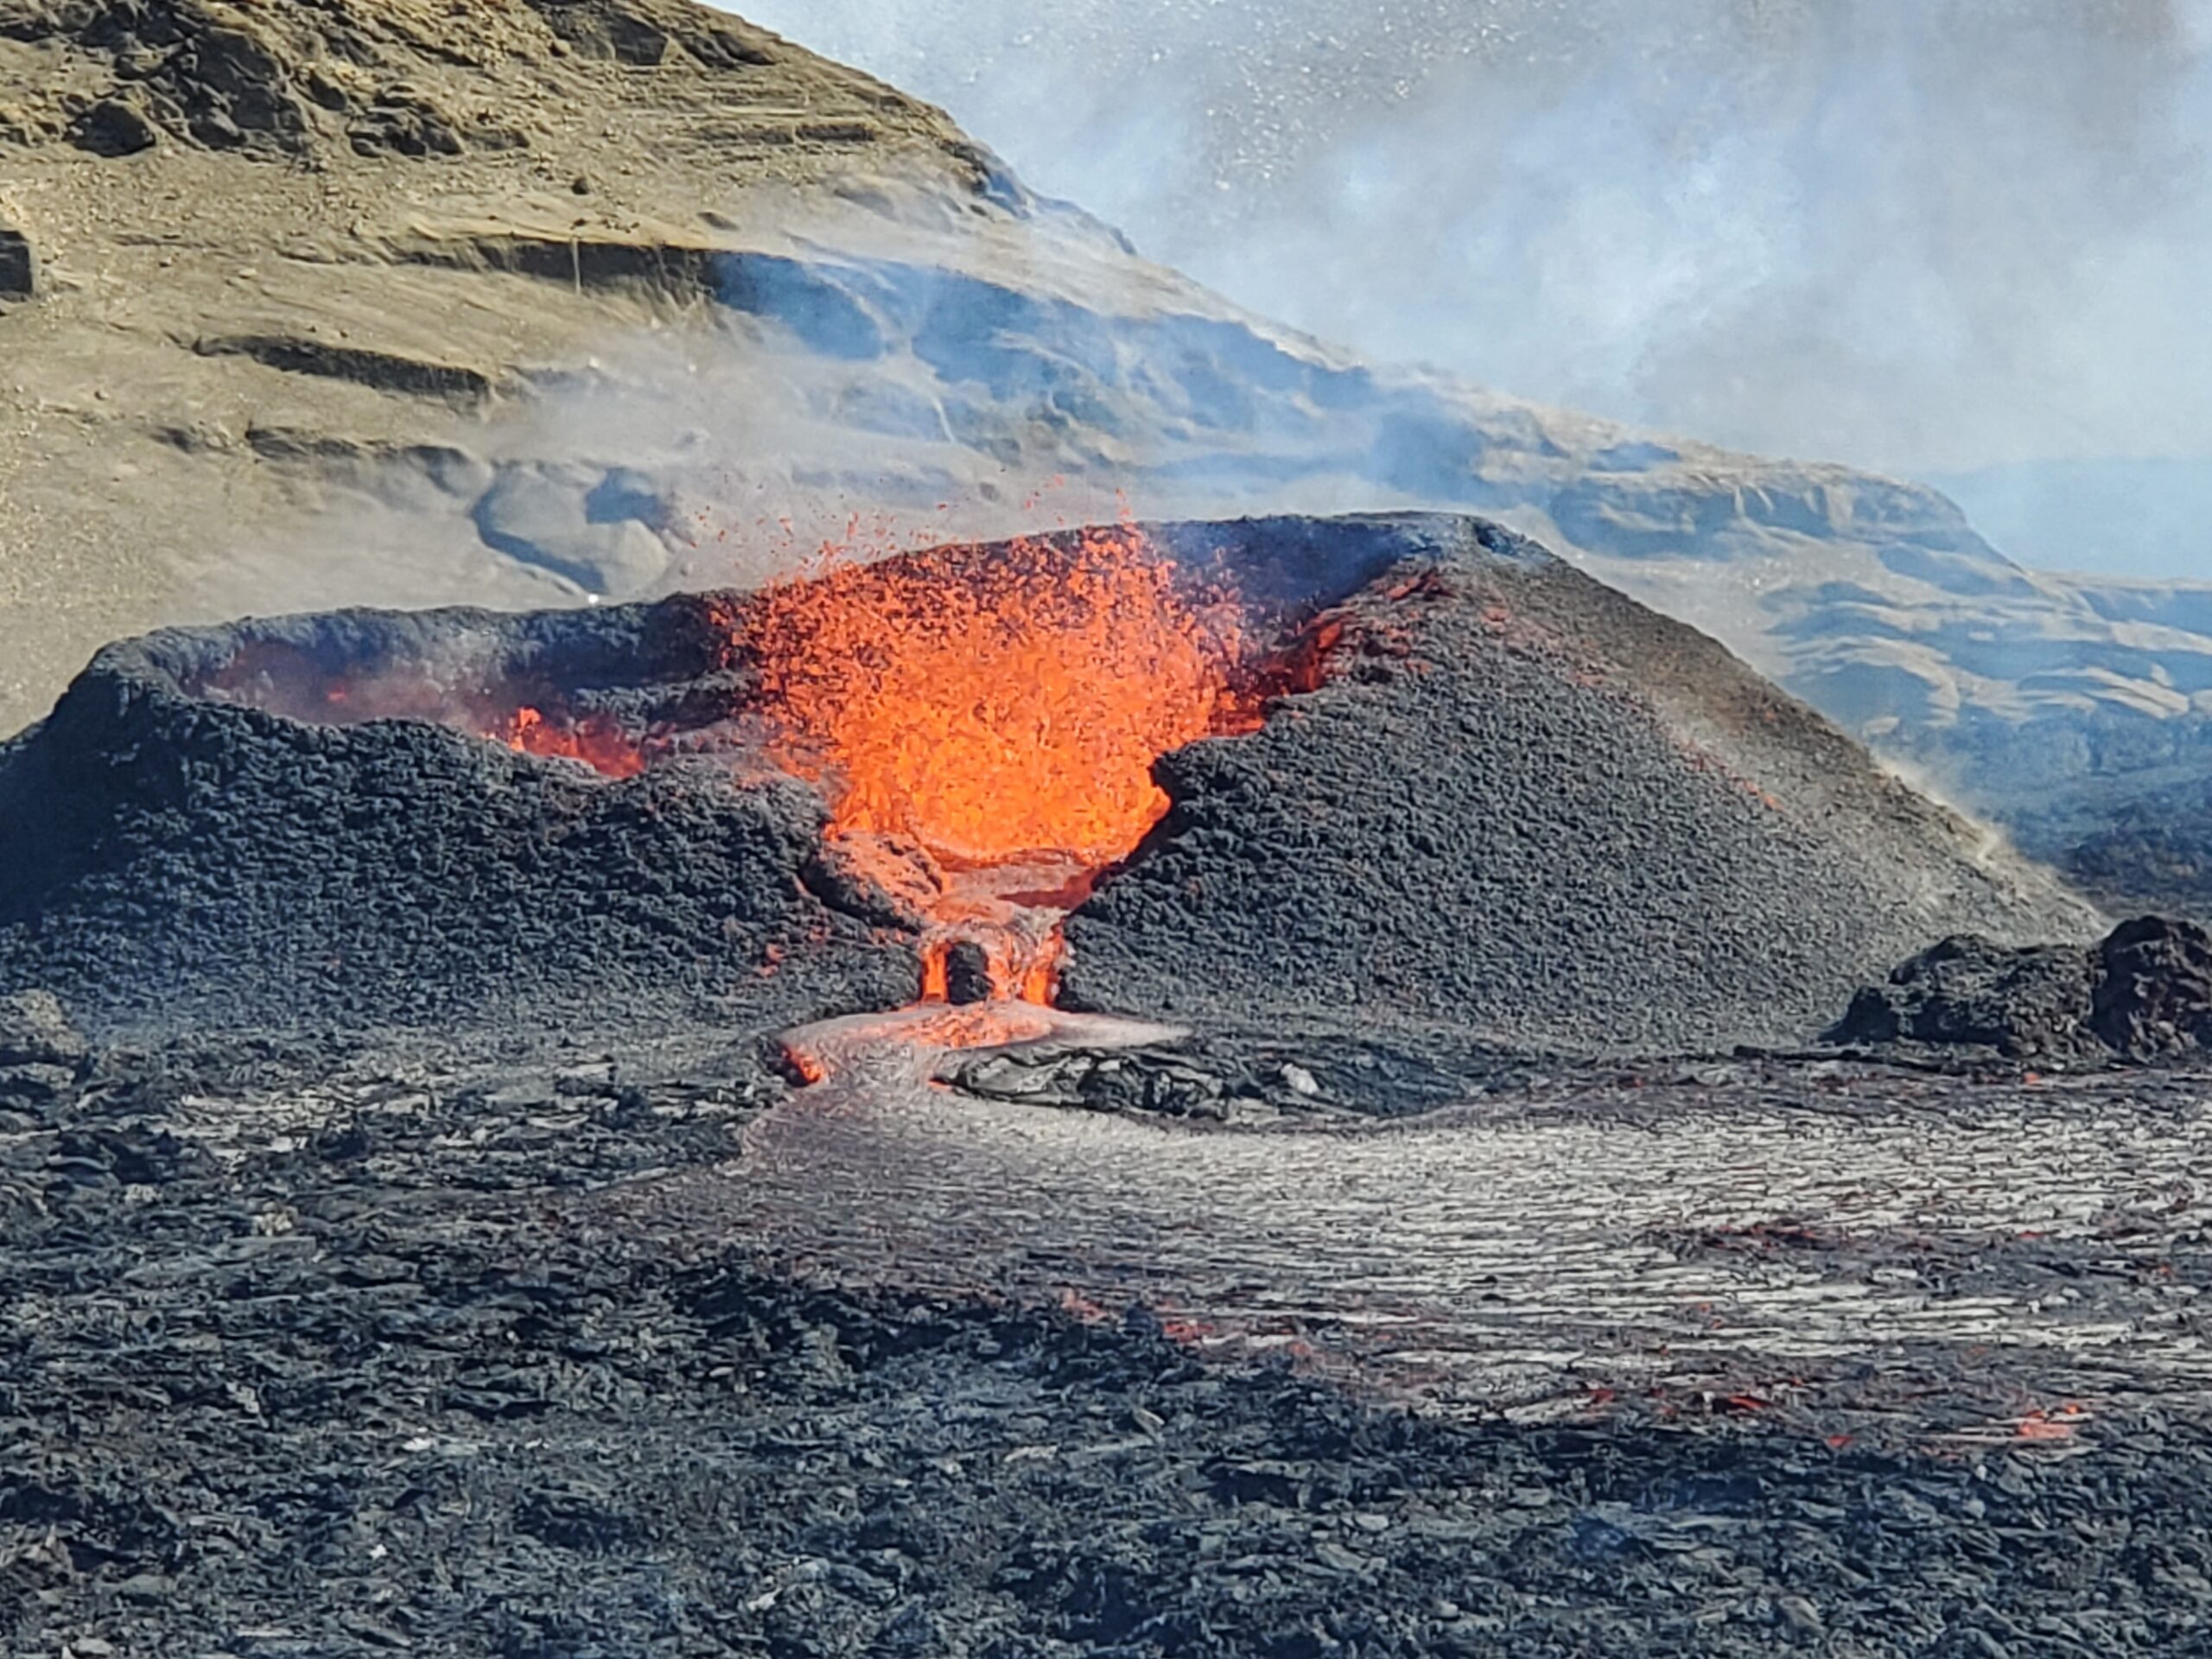
Eruption just happened to happen timed with our trip.
Caveat: I am no expert. This is just my comments from a single trip. There is lots more information out there.
Camper
I booked a van last year (summer 2021) when Craig said figure out someplace for us to go. I booked a camper first as I figured that would be a good place to start. For rentals, you can get everything from a Rav-4 sized vehicle with a popup on top, to king cab 4x4s with campers and snorkels and small RVs. If you wish to go to the interior, 4×4 is mandatory as 4×4 is required by law on “F” roads. We had considered a 4×4 and nixed it due to cost (almost twice as much) but in retrospect, I wish we had done it. Next trip? I’m sure your only limitation is how much you want to spend.
We saw lots of rental campers that are a small vehicle with a pop-up tent. Our observation, confirmed by talking to campers, is that they are COLD for sleeping and really wet when storming. After one rainy night, we saw people wringing their mattresses out. Not for us!!
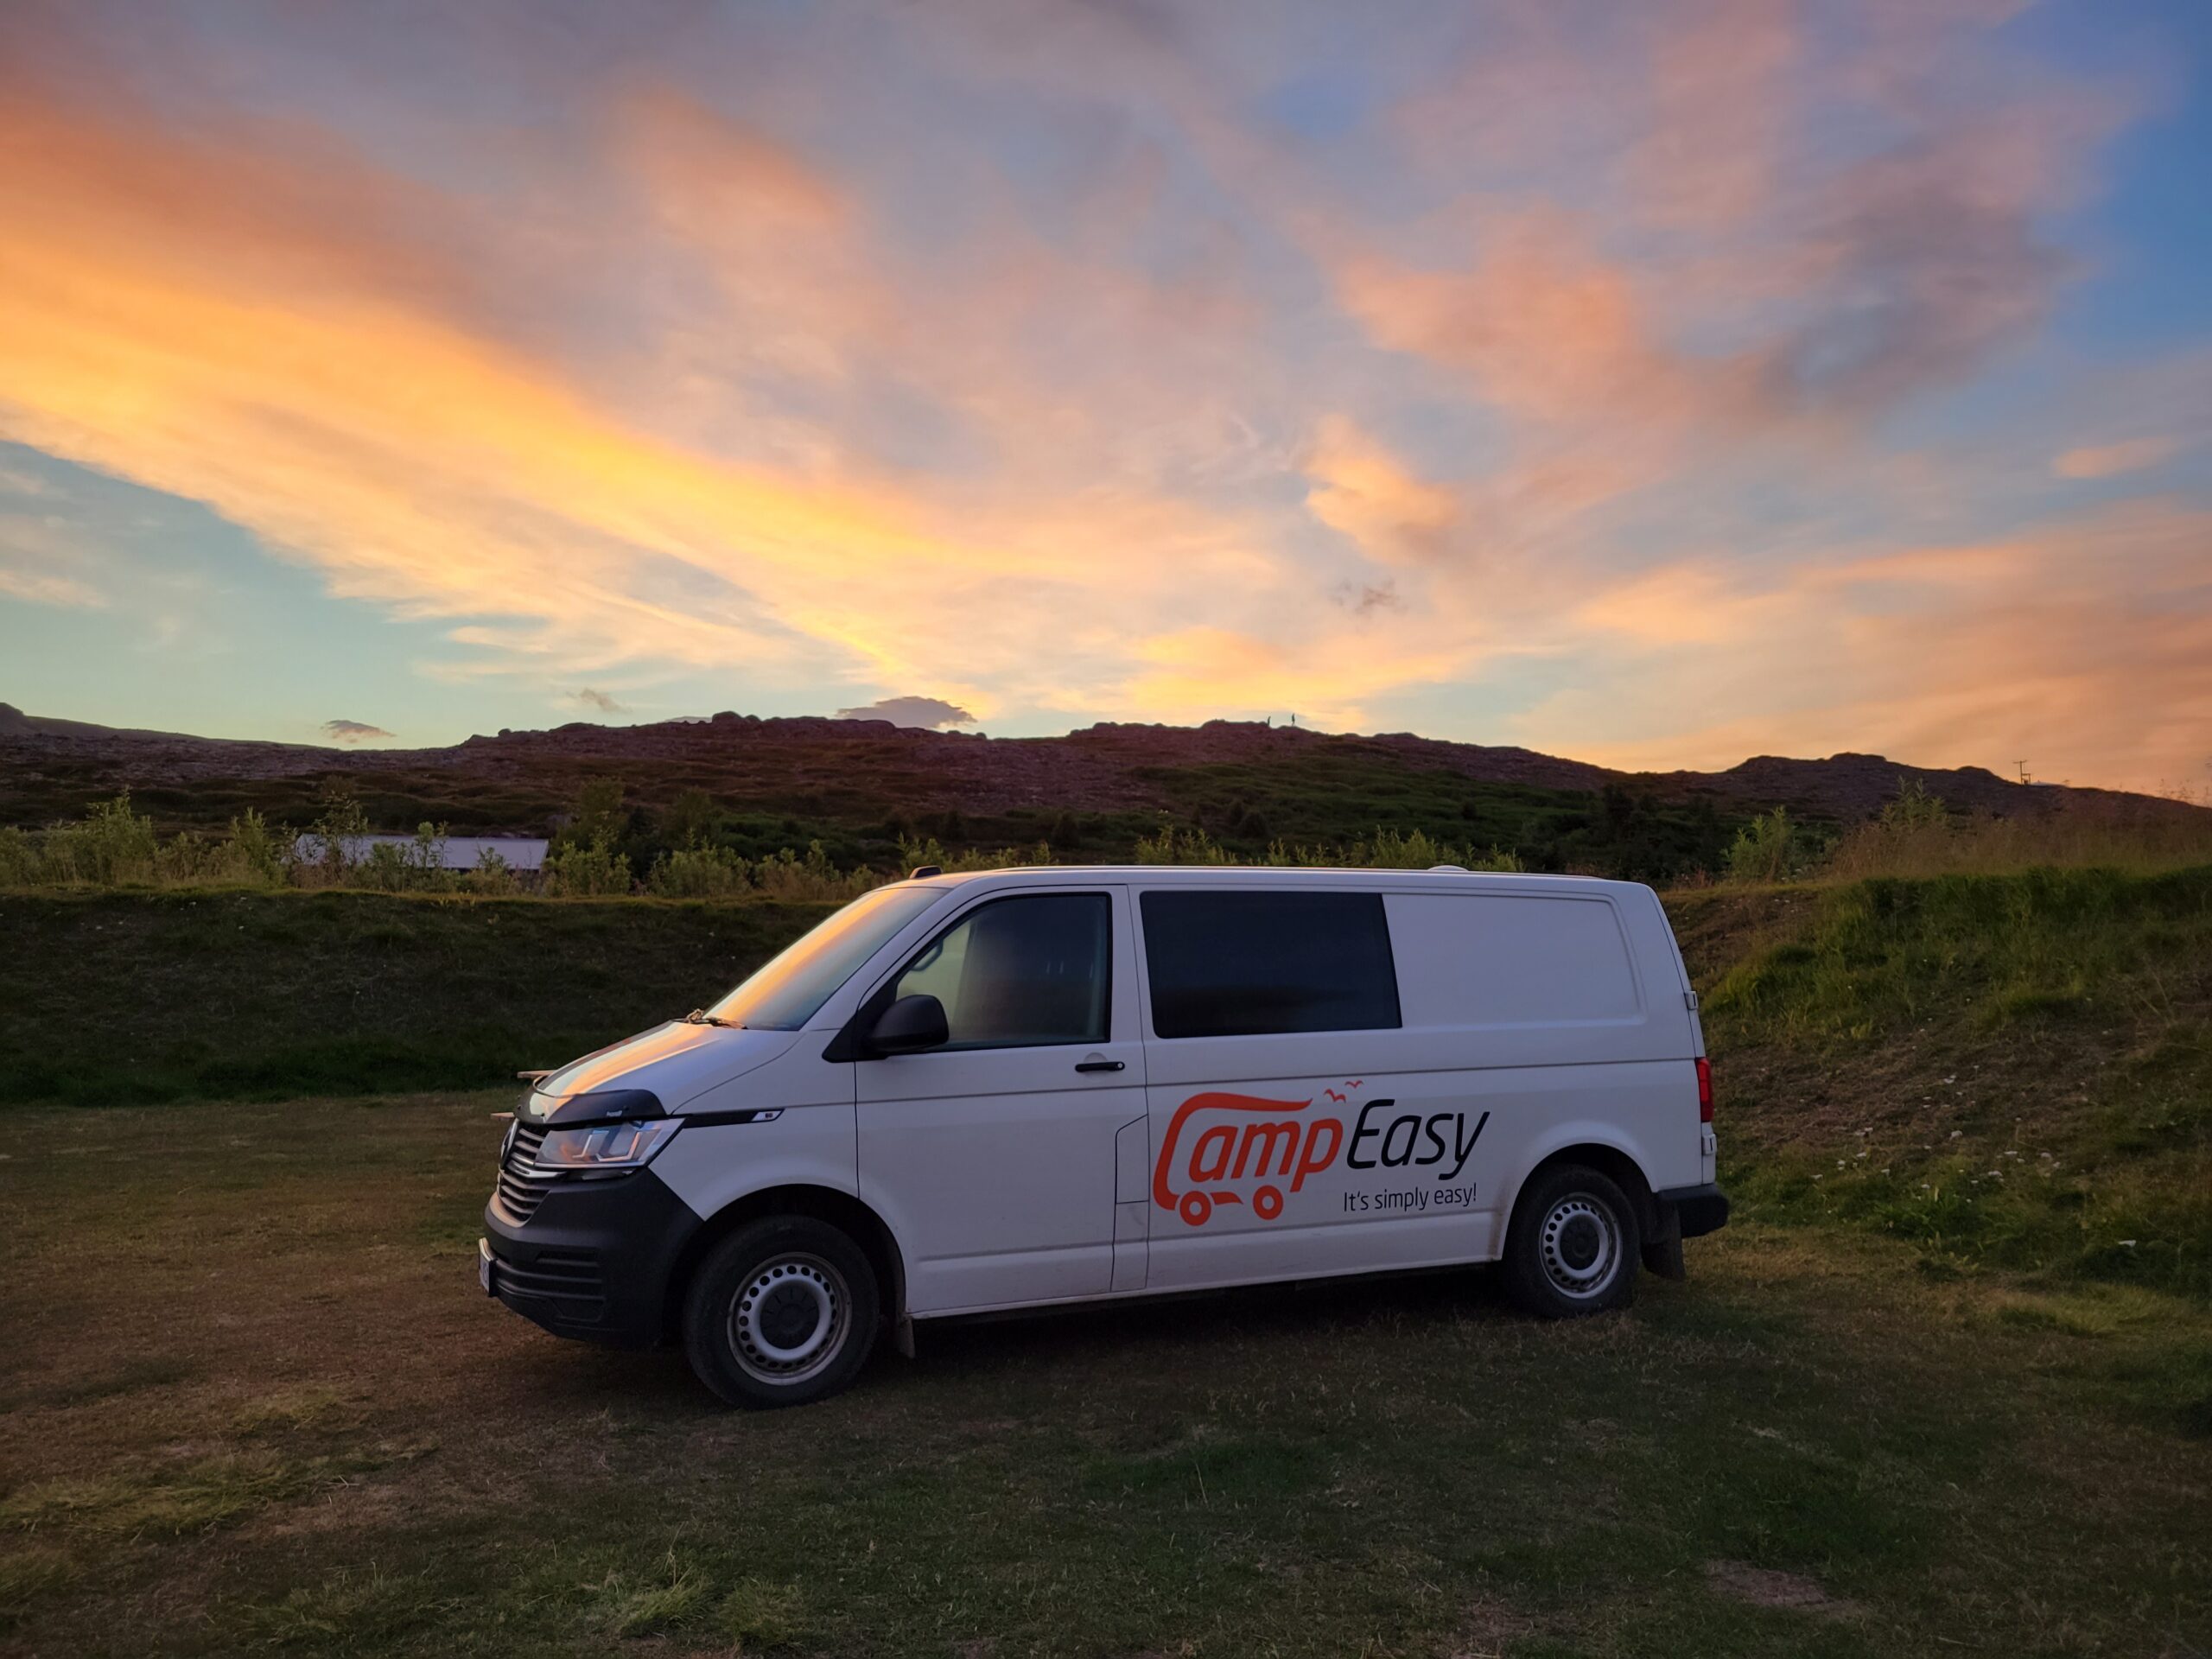
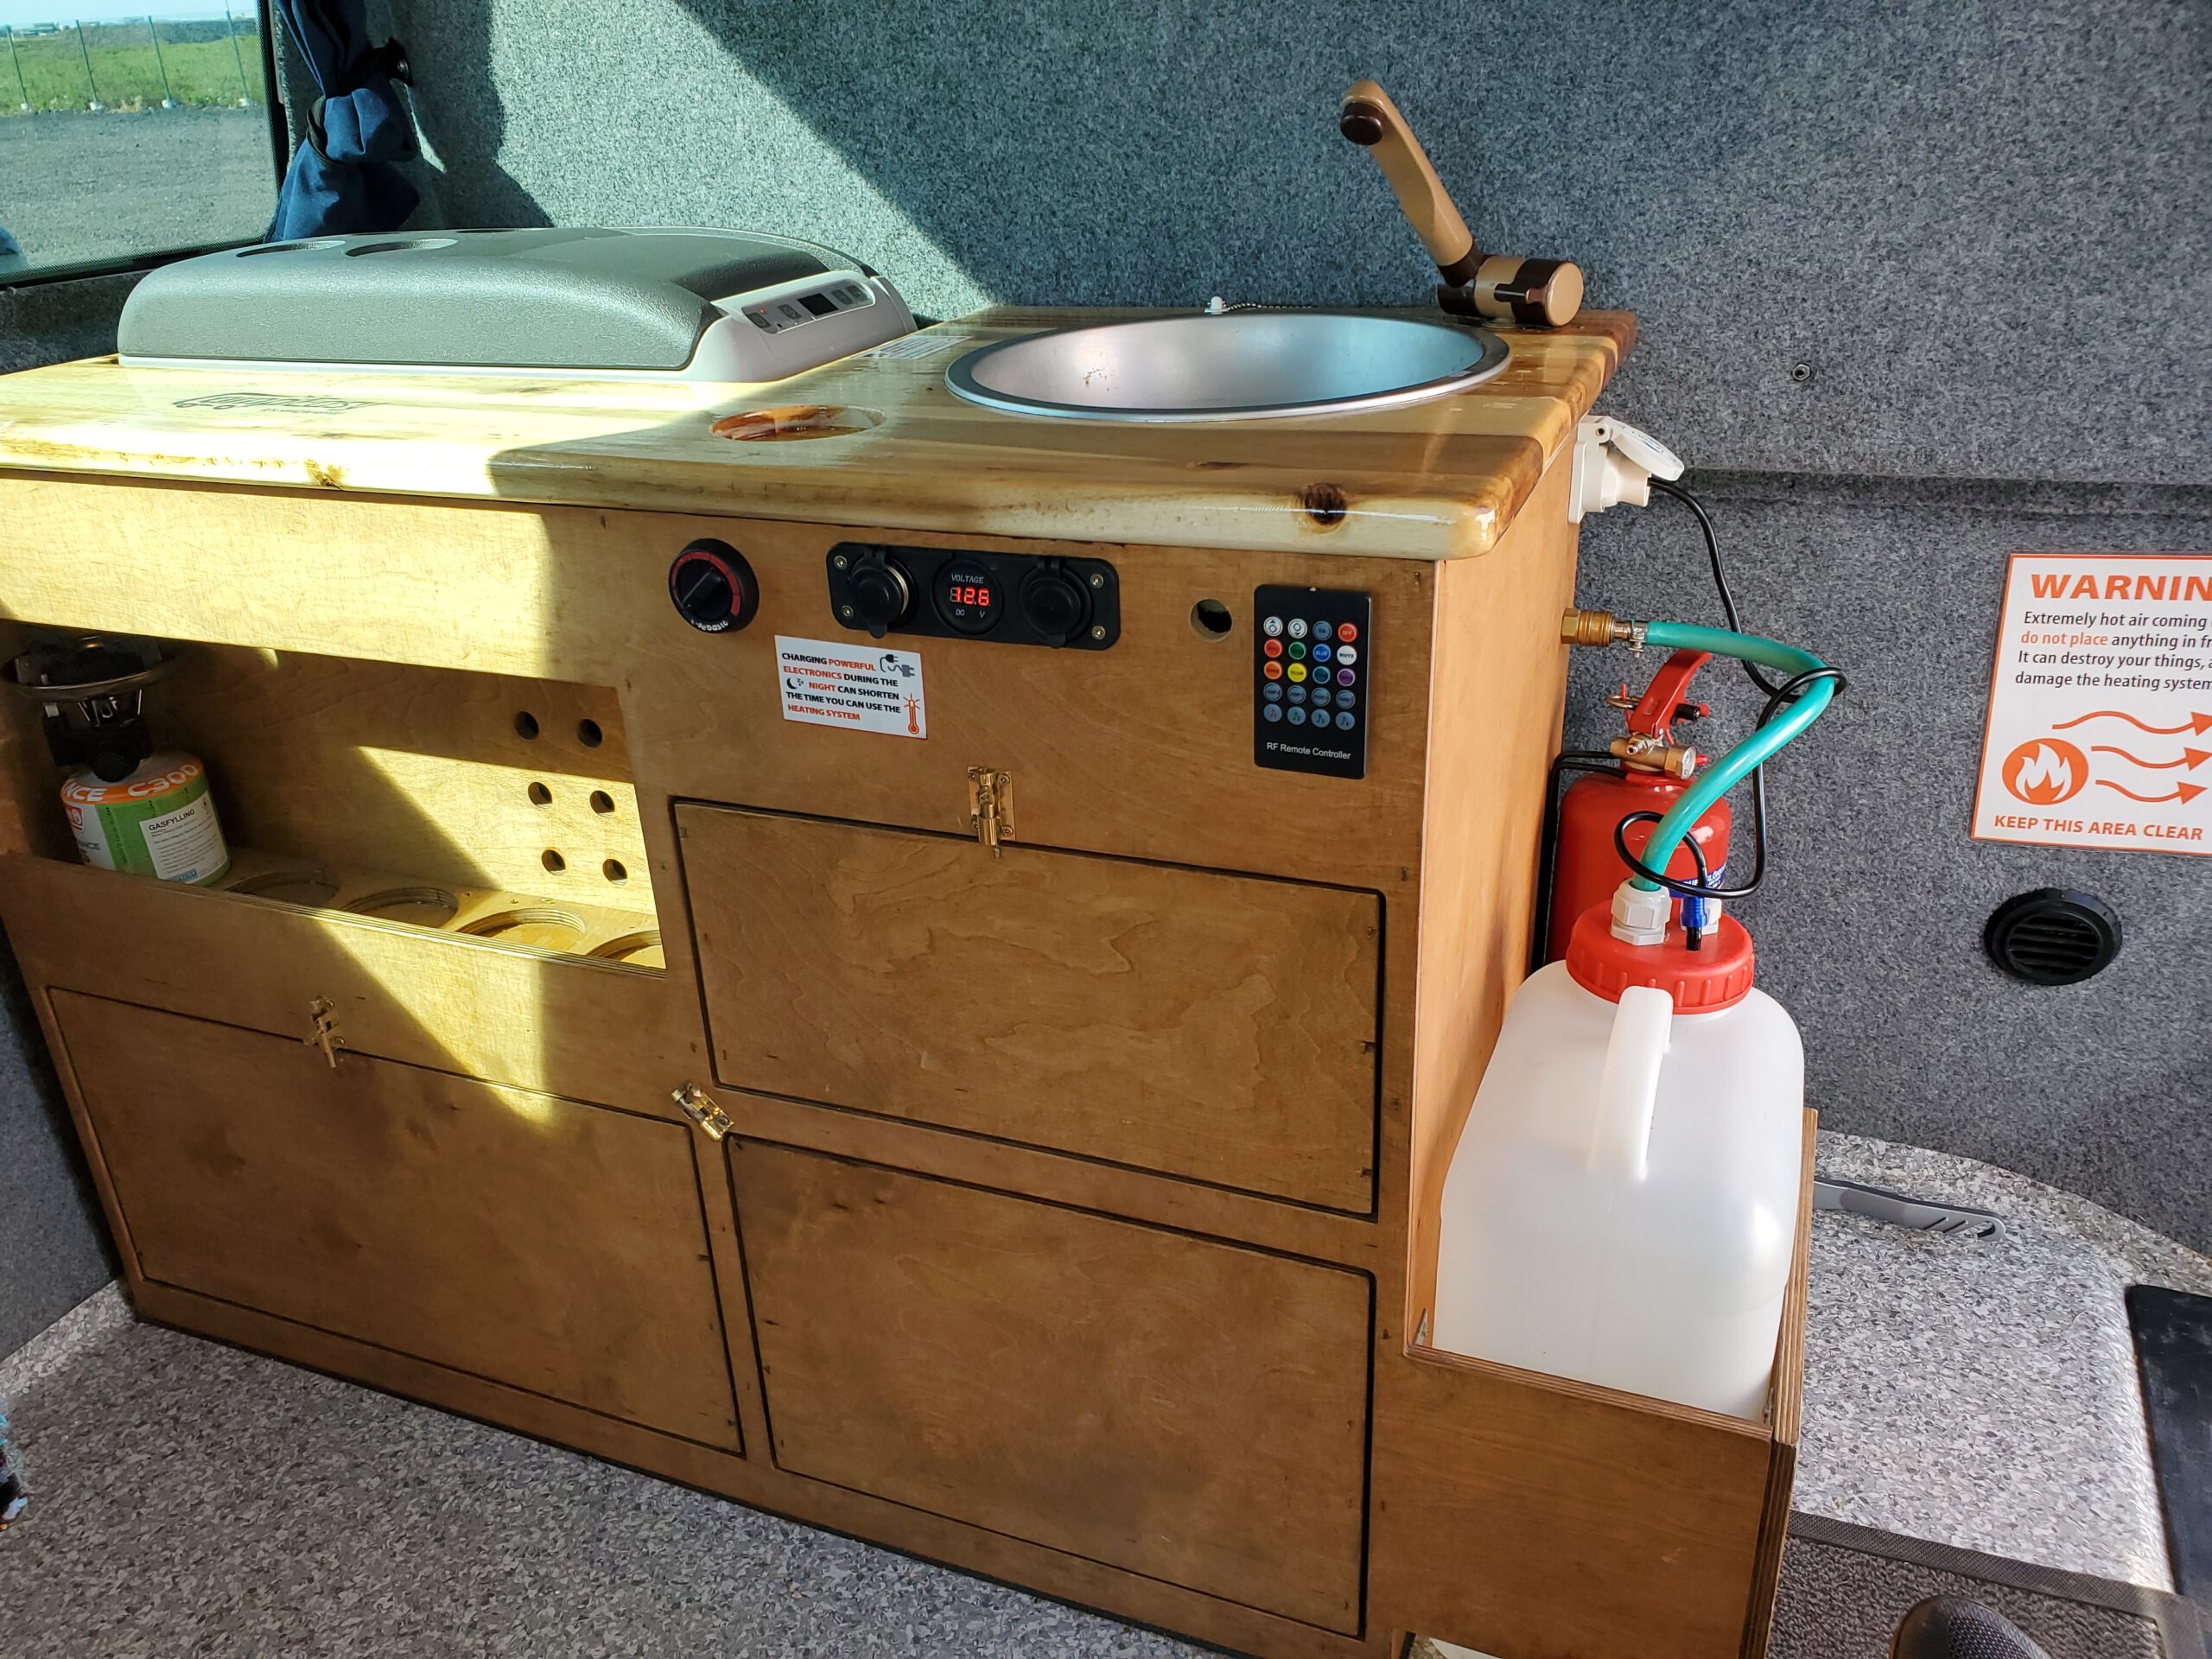
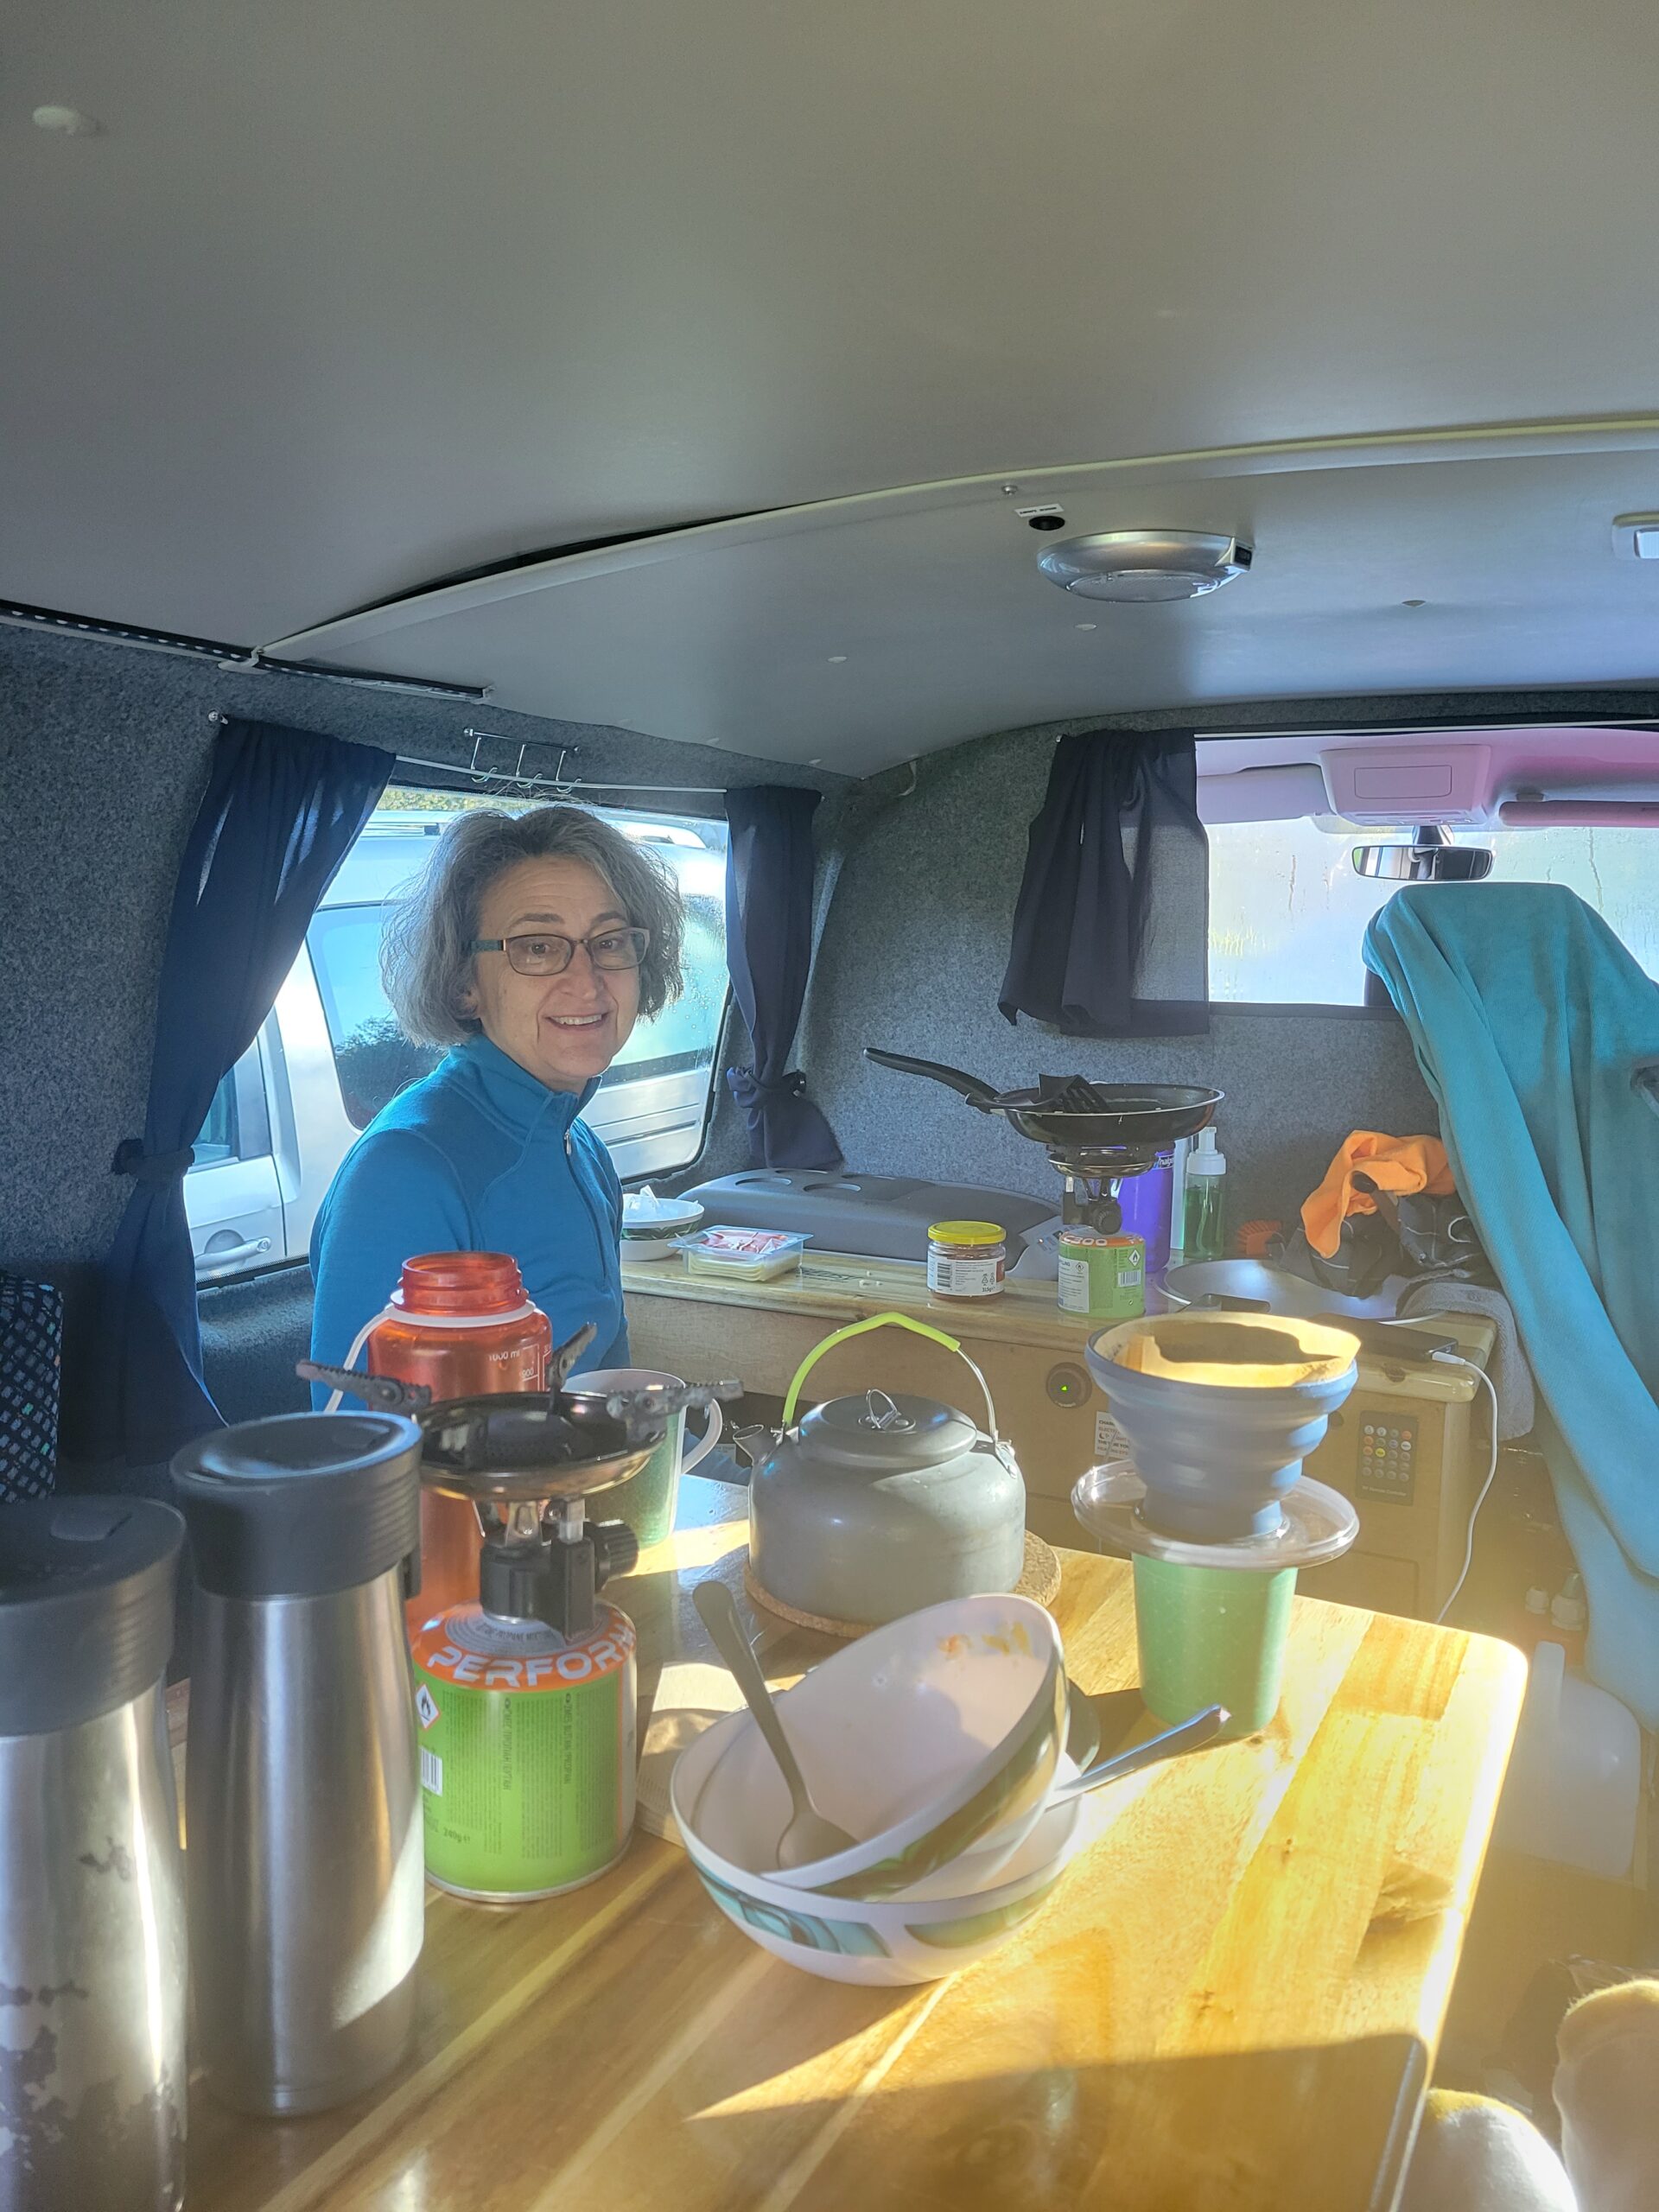
I chose CampEasy because of their excellent reviews. By booking so far ahead, I was able to get a good discount on the rental. Our van was a built out VW Transporter. We opted for this size because the table/bed conversion gives you a full width/queen bed. Smaller vans have the kitchen console long ways which gives you a double size bed: too small for us. The rig was basically equipped with bed that converts to benches/tables, a kitchen console with 12V cooler, 3 gal water jug with electric pump and a small sink, good heater and utility space. It comes with a single burner gas stove and basic kitchen stuff. We had the option to get a second burner and large pot which really helped with my cooking style. The van comes with bedding: duvets, pillows, sheet. This was adequate though good grief, who uses a cotton sheet in damp Iceland? Next time I will bring my own fleece sheet. Most of the van companies including ours offer extras like folding table, camp chairs and more. Whether they charge per day depends on the item and company. Our only complaint was the tires looked pretty iffy but thank goodness no issues. Iceland roads are hard on tires we were told. All in all, we were very satisfied with Campeasy. The vehicle was solid and the company very easy to work with.
CampEasyThe table goes away and you make a queen size bed using supports and the cushions on the wall. Very comfy!!Kitchen consoleInterior viewGood thing we know “van life”. Breakfast time.
Most companies including ours offer a navigation table that acts as a Wi-Fi router. They have their own info and nav software which connects you directly to staff for questions. Most importantly, you can add an unlimited Wi-Fi option for $6 day. Looking at phone plans, this made the most sense for us instead of taking what Verizon offered. In case you wondered how we could post prolifically to social media… that was how. Plus we had internet access to look anything up, good maps, etc. 4G coverage around the island was excellent.
Camping
For camping, there are several things to know. The first is wild camping/boondocking is expressly forbidden by law. You must stay in designated campground unless you have express permission from the landowner. Tourists created this situation by abusing the land; go figure. Second, there are campgrounds everywhere: most towns have one and some accommodations have a campground in addition to hostel or hotel. Lastly, no reservations are needed except maybe for Reykjavik city one. My understanding is all the rules apply in the interior, too.
It’s not camping like we have here in the US. Camping is a large grass area and you park where you want; there are not designated spaces. There is a central facility that will have toilets, sometimes showers, and a kitchen/washup area. Some have washers but no dryers. Showers are mostly free but not always. Bathrooms vary from very nice to thank god the toilet is clean. Washers are for fee too except for one campground we went to. We opted to cook in the camper as many times the kitchen was tiny with people lined up to use a single burner. These campgrounds are more like a legal place for people to stay at night as compared to camping itself as a destination. Most towns also have a geothermal pool/health facility. We showered, swam and soaked at a lot of these pools as they were very clean and nice compared some campground shower options. The farther you get off the Ring Road, the less people there are at the campgrounds.
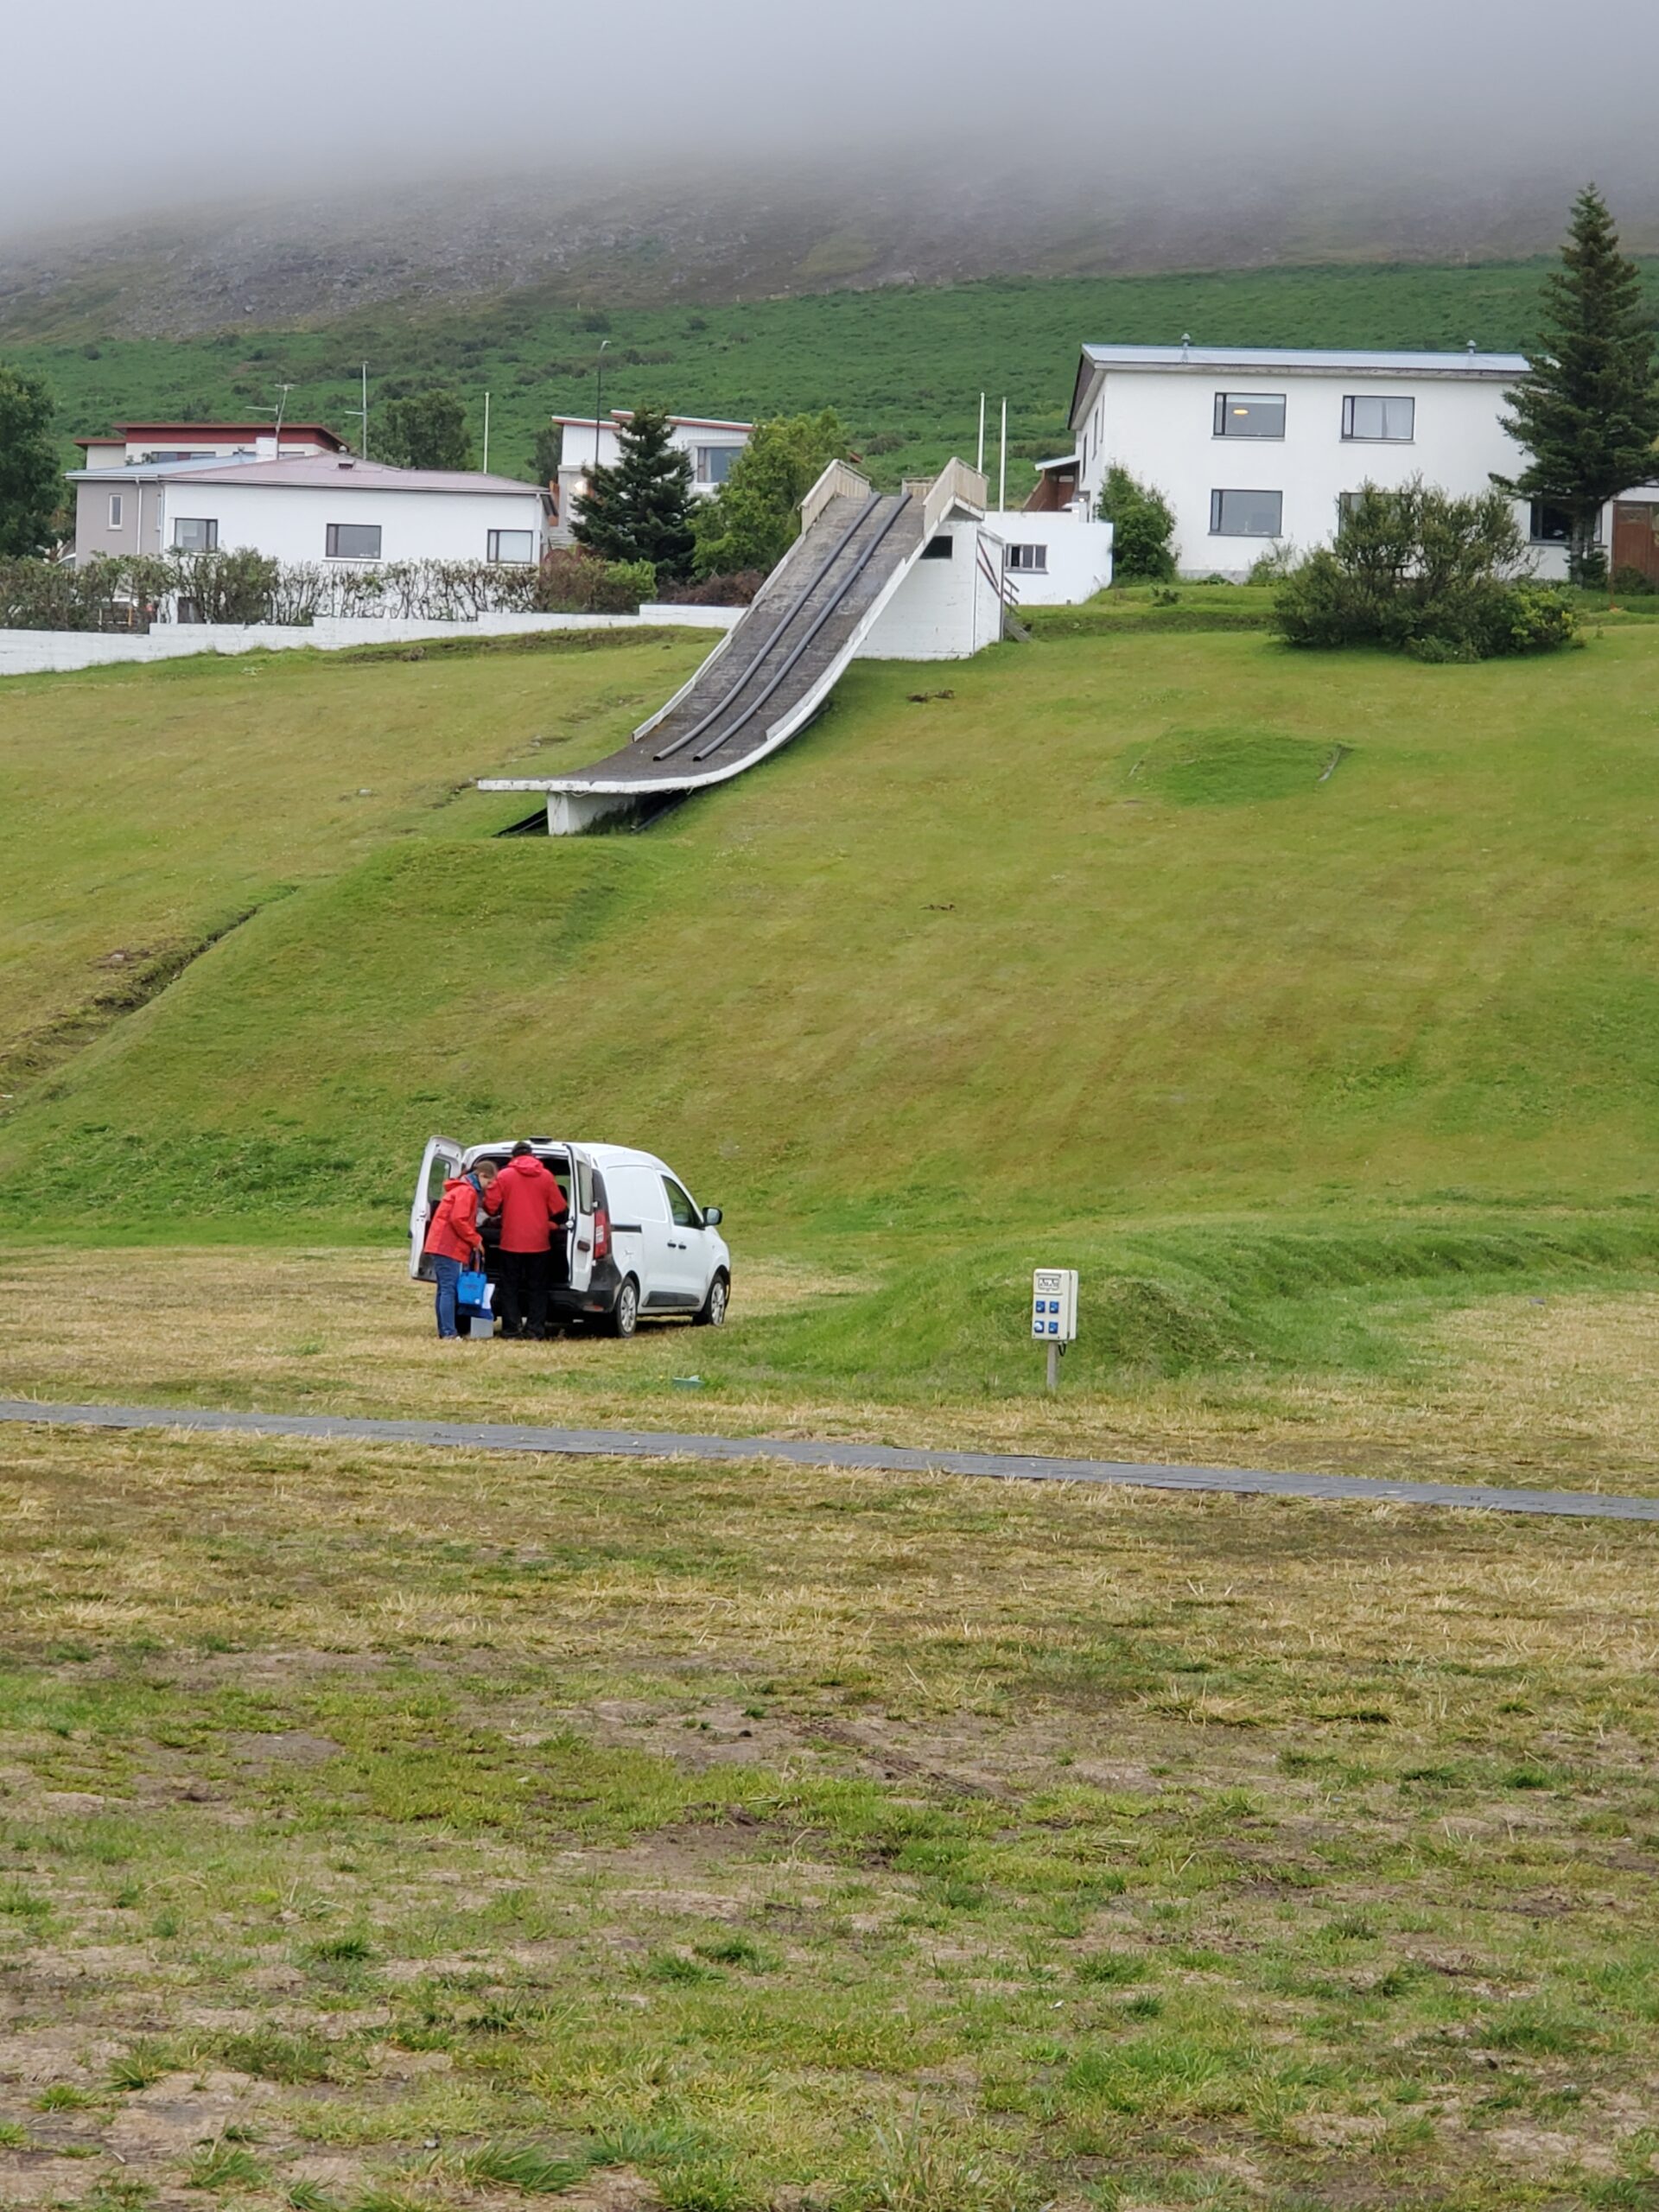
Olafsfjordur camp
Cost averaged $21 a night, with showers $2-5. There is something called a “camping card” where you prepay for a small selection of certain sites. I did not get this as I did not want to be locked into specific sites; it is only good for a small selection of sites.
Itinerary
(Or lack of). When I started to research this trip, I found dozens of suggested Ring Road itineraries online. Pretty early on, we decided to do a camper and not book accommodations, the main reason being we did not want to be locked into having to be at a certain place on a certain day. In truth, distances per day are pretty consistent so I think if you did book based on a suggested plan, you can’t really go wrong. The only thing we booked ahead was the first night camping in Reykjavik. We booked a kayak tour the night before we got to Djupivogor and whale watching the same day we decided to go.
You will find different recommendations on whether to do the Ring Road clockwise or counter-clockwise. Advice I was given was to go whichever way the weather report indicates will be better. We started counter clockwise at that is where we ended up after hiking to see the volcano.
There are tons of good websites with suggestions of things to see and do, whether it’s hikes, historical sites, or attractions. We personally try to avoid “attractions” and crowds but at the same time, as a unique island there are places that you may want to see that will have crowds or that cost money. I head the Lava Show in Vik is pretty cool, with a second one opening in Reykjavik soon. Since we got to hike in to see the active volcano, we didn’t consider that or a helicopter flight. We also passed on the Blue Lagoon and found a smaller spa to go on the other side of the island.
I found the Rick Steves guidebook to be rather worthless for our style of travel. There were a few helpful tidbits, but I did better with a detailed paper map, Gaia topos downloaded onto our tablet, and Google (we had unlimited wi-fi). I did research with Google and Trip Advisor. There are several FB groups on Iceland Travel that I found after the fact that look like good resources. For hiking, I used websites (“ten best hikes” etc), local info (example, at Skatafell) and Gaia by zooming way in on topo maps. I did notice that East Fjords has trail guides (books in Eng and Isk) that have dozens of trails in them. Surprisingly, Trail Forks did not have much at all.
Things to see and do
You won’t be able to see and do everything on your list. With the help of maps and Google, I would pre-planned stops a day or two ahead. I did have a list of “musts” that got adjusted as we went along. There are Points of Interest signs EVERYWHERE but you don’t always know what the POI is. I found out on the last day there is an app called Kringum that will help immensely in knowing what sites are out there. There are Points of Interest signs EVERYWHERE but you don’t always know what the POI is. There are so many more than are marked on maps or in Google. I think this app helps to dial that in. Don’t be afraid to get off the Ring Road and explore. The non-F gravel roads are just fine.
Typical POI sign
Anyway, here are some of the things we did, and some we missed, with comments. This is based on our counter-clockwise loop.
Things we did
Active volcano: well duh, if you get the chance to see an erupting volcano, DO IT. The Icelandic powers that be try to make it as accessible as possible but it may be a rough hike in.
Grindavik: very close to many cool geothermal sites.
Hveragerdi: this is where they built a shopping mall over the rift zone. It is a very active geothermal area. We missed the river you can hike up one hour to natural hot springs to soak in.
Pingvellir National Park: this was high on my list as it’s a park devoted to the rift zone and an important historical site. It rated a “meh” from us for two reasons. One, it was really crowded and two, there is interesting rift geology all over the island. You don’t have to go just one place to see it.
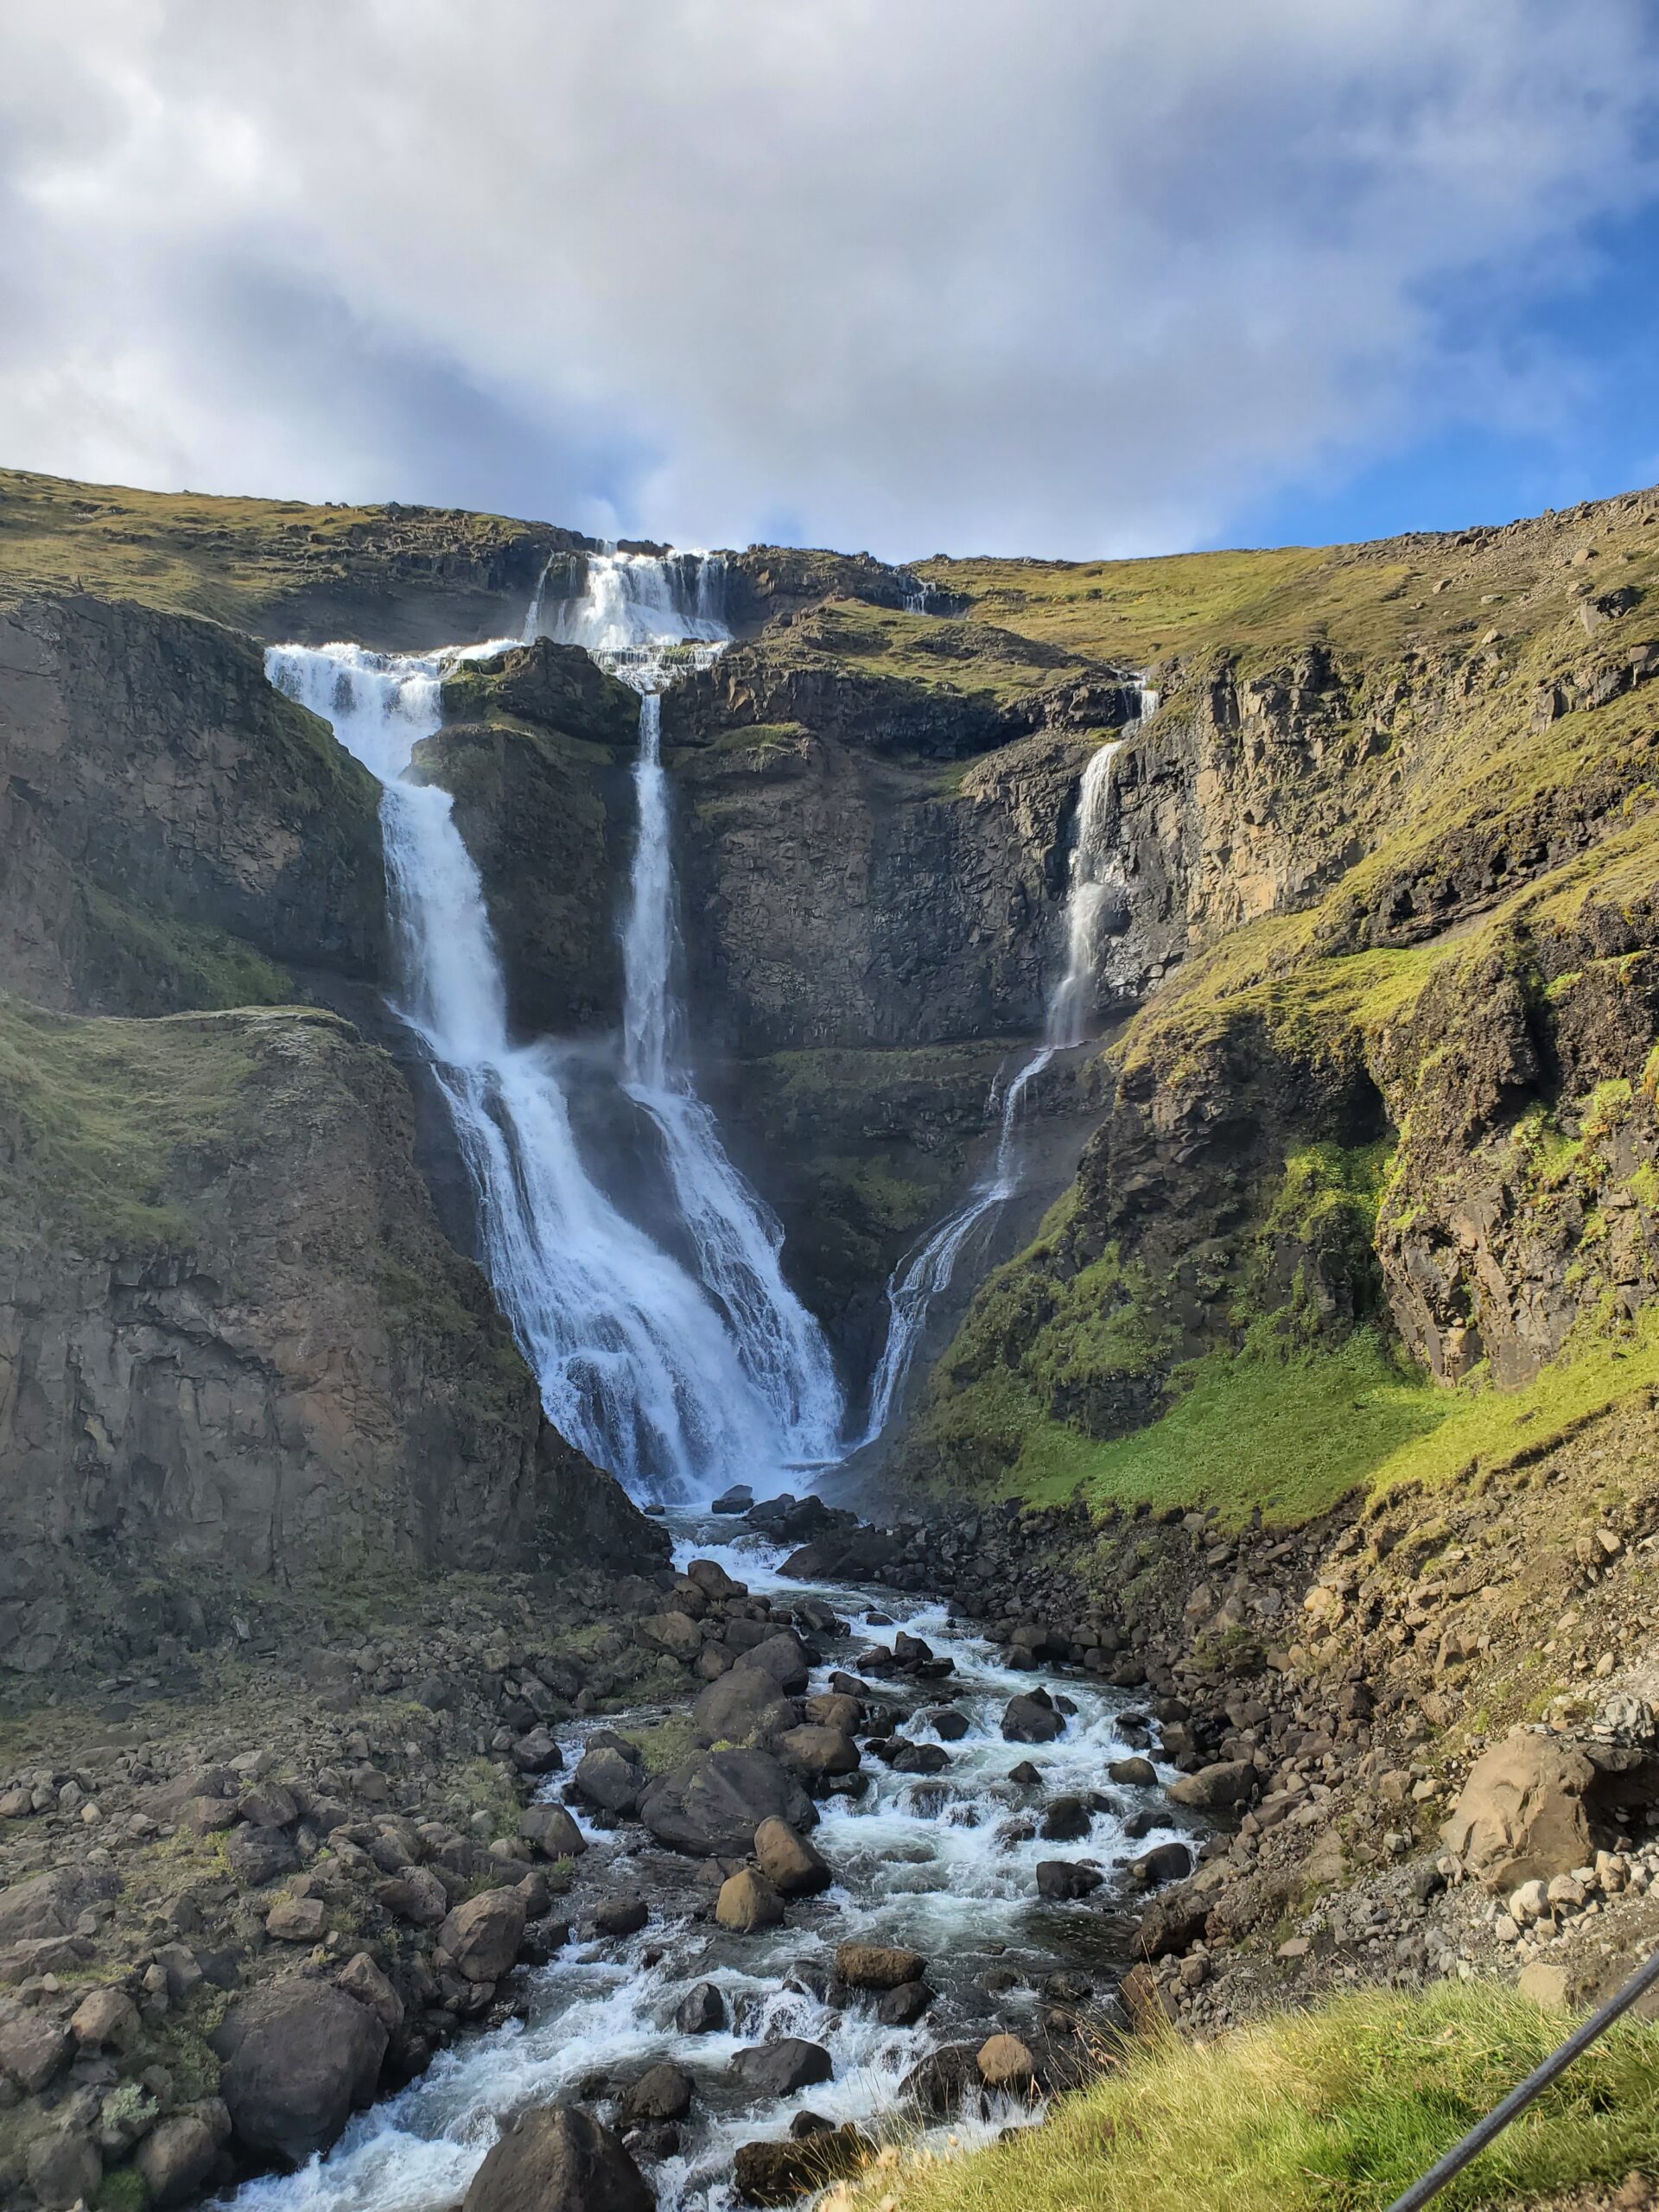
Waterfalls: Every waterfall is beautiful, but in retrospect I might not have paid to park to see some of them (Seljalandsfoss)…. there are only hundreds you will see. One gets excited to *finally* see them. We skipped Skogafoss (see comments on what we didn’t do)as the parking lot was a shitshow with busses everywhere plus downpour. As you move away from the busy south, parking will become free for attractions.
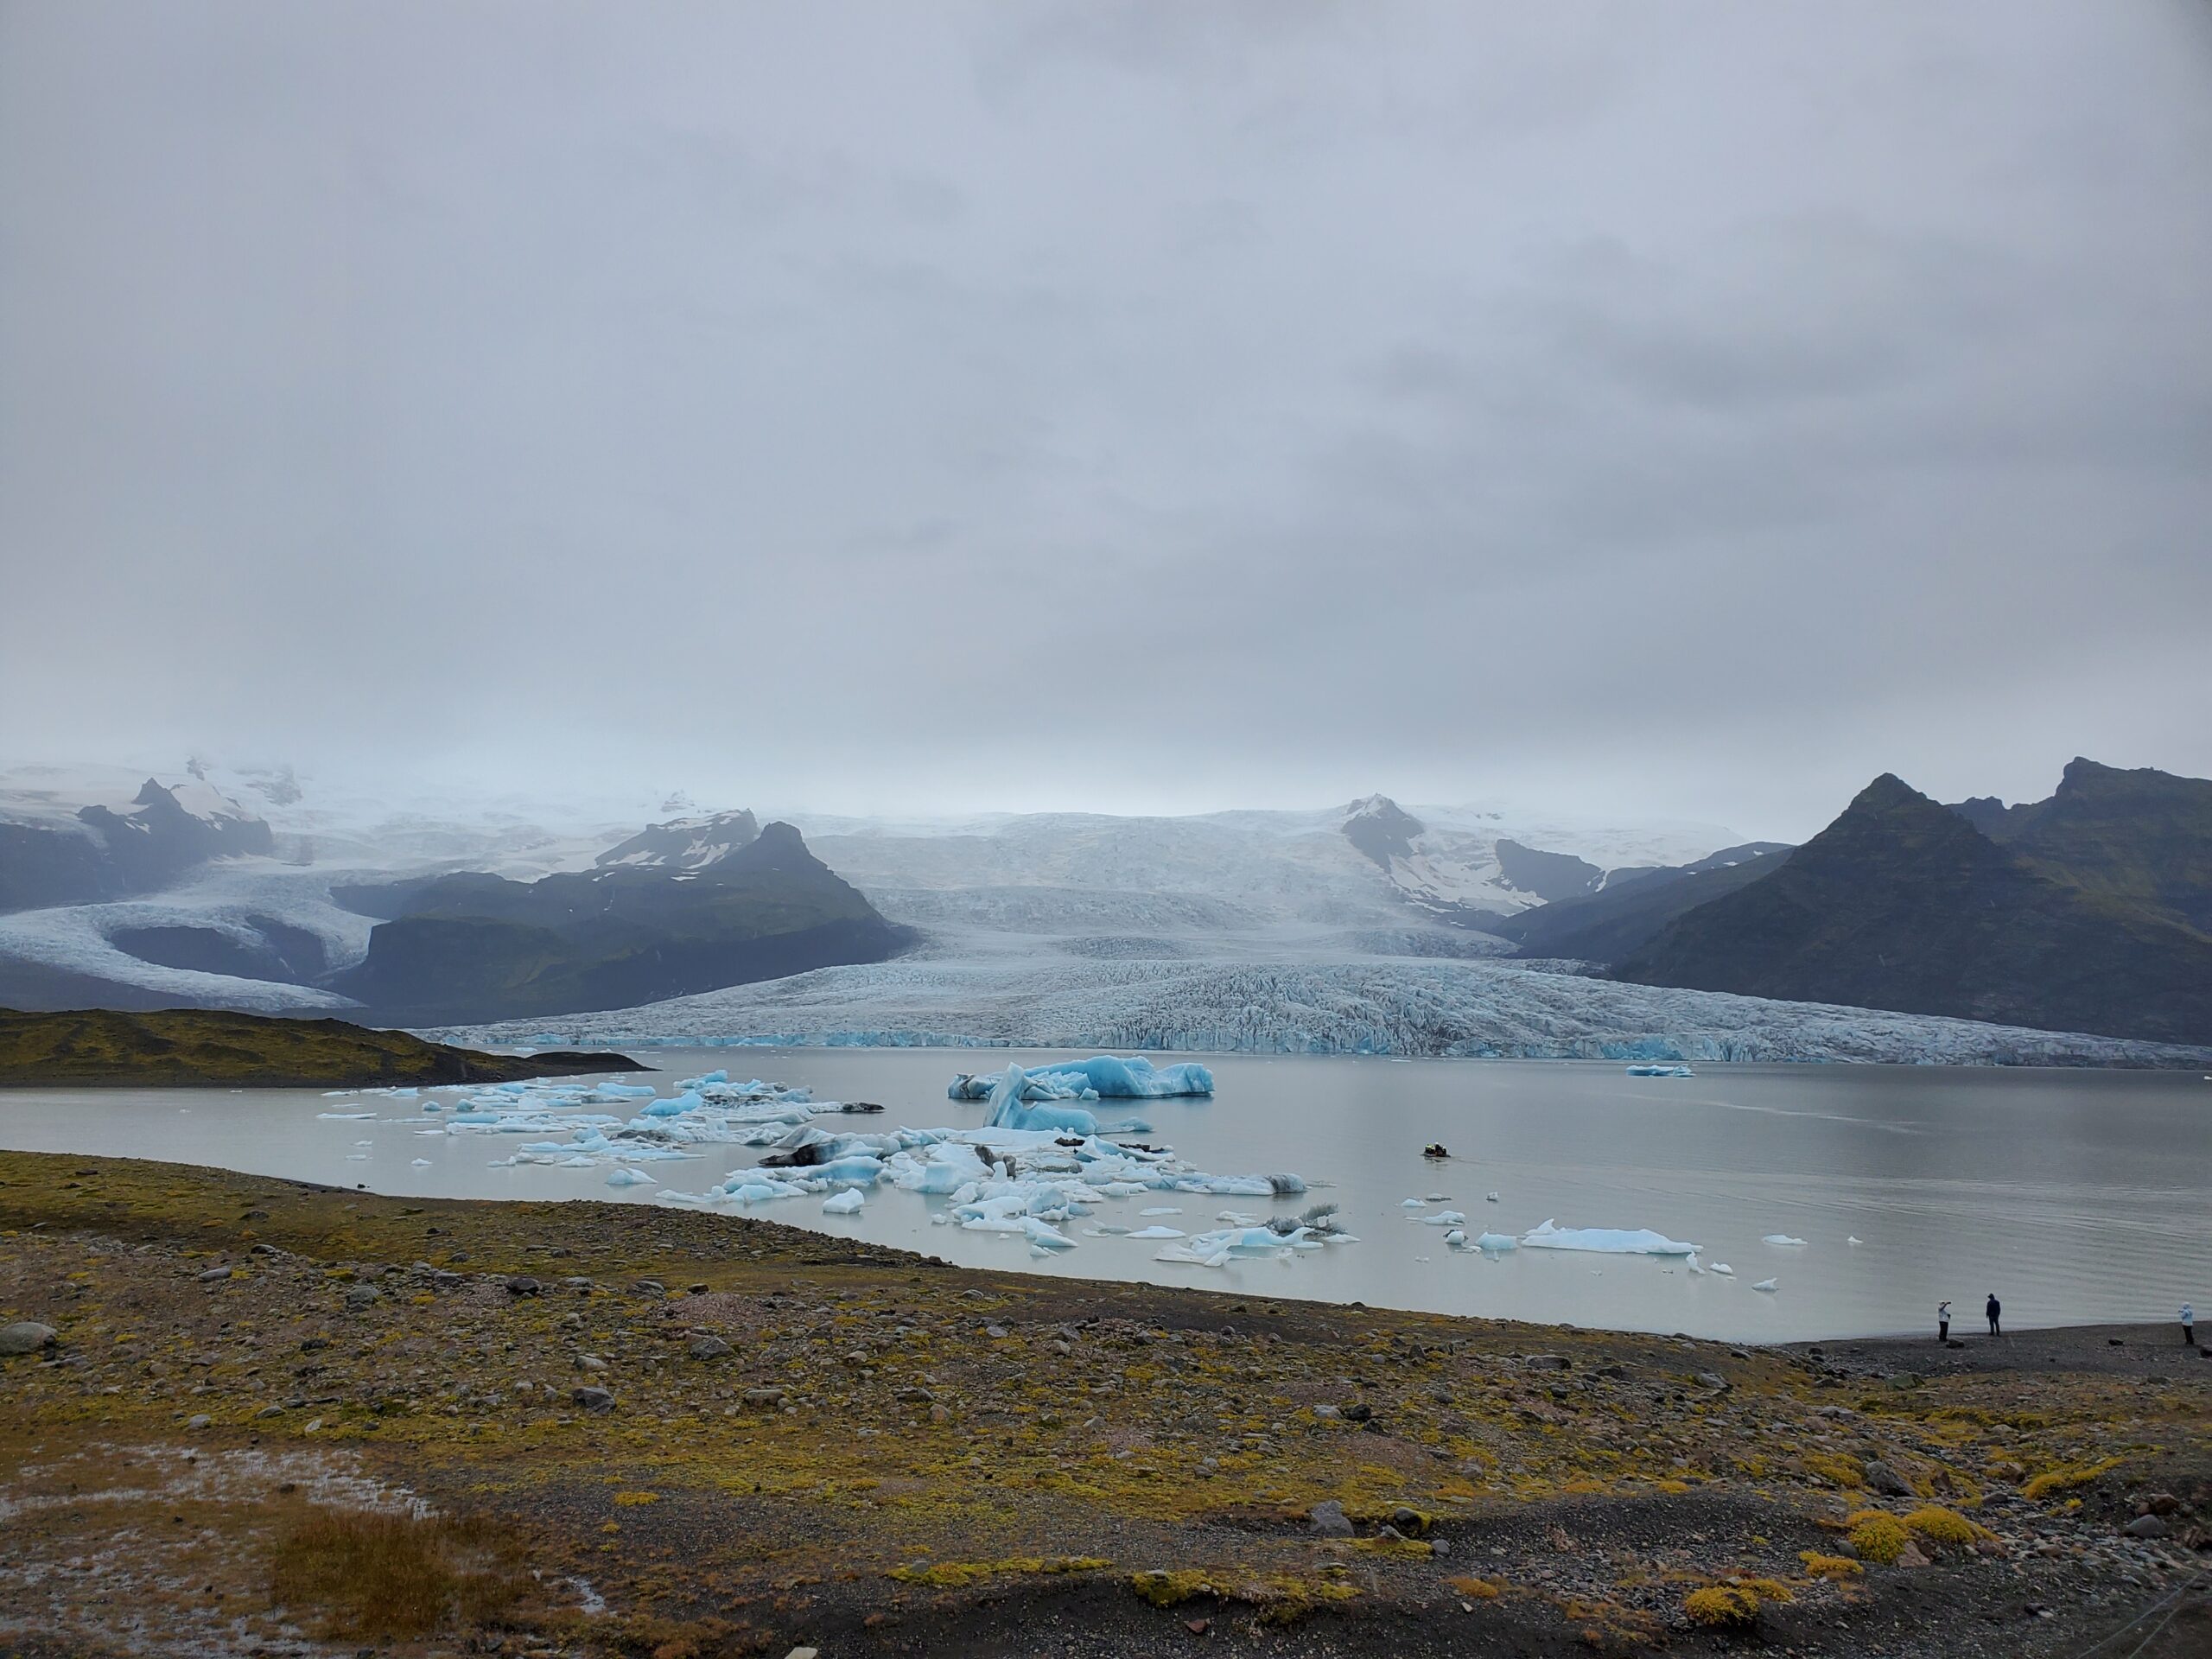
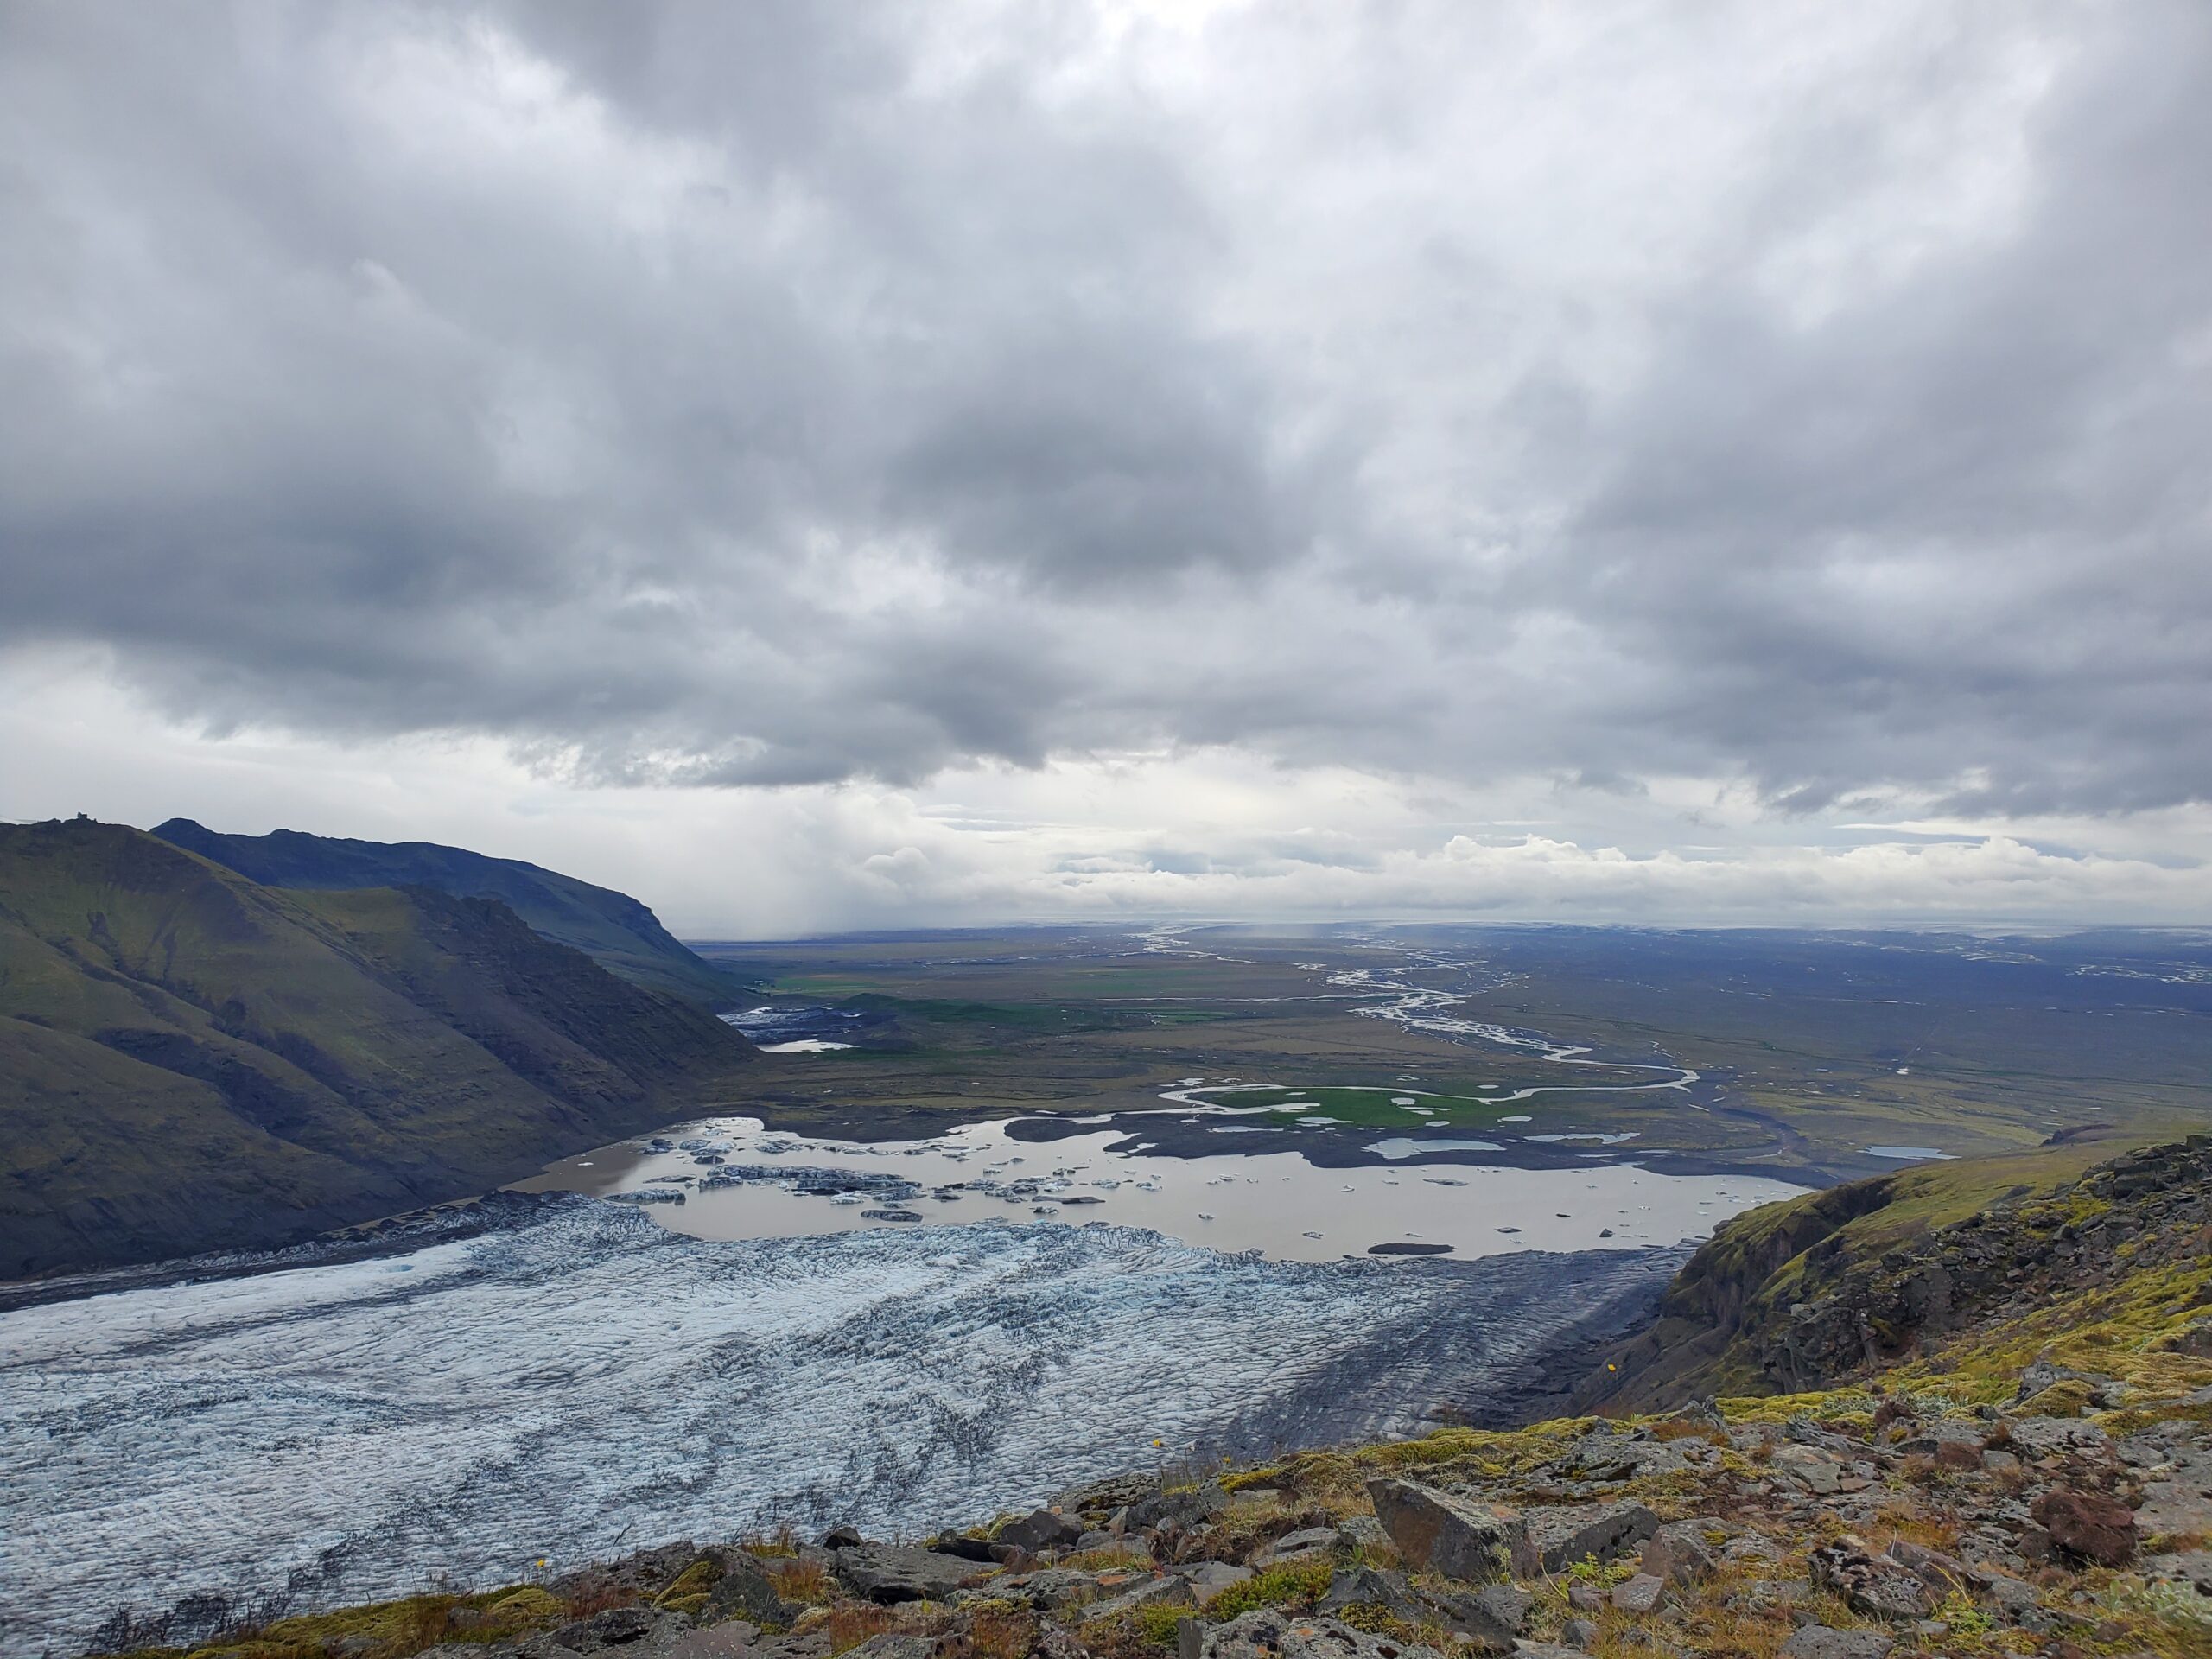
Vatnajokull National Park: Yes, some of it is busy. But it’s amazing and worth your time. We spent two days camping at Skatafell, doing long and short hikes. The points of interest are all related to the unusual geology, and in fact the area is a UNESCO World Heritage Geology Site. We did a worthwhile short day hike to Svartifoss one day. The next we did a much hard, more strenuous day hike loop on the S3 trail to Kristinartidar Peak, a 14 km loop with great views. There are many small POI pull outs with interpretive signs that you should check out. The geology info on the signs is very in depth. We skipped the black sand beach at VIK due to torrential downpour. (see comments on what we didn’t do) You can get up close to several of the glacial lagoons. When you get to Jokulsaron Glacier Lagoon and the Diamond beach, look for pull outs that are not the main (bus) parking area.
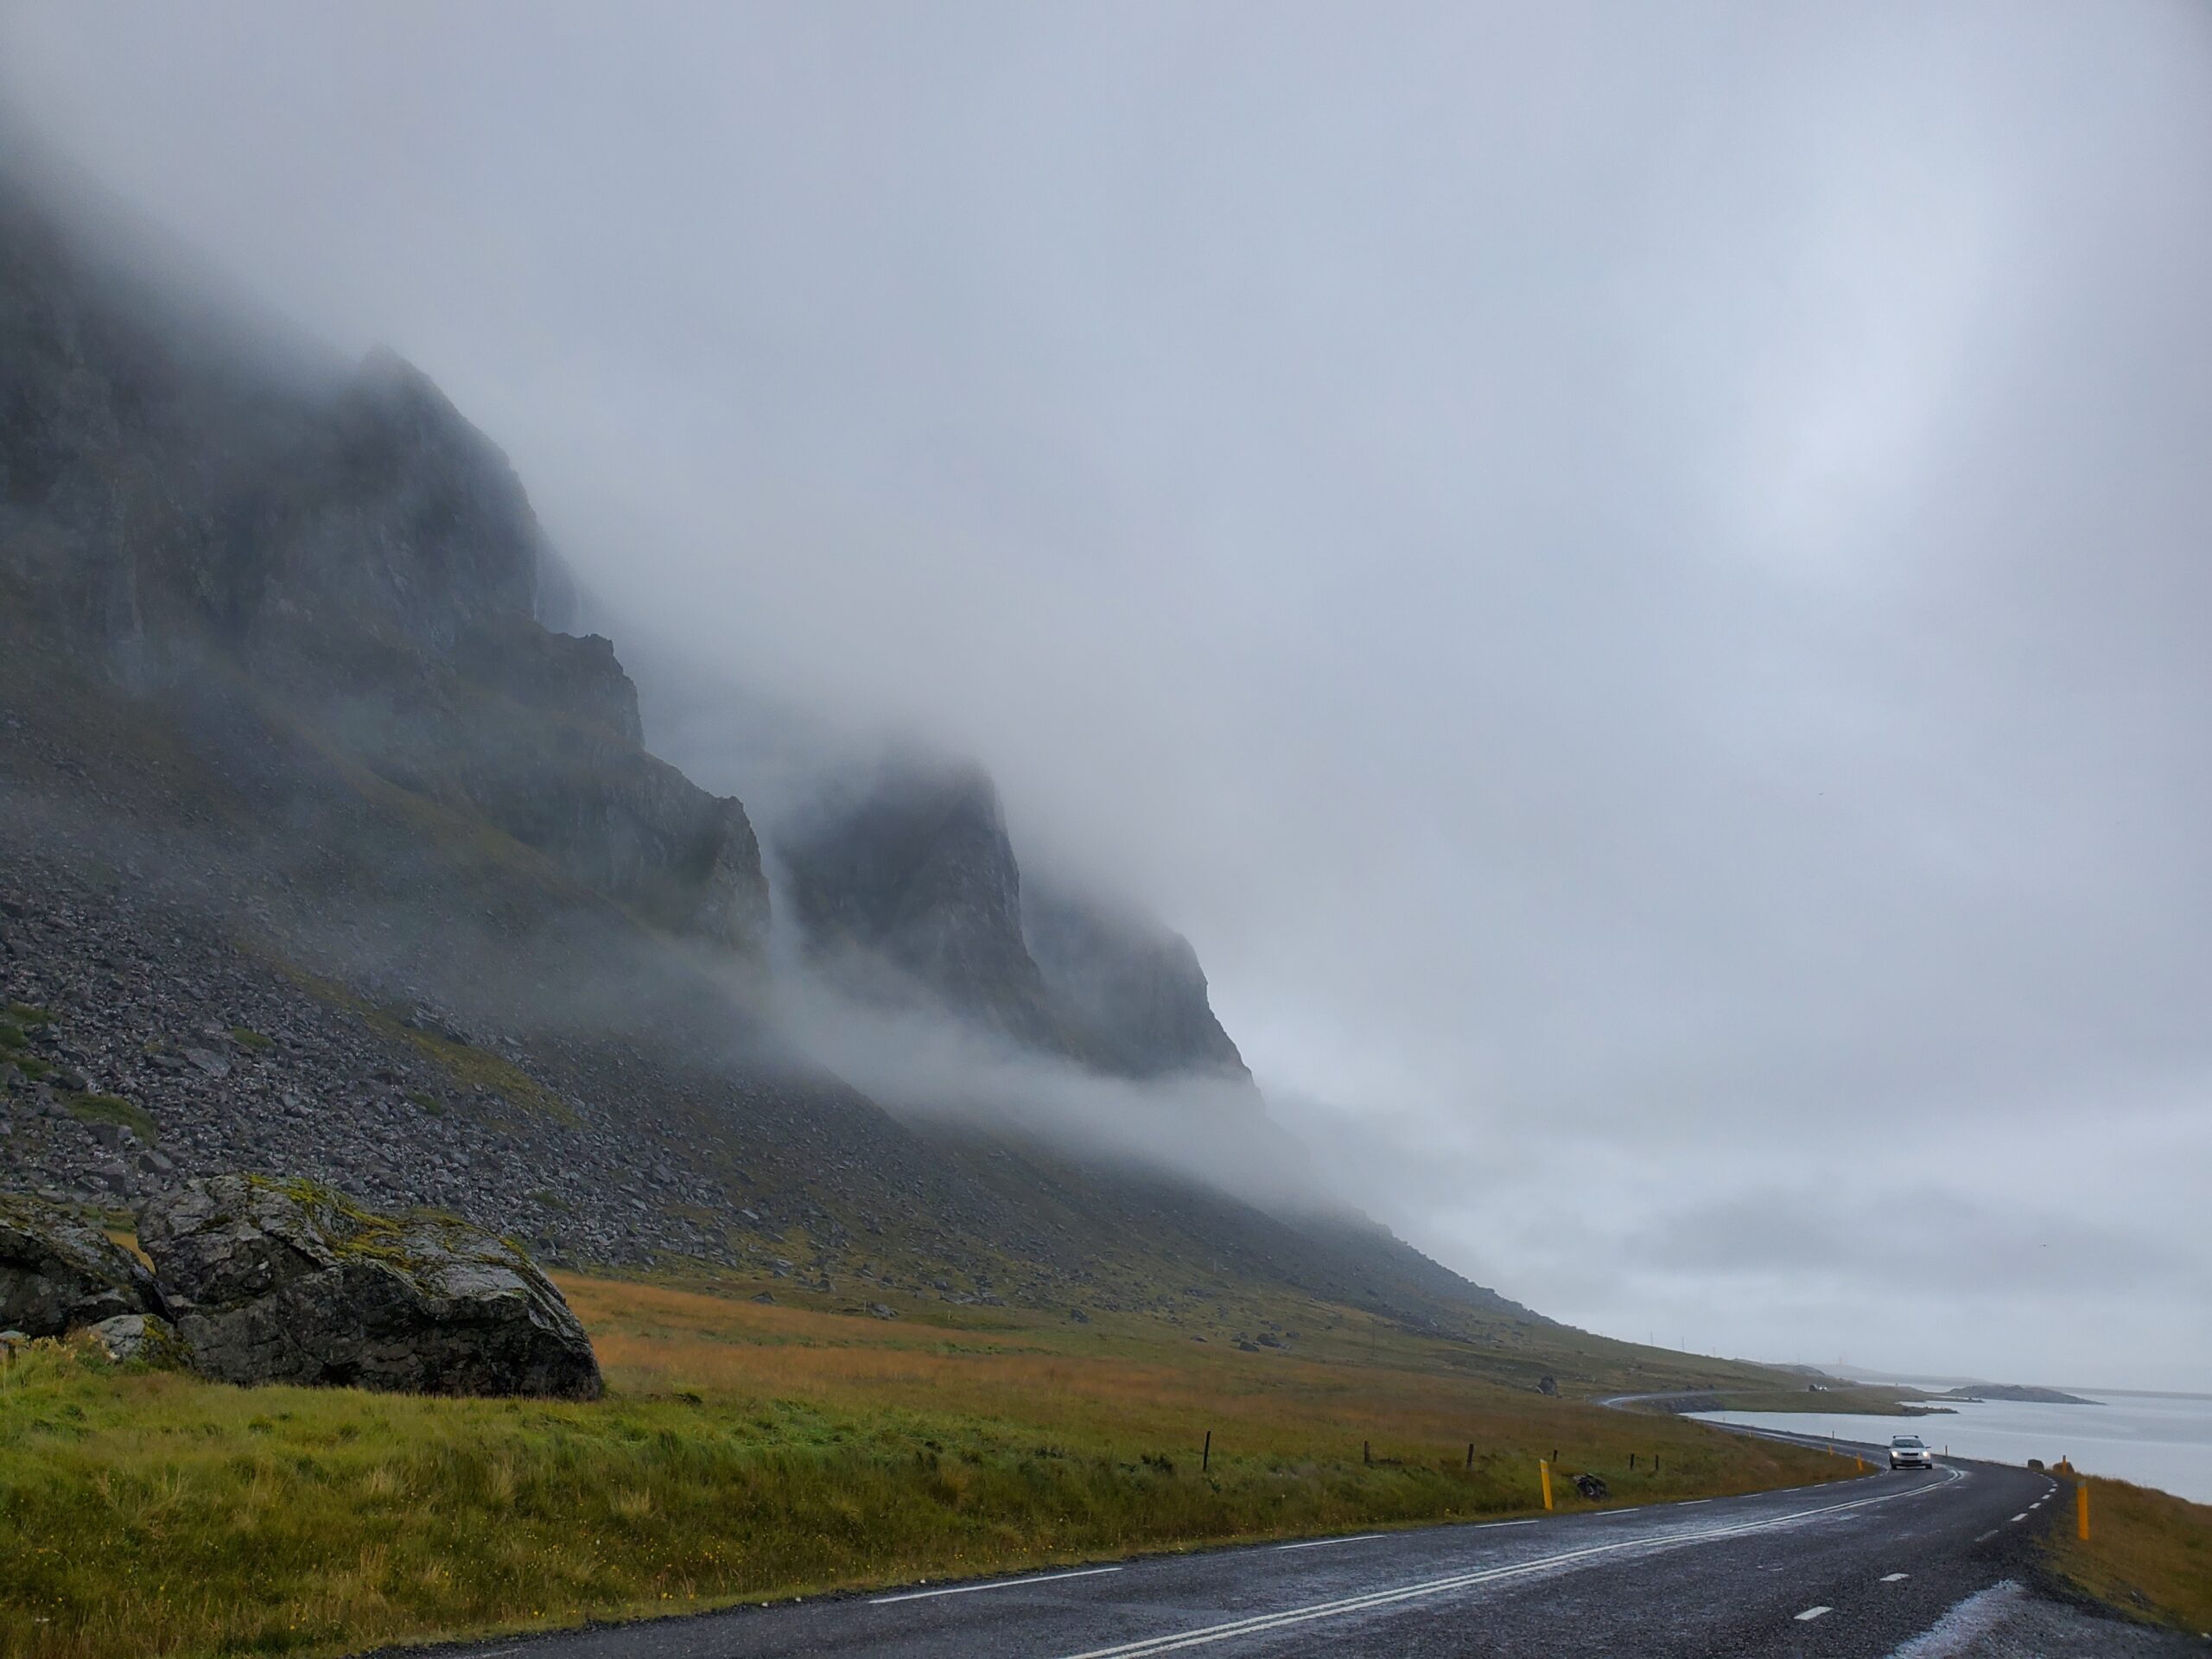
East Fjords: the weather kind of crapped out on us when we were in this area. We did a lot of driving the mist-shrouded fjords that was quite beautiful. It looks like there is tons of hiking here. We did a kayak tour out of Djupivigor that was pleasant but kind of meh for wildlife; not sure I would recommend that. I chose that area to get away from crowded tours and it was listed as a wildlife tour.
Bakkagerdi/Borganfjordur: We went here specifically to see puffins at the bird sanctuary, but they had left already. There are puffin sites on the south near the black sand beach at Vik that we should have checked but I forgot to put those in my notes.
Kirkjubaer: this is the oldest wood church in Iceland. Our kayak guide told us about it. It was beautiful. If old churches are your thing, there are lots to explore.
Hengifoss waterfall: another beautiful waterfall hike. Not that long but straight up.
Studlagil Canyon: everyone kept telling us to go here for the basalt columns. It rated a huge meh. There are much much more interesting basalt features like Hengifoss waterfall for example.
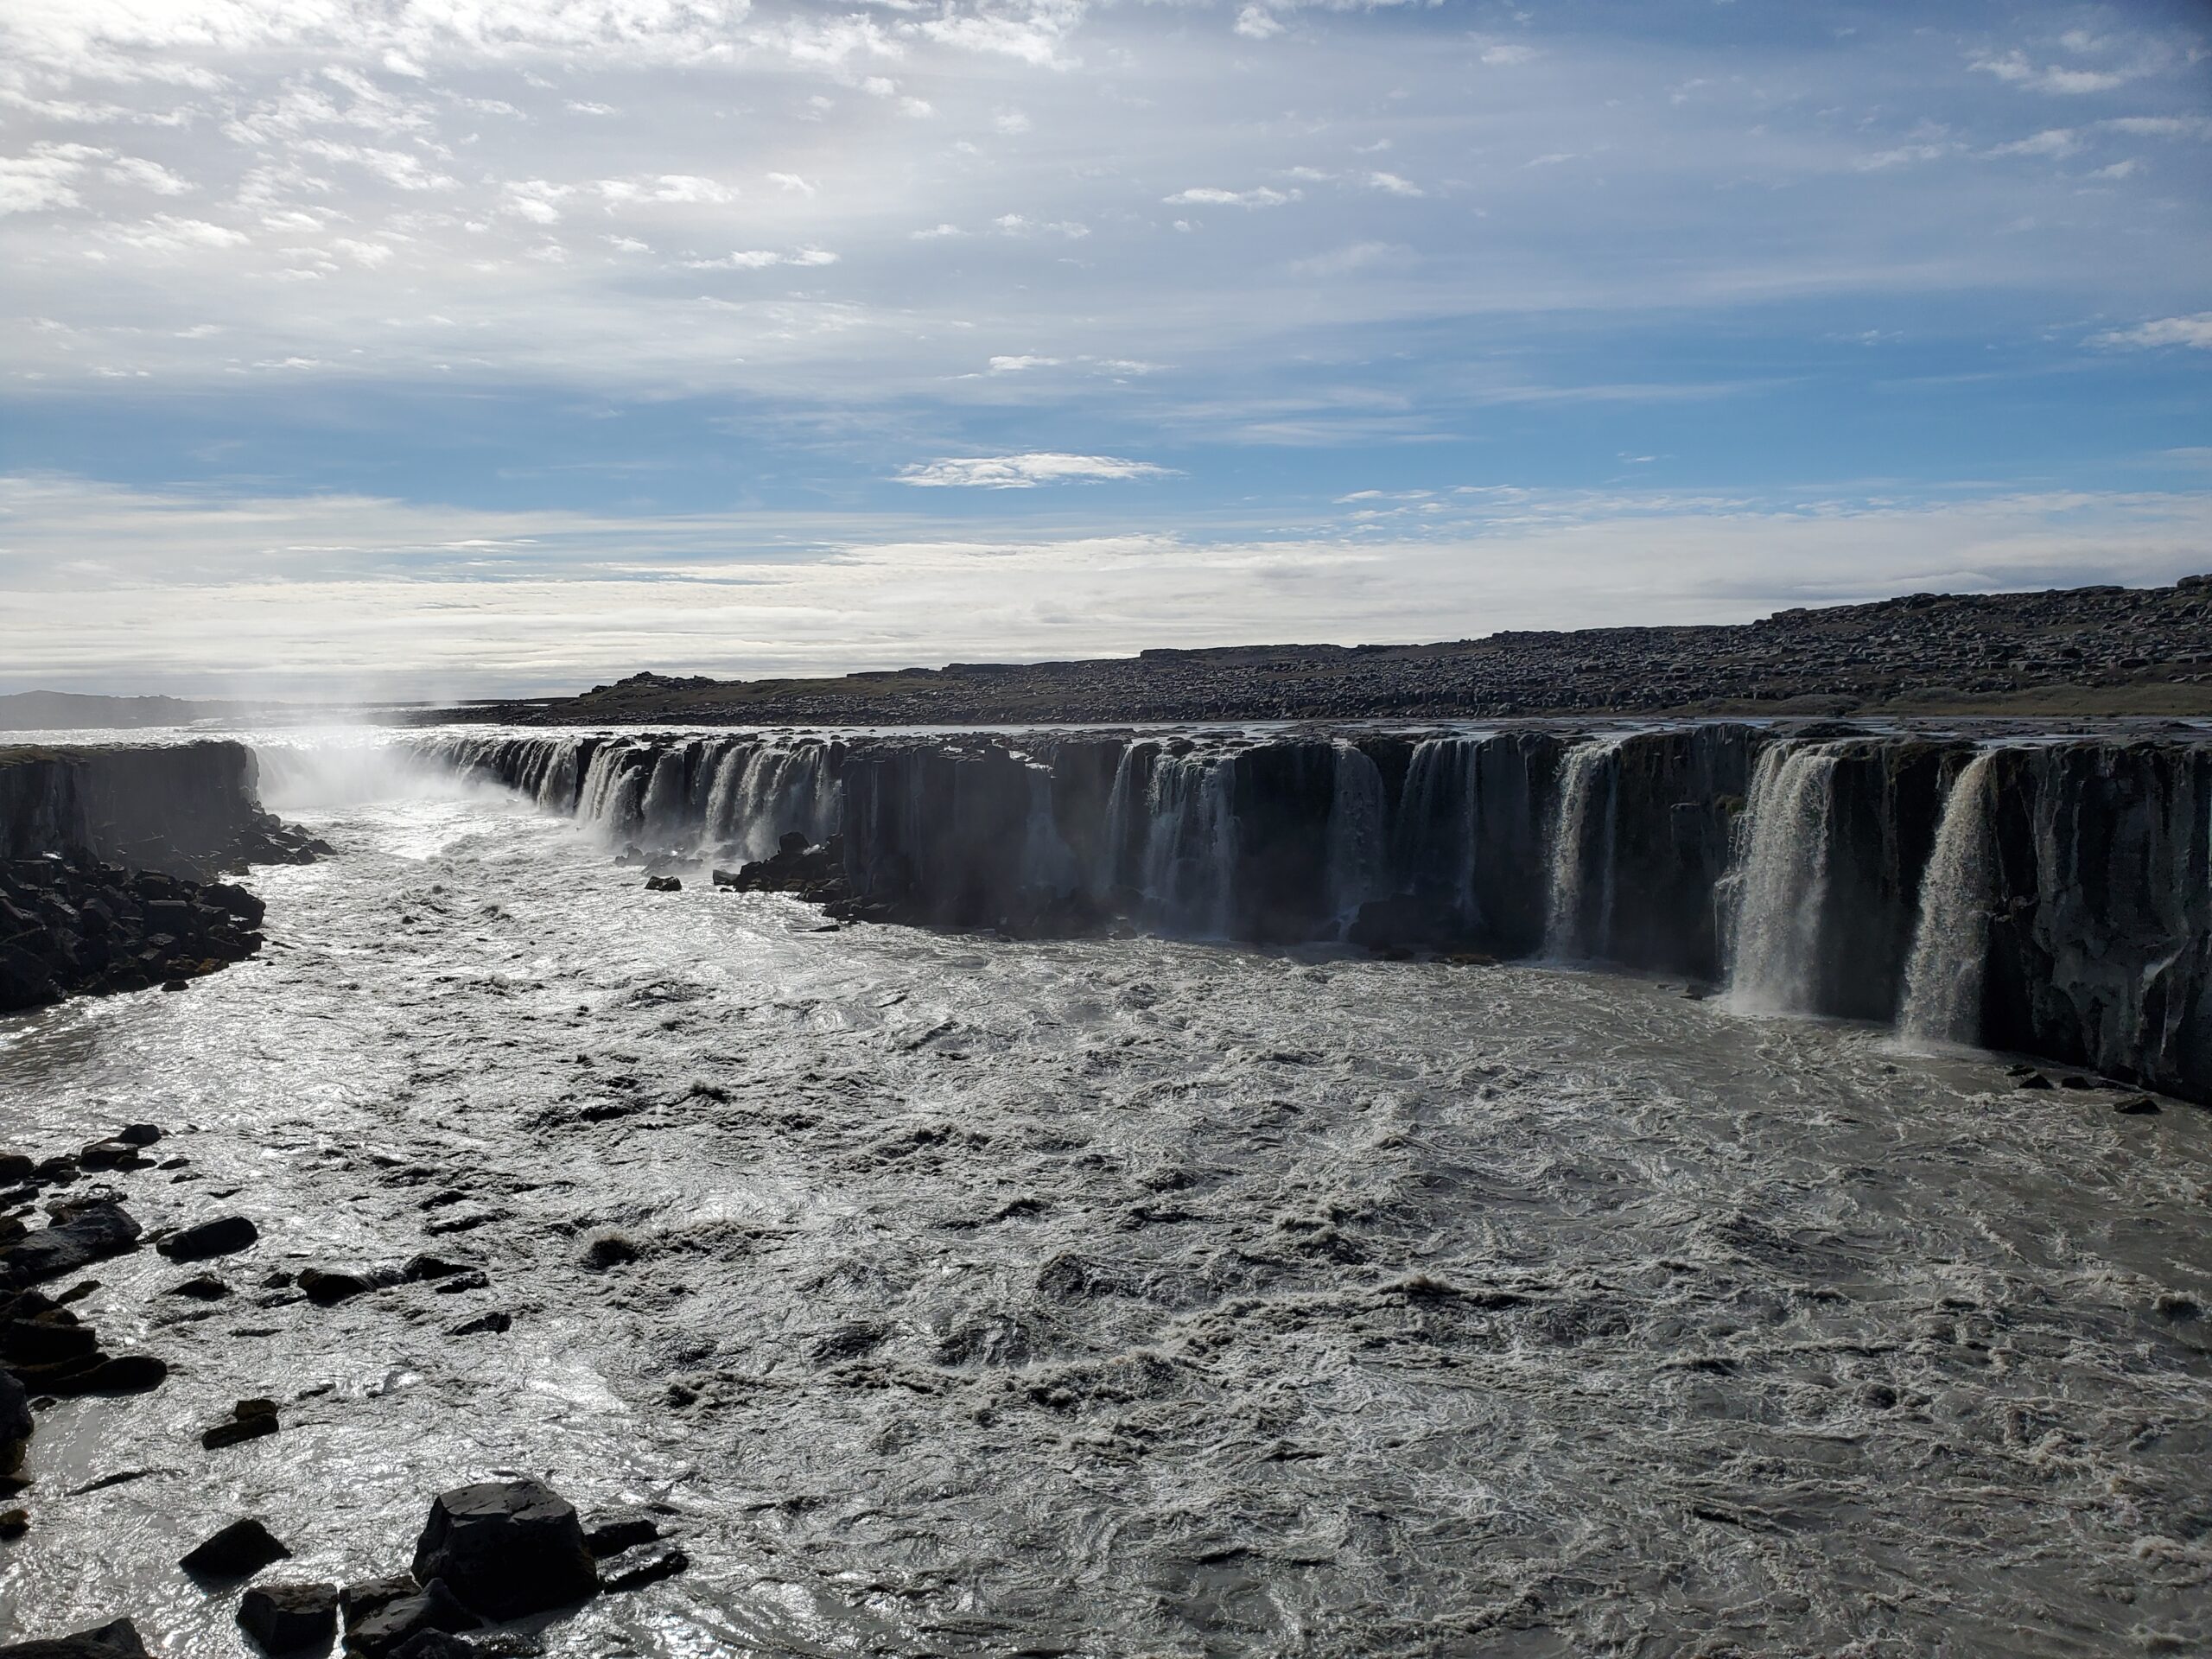
Dettifoss waterfall. Stunning
Asbyrgi canyon: another meh from us. It is the same kind of geomorphology as Dry Falls but smaller and with trees all over.
Wool farm at Gilhagi. Great stop at a family run wool farm.
Husavik: Cute little town. The whale museum is totally worth it. We had dinner, walked through town, swam at the pool. We used this as a base for Myvatn area. We had initially booked whale watching here and cancelled it. I could see hanging out here for a day or two. The GeoSeas thermal baths spa with infinity pools overlooking the ocean was fantastic.
Myvatn area: We skipped the Nature Baths and Game of Thrones film site, and focused on the truly amazing geology. The geo sites are easy to explore with good trails and boardwalks. The hikes are pretty short. Namafell hotpots and Krafla crater are must-dos. The Krafla power plant has really good displays inside.
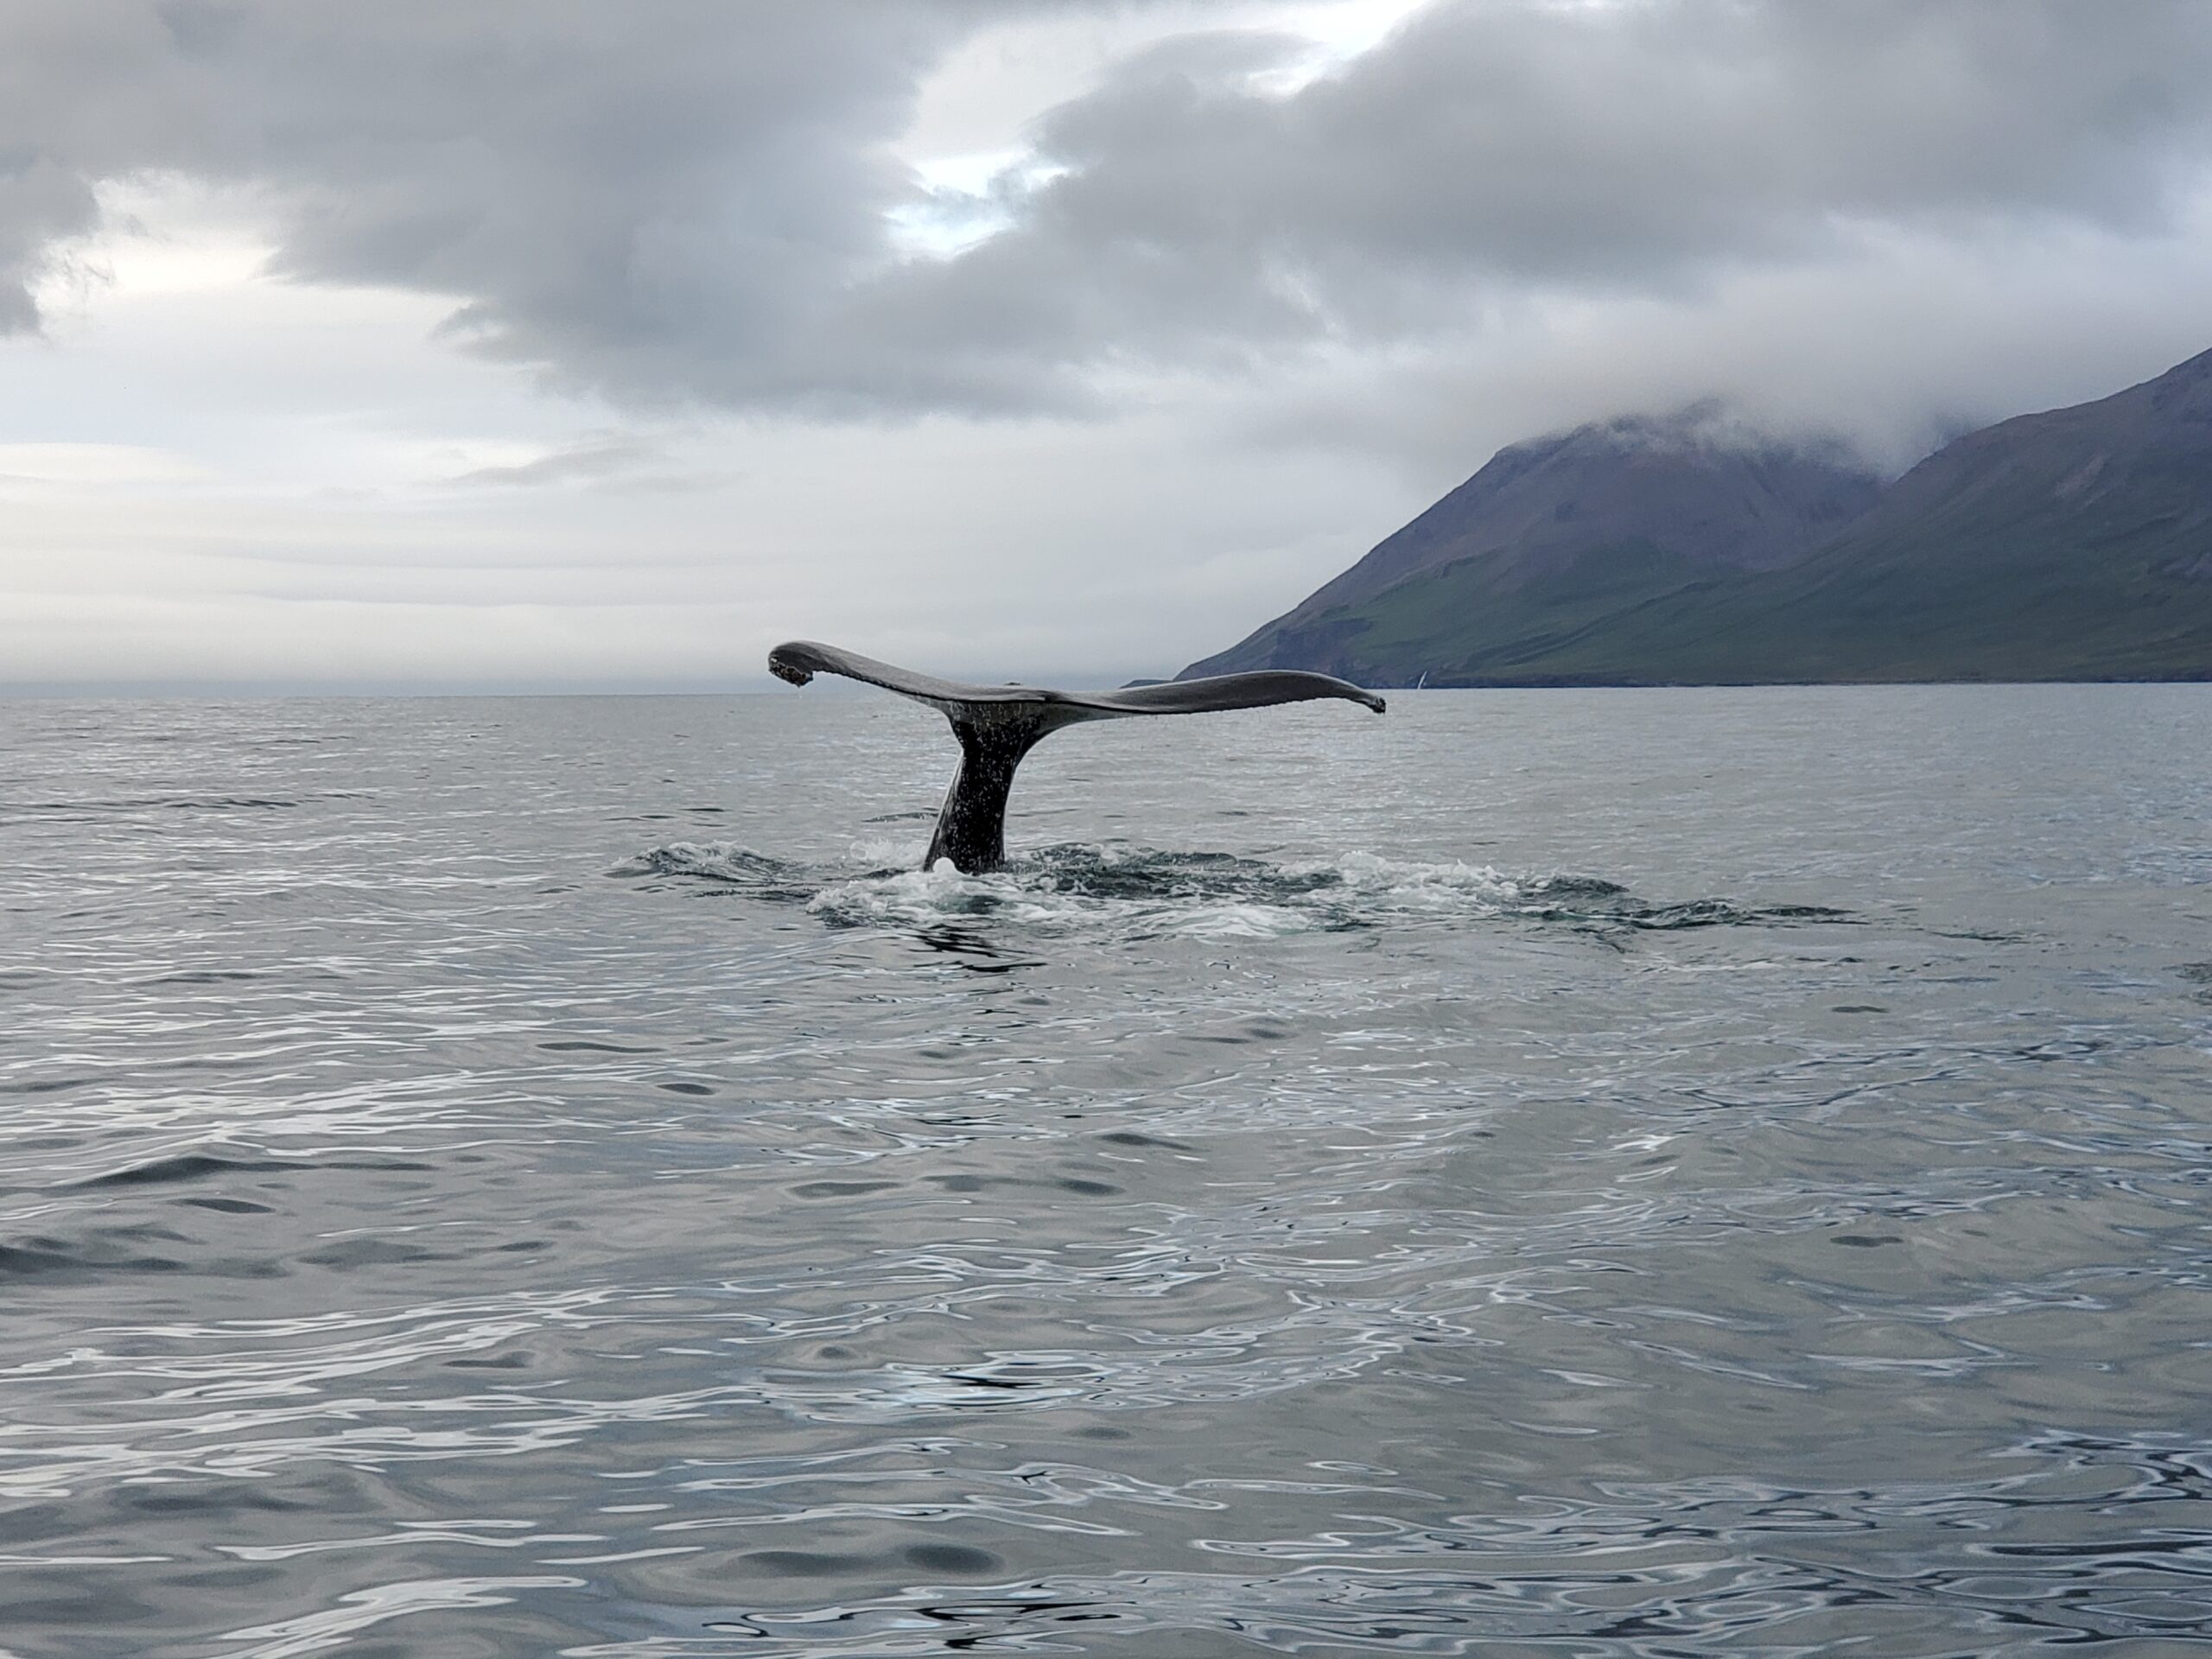
Whale watching: we scored by booking same day in Dalvik. We took a small “rib” boat out. It’s like a cushy zodiac. It’s fast and then they shut it off near the whales so you can get really close. We saw three humpbacks at very close range.
West and North: the weather turned again so we did more driving, scenery watching and checking POIs.
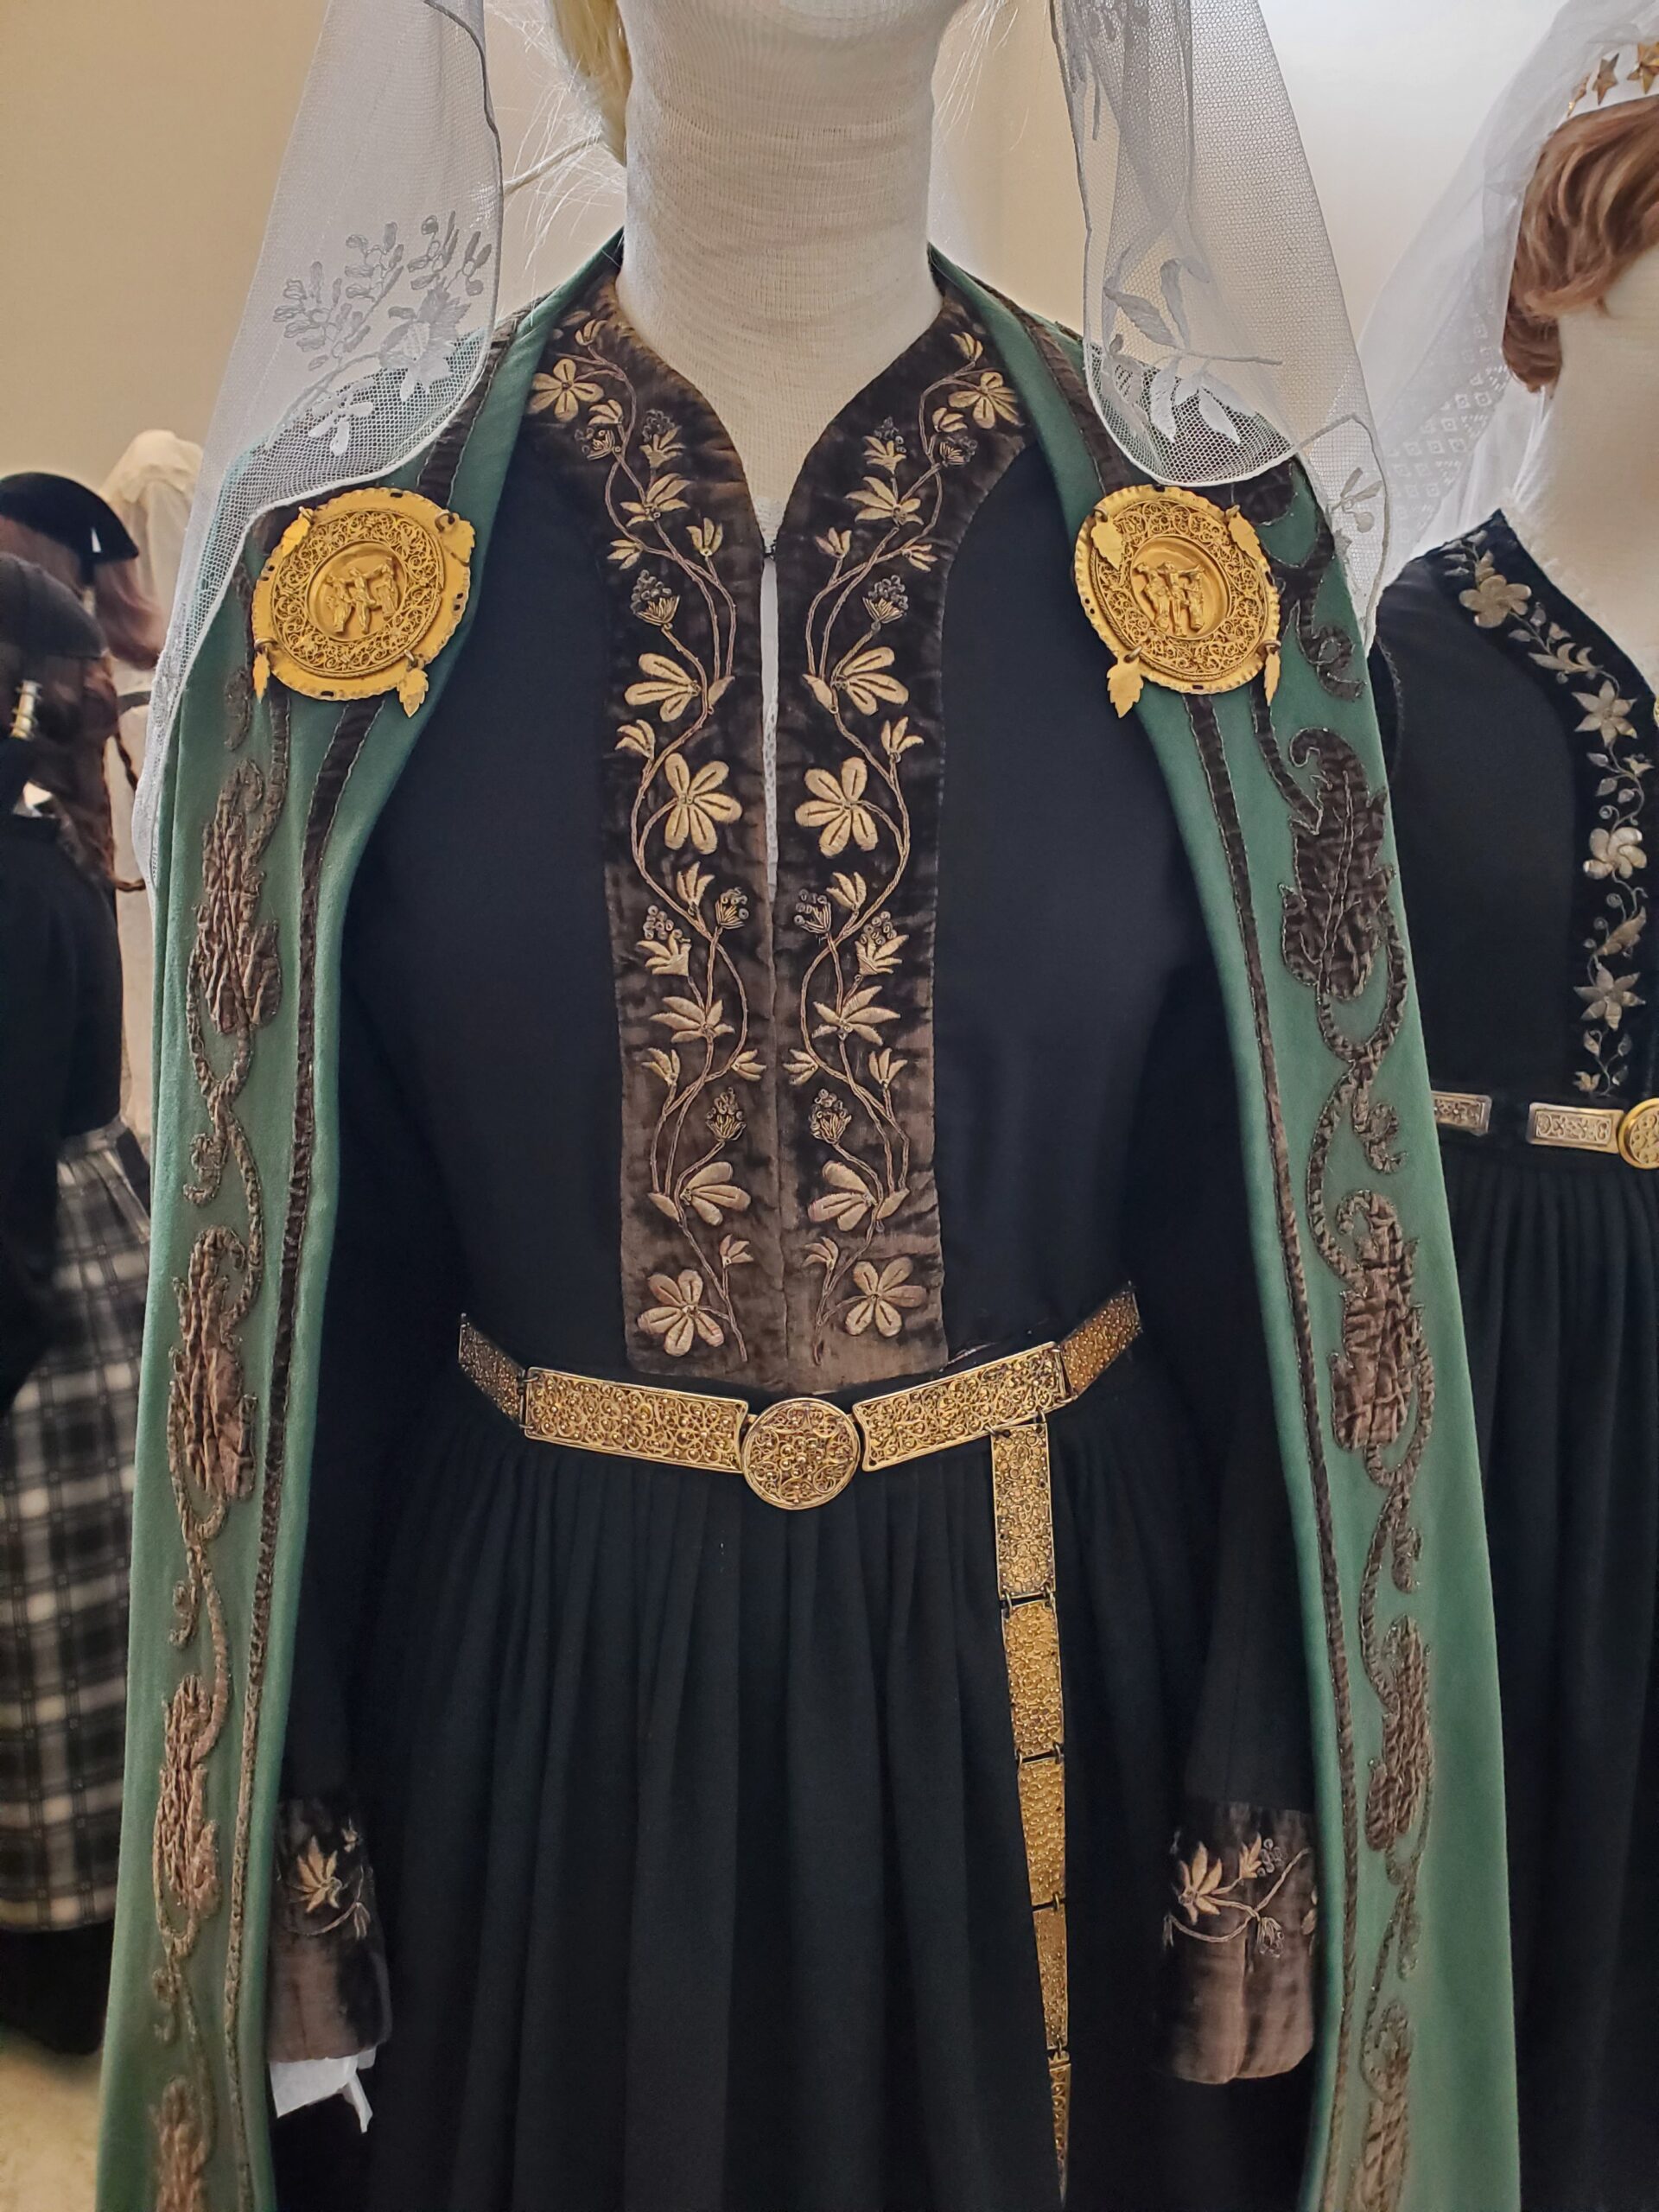
Textile museum at Bloundos: Totally worth it if fiber arts interest you
Eiriksstadir: this is a longhouse reconstruction/reenactment living museum. It is an excellent presentation. This was fascinating and totally worth it.
Reykjavik National Museum: very interesting and a good cultural base to start from. The lighting was poor which was a real disappointment.
Swimming pools: Every town has a geothermally heated swim center with showers, gym, lap pool, hot tubs and sometimes other features like sauna or waterslide. They are very reasonable and very clean. A great alternative to sometimes questionable campground shower facilities.
Glacier LagoonEast Fjord viewGlacier with outwash plainThingvellir NP RiftHumpbackHotpots at Namafell
Things we missed for various reasons:
Reykjavik Market: I really wanted to do this but the volcano ate up our Reykjavik day.
Reykjavik Food tour: this is supposed to be amazing but they were all booked. Book in advance if you want to do this. Plus… the volcano…
Puffins: they had already left the East Fjords but were still in the Vik area at Reynisfjara Beach. I had read about this location but forgot to make a note. Plus it was pouring rain when we were at Vik.
Blue Lagoon. Not our kind of scene.
Skogafoss waterfall and hike: one, it was pouring and two, Craig was turned off by the hikers lined up like ants and the tour busses in the parking lot. This waterfall is the beginning of the Firmvorduhals hike which I really wanted to do. The whole hike is huge, going over the pass into the interior. There are ways to hike the whole thing and shuttle bus back, but we were going to do out/back up to the pass. There are something like 27 waterfalls on the way up, and once you get past the first couple the crowds supposedly really thin out. If it hadn’t been pouring I would have pushed to do it.
The interior: It is supposed be even more geologically unique and interesting in the interior, but requires a 4×4 you can take on F roads. It is undeveloped in there but there are camps and backcountry hostels. Next time.
Greenhouse tour.
Natural hot springs
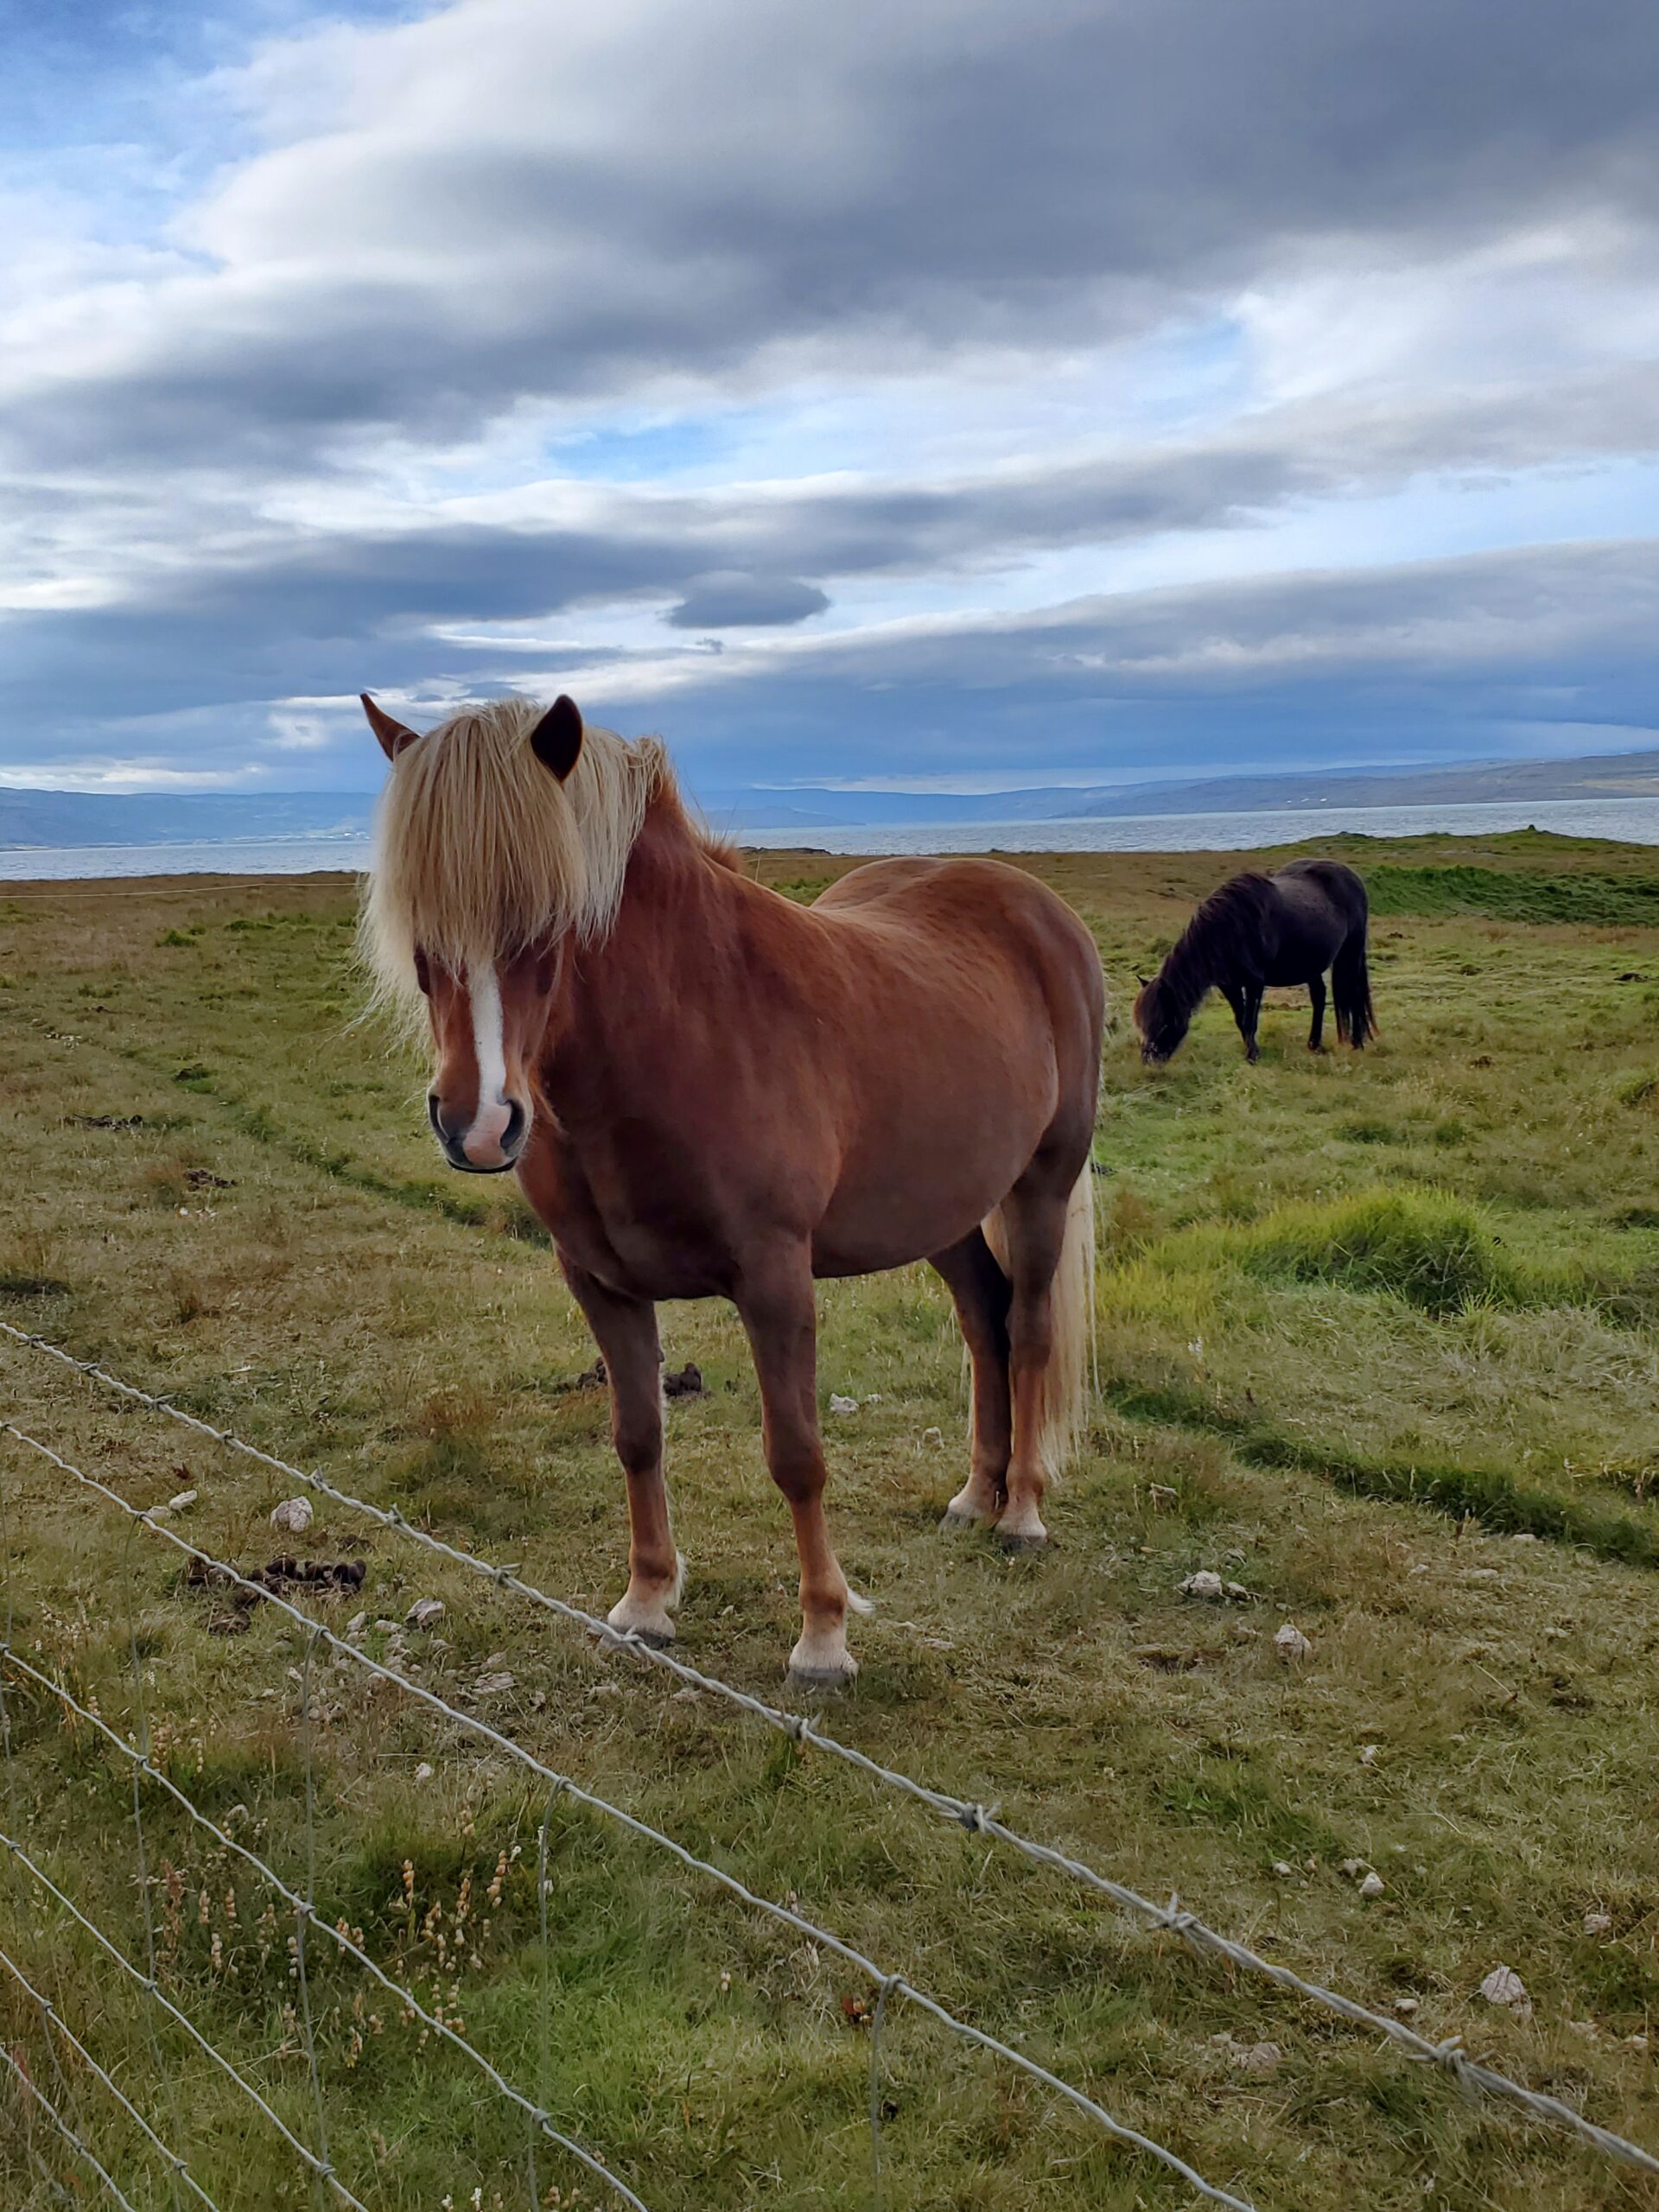
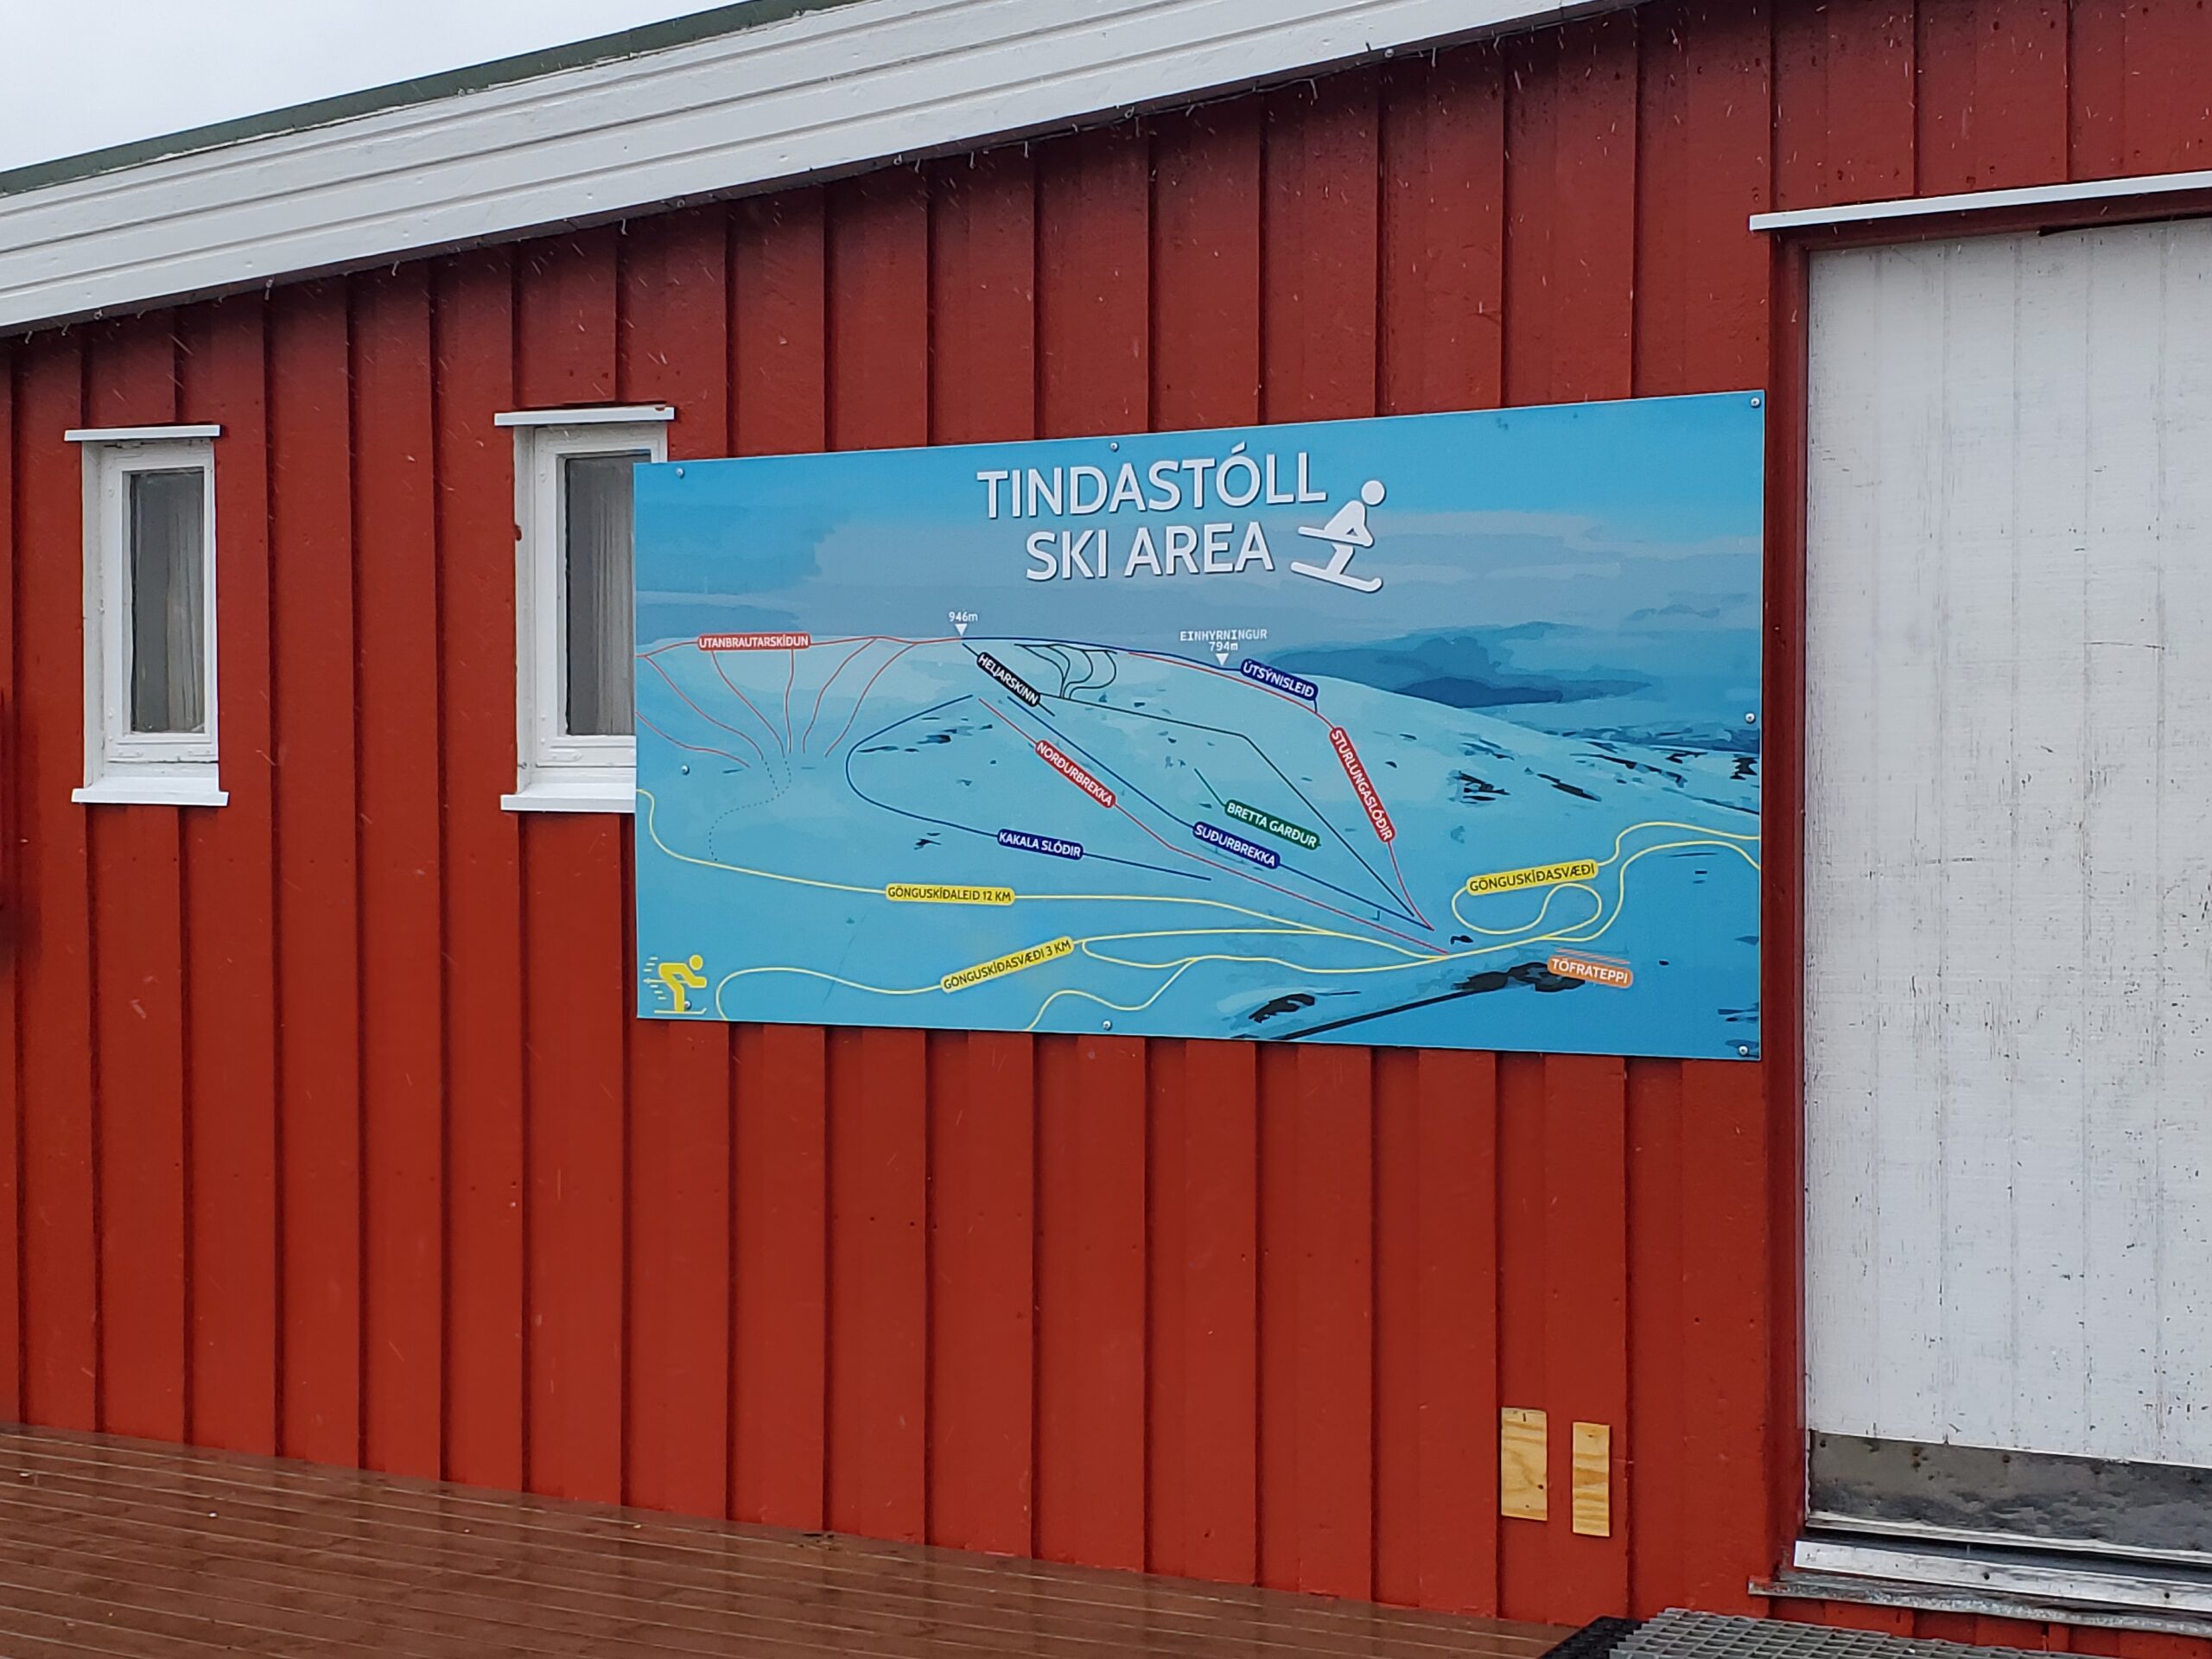
Krafla Power StationBanded basalt at Hengifossroadside fossPony DettifossOver the rift at KraflaDocent at EiriksstadirIcelandic Costume at Textile MuseumDrove up to the ski area
Where we stayed
This is a list of the towns/sites we camped at in the order we went counter clockwise, with comments as needed.
Reykjavik City Campground
Porlakshofn this town looks really cute, had a good Thai restaurant, and a coastal bike path that looks really nice.
Vik
Skatafell Very nice National Park campground. Free washer and dryer. We stayed two nights here.
Djupivogor
Bakkagerdi
Skjoldolfssstadir hunting lodge
Husuvik campsite had borderline gross facilities.
Olafsfjordur
Holmavik
Grindavik
Weather and what to wear
It’s true, the weather really does change every 5 minutes. In one day we could have sun, mist, downpour, huge winds and any mixture of the above. In August, 2022 temperature ranges were from a low of high 40’s to mid 50’s. Keep in mind it is damp and windy. All the advice is to dress in layers. I usually wore a wind block fleece legging or softshell pants, light merino base layers, a heavier base layer or fleece pullover and a vest with a Neoshell (waterproof breathable) jacket, or some combination of these. At night in our van I slept in Merino base layers. I had a hat, gloves and a light buff that served multiple purposes. I had T shirts and light leggings with me I never wore.
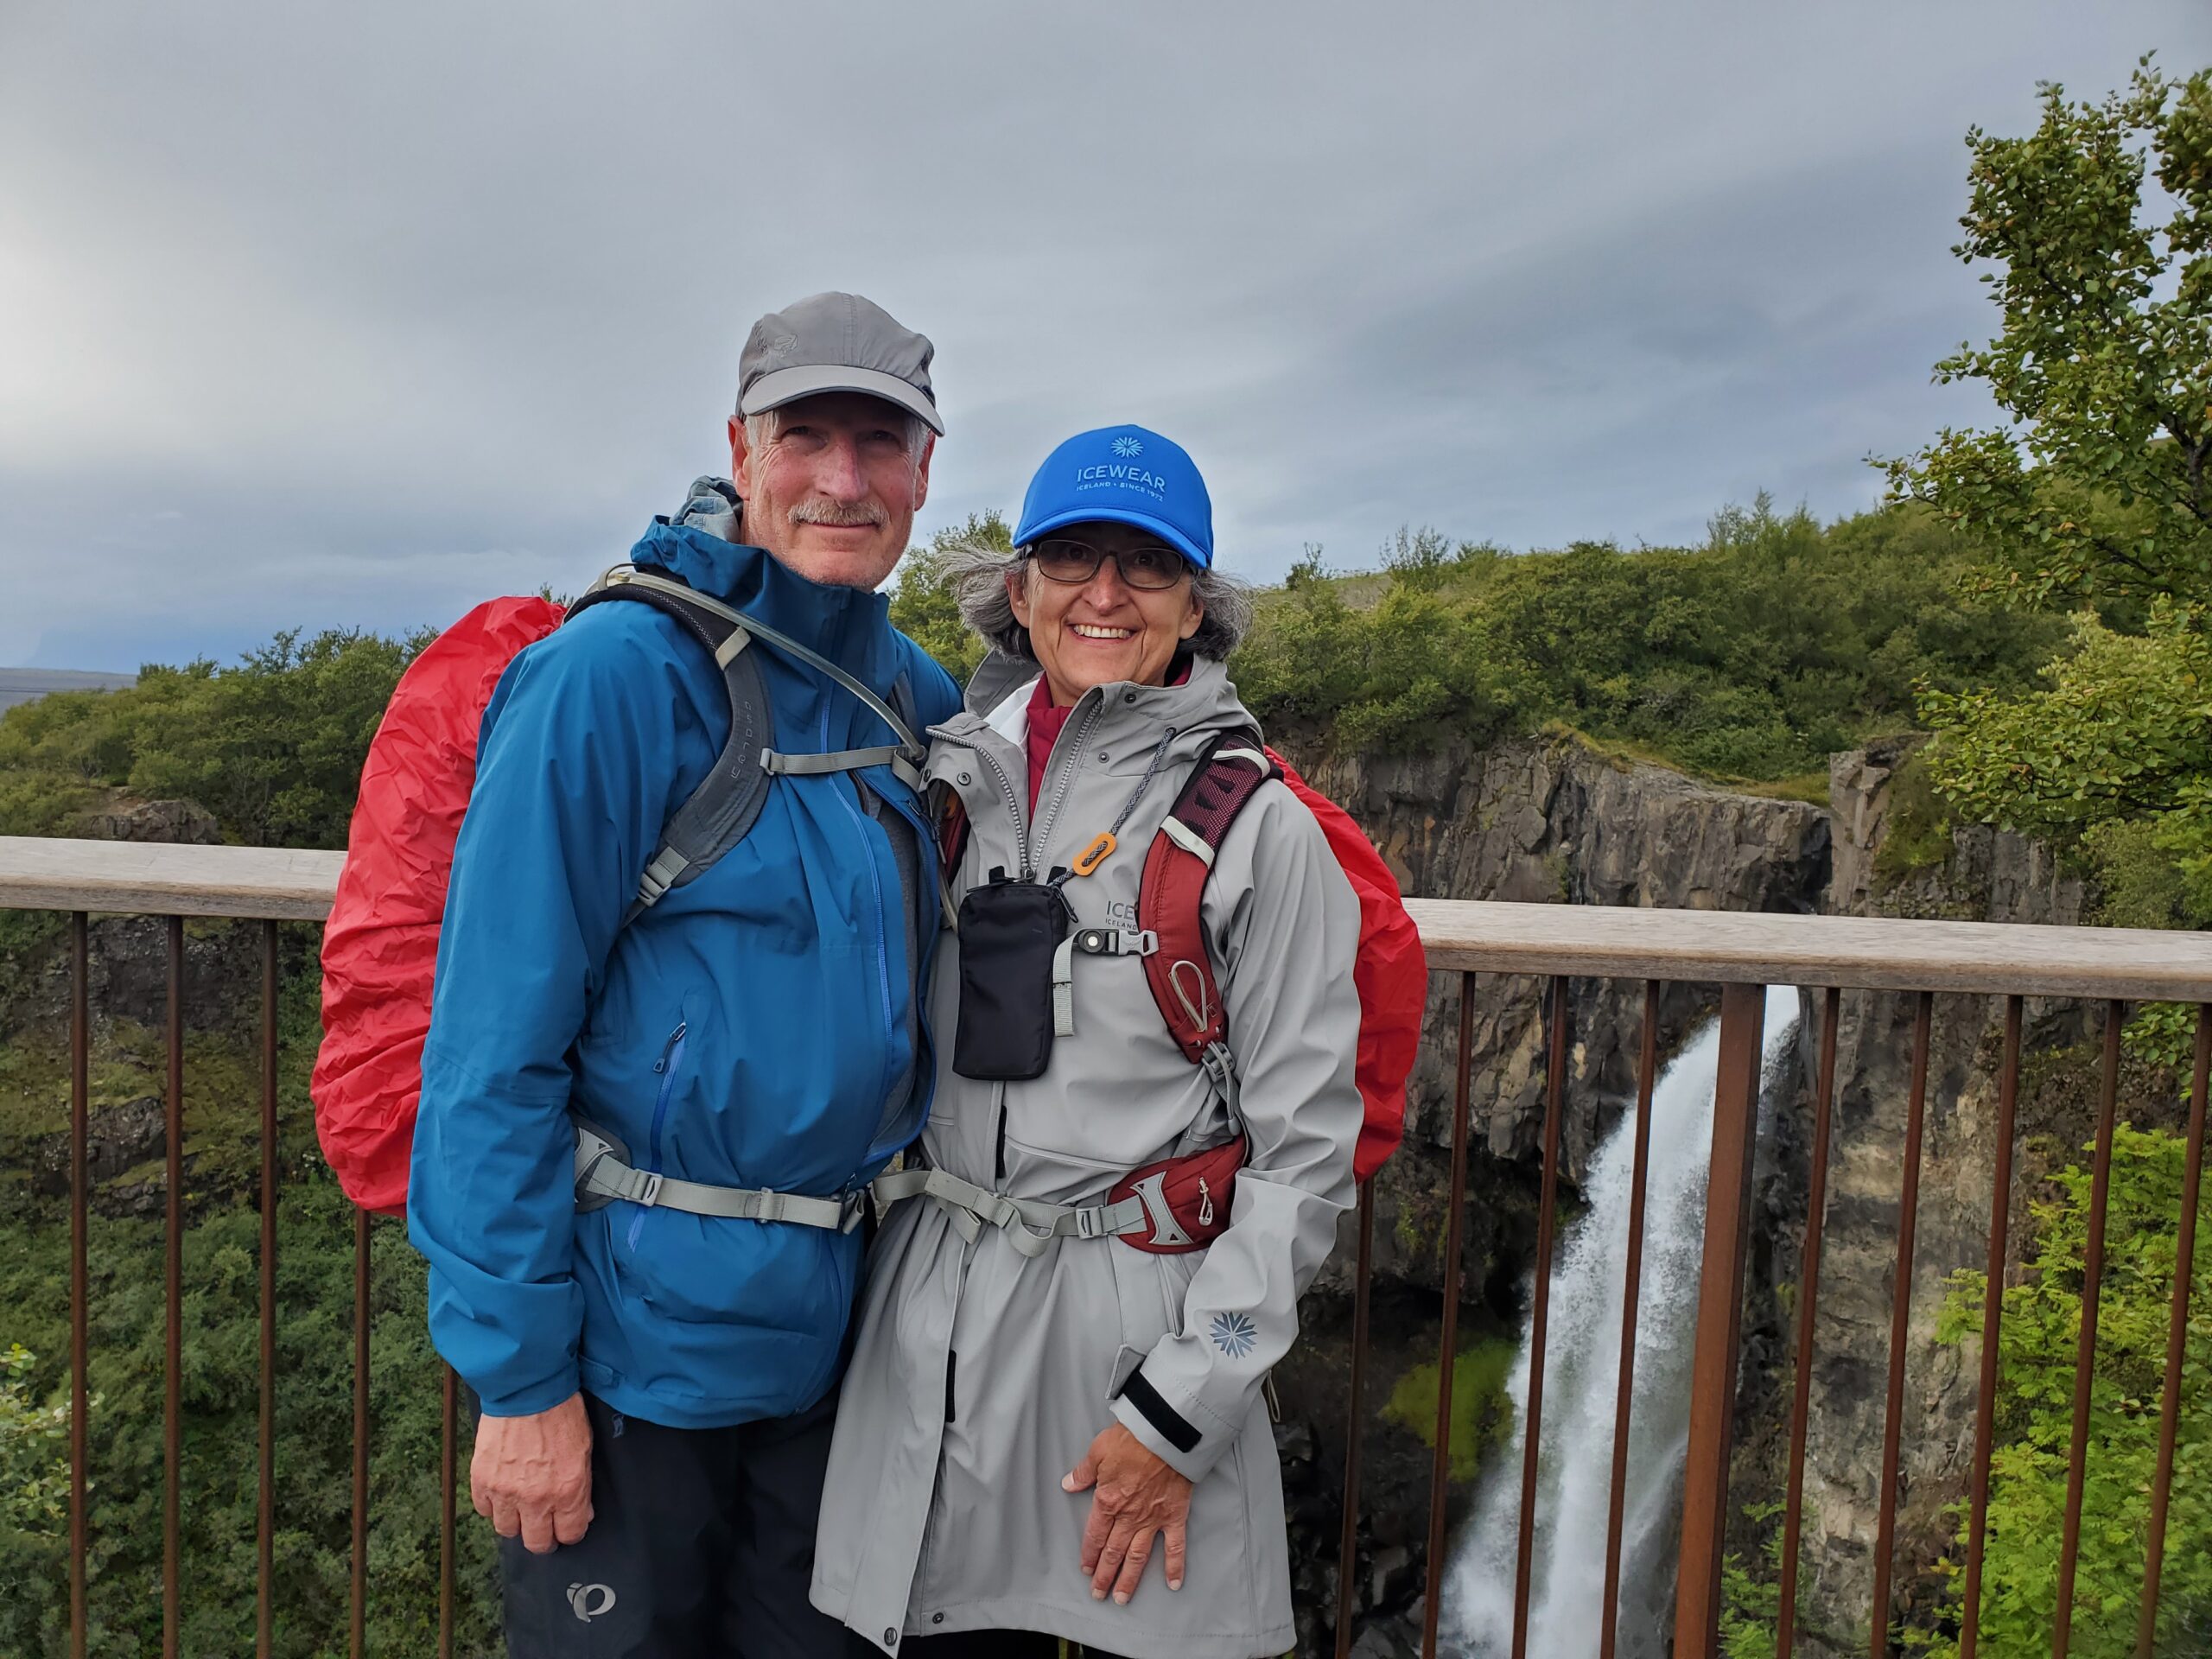
I have several thoughts on rain gear. You will get everything from heavy mist to outright long torrential downpours. A friend suggested two sets of rain gear: one to wear and one to dry. We definitely used the “two coats” plan. If you have an Alaska Guide style rain coat (PU vinyl) instead of Gore-tex type fabric, I would bring it. Gore-tex and similar will wet out but not Alaska style gear. We caved and bought this kind of coat while we were there. Umbrellas are worthless because of wind. For feet, I suggest waterproof hiking boots and waterproof walking shoes at a minimum.
Me in my “Alaska Guide Style” PU coated vinyl raincoat.