another time-saving technique I learned.
Recently I read a post on Facebook where someone described a technique use Glad Press N Seal to “slip” a copy of a garment. Whaaaaa? Sounded crazy but I was intrigued. I gave it a try and – yes- it is an amazing technique. I found it to be easy to do and very accurate. As someone who has copied numerous garments over the years with paper, pins, and needle wheel, I think this is vast improvement.
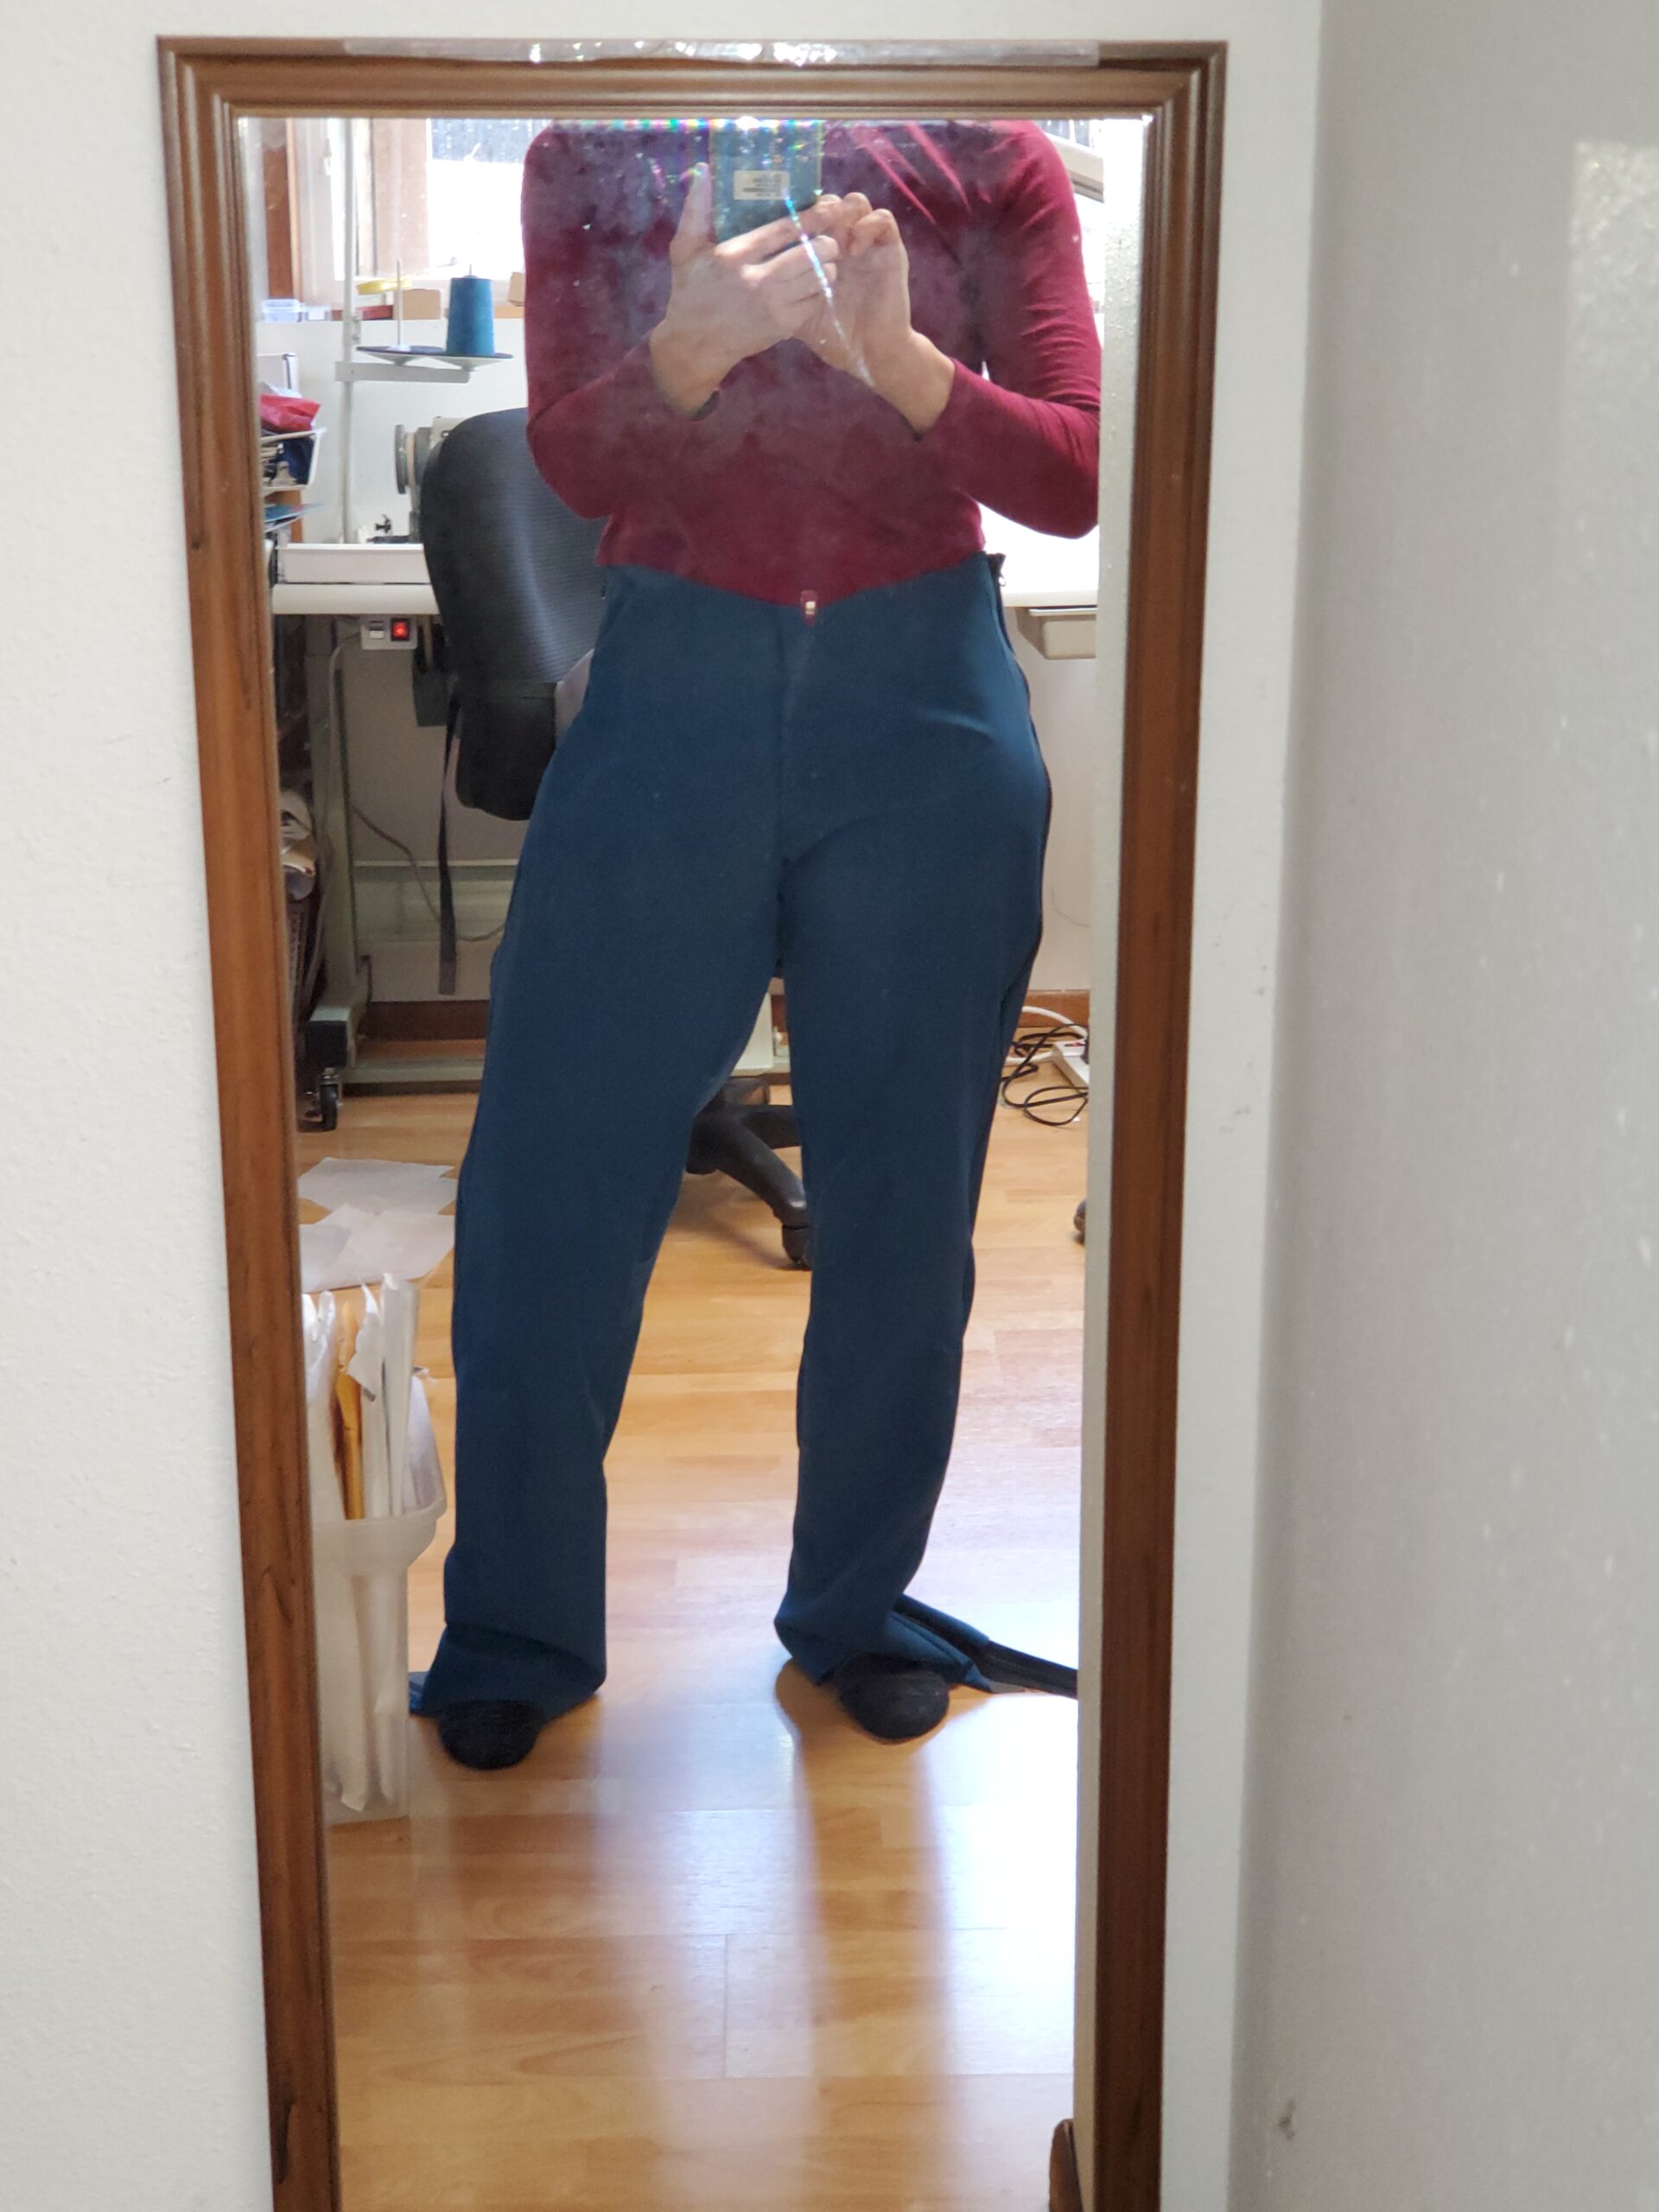
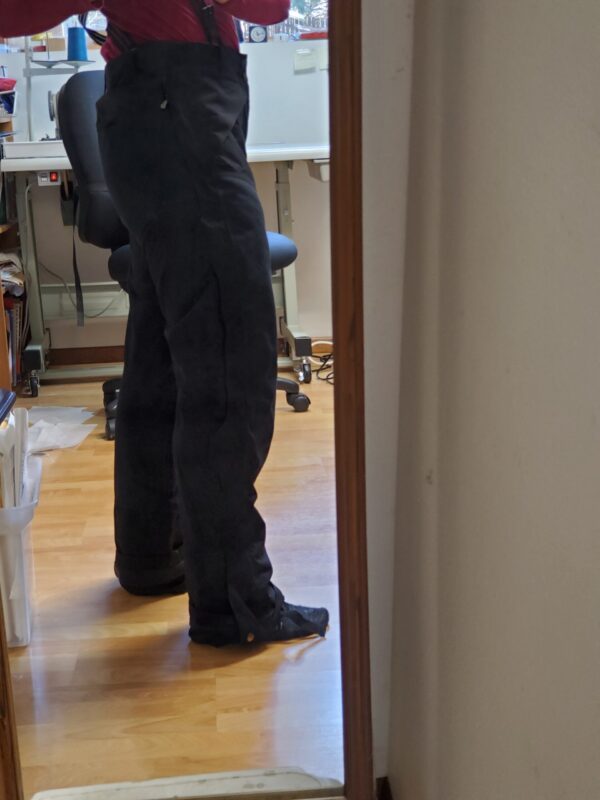
I put this method to the test copying my very favorite 25 year old Patagonia Ladies’ drop-seat ski pants which of course are not made any more. These pants are somewhat complicated with at least three different fabrics, darts, a gusset, and articulation. The pattern pieces I came up with required an absolute minimum of truing and re-drawing. It was very easy to make the changes I wanted to make in the process. Photos will be after the text explanation.
What you will need:
- Glad Press n Seal (try Amazon if you can’t find it in a store)
- A Sharpie
- Pellon Grid
- Assorted French curves and rulers
- A garment to copy
- A table to work on
- Scissors (for cutting Pellon Grid)
- Optional: Tailor’s Ham
Method of work:
Spread your garment out flat on a table. Decide which panel/part area you want to copy first. A flat area without darts or shaping would be a good first piece to do. Cut some Glad Press n Seal a little bit bigger than your area. You may have to stick several pieces together if it is a large area or an odd shape. The wrap has a slightly sticky side to it. You will press the wrap to your garment area, sticky side down. Make sure your area is as flat as possible, then smooth the wrap, eliminating any wrinkles. Once you have the wrap totally smoothed out, take a Sharpie and outline the seamline. I found it is easy to carefully run the marker right along the seam line. Mark the grainline and/or direction of most stretch. You will add seam allowance later. At this point, peel off the wrap, label it, and set it aside. I found the pieces stack and can be separated later.
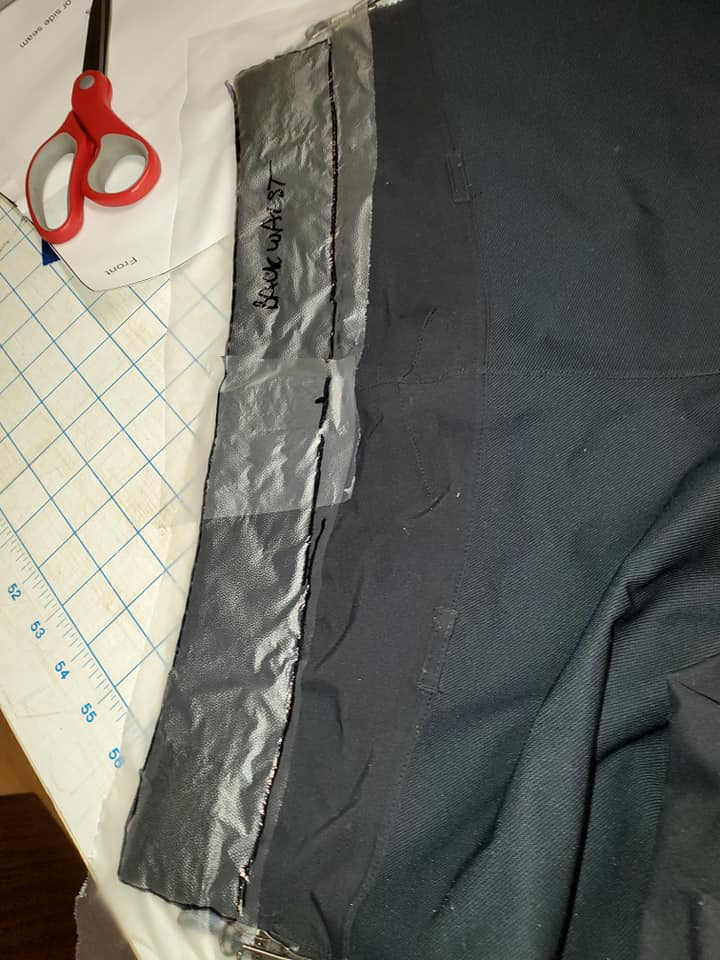
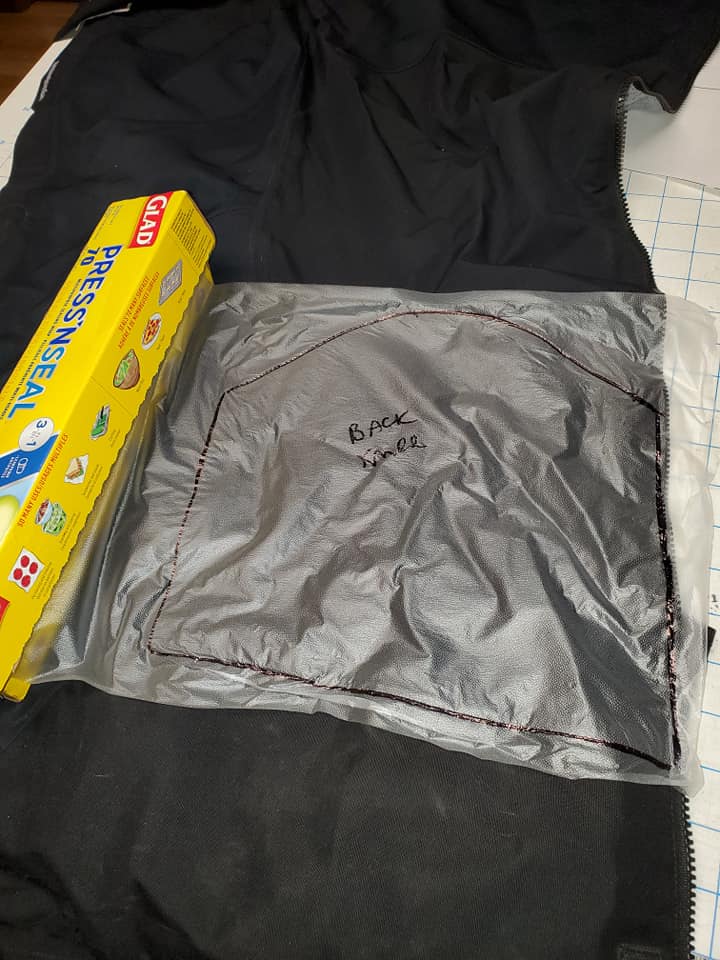
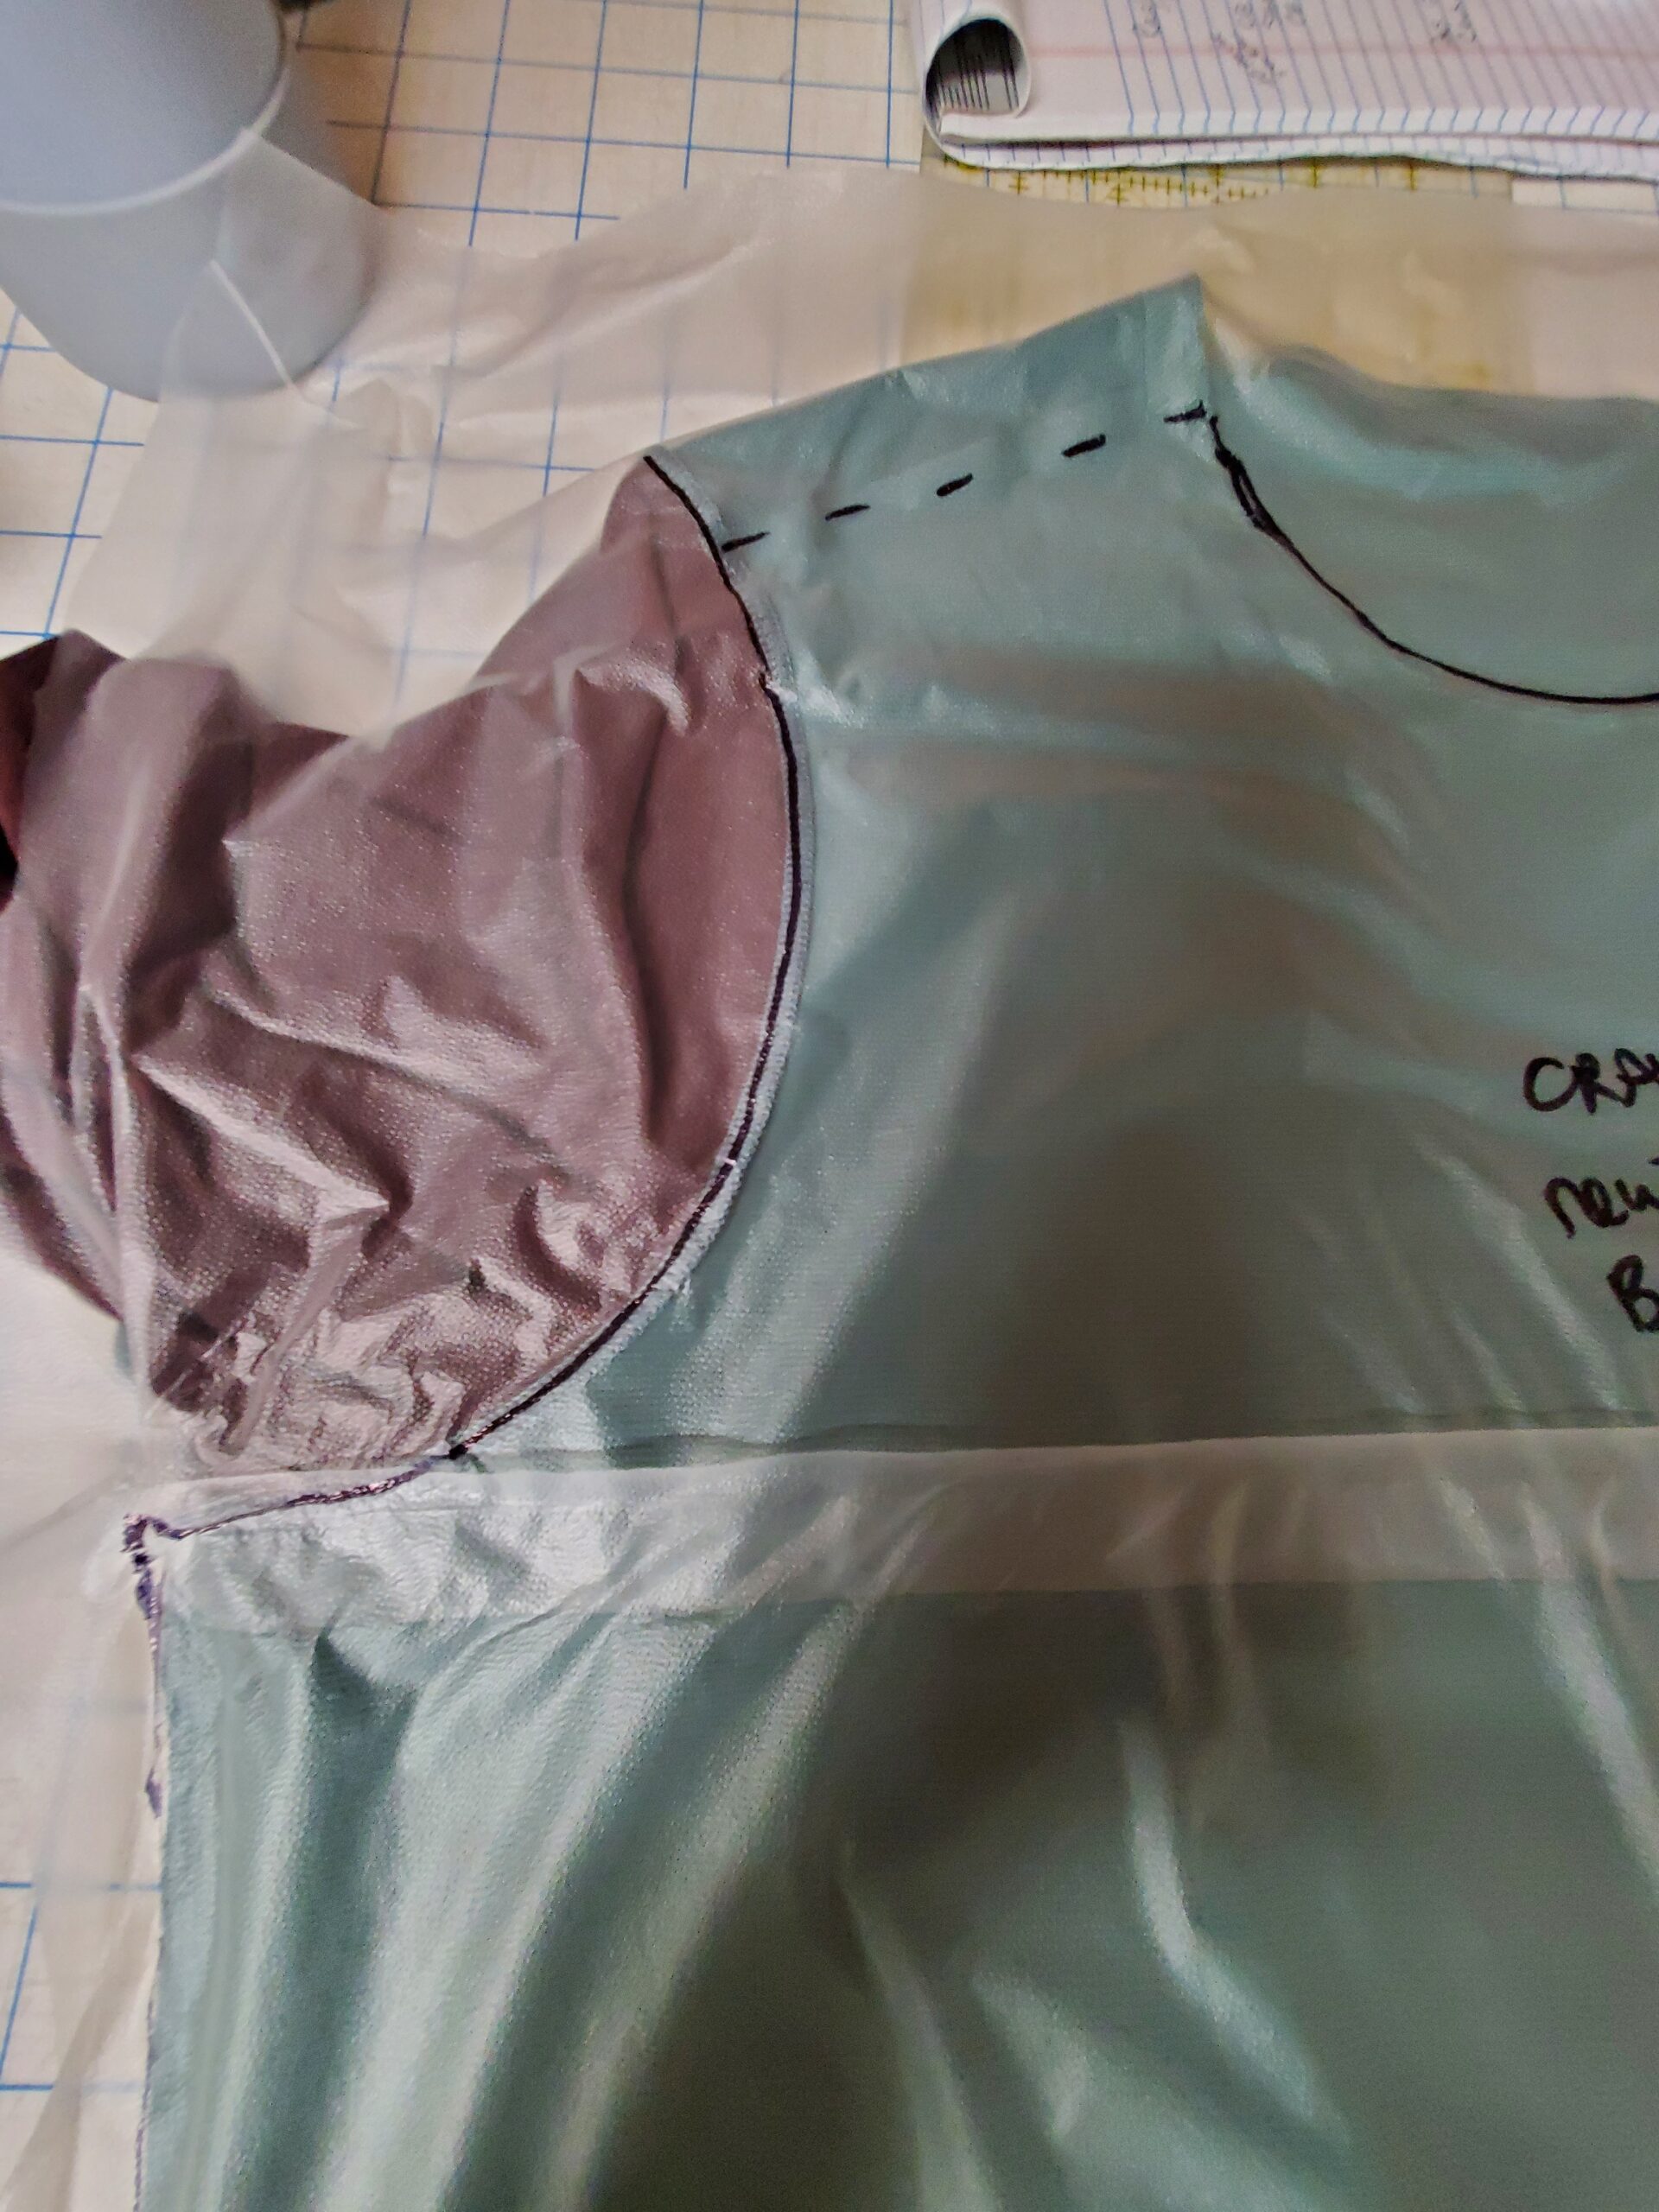
For curves and odd shaped areas you might want to shape that part of the garment over a tailor’s ham, the edge of an ironing board, or something with a similar shape. This will allow you to capture the shaping of curved seams or darts. What I found with darts is to smooth the wrap starting at the opposite end from where the dart is, then work the excess into an actual “dart” or fold in the wrap. Mark this with the pen so you don’t lose it when you flatten the piece in the next step. Trace the seamline as above with a Sharpie. Preserve this fold when you peel the wrap off the fabric. Label your piece and set it aside.
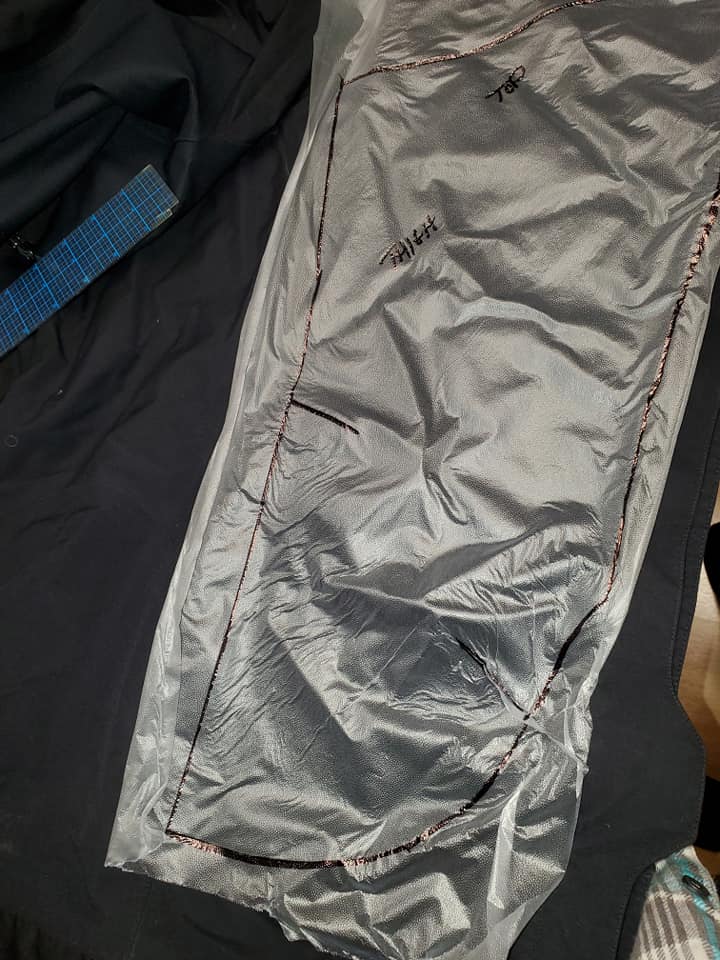
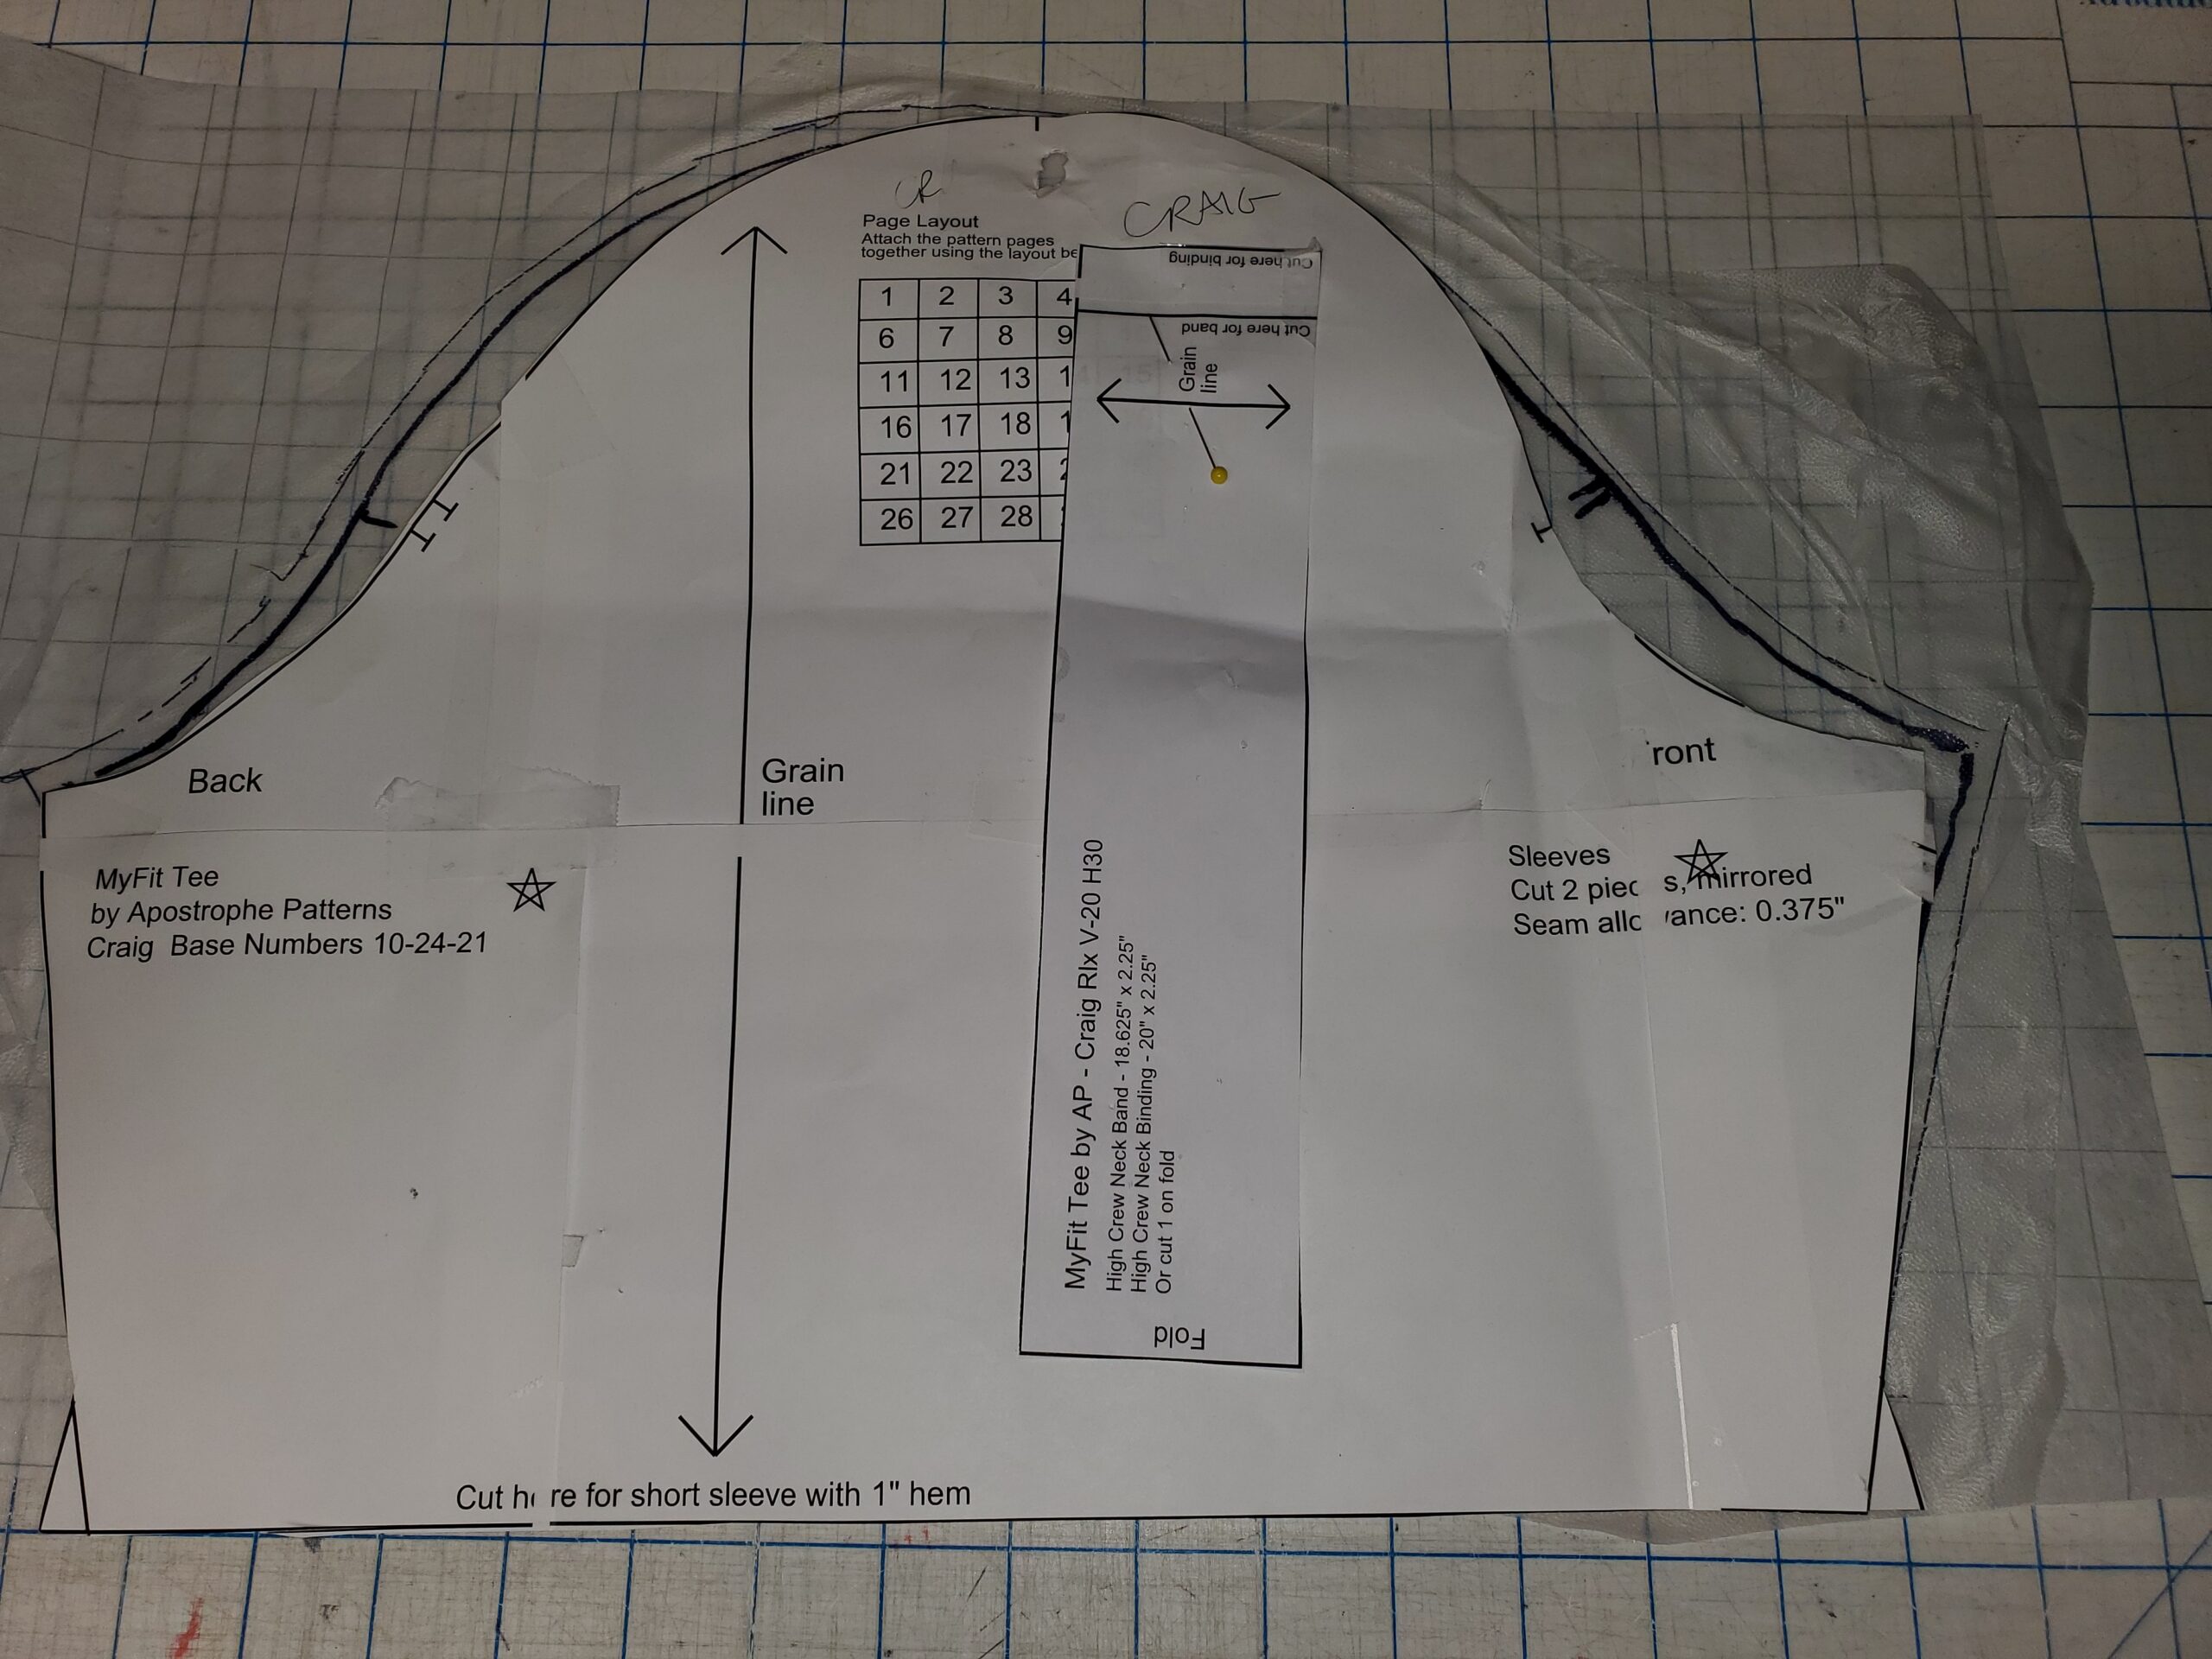
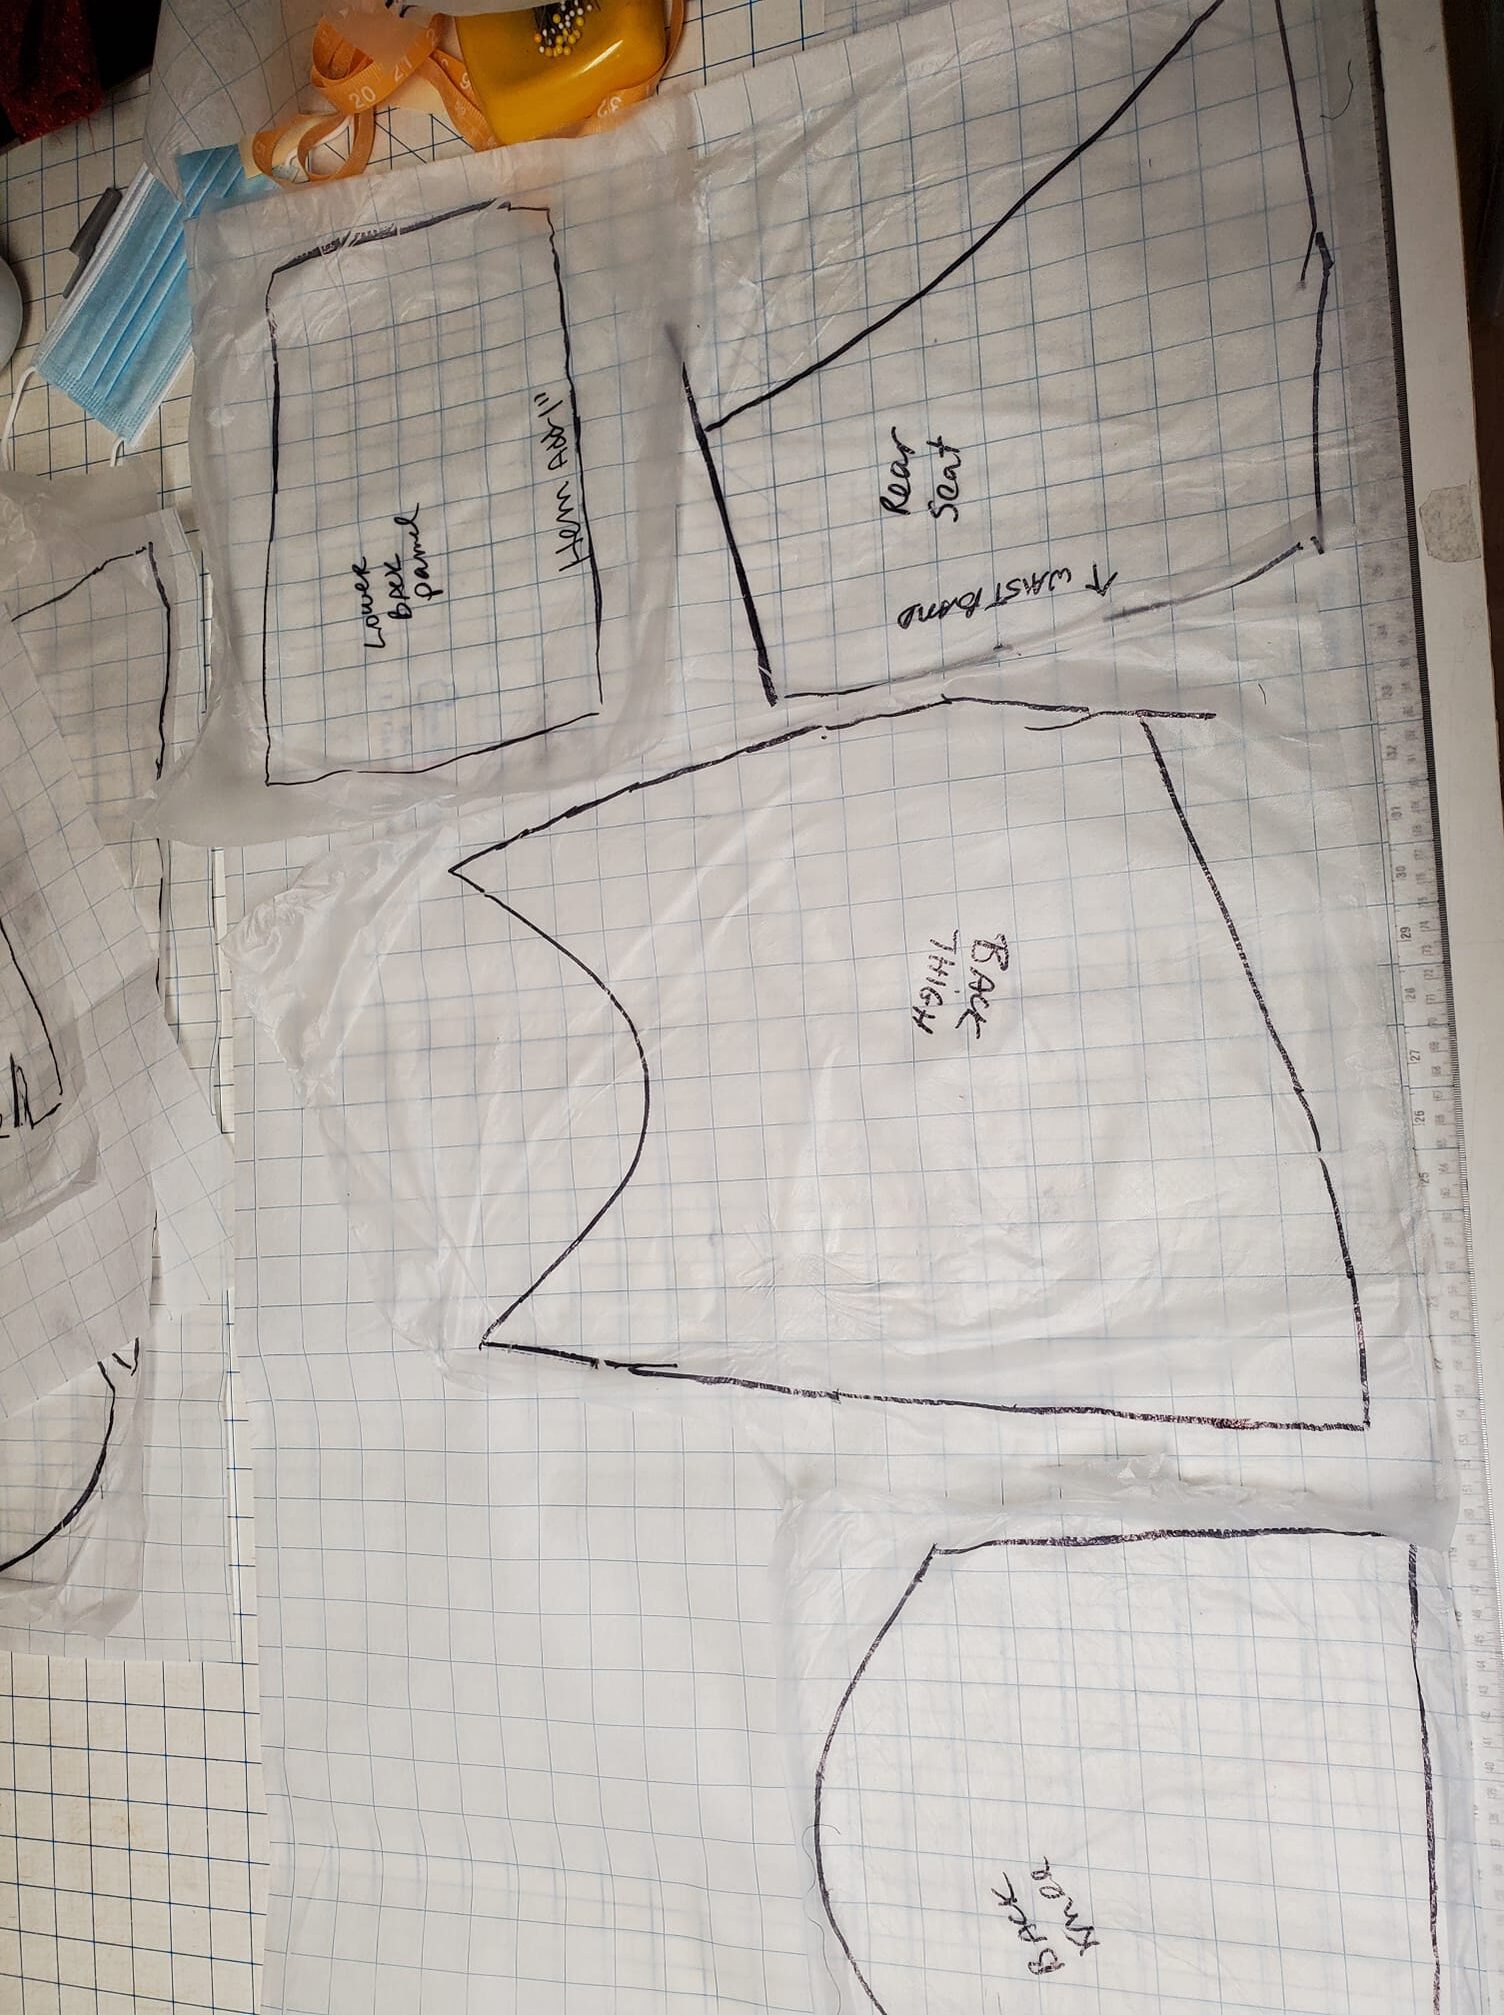
For every piece of the garment make a piece. Be sure to label each one. Once you have all your pieces traced, smooth each one onto the wrong side of a piece of Pellon a bit bigger. I like to line up the grainline. The pieces that have curves or darts should smooth out flat. If you marked a dart it should now lay flat. At this point, I touch up the seamlines if any are wonky, and make sure the piece has as needed notes and labelling. I might make some notches or other marks if it’s not obvious where it goes.
Once your wrap is onto the Pellon with all markings and seamlines, it’s time to check a few things. Using a tape measure, check your seamlines. When I did this, I found I was within 1/8″ on most seams, enough to mock it up in a muslin. If you are off any more than that, double check your garment and your tracing and correct it. Add your seam allowances, then peel the Pellon off and set it aside. You are now ready to make your mock up!


This fall I will make a finished pair with all the details out of Polartec Neoshell from Discovery Fabrics.
Update: I tried this technique copying a favorite wicking bike T of my husband’s. I was problem solving a sleeve issue, and copying this well fitting T was my solution to analyze sleeve problems in other patterns..