Tag Archives: gear repair

Base Layer Zip and Collar Finish

(new reformatted page coming soon, apologies for formatting)

Hello all, I know it’s been ages since I posted anything new. Here is a tutorial from the archives. If you are looking for a smooth, foolproof way to insert a zipper into knits or baselayers, look no further.
step24

I will show you how to do an enclosed inside finish,

Even and matching seams,
step13

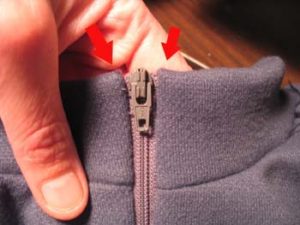
And a very tidy zipper insertion:

step12

First, thanks to Jalie Patterns for the the zipper insertion technique.  Grey garment pictured is the Vuokatti baselayer pattern, offered free by Shelby Kaava Outfitters.

Let’s get started!!

Zipper Insertion

Part 1, preparation

(CF=Center Front, WS=Wrong Side, RS=Right Side)

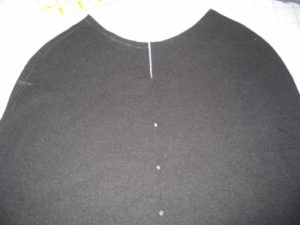
Adjust, layout and cut your pattern as usual. Figure out how long you want the front zipper to be, and mark the CF. Keep in mind collar width added to the front panel for the length of the zipper. Mark CF with dots and a 2″ slash at CF.
step1

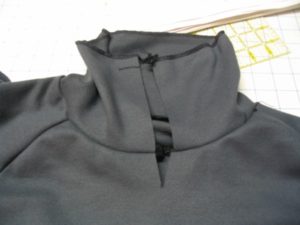
Sew sleeves, back and collar on. Do not sew side seams; you want to work flat.
step2

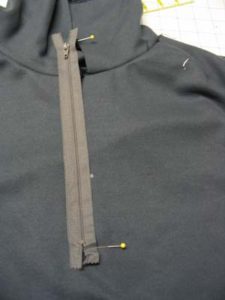
Check length of zipper against collar fold point and your marks.  I have the collar fold marked with a pin. This is the final width of the collar.
step3

Now, noting the exact placement of bottom zipper stop, mark bottom of the zipper with a pin

step4

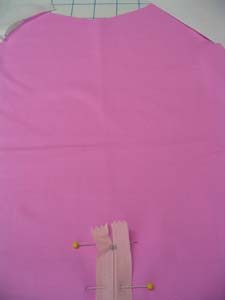
Turn zipper RS down and going the opposite way it should, on the RS front. Secure the zipper.
step3-5
step5

Where you have bottom of zipper marked with a pin, use a couple of pieces of clear tape on the WS. This will act as a stabilizer when you sew the bottom of the zipper. 


Part 2, sewing

step6

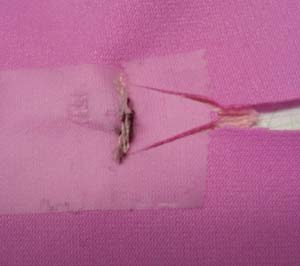
Now, stitching very carefully, stitch across the bottom of the zipper, RS of shirt up, zipper is RS down and pointing the wrong way. Take just a very few stitches, and backstitch. Even as pictured I took a few too many. You just want to secure the end of the zipper, no wider.

Then, you will carefully cut down the CF of your shirt from the slash at top CF, making a “>” at the end of the zipper. Clip EXACTLY to the edge of your stitching and make sure the legs of the  “>” are longer, not shorter.
step7

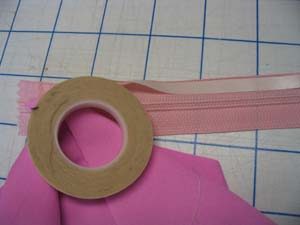
For the next step of actually sewing the zipper tape to the fabric, a nifty notion called Wonder Tape is very helpful. It is washable, and really keeps knits from distorting during this step.

Apply the Wonder Tape to the RS of the zipper.

step9
step8

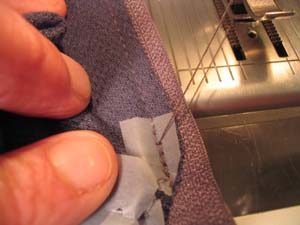
Turn  the long cut edge and press to secure, making sure there is no distortion. Stitch carefully, starting exactly at the apex of the “V” cut. Use the zipper foot to get close to the coil. Note that on the grey fabric, the edge of the fabric opening is placed only part way to the edge of the zipper tape. This is done deliberately, to keep the opening narrow and undistorted.
step11

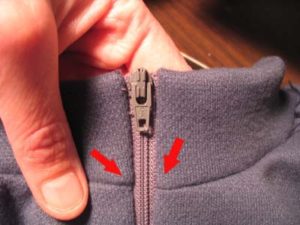
Finish both sides of the zipper. If you have been careful, you’ll have a nice, even, small  opening like pictured below.  When you are crossing the collar seams, make sure that they match up on either side Check this before you stitch. Fold the seam allowances towards the collar. This will also help with the collar treatment. Pick off any excess wonder tape you can see. The rest will wash out.

step12
step13-5

Collar Finish

If you’ve done the prior steps correctly, you’ll have a collar attached to your top The zipper should be about 1/2 way up the collar, with the top of the zipper at the desired height of the collar.  One some patterns you may want to trim the collar down. Reserge the cut edge.
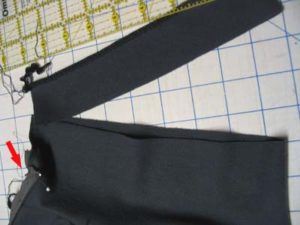
step16

Once the collar is trimmed,  finish the top of the zipper by folding it over twice. You can secure the folds with a pin, then fold the collar facing over the zipper tape, RS facing to RS collar. Make sure the top stop of the zipper is at the fold line for the collar, and that the serged edge of the facing is lined up with the collar/neckline seam. Then stitch carefully using zipper foot,  to secure the collar facing.
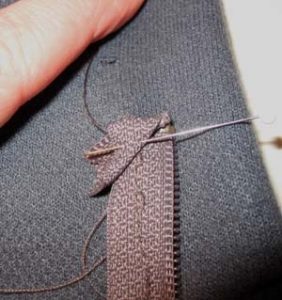
step14
step15

Do both sides. Check that collar seams and top corners/top stops are even by zipping the zipper closed and checking from the right side. Adjust as needed.
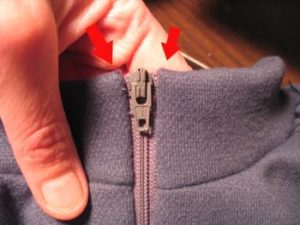
step13

Now for the fun part. We are going to do a “Burrito Style” enclosed finish of the facing. Fold the facing to inside. Use a pin to secure it  about 3/8 from the edge of the zipper, and a chalk or other pencil to make visible marks for that point on both the collar and the facing. (pictured) You might also want to make a marks on the collar facing where it meets the shoulder seam .(not pictured)
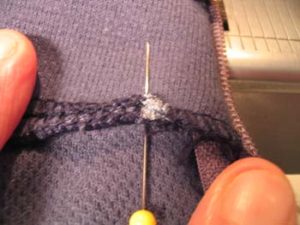
step19

Make sure that both the facing and the collar marked:
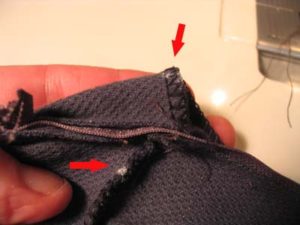
step20-1

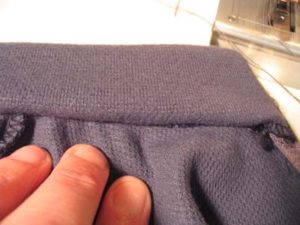
Matching the marks, fold the zipper tape down, and bring the collar facing to the collar seam, seams together, RS of collar facing to WS of shirt front body. Match your marks, and secure the two seams together. The zipper tape and the shirt front will be enclosed in the “burrito”. You should have something that looks like:

Note that the zipper is folded down under my fingers on the left side of the image.
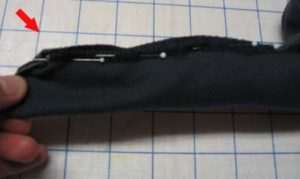
step21

Continue to pin, securing seams all the way from the zipper  to the where the shoulder seam intersects the collar, if not farther. Keep checking to make sure the shirt front and the zipper are not getting caught.

Close up view of the start:
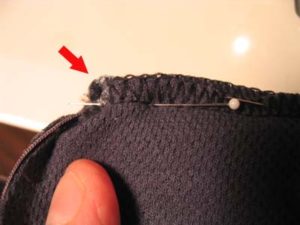
step22

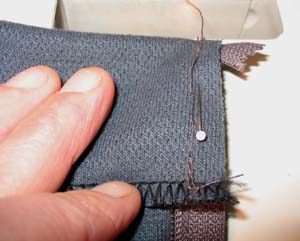
Use a narrow to medium zig-zag, sew your burrito. Start at the chalk marks by the zipper, and the two seam allowances together. Catch only the seam allowances, not the body of the shirt. Go at least to the shoulder seams if not farther.
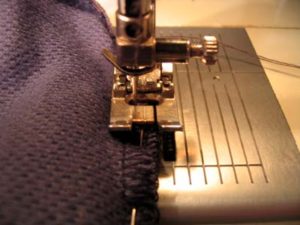
step23

Go as far as you can before you get to so much bulk folded inside that you have to stop. On most fabrics, you can go at least to where the shoulder seam meets the collar, and on light fabrics, farther. So go as far as you can, then back tack. Carefully undo the burrito checking to make sure you haven’t made any pleats. If you have done it correctly, you will have a nice finished facing. After you have burritoed both sides, to finish the CB part of the facing, just lap the collar facing edge on top of the collar seam edge and stitch in the ditch to hold the facing down.

step24

Common Zipper Problems

With most zipper repairs, it comes down to being able to diagnose the repair and having the correct part, if it can be fixed. Today we are going to look at some common zipper problems.

IMG_4980

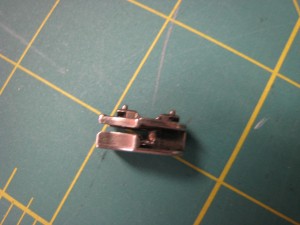
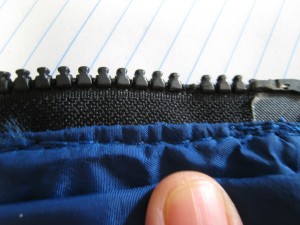
Here, the plastic around the male pin at the bottom of the zipper has completely worn away. The zipper pin will thread into the slider for a while, but it will become more and more difficult as time goes on. This cannot be fixed. The zipper must be replaced.


IMG_4988

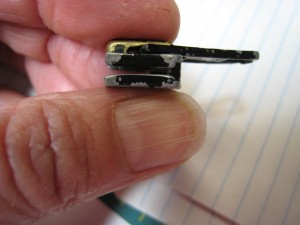
This zipper slider is bent. Even a very slight amount of bending will affect the meshing of the zipper when you zip it. If the zipper itself is not damaged, a new slider of the correct type can replace the bent one. {sidenote – squeezing the zipper with pliers to “fix” it is a stopgap measure only}


IMG_4995


The grab tab on the zipper pull has broken off. This also can be fixed by replacing the slider with an intact slider of the correct type.


IMG_4983


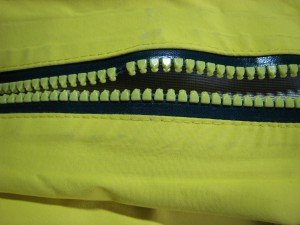
Here, the male pin has popped off the tape of a waterproof zipper. This cannot be repaired and requires a zipper replacement.


IMG_4985


This zipper slider shows classic signs of wear. Notice the very slight bending and the worn outer “corners”. It is very likely that the zipper was not zipping; not staying together when zipped.  This is an easy fix with a new zipper slider of the correct type.


IMG_5005 IMG_5004


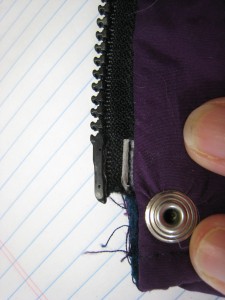
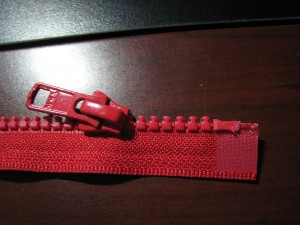
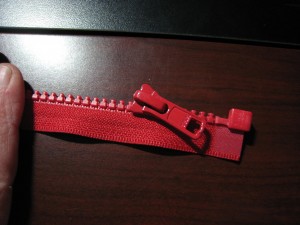
Here, the box has broken off the bottom of a separating jacket zipper.


It is supposed to look like this.

This is not repairable. The whole zipper must be replaced.


IMG_4981


Missing tooth on a vislon (tooth) zipper.

This is not repairable and requires a whole new zipper.


IMG_5003


Missing tooth on a waterproof vislon zipper.

This is not repairable and requires a whole new zipper.


That’s all for today. I will keep taking photos of zipper problems and post Part 2 later.

Bad Things That Happen To Good Gear

I suppose I should keep a tally but I don’t.

The Top 10 Bad Things That Happen To Gear, in no particular order. Outside of normal wear and tear, more or less…

1. Melting (backed into the stove, embers, dryers, heaters…)

2. Ultralight gear breaking from being ultralight.

3. Dog or other animal ate it.

4. Tore a hole in it. (tree branches #1 cause).

5. Saggy pants splitting at the crotch (wear a belt, dude)

6. Straps pulling out of seams (mostly poor construction, more on this later).

7. Zipper sliders getting squashed.

8. Zippers breaking from dirt and general wear.

9. Zippers breaking from not being threaded correctly at the bottom.

10. Lack of care: salt and dirt degradation of fabric

Now, for normal wear and tear –

  1. Worn down zipper sliders.
  2. Worn plastic on male pin at the bottom of a zipper.
  3. Worn out Velcro.
  4. Worn out elastic.
  5. Aged fabric – worn through, UV degraded, weakened
  6. PU  and other treatments/coatings flaking off

Zippers, Velcro and elastic are all fixable, more or less. The rest? Not so much.


My Machines, Part 3

{yes, I still have a few more}

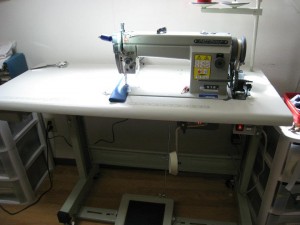
This is the workhorse. I couldn’t do what I do with out it. Silly me, I was advised to get this machine a long time ago, but being a cheapskate I procrastinated for years. I fought with an inappropriate machine for way too long.

Artisan Needle Feed with quiet servo motor

Artisan Needle Feed with quiet servo motor

This is a no-frills needle feed machine.  What is a needle feed?  The needle “walks” (feeds) as it pierces the fabric, moving the fabric back in conjunction with  the feed dogs. This makes for incredibly even feed of varying weights and thicknesses of fabric at any speed. Unlike a walking foot machine, the  presser foot does not walk; only the  needle does.  It does not have an automatic backtack or thread cutter, but that’s fine with me. It has a nice, quiet servo motor.  The needle feed has an incredible range. I can sew ripstop to Cordura with webbing. The key is to have the correct needle and thread.

If you want an industrial machine, and do not have someone local you feel good about, please contact Ron Anderson of A1 Sewing Machines

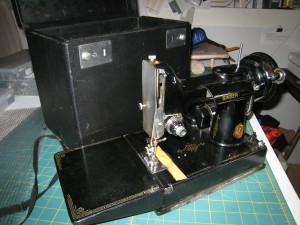
Last, for now, but certainly not least is my Singer Featherweight. IMG_4948


This machine used to belong to my mother-in-law, who was a very talented quilter. She also taught me to quilt; not like I do much of that lately but that is beside the point. This machine is hugely sentimental for me as it is the only thing of hers I got when she passed. And truthfully, this one belongs to my husband’s sister, but she has given it into my caretaking. There was another one that was to be mine, but…(insert family drama).  A funny story about this machine: I brought it up from the SF Bay Area to Washington shortly after 9/11. TSA officials didn’t like this item at all and I was pulled aside for the full meal deal bomb residue wipedown – for a little old lady’s quilting machine.

Coming up – more about different industrial machines, and “what machine should I buy”.

Mildew – what to do?

(note: this is from an old draft I evidently forgot about. Looks useful!!)

Removing Mildew
Remove mildew spots from clothing as soon as you discover them. Brush off mold outdoors so mildew spores do not scatter in the house. Sun and air fabrics thoroughly. If mildew spots remain, pretreat them by rubbing detergent into the dampened stain. Launder the items in hot water and chlorine bleach, if safe for fabric, and detergent. Rinse well and dry in the sun. If any stain remains, use lemon juice and salt. Again spread in the sun to bleach. Rinse thoroughly. Chlorine bleach is effective in killing the mildew growth and eliminating the staining. However, it cannot be used on silk, wool or nylon.

Sodium perborate and hydrogen peroxide are mild oxidizing bleaches. Use sodium perborate if the garment contains silk, wool or nylon. However, it is not safe for white silk and wool. Hydrogen peroxide is safe on all fibers and most colors, but be sure to test for colorfastness. Because these bleaches are mild, they are not very effective in removing mildew stains and will not actually kill the fungus.


Take non-washables to the drycleaner; identify the stain.

Remove mildew from leather foods by wiping the surface with diluted alcohol (l cup denatured or rubbing alcohol to l cup water). Dry in a current of air; use a fan for better circulation. If mildew remains, wash with saddle soap, or a soap containing a germicide or fungicide. Wipe with a damp cloth and dry in an airy place. Polish leather shoes and luggage with a good wax dressing.

Love, Attachment, and Saying Goodbye

very old REI tag

very old REI tag

Over the years, I have seen some amazing classics come through the shop. It’s always amusing when I have the same thing buried in the gear room somewhere. This happens more often than you think. Snow Lion, Petzl, first generation Patagonia and Marmot, Gerry; REI labels from the 70s….great old stuff. Some of it is terrific shape, and some of it is beat to shreds.

I DO understand your relationship with your gear. I get that you romanced and honeymooned in that tent, and your children were conceived in it. Perhaps you summited a particular peak with a certain coat or pack. Maybe you’ve had that day pack forever, taken it around the world, and it still works. Or it did, except for the zipper, My job is to know when to repair and give an item a little TLC, and when to find a tactful way to say, “it’s done”. I always feel bad as I do empathize!

1980: Alpenlite backpack,  wool from Army Navy surplus and Goodwill, Pivetta  5 hiking boots, Epoke 900s and Narrona 3-pin boots in the backpack. Location: Snow Creek trail, Yosemite

1980: Alpenlite backpack, wool from Army Navy surplus and Goodwill, Pivetta 5 hiking boots, Epoke 900s and Narrona 3-pin boots in the backpack. Location: Snow Creek trail, Yosemite

I confess that I didn’t truly get this until we had a family event that underscored this attachment. We used to have a Jansport traildome. The green one with the fiberglass poles? You know it if you’ve been around as long as I have. It was actually my husbands, acquired sometime in the late ’70s.  He and I did our first winter ski trip in it and many many backpack trips in the Sierra, and the Colorado and Wyoming Rockies. We had K-Koted the leaking floor back in 1985, Fast forward to the mid 90’s, when my husband and I are stoked to finally have the kids in their own tent (the Jansport) on family trips. We were camping on the backside of Mt. St. Helens, and over night there was a torrential downpour. Our kids roused us because the inside of the tent was a lake. Sigh. It was obvious: this tent was at the end of its life. How could that be? All I know is that it felt horrible and somehow wrong to toss it in a dumpster, but that’s what I did. Would a little farewell ceremony have been better? I’m not sure about that but I still recall the angst.


How do you know when it’s time to toss? Things like Velcro, snaps, zippers, and drawstrings are an easy fix. If the item needs patching, is the patch now going to be the strongest part of the item? This is not a good thing. How about the base fabric? Is it in good condition or is it showing signs of fading, thread breakdown, or UV-induced weakness? For tents especially, UV breakdown of the fabric and breakdown of the coatings is a sure sign of an elderly tent. Mildew and flakey coatings are unrepairable. In my experience, there is no good fix for worn floors or worn flies.  If you must use your tent on its last legs, the blue tarp fix (over the tent,  and/ or another one inside and on the floor) is the only real way to stay dry.

I can’t tell you the right way to say goodbye to beloved old gear. Whether you toss it,  tuck it into the rafters of your garage, or have a memorial ritual is up to you. What I can tell you is how to take care of what you do have, and make it last as long as it possibly can.

Happy Trails until next time…