
Thanks to Jalie Patterns for this great technique!
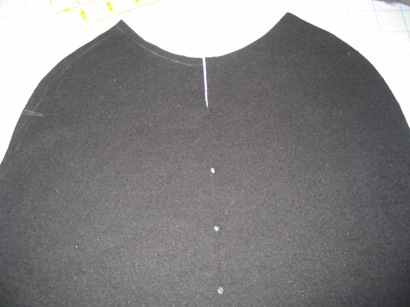
Adjust, lay out, and cut your pattern as usual. Figure out how long you want the front zipper to be, and mark the collar fold. Keep in mind collar width added to the front panel for the length of the zipper. Mark CF with dots and a 2″ slash.
Then sew sleeves, back, and collar on:
Check length of zipper against collar fold point and your marks.

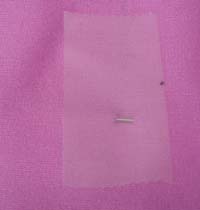
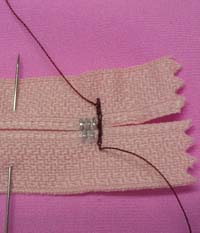
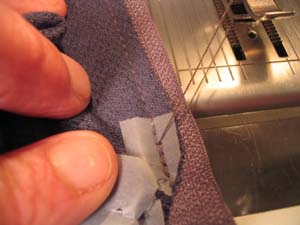
Now, noting exact placement of zipper stop, mark bottom of the zipper with a pin, turn zipper RS down and going the opposite way it should, on the RS front. Secure the zipper. Where you have bottom of zipper marked with a pin, use a couple of pieces of clear tape on the WS. This will act as a stabilizer when you sew the bottom.
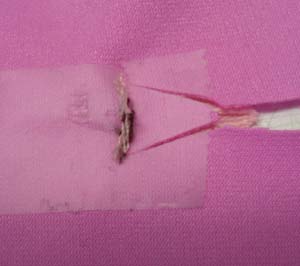
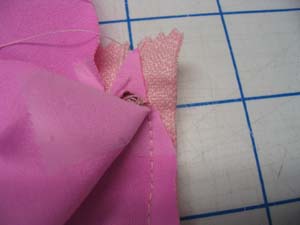
Now, stitching very carefully, stitch across the bottom of the zipper, RS of shirt up, zipper is RS down and pointing the wrong way. Take just a very few stitches, and backstitch. You just want to secure the end of the zipper, no wider. Then, carefully cut down the CF of your shirt, making a “>” at the end of the zipper. Clip EXACTLY to the edge of your stitching and make sure the “>” is longer, not shorter.
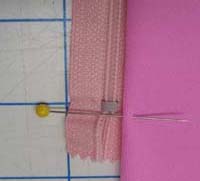
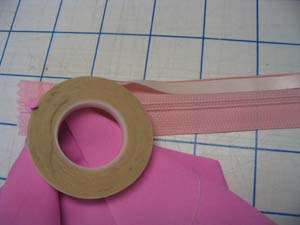
For the next step –actually sewing the zipper tape to the fabric — a nifty notion called Wonder Tape is very helpful. It is washable and really keeps knits from distorting during this step.
Apply the Wonder Tape to the RS of the zipper.
Turn cut edge at the “V” and press along the zipper edge to secure, making sure there is no distortion. Stitch carefully, starting exactly at the apex of the “V” cut. You can use the zipper foot to get nice and close to the coil if you want.
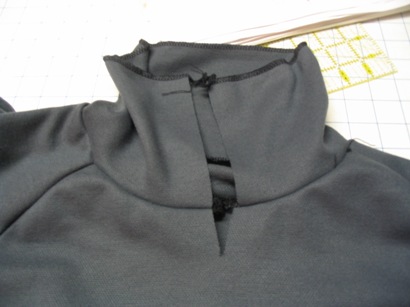
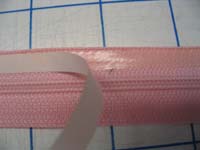
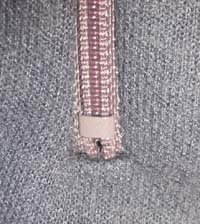
Finish both sides of the zipper. If you have been careful, you’ll have a nice, even opening like the photo on the lower left. When you are crossing the collar seams, make sure that they match up on either side. Fold the seam allowances toward the collar. This will also help with the collar treatment. You can pick the tape off the WS now, too.
Go to page 2